
Oblíbené kategorie
Hledáte přízi?


Komentáře / Otázky (30)
![]() Debra napsala:
Debra napsala:
Where can I get this pattern (Cabled Hide Away) in English? Thank you.
18.12.2021 - 15:15Odpověď DROPS Design :
Dear Debra, click on the scroll down menu below the photo to edit language and choose either UK-English (in cm only) or US-English (inches). Happy knitting!
20.12.2021 - 08:38
![]() Lourdes Flores napsala:
Lourdes Flores napsala:
Porque no hacen vídeos ? No todos entendemos los puntos y es mejor en algo súper visual. Las puntadas son hermosas Ojalá lo tomen en cuenta
26.09.2021 - 16:08Odpověď DROPS Design :
Hola Lourdes, hacemos tutoriales en formato vídeo para aquellas partes que consideramos más complicadas de entender en el patrón. Como entiendes, con el número de patrones que tenemos disponibles no es posible realizar un vídeo tutorial paso a paso de cada uno de ellos. También tenemos en nuestra sección de vídeos muchos tutoriales para principiantes para aprender a trabajar los diferentes puntos.
26.09.2021 - 19:49
![]() Hanne Jensen napsala:
Hanne Jensen napsala:
Er det muligt at få et billede af bagsiden af puden.
18.01.2020 - 16:19Odpověď DROPS Design :
Hei Hanne. Det har vi dessverre ikke. Men om du leser oppskrifte og ser på siden av puten der det er strikket M.2, vil du få et godt inntrykk av hvordan baksiden blir. God Fornøyelse!
27.01.2020 - 13:16
![]() Margret Bermes napsala:
Margret Bermes napsala:
Hallo und guten Abend, Ich denke bei der Anleitung ist bezüglich der Reihenfolge ein Fehler unterlaufen. Sie sagen in dem Diagramm zeigen sich hin- und Rückreihe.. das ergibt aber keinen Sinn. Es sind nur die Hinreihen gezeigt - wie allgemein üblich. Und dieRückreihe muss dann so wie die Maschen liegen. Freundlichen Gruß Margret Bermes Otto Stange Str. 15, 51377 Leverkusen 5
01.04.2018 - 00:50
![]() Vaidehi napsala:
Vaidehi napsala:
The pattern says to Knit two rows (garter st) and on same time the last row add 24 sts. Can you confirm If I understand this correct: RW1: Knit RW2: knit 16sts, k58 and add 24sts, K16 How to add 24 sts? is it every 2nd st and do I do YO or KFB since its on the WS? The Charts M.1 and M.2 are both to be read bottom right side to top in a zigzag flow right? I am doing cables for the 1st time I dont want to mess with it. Thanks Regards
13.01.2018 - 18:31Odpověď DROPS Design :
Dear Vaidehi, the 24 stitches "added" in the second row of the garter stitch, increasing the stitches, by making evenly distributed yarnovers. In teh next row, the yarnovers are knitted or purled (according to the pattern) twisted (so there is no holes left in their places. Yesm the patterns are read in zig zag fashion. Happy Knitting!
13.01.2018 - 21:48
![]() Catrin napsala:
Catrin napsala:
Är det OK att ta inspiration av flätmönstret, komponera ihop ett eget mönster på en tröja och dela online?
01.05.2017 - 10:31Odpověď DROPS Design :
Hej Catrin, ja det må du gerne for privat-brug, så skriver du bare i hvilken DROPS opskrift du har fundet inspiration :)
03.05.2017 - 13:32Christine napsala:
Doesn't one need to increase 24 after the fold so as to have back & front the same size? Thanks.
26.06.2016 - 16:55Odpověď DROPS Design :
Dear Christine, after the fold you are working in M.2, ie different pattern the front side of cushion, and there is then no need to inc sts evenly (cables tighten pieces in width, that's why you inc before working M.1 and dec before fold). Happy knitting!
27.06.2016 - 10:00Marta Baranowska napsala:
I'm not sure, but I think there is small mistake in the pattern and in place where is: slip 1 st on cable needle behind piece, K3, K1 from cable needle should be instead slip 1 st on cable needle behind piece, K3, P1 from cable needle. Am I correct?
14.12.2015 - 13:08Odpověď DROPS Design :
Wykonałam schemat i jest w porządku, czyli mamy: 'slip 1 st on cable needle behind piece, K3, K1'. POWODZENIA
14.12.2015 - 14:54Marta Baranowska napsala:
What is the best was to increase in that pattern? YO of other technique? Where the new stitches should be included?
13.12.2015 - 09:58Odpověď DROPS Design :
Dear Mrs Baranowska, you can choose your favorite technique to inc (YO worked into back of loop on next row, Knit 2 sts in 1 st (Kfbl)...). You first K 2 rows, inc are done evenly on 2nd row = from WS. Read more about inc evenly here. Happy knitting!
14.12.2015 - 10:10
![]() Roelanda Bonder napsala:
Roelanda Bonder napsala:
Ik snap de afmeting niet zo goed, want moet ik na de 1e 48 cm al minderen? dan krijg ik toch een kleiner achterpand en komt het patroon toch niet uit?
14.02.2015 - 12:09Odpověď DROPS Design :
Hoi Roelanda. Bij 48 cm brei je verder volgens een ander patroon (M.2). De st van dit patroon trekken zich minder samen dan de st van het kabelpatroon. Dus het komt goed. Veel breiplezier verder.
17.02.2015 - 15:54
|
||||||||||||||||
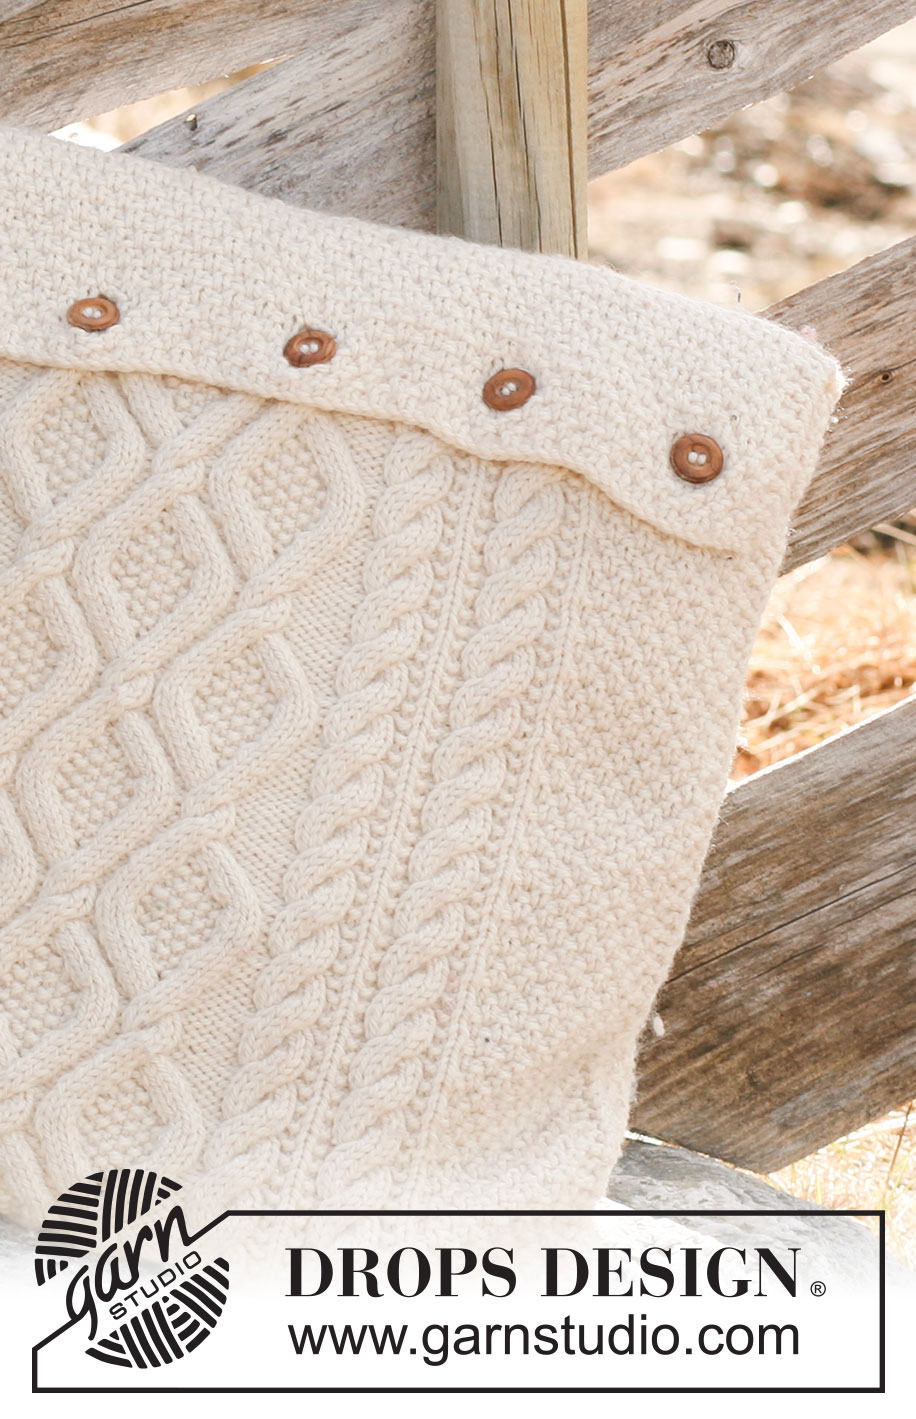
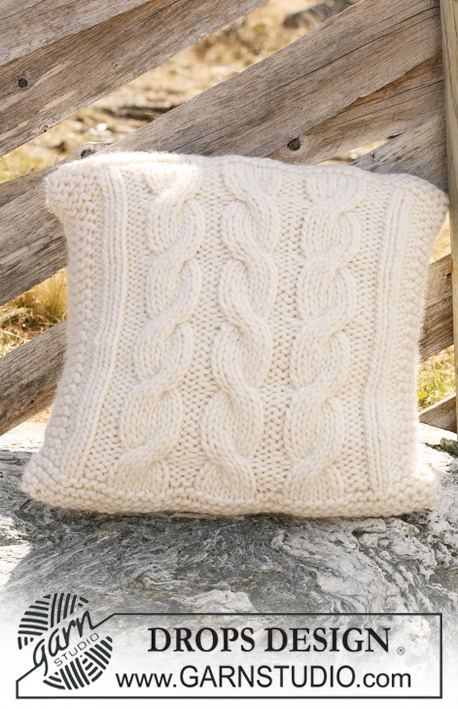
Cabled Hide Away#cabledhideawaypillow |
||||||||||||||||
 |
 |
|||||||||||||||
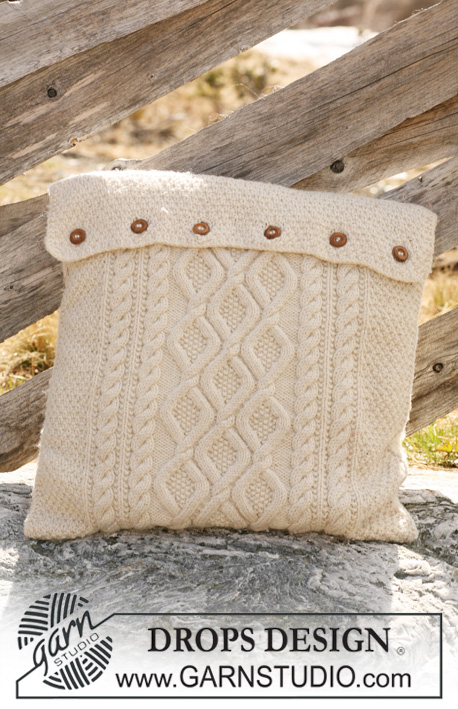
DROPS polštář s copánkovým vzorem pletený z příze "Alaska".
DROPS 117-50 |
||||||||||||||||
|
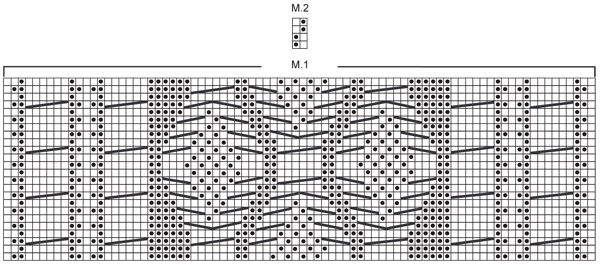
VROUBKOVÝ VZOR: Pleteme stále hladce, lícové i rubové řady. COPÁNKOVÝ VZOR: Viz schémata M.1 a M.2; vzor je nahlížen z lícové strany. -------------------------------------------------------- POLŠTÁŘ: Pleteme v řadách. Na kruhovou jehlici č.5 nahodíme přízí Alaska 86 ok a upleteme 2 řady vroubkovým vzorem; SOUČASNĚ v poslední řadě přidáme rovnoměrně 24 ok nad prostředními 58 oky = 110 ok. Následující řadu pleteme takto: 2 krajová oka vroubkovým vzorem, vzor M.2 nad následujícími 12 oky, vzor M.1 (= 82 ok), vzor M.2 nad následujícími 12 oky a končíme 2 krajovými oky vroubkovým vzorem. V tomto rozvržení vzorů pokračujeme. Ve výši 48 cm upleteme 2 řady vroubkovým vzorem nad všemi oky (= přehyb) a SOUČASNĚ v první řadě ujmeme rovnoměrně 24 ok nad prostředními 82 oky = 86 ok. Nyní pleteme vzorem M.2 se 2 krajovými oky na každé straně. Ve výši 96 cm umístíme do pleteniny značku a ve výši 102 cm vypleteme 6 knoflíkových dírek, takto: 2 oka vroubkovým vzorem, vzor M.2 nad následujícími 5 oky, 2 oka uzavřeme (= 1 dírka), *vzor M.2 nad následujícími 12 oky, 2 oka uzavřeme*, *-* opakujeme celkem 5x a končíme vzorem M.2 nad následujícími 5 oky a 2 oky vroubkovým vzorem. V následující řadě nad každými 2 uzavřenými oky nahodíme 2 oka nová. Pokračujeme vzorem M.2 se 2 krajovými oky vroubkovým vzorem na každé straně, a to a do výše 104 cm. Pak upleteme 2 řady vroubkovým vzorem nad všemi oky a poté všechna oka uzavřeme. Díl měří asi 105 cm. DOKONČENÍ: Díl přeložíme v místě přehybu a u značky, takže knoflíkové dírky leží vně. Sešijeme postranní švy. Přišijeme knoflíky. |
||||||||||||||||
Vysvětlivky ke schématu |
||||||||||||||||
|
||||||||||||||||
 |
||||||||||||||||
Dokončili jste tento model?Pak označte své fotky tagem #dropspattern #cabledhideawaypillow nebo je pošlete do galerie #dropsfan. Potřebujete s tímto návodem poradit?Otevřete-li si návod na stránce garnstudio.com, najdete tam 10 výukových video-ukázek, Komentáře/Dotazy a další užitečné informace. © 1982-2026 DROPS Design A/S. Vyhrazujeme si veškerá práva. Tento dokument, včetně všech jeho dílčích částí, podléhá autorským právům. Podrobnější komentář k možnostem užití našich návodů najdete dole pod každým návodem na našich stránkách. |
||||||||||||||||


V oblasti pletené a háčkované módy působí DROPS Design více než 40 let. Díky tomu vám můžeme nabídnout jednu z nejrozsáhlejších kolekcí modelů s bezplatnými návody dostupnými na internetu - navíc v 17 jazycích. K dnešnímu dni máme na 324 katalogů a 12284 návodů celkem - z nich je už 7570 dostupných v [češtině].
Přidejte komentář k návodu DROPS 117-50
Rádi bychom věděli, co si o tomto modelu myslíte!
Pokud se chcete na něco zeptat, dbejte prosím na to, abyste ve formuláři níže vybrali správnou kategorii - díky tomu se dříve dozvíte, co potřebujete vědět. Povinná pole jsou označena *.