
Popular categories
Looking for a yarn?


Comments / Questions (133)
![]() Peg Mohr wrote:
Peg Mohr wrote:
I am finding this really challenging to get started. On my 13th attempt. How is it possible to eliminate the visible shift when switching from knit to purl in order to accomplish the garter stitch in the round? Thanks for your help.
30.08.2016 - 19:38DROPS Design answered:
Dear Mrs Mohr, beg of round should be at 1st st (first marker), and when you inc on each side of markers, the inc before 1st marker has to be worked at the end of round to make a sweet transition, ie work 1st st from beg of round, YO, continue as before until end of round and make a YO (inc before 1st marker). On next round, work the yos in garter sts as the other sts around (if you are making YO's on a P round, K all Yos on next round). Happy knitting!
31.08.2016 - 09:21
![]() Plüschappel wrote:
Plüschappel wrote:
Thank you Canada! Your hint solved my problem too (visible line in the solid part)!!! Für alle, die sich damit auch rumschlagen: um eine sichtbare Naht an der Stelle zu vermeiden, an der Rundenende und -anfang aufeinander treffen, muss man den Rundenwechsel bei jeder Reihe wieder genau vor den ersten Umschlag schieben. Der Versatz wird neben dem Umschlagsloch dann quasi unsichtbar.
03.07.2016 - 10:19
![]() Gio wrote:
Gio wrote:
Buonasera,quando arrivo a dover fare il giro in cui mettere in attesa le 16 maglie per il collo, e continuare avanti e indietro, le 26 maglie dopo il primo segnapunti ( dove cambiavo giro) e prima delle 16 maglie in attesa, non tornano col resto e mi vengono 2 ferri a maglia rasata. Il ferro prima di questo giro l'ho fatto a rovescio come indicato ma al segnapunti ho dovuto cambiare giro.Dove sbaglio ? Spero di esser stata chiara.. Grazie infinite
06.04.2016 - 23:16DROPS Design answered:
Buonasera Gio. Quando ritorna a lavorare sulle 26 m dopo il primo segno, dovrebbe lavorare queste m a rov per avere la maglia legaccio corretta. Buon lavoro!
06.04.2016 - 23:51
![]() Joanne wrote:
Joanne wrote:
Is it possible to see an English translated version of these comments?
27.02.2016 - 03:50DROPS Design answered:
Dear Joanne, you are welcome to use an online translator, and/or to ask your question here. Happy knitting!
27.02.2016 - 16:18
![]() Laura wrote:
Laura wrote:
Ich habe den Pullover fast fertig bis auf die Ärmel. Ich habe für Größe M wie angegeben 13 Knäuel bestellt. Nun ist meine Wolle aufgebraucht aber die Ärmel fehlen noch. Wie viele Knäuel brauche ich in etwa für beide Ärmel und das vernähen des Pullovers? Drei, vier?
17.02.2016 - 15:04DROPS Design answered:
Haben Sie denn die Originalwolle verwendet, die Maschenprobe eingehalten und passen die Maße Ihres Pullovers zur Maßskizze? Eigentlich sollte die Garnmenge ausreichen. Sie sollten für die Ärmel 4 Knäuel einplanen.
18.02.2016 - 10:55
![]() Joanne wrote:
Joanne wrote:
I have completed the increasing on the front of this sweater. Where the stitches change from a knit to a pearl row there is a very visible line up the centre of the solid part. Is there some way of avoiding this line from forming.
17.02.2016 - 06:11DROPS Design answered:
Dear Joanne, you can displace beg of round so that round always start before first YO to make it less visible. Happy knitting!
17.02.2016 - 09:41
![]() Sara wrote:
Sara wrote:
Volevo chiedere : io inizio ha lavorare con 4 ferri a doppia punta e continuo a lavorare con 4 ferri fino a quando ? . come fanno a stare 60 maglie su un ferro a doppia punta? non cascano dalle parti ?? . poi se ho capito bene chiudo i 3 ferri dopo i 29 aumenti e vado avanti con il collo ??. scusate ma non ho mai lavorato con doppi ferri e quindi vi chiedo questo e non è chiaro nella spiegazione quando si chiudono gli altri . grazie
20.01.2016 - 10:40DROPS Design answered:
Buongiorno Sara, il lavoro inizia in tondo sui f a doppia punta, con 8 m divise su 4 f (2 m per f) e prosegue come indicato; quando aumentano le maglie e sono troppe per lavorare sui f a doppia punta deve proseguire con i ferri circolari lavorando sempre in tondo fino alla fine degli aumenti: a questo punto deve mettere in sospeso le maglie centrali per il collo e lavorare avanti e indietro come indicato sul resto delle m. Ci riscriva se ha altri dubbi. Buon lavoro!
20.01.2016 - 15:11
![]() Giovanna Degl'Innocenti wrote:
Giovanna Degl'Innocenti wrote:
Buonasera, mi scuso ma non so se ho capito bene cosa devo fare dopo aver lasciato in attesa 16 maglie: Lei scrive che devo intrecciare 2 m "2 volte" e poi 1 m 2 volte ( 4+2) ; quindi dal ferro devo diminuire in totale sei maglie dividendo gli intrecci sui due lati del collo, (3 per ogni lato) oppure 12 maglie in totale ( 6 per ogni lato) ? Grazie infinite
11.11.2015 - 21:45DROPS Design answered:
Buonasera Giovanna. Le diminuzioni sono 6 per ogni lato, quindi 12 in totale. Buon lavoro!
11.11.2015 - 22:09
![]() Plüschappel wrote:
Plüschappel wrote:
Hallo! Mein Problem von neulich besteht leider noch, hat vielleicht jemand eine Idee? "Bei mir entsteht beim Stricken des Vorderteils immer eine Naht, d.h. die Runde schließt versetzt. Wie kann ich das ohne Naht hinbekommen?" Über eine Antwort würde ich mich sehr freuen!
09.11.2015 - 20:29DROPS Design answered:
Sie stricken ja immer 1 Rd re und 1 Rd li im Wechsel. Ein ganz leichter Versatz ist normal beim Stricken von kraus rechts in Runden.
13.11.2015 - 22:13
![]() Plüschappel wrote:
Plüschappel wrote:
Hallo! Bei mir entsteht beim Stricken des Vorderteils immer eine Naht, d.h. die Runde schließt versetzt. Wie kann ich das ohne Naht hinbekommen? Danke und liebe Grüße!
03.11.2015 - 15:16
|
|
Hugs and kisses#hugsandkissessweater |
|
 |
 |
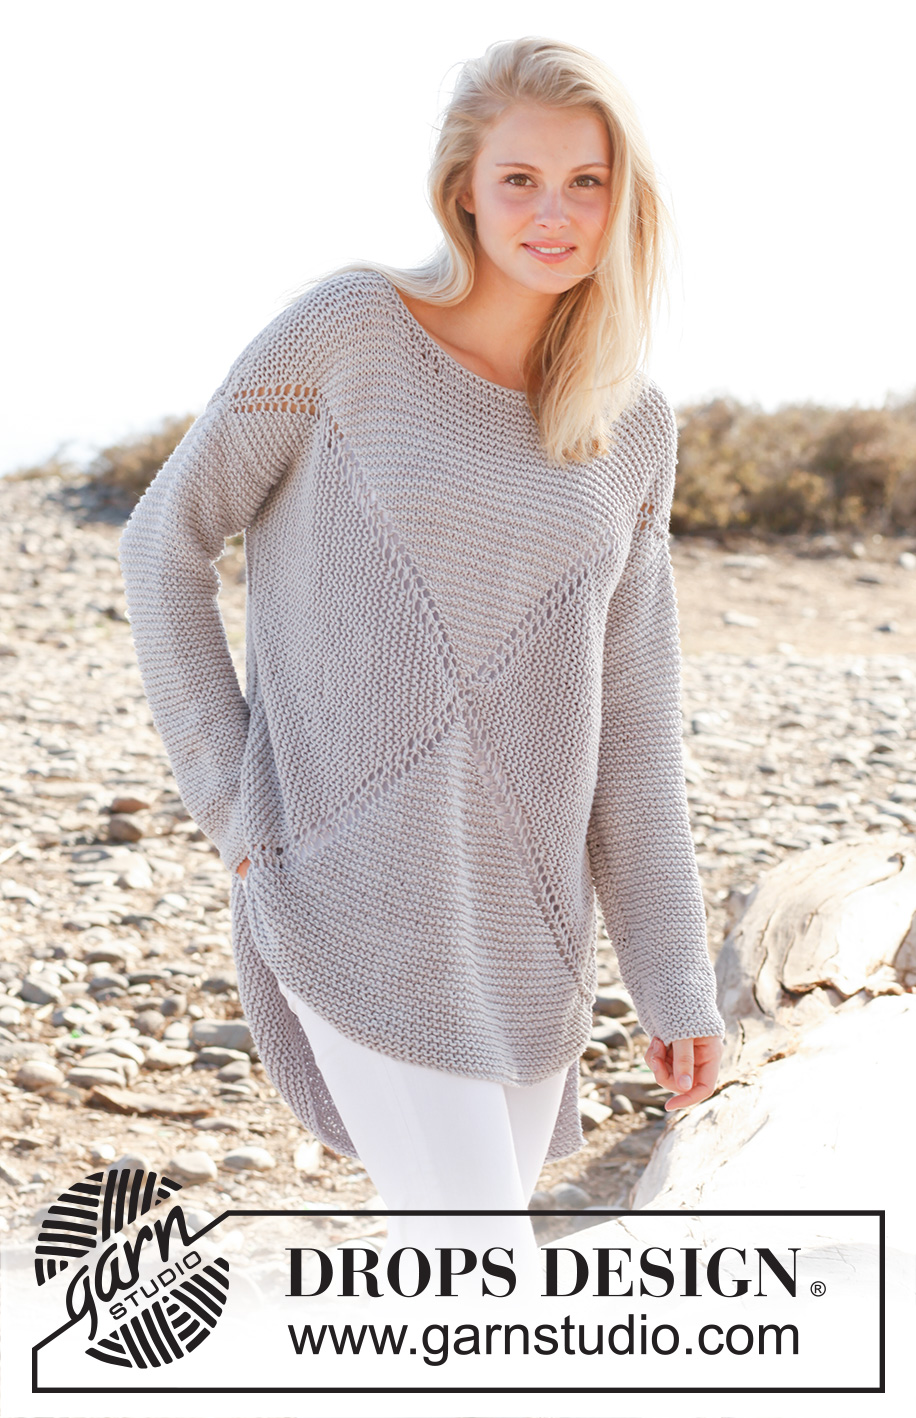
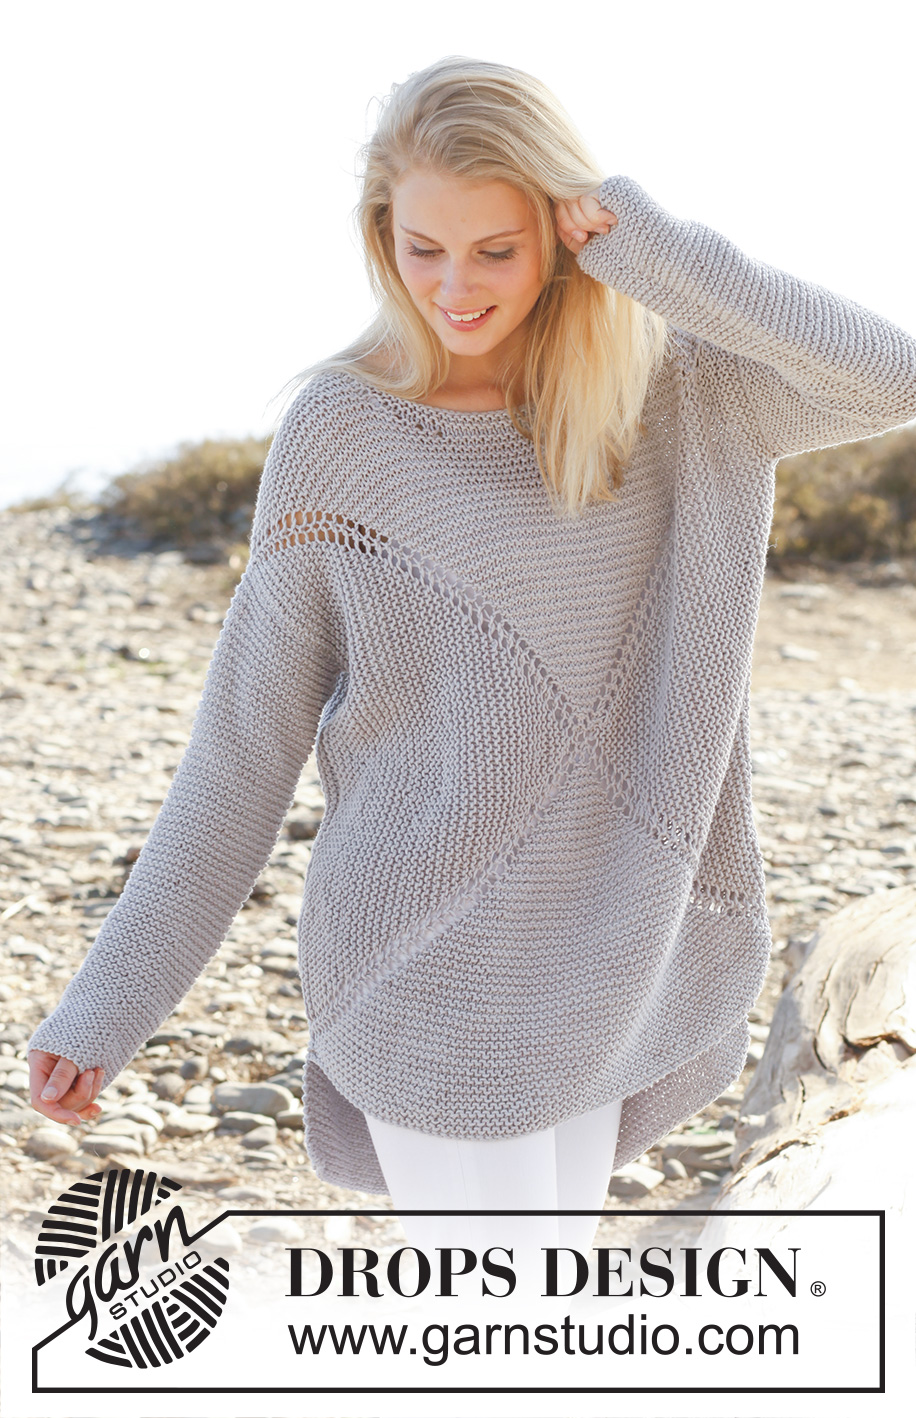
Knitted DROPS jumper worked in a square in garter st in ”Paris”. Size: S - XXXL.
DROPS 146-2 |
|
|
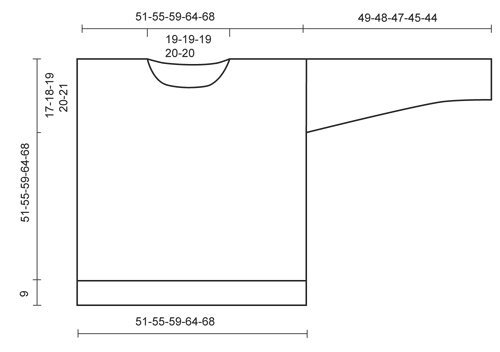
GARTER ST (in the round on circular needle): 1 ridge = 2 rounds. * K 1 round and P 1 round *, repeat from *-*. GARTER ST (back and forth on needle): K all rows. 1 ridge = 2 rows K. MEASURING TIP: Hold the piece up when measuring. Because of the garter st and the weight of the yarn the sleeve will be somewhat longer. If a lighter sleeve is wanted, work 4 ridges at the bottom of sleeve, then work in reversed stocking st. ---------------------------------------------------------- JUMPER: Worked in 2 parts from mid front/mid back in a square. Cast on and work on double pointed needles, switch to circular needle when needed. Finish by working the sleeves. FRONT PIECE: Cast on 8 sts with Paris and divide them on 4 double pointed needles size 6 mm (= 2 sts on every needle). Insert a marker in the first, third, fifth and seventh st (= 4 markers). Then work in the round and in GARTER ST over all sts - see explanation above. AT THE SAME TIME on every other round make 1 YO on each side of every marker (= 8 inc on every other round), on next round K YOs to make holes. Continue like this until there are 240-264-288-320-344 sts on needle (= 29-32-35-39-42 inc and 60-66-72-80-86 sts on each of the 4 sides). Stop with 1 P round. Now slip the middle 16-16-18-18-18 sts between 1st and 2nd marker on a stitch holder for neck, then work piece back and forth. Continue in garter st and continue inc at markers - AT THE SAME TIME cast off towards the neck on every other row as follows: 2 sts 2 times and 1 st 2 times. Continue inc until there are 284-308-330-362-386 sts on needle (= 38-41-44-48-51 inc, 78-84-90-98-104 sts between markers, 25-28-30-34-37 sts on each side of neck). Keep sts between 3rd and 4th marker on needle, cast off the other sts = 78-84-90-98-104 sts on needle. Work 2 ridges back and forth over these sts. Cast off. Insert a marker in each side, 17-18-19-20-21 cm down from the shoulder. This shows where the sleeve is sewn in. BACK PIECE: Cast on 8 sts with Paris and divide them on 4 double pointed needles size 6 mm (= 2 sts on every needle). Insert a marker in the first, third, fifth and seventh st (= 4 markers). Then work in the round and in garter st over all sts, AT THE SAME TIME on every other round make 1 YO on each side of every marker (= 8 inc on every other round), on next round K YOs to make holes. Continue like this until there are 288-312-336-368-392 sts on needle (= 35-38-41-45-48 inc and 72-78-84-92-98 sts between markers). Now cast off the middle 28-28-30-30-30 sts between 1st and 2nd marker for neck, then work piece back and forth = 260-284-306-338-362 sts. Continue inc until there are 284-308-330-362-386 sts on needle (= 38-41-44-48-51 inc, 78-84-90-98-104 sts between markers, 25-28-30-34-37 sts on each side of neck). Keep sts between 3rd and 4th marker on needle, cast off the other sts = 78-84-90-98-104 sts on needle. Work 15 ridges back and forth over these sts. Cast off. Insert a marker in each side, 17-18-19-20-21 cm down from the shoulder. This shows where the sleeve is sewn in. SLEEVE: Worked back and forth on circular needle. READ MEASURING TIP! Cast on 37-38-41-44-45 sts (incl 1 edge st in each side) on circular needle size 6 mm with Paris. Work in garter st. When piece measures 8 cm, inc 1 st in each side. Repeat inc every 5-4½-4½-4-3½ cm 7-8-8-8-9 more times (= 8-9-9-9-10 inc in total) = 53-56-59-62-65 sts. Cast off when piece measures 49-48-47-45-44 cm (shorter measurements in the larger sizes because of broader shoulder width). ASSEMBLY: Sew the shoulder seams. Sew in sleeves down to markers on front/back piece. Sew underarm and side seams in one inside 1 edge st, leave the bottom 10 cm = vent. NECK EDGE: Knit up approx. 66 to 74 sts (incl sts on stitch holder) on a short circular needle (40 cm) around the neck. Work 2 ridges. Cast off. |
|
 |
|
Have you finished this pattern?Tag your pictures with #dropspattern #hugsandkissessweater or submit them to the #dropsfan gallery. Do you need help with this pattern?You'll find 17 tutorial videos, a Comments/Questions area and more by visiting the pattern on garnstudio.com. © 1982-2026 DROPS Design A/S. We reserve all rights. This document, including all its sub-sections, has copyrights. Read more about what you can do with our patterns at the bottom of each pattern on our site. |
|


With over 40 years in knitting and crochet design, DROPS Design offers one of the most extensive collections of free patterns on the internet - translated to 17 languages. As of today we count 325 catalogues and 12298 patterns translated into English (UK/cm). 12298
We work hard to bring you the best knitting and crochet have to offer, inspiration and advice as well as great quality yarns at incredible prices! Would you like to use our patterns for other than personal use? You can read what you are allowed to do in the Copyright text at the bottom of all our patterns. Happy crafting!
Post a comment to pattern DROPS 146-2
We would love to hear what you have to say about this pattern!
If you want to leave a question, please make sure you select the correct category in the form below, to speed up the answering process. Required fields are marked *.