
Popular categories
Looking for a yarn?


Comments / Questions (16)
![]() Joanna Gibowska wrote:
Joanna Gibowska wrote:
Spódnica bardzo mi się podoba. Moja jest w kolorze 03. Radziłabym jednak zrobić rozmiar większą i trochę dłuższą, bo wiskoza po praniu się kurczy, a tej wełny nie wolno prasować. Dół wykończyłam szydełkiem. Super 👍
01.06.2023 - 10:59DROPS Design answered:
Joasiu, jak zaczniesz ją nosić, to spódniczka znów się troszkę rozciągnie i nie powinna być zbyt mała. Bardzo dziękujemy za zainteresowanie naszymi wzorami i włóczkami :) Pozdrawiamy!
01.06.2023 - 11:37
![]() Laetitia wrote:
Laetitia wrote:
Bonjour Dans le matériel, il est écrit qu'il faut des aiguilles 3 et 4 mais dans les explications je ne vois pas à quel moment il faut prendre les aiguilles 4 mm. Pouvez vous m'éclairer sur ce point svp? Merci
26.04.2023 - 22:41DROPS Design answered:
Bonjour Laetitia, effectivement, nos stylistes vont vérifier cela le plus rapidement possible, merci pour votre retour. Vous devrez changer pour l'aiguille circulaire 4 après la bordure doublée (pour la partie JUPE. Bon tricot!
27.04.2023 - 08:23
![]() Henriette Bildt Pedersen wrote:
Henriette Bildt Pedersen wrote:
Den er så enkel og fin, håber på mange stemmer til den
22.01.2023 - 16:36
![]() Kari Little wrote:
Kari Little wrote:
Rosebud Skirt
19.01.2023 - 10:12
![]() Rosa G wrote:
Rosa G wrote:
Sweet skirt
18.01.2023 - 17:44
![]() Lunea wrote:
Lunea wrote:
Just "skirty"
17.01.2023 - 20:29
|
|
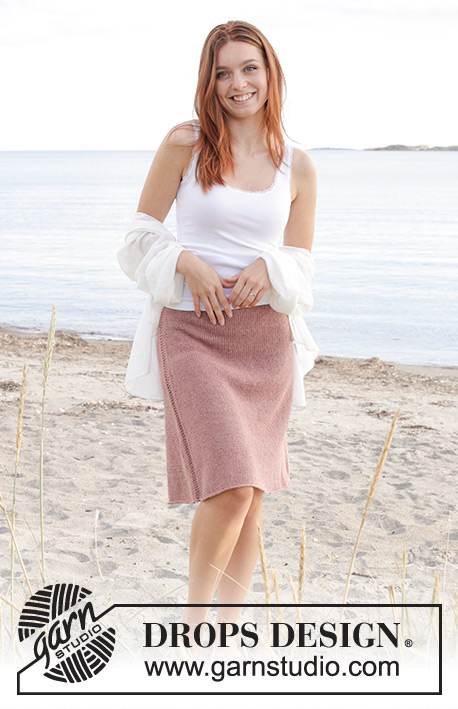
Rose Whisper Skirt#rosewhisperskirt |
|
 |
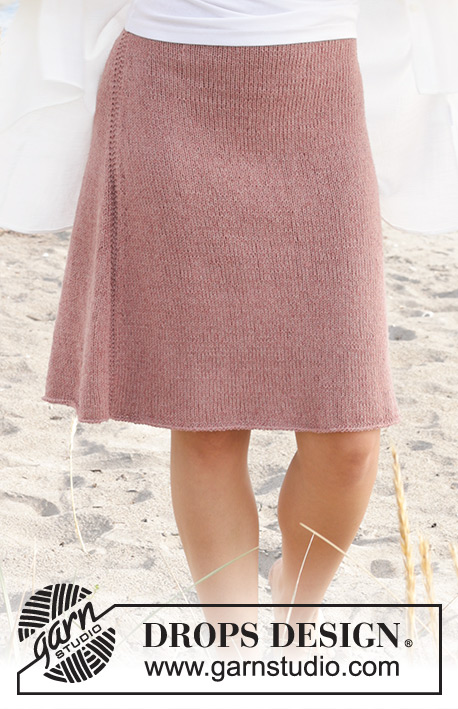 |
Knitted skirt in DROPS Belle. Piece is knitted top down in stocking stitch. Size: S - XXXL
DROPS 240-11 |
|
|
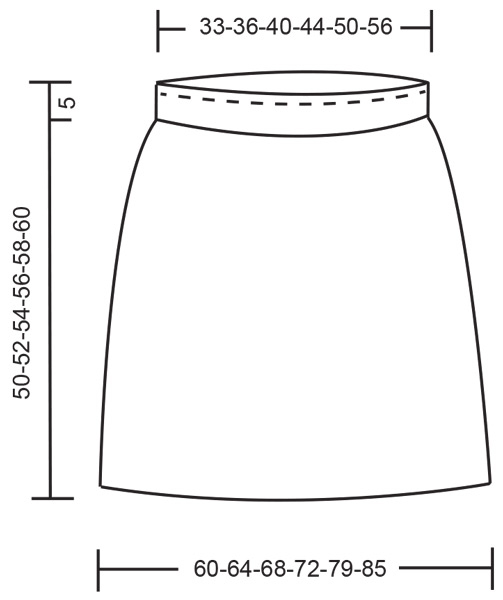
---------------------------------------------------------- EXPLANATION FOR THE PATTERN: ---------------------------------------------------------- GARTER STITCH (worked in the round): 1 ridge vertically = 2 rounds, i.e. knit 1 round and purl 1 round. INCREASE TIP-1: Increase in each side as follows: Work 4 stitches past marker, make 1 yarn over, work in stocking stitch until 4 stitches remain before next marker, make 1 yarn over, work 2 stitches in stocking stitch, 4 stitches in garter stitch (marker is in the middle of these 4 stitches), work 2 stitches in stocking stitch, make 1 yarn over, work in stocking stitch until 4 stitches remain before marker, make 1 yarn over and work 2 stitches in stocking stitch and 2 stitches in garter stitch. 4 stitches have been increased on round, on next round knit yarn over twisted to avoid holes. INCREASE TIP-2: Increase by making 1 yarn over BEFORE each marker on round. On next round knit yarn overs twisted to avoid holes. Increase alternately AFTER and BEFORE marker threads. ---------------------------------------------------------- START THE PIECE HERE: ---------------------------------------------------------- SKIRT– SHORT OVERVIEW OF THE PIECE: Worked in the round on circular needle, top down. HEM AND EDGE: Cast on 140-152-168-184-212-236 stitches on circular needle size 3 mm. Work in the round in stocking stitch until piece measures 1½ cm (hem on the inside of skirt). Work rib = knit 2/purl 2 for 1½ cm. Fold hem on the inside of piece so that hem on next round is worked together with stitches on needle. Work next round as follows: * Insert right needle in next stitch on left needle, insert needle in the same stitch at the bottom along cast-on edge, knit these 2 stitches together, knit 1 and purl 2 stitches from left needle, skip 3 stitches along cast-on edge *. Work from *-* the entire round. Now every 4th stitch from cast-on edge is worked together with stitches on needle (folded hem for elastic). Work rib (knit 2/purl 2) until rib measures total 5 cm. SKIRT: Switch to circular needle size 4 mm. Work 4 stitches in GARTER STITCH - read explanation above, insert a marker between these 4 stitches, work 66-72-80-88-102-114 stitches in stocking stitch, work 4 stitches in garter stitch and insert a marker between these 4 stitches, work 66-72-80-88-102-114 stitches in stocking stitch. REMEMBER THE KNITTING TENSION! Work in stocking stitch with 4 stitches in garter stitch in each side until finished measurements. When piece measures 6 cm, insert 8 marker threads in piece without working. Count from marker in the side and insert marker threads as follows: * Count 14-15-16-18-21-23 stitches from the side insert a marker thread before next stitch, count 14-15-17-18-21-24 stitches, insert a marker thread before next stitch, count 14-16-18-20-22-24 stitches, insert a marker thread before next stitch, count 14-15-17-18-21-24 stitches and insert a marker thread before next stitch, 14-15-16-18-21-23 stitches remain until marker in the side *. Repeat from *-* one more time. 4 marker threads have been insert on the front side of skirt and 4 marker threads on the back side of skirt. On next round increase at the markers and at the marker threads - read INCREASE TIP-1 and INCREASE TIP-2 in explanation above and increase in the different sizes as follows: SIZE S - M - L: On first increase, increase both at the markers and the marker threads, then repeat increase at markers every 1½-1½-1½ cm until increase has been done 22-23-23 times in total and increase at the marker threads every 11-11-12 cm until increase has been done 3 times in total. SIZE XL - XXL - XXXL: On first increase, increase both at the markers and the marker threads, then repeat increase at markers alternately every 1½ and 2 cm until increase has been done 24-24-24 times in total and increase at the marker threads every 13-14-15 cm until increase has been done 3 times in total. ALL SIZES: When all increases are done there are 252-268-284-304-332-356 stitches on row. Continue to work in stocking stitch and garter stitch until piece measures 50-52-54-56-58-60 cm. Cast off by knitting. ASSEMBLY: Cut an elastic of appropriate length. Thread the elastic through hem made at the top of skirt, tie a knot. |
|
|
|
Have you finished this pattern?Tag your pictures with #dropspattern #rosewhisperskirt or submit them to the #dropsfan gallery. Do you need help with this pattern?You'll find 17 tutorial videos, a Comments/Questions area and more by visiting the pattern on garnstudio.com. © 1982-2025 DROPS Design A/S. We reserve all rights. This document, including all its sub-sections, has copyrights. Read more about what you can do with our patterns at the bottom of each pattern on our site. |
|


With over 40 years in knitting and crochet design, DROPS Design offers one of the most extensive collections of free patterns on the internet - translated to 17 languages. As of today we count 314 catalogues and 11821 patterns translated into English (UK/cm). 11821
We work hard to bring you the best knitting and crochet have to offer, inspiration and advice as well as great quality yarns at incredible prices! Would you like to use our patterns for other than personal use? You can read what you are allowed to do in the Copyright text at the bottom of all our patterns. Happy crafting!
Post a comment to pattern DROPS 240-11
We would love to hear what you have to say about this pattern!
If you want to leave a question, please make sure you select the correct category in the form below, to speed up the answering process. Required fields are marked *.