
Populære kategorier
Ser du etter et garn?


Kommentarer / Spørsmål (119)
![]() Marcia Ebert skrev:
Marcia Ebert skrev:
The pattern calls for knitting A then B then C That would be following the pattern right to left. Is this correct? It would be much easier to follow it left to right. I find this confusing. It is a pretty sweater.
15.01.2019 - 04:08DROPS Design answered:
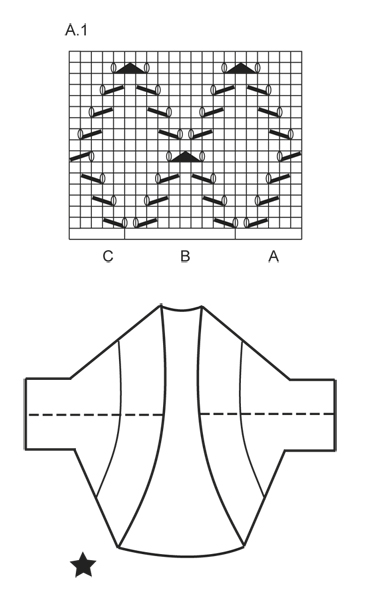
Dear Mrs Ebert, diagrams are worked top down, from RS read from the right towards the left and from WS from the left towards the right. Work A, then repeat B and finish row with C. On row 15, work the last 2 sts in A/B together with the first st B/next B/C. Happy knitting!
15.01.2019 - 09:39Carla skrev:
Drops 146-16. I’ve never read a pattern like this before and I’m very lost is there a tutorial showing what to do after doing the garter st for 7cm??
12.11.2018 - 00:51DROPS Design answered:
Dear Carla, you can find the videos, related to this pattern at the left of the page, below the pictures. Also there are detailed explanation of the symbos of the pattern chart. If you need further help you can also ask for it in person in the store where you bought your DROPS yarn from. Happy Crafting!
12.11.2018 - 01:50
![]() Kitty Neijssel skrev:
Kitty Neijssel skrev:
Voor dit patroon zou voor maat XXXL 350 gram nodig zijn. Ik heb dus 7 bolletjes besteld. Al na 1 bolletje zag ik dat die hoeveelheid lang niet genoeg zou zijn. Na 4 bollen ben ik nog niet op de helft. Volgens mijn berekening heb ik nog 2 bollen nodig. Ik ben zeker geen beginnende breister ( ex-lerares Textiele Werkvormen en gedegen hobby-breister). Alles klopt volgens de stekenproef e.d. Ik ben een enthousiaste fan van Drops en tot nog toe heb ik nog nooit een probleem gehad met de patronen.
26.03.2018 - 13:20
![]() Anna skrev:
Anna skrev:
Da quale lato va letto il diagramma A1? La linea tratteggiata è la manica?
20.11.2017 - 07:53DROPS Design answered:
Buongiorno Anna. Il diagramma si legge dal basso verso l’alto e da destra verso sinistra (lavorando avanti e indietro, i ferri pari si leggono da sinistra verso destra). Nel grafico con le misure, le linee tratteggiate sono le parti che verranno cucite: dovrà cucire sotto le maniche e i lati del davanti e dietro. Buon lavoro!
20.11.2017 - 11:04
![]() Natasja skrev:
Natasja skrev:
Hi. Im about to cast on for the sleeves, and i dont understand the 10 st. Is it 10 st in each side or 5 st in each side, and how ?
07.08.2017 - 12:24DROPS Design answered:
Hi Natasja, You cast on 10 new stitches at the end of the next 2 rows, so 10 stitches at the end of the first row and then 10 new stitches at the end of the next row. So 20 stitches all in all. I hope this helps. Happy knitting!
07.08.2017 - 15:53
![]() Karine skrev:
Karine skrev:
Bonjour, Je tricote la taille L J'ai un souci à la première ligne du diagramme A1. 3 m. pt mousse - A1a - A1b - terminer par A1c OK mais il me reste 6 mailles avant de terminer 3 m pt mousse de la fin ? Logiquement, répétition de 5 fois diagramme A1 sur la ligne c'est juste ? Je refais plusieurs fois, j'arrive toujours pareil, je ne comprends pas :(
03.04.2017 - 17:49DROPS Design answered:
Bonjour Karine, vérifiez bien que vous avez bien 6 m pour A.1A, 10 m pour chaque motif de A.1B et 5 m pour A.1C, ainsi, vous devriez bien avoir: 3 m point mousse, 6 m de A.1A, 11-12-13-14 fois A.1B (= 110-120-130-140 m en A1B), 5 m de A.1C et 3 m point mousse = 127-1237-147-157 m. Bon tricot!
04.04.2017 - 10:04
![]() April skrev:
April skrev:
Reading the pattern as we add the sleeves which pattern do we follow. It says to fit A.1 in before the increase. I'm confused as to which diagram we use for the sleeves.
18.07.2016 - 04:05DROPS Design answered:
Dear April, start with 3 sts in garter st, then work A.1A on the next 6 sts (= new sts cast on for sleeve), now work first A.1B over the next 10 sts (= last st cast on for sleeve + the next 3 sts previously worked in garter st + the next 6 sts previously worked in A.1A), then repeat A.1B and A.1C as before until end of row, cast on the 10 new sts and continue as before. Happy knitting!
18.07.2016 - 09:35
![]() Arika skrev:
Arika skrev:
There is no way size L needs just 300 g. I am at 24 cm and I'm starting my 4th skein. I did the gauge and it was correct so it is not an issue of my loose knitting style. Now I have to order one more skein just to finish the garment. This is extremely frustrating as I'm not even sure if the dye lots match. Not to mention extra shipping cost (I was not planning to buy any yarn anytime soon). PLEASE correct the yardage for other knitters!
15.06.2016 - 05:07
![]() Jayne Bradbury skrev:
Jayne Bradbury skrev:
Regarding the chart: Are all rows, both right and wrong side, on the chart? Or just the right side? There are no numbers on the side of the chart to clarify and I want to be sure.
31.05.2016 - 16:17DROPS Design answered:
Dear Mrs Bradbury, diagram shows all rows both from RS and from WS, seen from RS - read more about diagrams here. Happy knitting!
31.05.2016 - 17:01
![]() Sue skrev:
Sue skrev:
I do not understand the construction of this garment. Where are the sleeves? Where is the head?
29.05.2016 - 02:59DROPS Design answered:
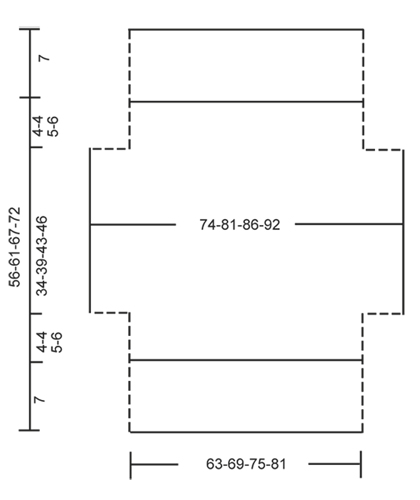
Dear Sue, the moss st edge around opening consists on the 7 cm worked at the beg of piece and the 7 cm worked at the end of piece (see measurement chart). The sts cast on /cast off on each side are for sleeves. The dotted lines on each side are the sides you will sew tog to create sleeves. In chart with black star, you can see the dotted line (seam for sleeves) and the 7 cm moss st edge around opening. Happy knitting!
30.05.2016 - 09:26
|
|||||||||||||||||||
Cassie#cassiebolero |
|||||||||||||||||||
 |
 |
||||||||||||||||||
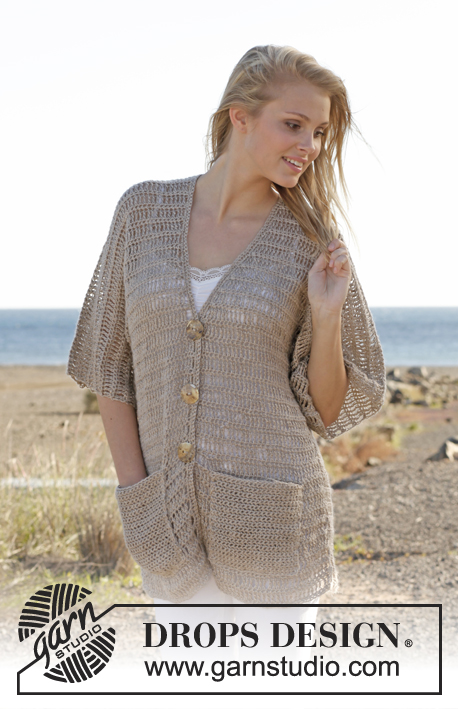
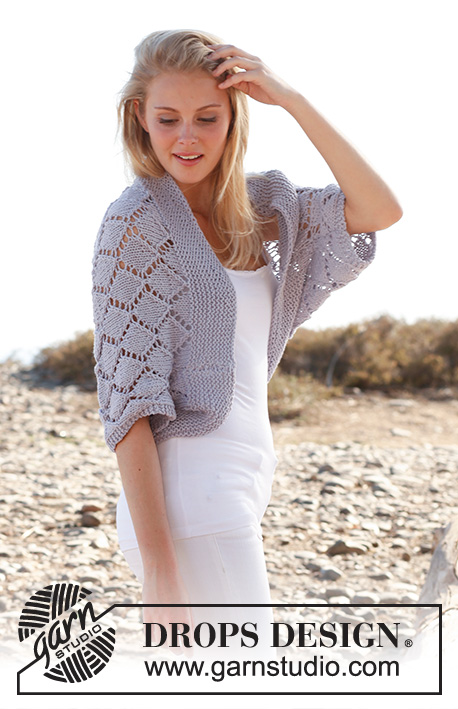
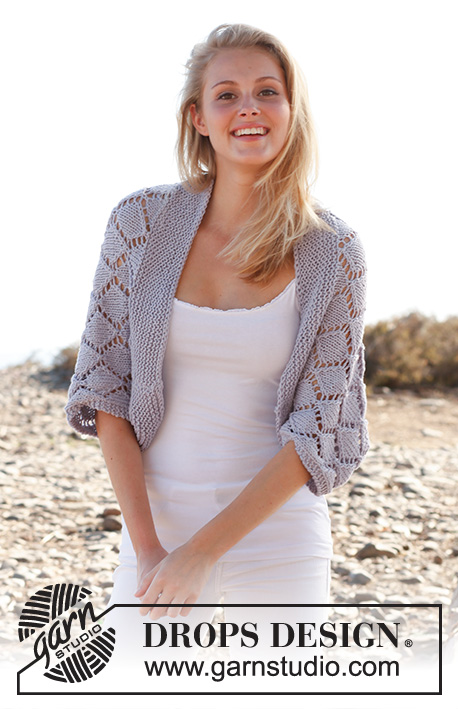
Strikket DROPS bolero i ”Big Merino” med hullmønster. Str S - XXXL
DROPS 146-16 |
|||||||||||||||||||
|
BOLERO: Arb strikkes frem og tilbake på rundp for å få plass til alle m. Legg opp 107-117-127-137 m på rundp 5 med Big Merino. Strikk rilller til arb måler 7 cm. Videre strikkes det slik - fra retten: 3 m RILLE - se forkl over, A.1A (= 6 m), A.1 B over de neste 90-100-110-120 m, avslutt med A.1 C (= 5 m) og 3 m RILLE. Fortsett A.1 med 3 m rille i hver side. HUSK PÅ STRIKKEFASTHETEN! Når arb måler 11-11-12-13 cm legges det opp 10 m på slutten av de 2 neste p til erme = 127-137-147-157 m. Strik slik: 3 m rille, A.1A (= 6 m), A.1 B over de neste 110-120-130-140 m, avslutt med A.1 C (= 5 m) og 3 m RILLE. NB! Fortsett A.1 slik at det stemmer med A.1 før økningen til erme! Når arb måler 45-50-55-59 cm felles det 10 m på beg av de 2 neste p = 107-117-127-137 m. Strikk slik: 3 m rille, A.1A (= 6 m), A.1 B over de neste 90-100-110-120 m, avslutt med A.1 C (= 5 m) og 3 m rille. Når arb måler 49-54-60-65 CM strikkes det videre med riller over alle m. Fell av når arb måler 56-61-67-72 cm. MONTERING: Sy side- og underermsømmene i ett innenfor 1 kantm – se stiplet linje på målskissen. |
|||||||||||||||||||
Diagramforklaring |
|||||||||||||||||||
|
|||||||||||||||||||
 |
|||||||||||||||||||
 |
|||||||||||||||||||
Har du fullført dette mønsteret?Tagg bildene dine med #dropspattern #cassiebolero eller send dem til #dropsfan-galleriet. Trenger du hjelp med denne oppskriften?Du finner 15 instruksjonsvideoer, kommentarer/spørsmål og mer i oppskriften på www.garnstudio.com © 1982-2026 DROPS Design A/S. Alle rettigheter er reservert. Dette dokumentet med sine underdokumenter har copyright. Les mer om hva du er tillatt å gjøre med våre oppskrifter nederst i alle våre oppskrifter på vår nettside. |
|||||||||||||||||||


Med over 40 år i strikke- og heklebransjen, tilbyr DROPS Design en av de mest omfattende samlingene av gratis oppskrifter på internett - oversatt til 17 språk. Per i dag har vi 324 kataloger og 12290 oppskrifter på Norsk.
Vi jobber hardt for å tilby det beste innen strikking og hekling, inspirasjon og gode råd, men også kvalitetsgarn til fantastiske priser! Vil du bruke våre oppskrifter til annet enn personlig bruk? Du kan lese om hvilke regler som gjelder i teksten Copyright nederst på siden i alle våre oppskrifter. God fornøyelse!
Kommenter oppskrift DROPS 146-16
Vi vil gjerne høre din mening om denne modellen!
Hvis du ønsker å stille et spørsmål, husk å velge riktig kategori i menyen under - det vil sørge for at du får svar raskere. Obligatoriske felt er markert med *.