How to work a sweater top down

Several of our sweaters are worked top-down, and this is primarily because it provides more flexibility in terms of adjusting the swweater to personal measurements or preferences. It is easier to adjust the length of sleeves, body and especially the yoke. Working top-down also makes it easier to try the piece on while working.

In this lesson we show you how to work a sweater with a simple raglan increase. Start by picking the pattern you want to knit and use this lesson to guide you. If you want to work on a pattern with a different kind of raglan just follow the instructions for increases in you pattern - you’ll notice that the principle of top-down is the same as in this example. Similarly, this technique can also be used when working a round yoke, just follow the increase instructions for the round yoke instead of the raglan showed here.

Additionally, If you’re working a jacket top-down the technique will be the same, but you’ll work the piece back and forth on needle, starting mid front (a marker at the back will not be necessary).

Let’s get started

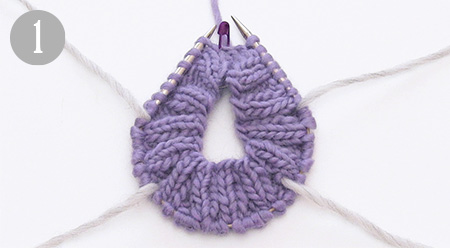
1) We have started this example by casting on 48 stitches and working 3 cm = 1 1/8" rib (knit 2, purl 2), before starting the raglan increases.

After the rib edge, continue in stocking stitch and place a marker mid-back. Continue by placing 4 marker threads for raglan in the transition between body and sleeves (from 1. mark to 1. marker thread = half back piece. From 1. to 2. marker thread = 1. sleeve. From 2. to 3. marker thread = front piece. From 3. to 4. marker thread = 2. sleeve. The remaining stitches between 4. marker thread and 1. mark = half back piece).

2) Start increasing for raglan on each side of the 4 marker threads.

3) Increase as follows: start 1 stitches before marker thread, make 1 yarn over on right needle.

4) Work 2 stitches (marker thread sits between these stitches), make 1 yarn over on right needle.

5) First increases (yarn overs) before and after 1. marker thread is now complete. Repeat increases at each marker thread (=8 stitches increased on round).

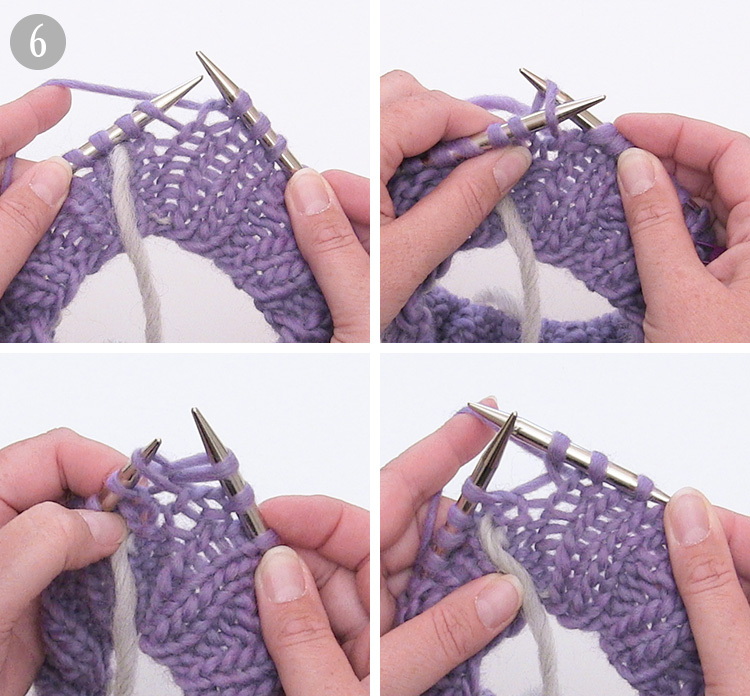
6) On next round, knit the yarn overs twisted (work in the back loop of stitch) to avoid holes.

7) Continue with pattern, and increase for raglan as explained.

8) When all increases for raglan are complete, continue working until you reach the measurements for where piece is divided for body and sleeves.

9) Divide piece for sleeves and front/back piece, and finish each part separately. Work until 1. marker thread (=half back piece).

10) Place stitches between 1. and 2. marker thread on a thread/stitch holder (= 1. sleeve).

11) Cast on new stitches under sleeve.

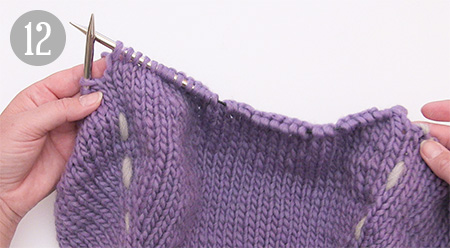
12) Work stitches between 2. and 3. marker thread (=front piece).

13) Place stitches between 3. and 4. marker thread on a thread/stitch holder (= 2. sleeve).

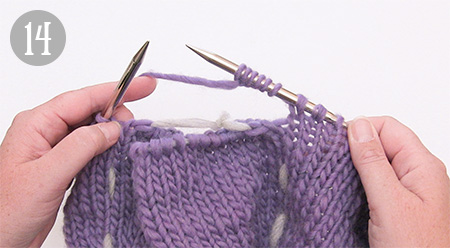
14) Cast on new stitches under sleeve (same number of stitches as cast on under 1. sleeve).

15) Work remaining stitches on back piece (until 1. marker).

16) Work the body in the round, follow instructions for increases, decreases, length and rib edge in your pattern. If you’re unsure about the length of piece, or considering shortening/lengthening it, you can easily try the jumper on while working (TIP: when trying the piece on, distribute stitches over several circular needles to minimise the risk of losing any stitches).

17) Work sleeves: place stitches from one of the threads/stitch holders back on the needle.

18) A: Cast on new stitches under sleeve (see pattern for exact number) and place a marker. The piece is now measured from here. B: Pick up 1 stitch in each of the stitches cast on under the sleeve.

19) Work the length stated in the pattern, place a new marker in the middle of the new stitches cast on. Decrease 1 stitch on each side of the marker.

20) Work until 2 stitches remain before the stitch with marker, slip 1 stitch onto right needle, knit 1, pass the slipped stitch over (= 1 stitch decreased).

21) Work stitch with marker.

22) Knit 2 stitches together (=1 stitch decreased).

You have now decreased 1 stitch before and 1 stitch after marker (= 2 stitches decreased).

23) Follow instructions in pattern regarding the number of decreases and cm/rounds in-between each decrease.

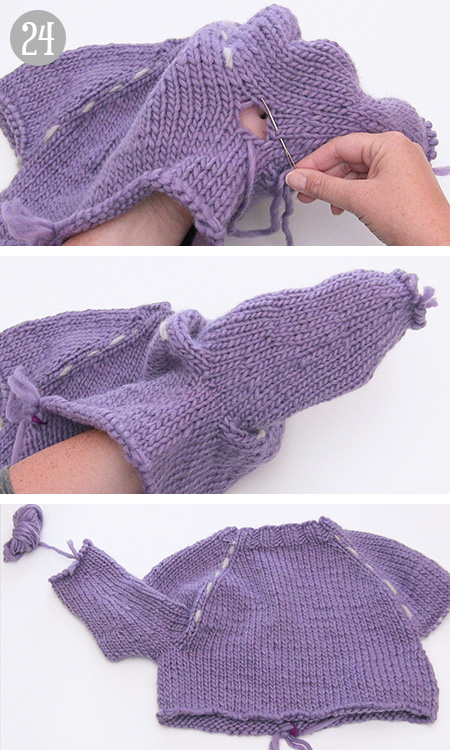
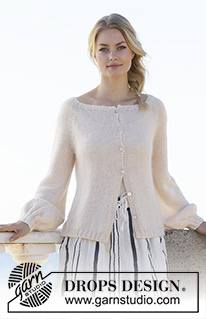
24) When both sleeves have been completed, sew the hole under sleeves.

When the body and sleeves are completed according to the pattern, remove all markers and marker threads, and fasten all strands. The jumper is now finished!

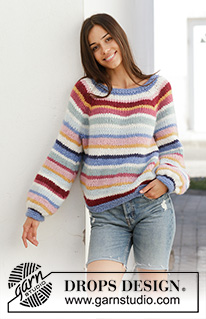
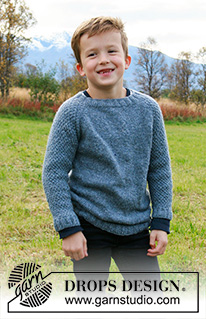
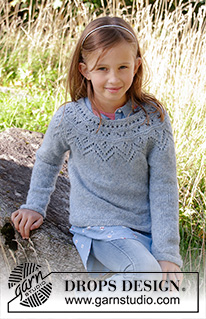
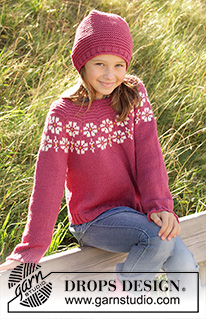
Still haven’t chosen a top down pattern? Find some inspiration below:

Comments (151)

Andrea wrote:

Die beste Strickanleitung die ich seit längerem in den Händen hatte. Habe noch nie top down gestrickt und muss erst 50 Jahre stricken um zu so einer tollen Anleitung zu kommen. Und so easy. Absolut top und nach der Maschenprobe passt alles ganz exakt, geht megaschnell und sieht super aus. Eine Frage noch zu der Wolle ist diese frei von Tierleid (beispielsweise Mulesing ) ? Vielen Dank

27.04.2020 - 17:45:

Rosalind wrote:

Hei!Takk for mange fine videoer og forklaringstekster. De har hjulpet meg mye på min strikkereise. Denne er veldig tydelig forklart og bildene er veldig bra. Jeg bare lurer på, hvilket tykkelse er det på strikkepinnene dere har brukt her og hva sånn cirka er strikkefastheten?

27.04.2020 - 11:57:

ROUVIER wrote:

Bonjour. habituée au tricot, je vous avoue que j'ai du mal à comprendre les explications du modèle autumn stroll qui me plait beaucoup. serait-il possible d'avoir de l'aide? merci d'avance.

26.04.2020 - 10:24:

DROPS Design answered:

Bonjour Mme Rouvier, vous pouvez volontiers poser votre question dans la rubrique du même nom sur la page de ce modèle - Votre magasin DROPS saura également vous aider - même par mail ou téléphone - pour toute assistance individuelle. Bon tricot!

27.04.2020 - 10:27:

Elsa wrote:

Bonjour ! Je cherche désespérément une réponse et votre aide me serait précieuse ! Lorsque l'on a tricoté séparément le devant et le dos, il faut reprendre un tricot en rond ... mais il ne suffit pas juste de mettre toutes les mailles sur la même aiguille circulaire non ? Y a-t-il quelque chose à faire de particulier ...? Peut être que la réponse est toute simple mais vraiment je bloque ! Merci de votre réponse, bonne journée !

01.04.2020 - 17:13:

DROPS Design answered:

Bonjour Elsa, quand vous tricotez un pull de haut en bas, vous allez tricoter 1 tour pour diviser les mailles de l'empiècement et donc mettre celles des manches en attente, monter de nouvelles mailles sous les manches et continuer en rond ( à partir de la photo-8) - et on continue sur les nouvelles mailles en rond (pull). Pour les manches (photo-13), on monte des mailles ou on en relève dans celles du côté et on tricote en rond. Cette vidéo pourrait-t'elle vous aider? Bon tricot!

02.04.2020 - 08:59:

Barbara wrote:

Buongiorno, come posso cercare sul sito i modelli realizzato in top-down? C’è modo di effettuare una ricerca con questa tecnica?

26.03.2020 - 19:11:

DROPS Design answered:

Buongiorno Barbara, può cercare "top down" nella barra "Trova modelli". Buon lavoro!

03.04.2020 - 09:20:

Maryse wrote:

Bonjour a vous , je suis tjs ennuyee avec ce calcul, comment calculer le nbres de mailles pour commencer le raglan, faut il diviser par 4 ou par 3 dont un par 2 pour les manches, je vous remercie, cordialement Maryse

19.03.2020 - 08:32:

DROPS Design answered:

Bonjour Maryse, nous ne montrons ici qu'un exemple, tout va dépendre de votre tension, de la largeur souhaitée pour votre encolure, du nombre de mailles dédiées aux raglans etc... vous trouverez tous nos modèles tricotés en top down ici, vous pourrez ainsi vous inspirer de celui qui vous convient le mieux. N'hésitez pas à vous adresser à votre magasin pour toute assistance individuelle complémentaire. Bon tricot!

19.03.2020 - 10:19:

Lysiane wrote:

Bonjour, je suis débutante pour le tricot circulaire et je me lance pour mon premier modèle top-down (strawberry rain),et je ne sais comment faire avec la longueur du câble, pour le début : encolure, un câble de 80 c'est trop long, les mailles sont beaucoup trop distendues et avec un petit câble, ça va être difficile par la suite quand j'aurai le corps du pull à tricoter, trop de mailles sur un petit câble. Comment gérer cela ?? Merci beaucoup

18.03.2020 - 10:52:

DROPS Design answered:

Bonjour Lysiane, quand on tricote en top down, on commence effectivement par une aiguille circulaire de 40 cm ou des aiguilles doubles pointes pour avoir suffisamment de place pour toutes les mailles, si vous avez une seule aiguille de 80 cm vous pouvez utiliser la technique dite du magic loop. Bon tricot!

19.03.2020 - 10:21:

Fiorina wrote:

Interessante tutorial. C'è una spiegazione simile per la tecnica bottom - up?

31.01.2020 - 19:34:

DROPS Design answered:

Buongiorno Fiorina. Purtroppo un tutorial simile per la tecnica bottom up non è disponibile. I nostri modelli sono però tutti accompagnati da video che descrivono le varie tecniche usate per realizzarli (lavorazione in tondo, in piano, come cucire le singole parti e così via). Buon lavoro!

04.02.2020 - 10:08:

Marina wrote:

Salve, ho lavorato e quasi finito un maglione top down ma ho cambiato idea sullo scollo e vorrei fare un dolcevita piuttosto del semplice girocollo. Come faccio a riprendere le maglie Del collo e fare il collo alto? (la lavorazione dello scollo e’ a coste 2/2 che vorrei mantenere sul dolcevita). Ho già provato a fare il tutto ma si vede uno strano errore da dove riprendo a lavorare (le coste sembrano inclinate o comunque sbagliate). C’è un qualche trucco? Grazie mille, Marina

19.01.2020 - 22:09:

Laurence wrote:

Bonjour, Pouvez-vous me dire s'il est possible de se baser sur un modèle "bas en haut" pour tricoter de "haut en bas" ? Merci pour votre réponse

15.01.2020 - 11:03:

DROPS Design answered:

Bonjour Laurence, probablement, il vous suffit peut être d'inverser les explications pour commencer par le nombre de mailles rabattues et augmenter au lieu de diminuer ou vice versa, mais attention au point fantaisie/motif, car tricoté de bas en haut au lieu de haut en bas peut en modifier/altérer le résultat. Votre magasin DROPS saura vous apporter toute aide personnalisée complémentaire, même par mail ou téléphone. Bon tricot!

16.01.2020 - 09:38:

Solveig Jensen wrote:

Jeg har lige strikket den første trøje oppefra model moonlight jakke-lign. Synes dig halsudskæringen falder lige lovlig bred - kan jeg rette op bagefter eller starte forfra?

09.01.2020 - 07:09:

DROPS Design answered:

Hei Solveig. Du kan evnt strikke en ny vrangbord helt til slutt, der du felller en del masker slik av vrangborden blir strammere. Eller evnt hekle en rad med kjedemasker på bakstiden ved overgangen mellom vrangborden/bolen, slik at det strammer seg litt. God Fornøyelse!

27.01.2020 - 07:47:

Mona wrote:

Finnes det något mønster att sticka oppifrån och ned på alpakka på pinner 2,5 til 3,5?

06.01.2020 - 14:40:

Manuela Päßler wrote:

Welche Länge an Stricknadeln nimmt man?

21.12.2019 - 11:09:

DROPS Design answered:

Liebe Frau Päßler, am Anfang beginnt man oft mit 40 cm Stricknadel (oder mit Nadelspiel wenn der Umfang weniger als 40 cm ist), dann können Sie mit einer längeren Nadeln (60 cm oder/und 80 cm) weiter stricken, dh wenn mann nicht genügend Platz für alle Maschen hat, dann kann man eine längere Nadeln benutzen. Viel Spaß beim stricken!

02.01.2020 - 16:43:

Lucia wrote:

Scusate volevo scrivere se volessi uno scollo più profondo sul davanti come dovrei fare? grazie

28.11.2019 - 08:35:

Lucia wrote:

Se volessi lo scippo più profondo sul davanti come devo fare? grazie

28.11.2019 - 08:32:

DROPS Design answered:

Buonasera Lucia, può scegliere un modello con questa caratteristica nel nostro catalogo oppure rivolgersi al suo rivenditore DROPS di fiducia. Buon lavoro!

12.01.2020 - 20:26:

Rosamaria Cellerino wrote:

Grazie per tutte le spiegazioni, le idee che mi regalate!!! Lavoro per i miei nipotini ed i cani!!!Complimenti!!!

21.11.2019 - 22:21:

Mari wrote:

Spiegazione molto chiara che mi ha ha dato lo spunto per fare un maglione senza tutorial Per me una grande soddisfazione Grazie !!!!!!

11.11.2019 - 07:37:

Gry Gerhardt wrote:

Hei! Strikker Warm Fall Drops 186-35. Lurer på hvordan jeg følger diagrammet A1 og A2 når jeg strikker ovenfra og ned? Begynner jeg på toppen av diagrammet?

10.11.2019 - 22:52:

DROPS Design answered:

Hei Gry. Du begynner nederst på diagrammene. Uansett om det skal strikkes ovenfra og ned eller nedenifra og opp, så starter man et diagram nederst til høyre. God Fornøyelse!

18.11.2019 - 09:54:

Patrizia wrote:

Dea, osservando la foto al punto 15, si riescono a contare le maglie, 16 m per il davanti, 16 per il dietro, 8 per ciascuna manica.

09.11.2019 - 09:50:

Hege wrote:

Synes denne var veldig god. Besøk meg også gjerne på http://strikkehege.bloggnorge.com/

23.10.2019 - 13:21:

Leave a comment or question to this lesson

Your email address will not be published. Required fields are marked *.