
Popular categories
Looking for a yarn?


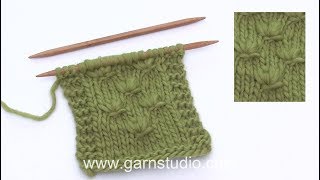
How to knit Indian cross stitches

For this sample we cast on 32 sts (divisible by 8). We have already knit 1 rapport
(1-12 row) and row 1-4 for the second time. In the video we start at row 5 for the second time.
Row 1-4: K all sts.
Row 5: K 1, * K next st but wrap yarn 4 times around the needle before pulling through (3 of 4 yo's will be dropped on next row). Continue like this in each st across, K last st on row. Turn *.
Row 6: Slip 1st st to right needle. Slip 1 yo and drop 3 yo's in each of the next 7 sts = 8 long sts on right needle, pull and stretch sts to make them evenly long. Slip the first 4 of the 8 sts over the last 4 sts and onto the left needle, then slip the last 4 sts on right needle onto left needle (= 8 loose sts on left needle crossing each other). Make sure they are lined up in the right order. Now K these 8 sts. Continue like this crossing the next 8 sts, and the next 8 and so on across.
Row 7-10: K all sts
Row 11: As row 5.
Row 12: Slip 1st st to right needle. Slip 1 yo and drop 3 yo's in each of the next 3 sts = 4 long sts on right needle, pull and stretch sts to make them evenly long. Slip the first 2 of the 4 sts over the last 2 sts and onto the left needle, then slip the last 2 sts on right needle onto left needle (= 4 loose sts on left needle crossing each other). Make sure they are lined up in the right order. Now K these 4 sts. Slip the next 8 sts over to right needle, pull and stretch sts to make them evenly long. Slip the first 4 of the 8 sts over the last 4 sts and onto the left needle, then slip the last 4 sts on right needle onto left needle (= 8 loose sts on left needle crossing each other). K these 8 sts. Continue like this crossing the next 8 sts, and the next 8 and so on across, until 4 sts remain on row. Slip the next 4 sts over to right needle, pull and stretch sts to make them evenly long. Slip the first 2 of the 4 sts over the last 2 sts and onto the left needle, then slip the last 2 sts on right needle onto left needle (= 4 loose sts on left needle crossing each other). K these 4 sts.
Repeat row 1-12 to desired length.
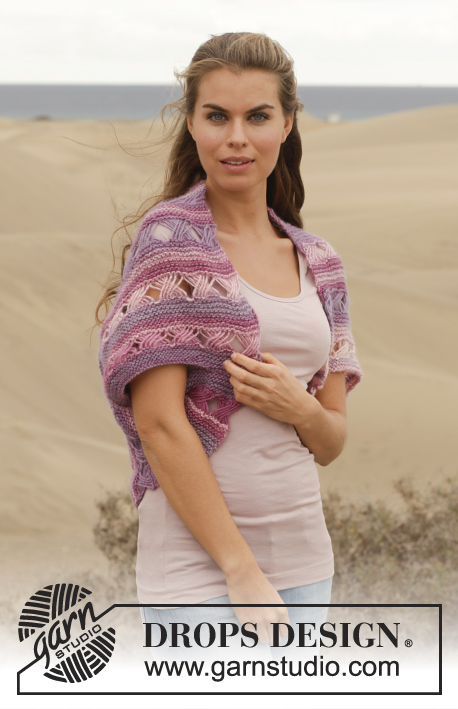
You must read the pattern and look at the chart to be able to follow. You’ll find a pattern using this technique by clicking on the picture below.
Patterns using this technique
Video #432, listed in: Learn to knit, Texture Knitting, Dropped & Long Stitches
Our videos do not have sound. We are a worldwide company and our videos are watched by people speaking endless of different languages and many do not understand English. So since there is not a given language for us to use, we instead have written instructions to accompany the video, and then there is no sound to disturb while watching.
You can adjust the speed of this video by clicking on the icon, on the play bar.
Leave a comment or question to this video
Your email address will not be published. Required fields are marked *.
You might also like


With over 40 years in knitting and crochet design, DROPS Design offers one of the most extensive collections of free patterns on the internet - translated to 17 languages. As of today we count 324 catalogues and 12290 patterns translated into English (UK/cm).
We work hard to bring you the best knitting and crochet have to offer, inspiration and advice as well as great quality yarns at incredible prices! Would you like to use our patterns for other than personal use? You can read what you are allowed to do in the Copyright text at the bottom of all our patterns. Happy crafting!
Amei este ponto gostaria de aprender outros pontos
01.06.2016 - 03:12Hoi, gewoon breinaalden gebruiken, met rondbreinaalden blijf het achter de naald hangen en blijf je aan je draaden plukken. Verder een mooie steek
26.08.2015 - 10:28Mariam Jutta wrote:
I have tried this on a circular needle and it was very difficult to move the row with the loops...the loops tend to get stuck under and above each other when you try to push them back to the front and knit them off.........it seems best to use straight needles for projects that include this pattern, at least for the portions that include this pattern. I had a very frustrating time indeed :P
07.04.2015 - 10:00Vind het een mooi patroon en een heel duidelijke uitleg
12.09.2014 - 23:19Hejsa, har en opskrift på en bluse/trøje med indiske korssting?
19.08.2014 - 15:59Merci , je vais essayer encore ;-) Bonne année ( du cheval) et bon tricot
05.02.2014 - 21:21Susanne wrote:
Thank you for the demonstration. It was very clarifying.
30.01.2014 - 13:46Bonjour , je n'arrive pas à comprendre comment faire pour ne pas augmenter le nombre de maille à chaque fois que je faire le jeté :-/ le mien il a augmenté exponentiellement... Merci d'avance pour les explications ;-) bonne journée!
07.01.2014 - 08:47DROPS Design :
Bonjour Rivana, les jetés ne doivent pas être tricotés mais lâchés au rang suivant, les mailles sont ainsi plus longues mais vous devez bien conserver le même nombre de mailles à chaque fois. Bon tricot!
09.01.2014 - 17:29