
Categorías populares
¿Buscas un hilo?


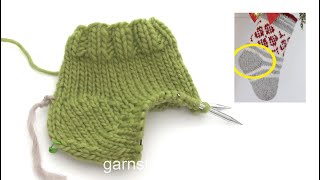
Cómo tejer un calcetín con un talón diagonal
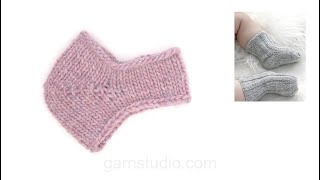
1. Primero se tejen hileras cortas sobre la parte de arriba del talón, después sobre la parte de abajo del talón, y terminamos tejiendo en redondo sobre todos los puntos y tejiendo hacia la punta del pie.
2. Los puntos en la parte de arriba del pie son colocados en un hilo/gancho auxiliar y solo se tejen los puntos del talón. Tejer hasta que reste 1 punto en la hilera, Virar, deslizar el primer punto en la aguja izquierda para la aguja derecha, apretar el hilo y tejer de vuelta. Tejer así de ida y vuelta, tejiendo 1 punto menos en cada hilera y tejiendo hasta el número de puntos indicado.
3. Continuar de ida y vuelta, pero ahora tejiendo 1 punto más en cada hilera sobre los puntos del talón. Para evitar que se formen agujeros cada vez que se gira la labor, levantar el hilo horizontal antes de punto siguiente y colocarlo retorcido en la aguja izquierda, después tejer este junto con el punto siguiente en la aguja izquierda. Virar, deslizar el primer punto en la aguja izquierda para la aguja derecha, apretar el hilo y tejer de vuelta. Tejer así de ida y vuelta hasta haber tejido todos los puntos del talón.
4. Colocar los puntos del hilo/gancho auxiliar de vuelta en las agujas.
5. Continuar en redondo hasta obtener la medida indicada.
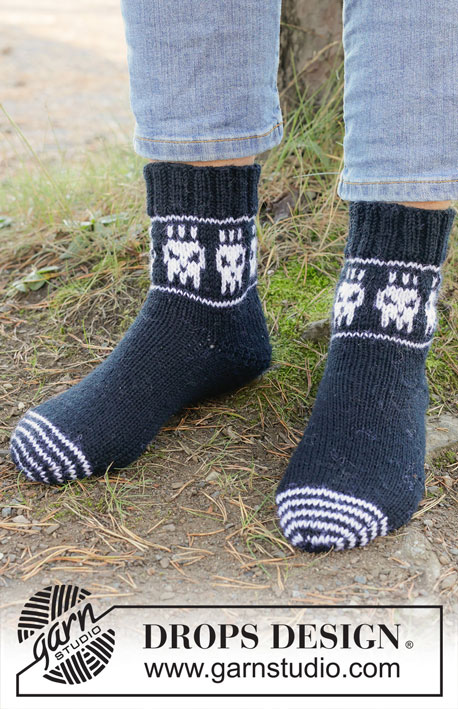
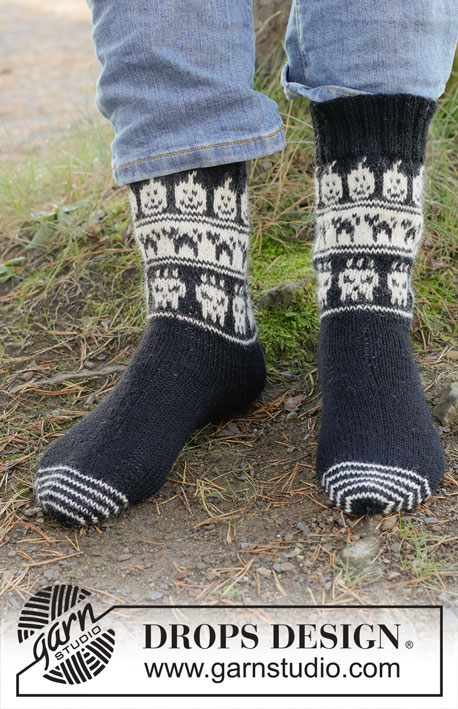
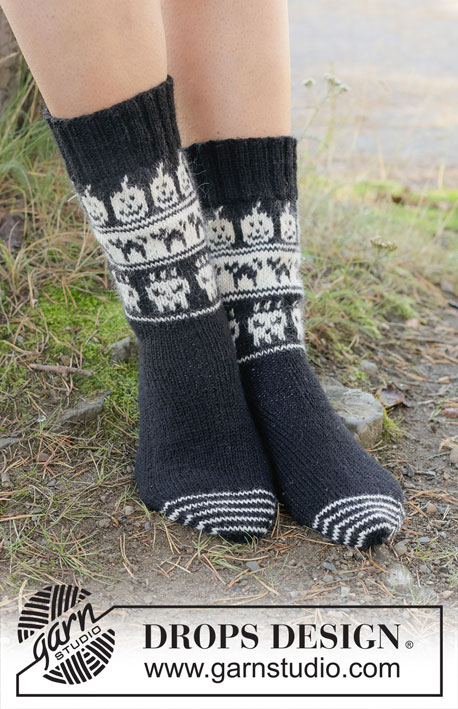
Patrones que utilizan esta técnica

Video #1164, listado en: Aprende a hacer punto, Talones & Puntas, Socks and Slippers
Nuestros videos no tienen sonido. Somos una empresa internacional y nuestros videos son vistos por personas que hablan diferentes idiomas y muchas de ellas no comprenden el español. Consecuentemente, como no hay un idioma determinado a usar por nosotros, hemos escrito las instrucciones que acompañan el video, y no hay ningún sonido que interfiera mientras se ve el video.
Puedes ajustar la velocidad de este video haciendo clic en el ícono en la barra de reproducción.
Dejar un comentario o pregunta acerca de este video
Tu dirección de email no será publicada. Los campos obligatorios están marcados con un *.
También te podría gustar...


Con más de 40 años en el diseño de modelos de punto y de ganchillo, DROPS Design ofrece una de las más vastas colecciones de patrones gratuitos en el internet - traducidos en 17 idiomas. Al día de hoy, contamos con 324 catálogos y 12290 patrones - de los cuales 11685 están traducidos en español.
Nosotros trabajamos con mucho esmero para brindarte lo mejor que las labores de punto y ganchillo tienen para ofrecer,inspiración y consejos, así como hilos de magnífica calidad a precios increíbles! Te gustaría usar nuestros patrones para otro fin además del uso personal? Puedes leer acerca de lo que estás permitida a hacer en el texto de Copyright en la parte de abajo de todos nuestros patrones. Felices labores!
Hvorfor er det ingen som snakker ? Forklaring med tale i tillegg til video hadde vert fint
20.03.2026 - 12:58DROPS Design :
Hei Margrethe. Våre video har ikke lyd. Vi er et verdensomspennende selskap og videoene våre blir sett av mennesker over hele verden, som hverken snakker engelsk eller norsk. Vi har derfor skrevet instruksjoner på de språk vi har oppskrifter på, som du finner under våre videoen eller link til forklaring. Dessuten er det ingen lyd som forstyrre mens du ser på :) mvh DROPS Design
23.03.2026 - 07:18I am so confused by this line in the pattern. Can you clarify? "Continue back and forth but now work 1 st more for every row over heel. "
08.02.2026 - 06:50DROPS Design :
Dear Barb, the increase is shown in step 3 of the video (as seen in the upper left corner). The stitches that were left at the end of the previous rows (when we turned as 1 stitch was left) will now be worked with the other stitches, adding one stitch on each side of the row, two on each row. In order to avoid getting holes, lift 1 horizontal thread before the stitch leftover from the short rows, that we are going to add to our row and place it twisted onto the left needle. Now work together this twisted stitch and the stitch from the short row, turn the piece, tighten the strand and work back. Continue back and forth until all stitches from the heel have been worked. Happy knitting!
08.02.2026 - 19:00Die Videos und die Hilfe zu diversen Problemen bei Handarbeiten sind super. Ich konnte dazu immer eine Anleitung finden stricken/häkeln/zusammenfügen der Teile. Danke!!!
03.10.2021 - 10:50Looking for a video after the heel showing decreases before and after the marker. Is this done only on one side? There’s only one marker.
09.05.2020 - 03:38DROPS Design :
Dear Mrs Sartorio, this video shows (for a baby sock pattern) how to decrease after 1st marker (= time code 22:07, just before the sts for upper foot) and after 2nd marker (= time code 23:00, just after the sts for upper foot). Hope this will help, happy knitting!
11.05.2020 - 11:22Warum so umständlich ? ≥ Falsche Bumerangferse: Am Ende jeder Reihe 2 Maschen zusammen stricken. Um dann in den Knötchen diese Maschen wieder aufnehmen. Ganz einfach . Die Linken Maschen kann man auch viel einfacher stricken.
04.03.2019 - 01:57Warum so umständlich ? ≥ Falsche Bumerangferse: Am Ende jeder Reihe 2 Maschen zusammen stricken. Um dann in den Knötchen diese Maschen wieder aufnehmen. Ganz einfach . Die Linken Maschen kann man auch viel einfacher stricken.
04.03.2019 - 01:54E subito appena finito di lavorare il tallone si continua su tutte le maglie? grazie
01.03.2019 - 17:57DROPS Design :
Buongiorno Loretta. Sì, terminato il tallone , riprende a lavorare sulle maglie, come indicato nelle spiegazioni del modello. Buon lavoro!
02.03.2019 - 10:00Er dette teknikken som heter "german shortrows"?
06.11.2018 - 02:14