
Popular categories
Looking for a yarn?


|
|||||||||||||||||||||||||||||||
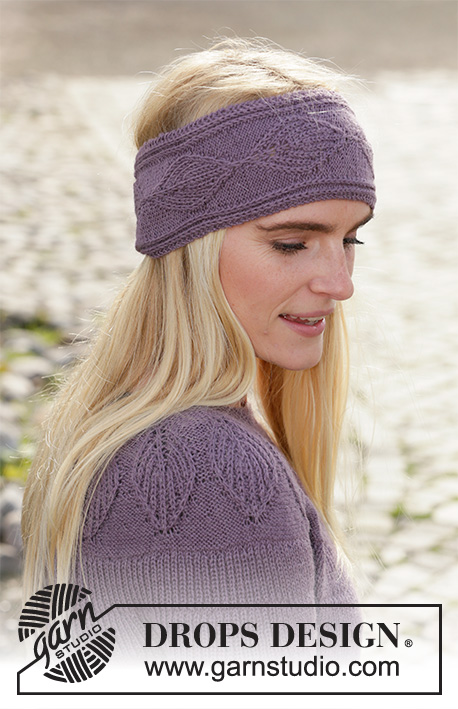
Quiet Moments Jacket |
|||||||||||||||||||||||||||||||
 |
 |
||||||||||||||||||||||||||||||
Knitted jacket in DROPS Flora. The piece is worked top down with round yoke, rib and leaf pattern in false Fisherman’s rib on the yoke. Sizes S - XXXL.
DROPS 206-10 |
|||||||||||||||||||||||||||||||
|
------------------------------------------------------- EXPLANATIONS FOR THE PATTERN: ------------------------------------------------------- RIDGE/GARTER STITCH (worked back and forth): Knit all rows. 1 ridge in height = Knit 2 rows. PATTERN: See diagram A.1. Choose diagram for your size. The diagrams show all rows in the pattern seen from the right side. INCREASE/DECREASE TIP (evenly spaced): To work out how to increase/decrease evenly, count the total number of stitches on needle (e.g. 284 stitches), minus the bands (e.g. 10 stitches) and divide the remaining 274 stitches by the number of increases/decreases to be made (e.g. 59) = 4.6. In this example, increase by making 1 yarn over after alternately each 4th and 5th stitch. Do not increase over the bands. On the next row work the yarn overs twisted to avoid holes. When decreasing, work together alternately each 3rd and 4th stitch and each 4th and 5th stitch. INCREASE TIP (for sides of body and mid under sleeves): All increases are worked from the right side! Start 2 stitches before the marker thread, 1 yarn over, knit 4 (marker thread sits between these 4 stitches), 1 yarn over (2 stitches increased at each marker thread). On the next row/round work the yarn overs twisted to avoid holes. Then work the new stitches in stockinette stitch. DECREASE TIP (for mid under sleeves): Start 3 stitches before the marker thread, knit 2 together, knit 2 (marker thread sits between these 2 stitches), slip 1 stitch as if to knit, knit 1 and pass the slipped stitch over the knitted stitch (= 2 stitches decreased). BUTTONHOLES: Work buttonholes on the right band (when the garment is worn). Work from the right side when there are 3 stitches left on the row as follows: Make 1 yarn over, knit 2 together and knit 1. On the next row (wrong side), knit the yarn over to leave a hole. The first buttonhole is worked when the rib on the neck measures approx. 1½-2 cm = ½"-¾". Then work the other 6-6-6-7-7-7 buttonholes with approx. 8-8-8-7½-7½-8 cm = 3⅛"-3⅛"-3⅛"-2⅞"-2⅞"-3⅛" between each one. BINDING OFF TIP: To avoid the bind-off edge being tight you can bind off with a larger size needle; or make 1 yarn over after approx. each 8th stitch at the same time as binding off (yarn overs bind off as normal stitches). ------------------------------------------------------- START THE PIECE HERE: ------------------------------------------------------- JACKET – SHORT OVERVIEW OF THE PIECE: The neck and yoke are worked back and forth with circular needle from mid front and top down. The yoke is divided for body and sleeves and the body continued back and forth. The sleeves are worked in the round with short circular needle/double pointed needles, top down. NECK: Cast on 115-123-131-131-139-147 stitches (including 5 band stitches on each side towards mid front) with short circular needle size 2.5 mm = US 1,5 and Flora. Purl 1 row (= wrong side). The next row is worked as follows from the right side: 5 band stitches in GARTER STITCH – read description above, * knit 1, purl 1 *, work from *-* until there are 6 stitches left on the row, knit 1 and finish with 5 band stitches in garter stitch. Continue this rib for 3-3-3-4-4-4 cm = 1⅛"-1⅛"-1⅛"-1½"-1½"-1½" – remember BUTTONHOLES on right band – read description above. When the rib is finished insert 1 marker after the 5 band stitches at the beginning of the row ; the yoke will be measured from this marker! YOKE: Change to circular needle size 3 mm = US 2,5 and work the next row as follows from the right side: 5 band stitches in garter stitch, work A.1A until there are 6 stitches left on the row (= 13-14-15-15-16-17 repeats of 8 stitches), A.1B (= 1 stitch) and finish with 5 band stitches in garter stitch. Continue this pattern and increase as shown in the diagram. REMEMBER THE KNITTING GAUGE! When A.1 has been completed there are 284-305-326-326-363-385 stitches on the needle and the piece measures approx. 11-11-12-12-13-13 cm = 4⅜"-4⅜"-4¾"-4¾"-5⅛"-5⅛" from the marker on the neck. Work 2 rows stockinette stitch with 5 band stitches in garter stitch on each side – AT THE SAME TIME on the last row of stockinette stitch (wrong side) increase 59-76-81-85-90-106 stitches evenly spaced – read INCREASE/DECREASE TIP = 343-381-407-411-453-491 stitches. The next row is worked as follows from the right side: 5 band stitches in garter stitch, * knit1, purl 1 *, work from *-* until there are 6 stitches left on the row, knit 1 and finish with 5 band stitches in garter stitch. Continue this rib for 3-3-4-4-5-5 cm = 1⅛"-1⅛"-1½"-1½"-2"-2". Then work 2 rows stockinette stitch with 5 band stitches in garter stitch on each side – AT THE SAME TIME on the last row of stockinette stitch (wrong side) increase 36-38-40-42-46-48 stitches evenly spaced = 379-419-447-453-499-539 stitches. The next row is worked as follows from the right side: 5 band stitches in garter stitch, * knit 1, purl 1 *, work from *-* until there are 6 stitches left on the row, knit 1 and finish with 5 band stitches in garter stitch. Continue this rib for 3-3-4-4-5-5 cm = 1⅛"-1⅛"-1¼"-1¼"-2"-2". Knit 1 row where you decrease 46-46-42-16-34-34 stitches evenly spaced = 333-373-405-437-465-505 stitches. The piece measures approx. 18-18-21-21-24-24 cm = 7"-7"-8¼"-8¼"-9½"-9½" from the marker on the neck. Continue working stockinette stitch with 5 band stitches in garter stitch on each side towards mid front (without increasing or decreasing) until the piece measures 20-22-24-26-28-30 cm = 8"-8¾"-9½"-10¼"-11"-11¾" from the marker on the neck. Now divide the yoke for body and sleeves, working the next row as follows: Work 54-59-63-69-75-82 stitches in garter stitch and stockinette stitch as before (= front piece), place the next 64-74-82-86-88-94 stitches on 1 thread for sleeve, cast on 8-8-10-10-12-12 new stitches on the needle (= in side under sleeve), work 97-107-115-127-139-153 stitches in stockinette stitch (= back piece), place the next 64-74-82-86-88-94 stitches on 1 thread for sleeve, cast on 8-8-10-10-12-12 new stitches on the needle (= in side under sleeve) and work the remaining 54-59-63-69-75-82 stitches in stockinette stitch and garter stitch as before (= front piece). Body and sleeves are finished separately. THE PIECE IS NOW MEASURED FROM HERE! BODY: = 221-241-261-285-313-341 stitches. Insert 1 marker thread 58-63-68-74-81-88 stitches in from each side (= sides of body). There are 105-115-125-137-151-165 stitches between the threads on the back piece. Allow the marker threads to follow you work onwards; they will be used when increasing in the sides. Work stockinette stitch back and forth with 5 band stitches in garter stitch on each side towards mid front – remember buttonholes on right band. When the piece measures 3-3-3-4-4-4 cm = 1⅛"-1⅛"-1⅛"-1½"-1½"-1½" from the division, increase 1 stitch on each side of both marker threads – read INCREASE TIP (= 4 stitches increased). Increase like this every 3½-3½-3½-3-3-3 cm = 1¼"-1¼"-1¼"-1⅛"-1⅛"-1⅛" a total of 7-7-7-8-8-8 times on each side = 249-269-289-317-345-373 stitches. Continue working until the piece measures 28-28-28-27-27-27 cm = 11"-11"-11"-10⅝"-10⅝"-10⅝" from the division (there is approx. 3-3-3-4-4-4 cm = 1⅛"-1⅛"-1⅛"-1½"-1½"-1½" left to finished length; you can try the jacket on and work to desired length). Knit 1 row from the right side where you increase 64-70-74-80-88-96 stitches evenly spaced (bands worked in garter stitch; do not increase on bands) = 313-339-363-397-433-469 stitches; the increases are to avoid the rib being tight. Change to circular needle size 2.5 mm = US 1,5 and work the next row as follows from the wrong side: 5 band stitches in garter stitch, * purl 1, knit 1 *, work from *-* until there are 6 stitches left on the row, purl 1 and finish with 5 band stitches in garter stitch. Continue this rib for 3-3-3-4-4-4 cm = 1⅛"-1⅛"-1⅛"-1½"-1½"-1½". Bind off with garter stitch over garter stitch, knit over knit and purl over purl – read BINDING OFF TIP! The jacket measures approx. 54-56-58-60-62-64 cm = 21¼"-22"-22¾"-23⅝"-24⅜"-25¼" from the shoulder down. SLEEVE: Place the 64-74-82-86-88-94 stitches from the thread on the one side of the piece on short circular needle size 3 mm = US 2,5 and knit up 1 stitch in each of the 8-8-10-10-12-12 stitches cast on under the sleeve = 72-82-92-96-100-106 stitches. Insert a marker thread in the middle of the 8-8-10-10-12-12 stitches under the sleeve (allow it to follow your work onwards; it will be used when decreasing and increasing under the sleeve). Start the round at the marker thread and work stockinette stitch in the round. When the piece measures 2-2-2-2-1-1 cm = ¾"-¾"-¾"-¾"-⅜"-⅜" from the division decrease 2 stitches mid under sleeve – read DECREASE TIP. Decrease like this every 2½-1½-1-1-1-1 cm = 1"-½"-⅜"-⅜"-⅜"-⅜" a total of 5-9-12-12-13-15 times = 62-64-68-72-74-76 stitches. When the sleeve measures 16 cm = 6¼" from the division in all sizes increase 2 stitches mid under sleeve – read INCREASE TIP. Increase like this every 2-2-1½-1-1-½ cm = ¾"-¾"-½"-⅜"-⅜"-⅛" a total of 10-11-12-12-13-14 times = 82-86-92-96-100-104 stitches. Continue working until the sleeve measures 39-37-35-32-30-28 cm = 15¼"-14½"-13¾"-12½"-11¾"-11" from the division (there is approx. 3-3-3-4-4-4 cm = 1⅛"-1⅛"-1⅛"-1½"-1½"-1½" left to finished length; you can try the jacket on and work to desired length). NOTE: Shorter measurements in larger sizes due to wider neck and longer yoke. Knit 1 round where you increase 24-26-28-28-30-32 stitches evenly spaced = 106-112-120-124-130-136 stitches. Change to short circular needle size 2.5 mm = US 1,5 and work rib in the round (= knit 1/ purl 1) for 3-3-3-4-4-4 cm = 1⅛"-1⅛"-1⅛"-1½"-1½"-1½". Bind off with knit over knit and purl over purl – remember BINDING OFF TIP! The sleeve measures approx. 42-40-38-36-34-32 cm = 16½"-15¾"-15"-14¼"-13⅜"-12½" from the division. Work the other sleeve in the same way. ASSEMBLY: Sew buttons onto left band. |
|||||||||||||||||||||||||||||||
Diagram explanations |
|||||||||||||||||||||||||||||||
|
|||||||||||||||||||||||||||||||

|
|||||||||||||||||||||||||||||||

|
|||||||||||||||||||||||||||||||

|
|||||||||||||||||||||||||||||||
|
Have you made this or any other of our designs? Tag your pictures in social media with #dropsdesign so we can see them! Do you need help with this pattern?You'll find tutorial videos, a Comments/Questions area and more by visiting the pattern on garnstudio.com. © 1982-2024 DROPS Design A/S. We reserve all rights. This document, including all its sub-sections, has copyrights. Read more about what you can do with our patterns at the bottom of each pattern on our site. |
|||||||||||||||||||||||||||||||


With over 40 years in knitting and crochet design, DROPS Design offers one of the most extensive collections of free patterns on the internet - translated to 17 languages. As of today we count 304 catalogs and 11422 patterns - 11417 of which are translated into English (US/in).
We work hard to bring you the best knitting and crochet have to offer, inspiration and advice as well as great quality yarns at incredible prices! Would you like to use our patterns for other than personal use? You can read what you are allowed to do in the Copyright text at the bottom of all our patterns. Happy crafting!
Comments / Questions (13)
Me está costando armar el canes, no entiendo a que se refiere ◇ y no me dan los puntos
08.05.2023 - 23:23DROPS Design answered:
Hola María, el símbolo del diamante en el diagrama se refiere a 1 punto de derecho en el punto debajo del punto siguiente. Puedes ver cómo trabajarlo en este vídeo: https://www.garnstudio.com/video.php?id=1389&lang=es
14.05.2023 - 18:49Hej, jeg strikker størrelse M. Jeg kan ikke finde ud af række 8 i diagrammet, Der skal strikkes 1 vrang 1 ret 1 vrang 1 ret og 1 vrang. Men imellem vrangmaskerner er der2 retmasker pga. omslaget i række 7.
28.12.2022 - 11:42DROPS Design answered:
Hej Lena, det er omslagene du strikker ret og så er det maskerne på hver side af de 2 omslag som strikkes vrang ifølge pind 8 i diagrammet :)
08.03.2023 - 10:18Tein mallitilkun puikoilla nro 5 enkä siltikään päässyt oikeaan neuletiheyteen. Yleensä minulla riittää että otan max numeroa suuremmat puikot, nyt tuntuu että tuo neuletiheys on ilmoitettu väärin. Vai mikä on pielessä? Onko kukaan muu huomannut asiaa?
08.08.2021 - 06:19Stickar Quiet Moments jacket. Förstår inte rad 7 i diagrammet. Tre vita rutor, sen öka en maska, sen 2 maskor vridet aviga tillsammans.Vad betyder det som står före 2 maskor aviga tillsammans?? Ser ut som två ovaler med svart tecken 8som betyder att man ska sticka en rät maska i maskan under... )Vad betyder ovalerna? Förstår inte, Tacksam för hjälp! Mvh Gunnel Ståhl
22.04.2020 - 08:23DROPS Design answered:
Hej Jag förstår inte riktigt var i diagrammet du är, vilken storlek stickar du? Enligt det du skriver ser det inte ut att vara rad 7... Mvh DROPS Design
27.04.2020 - 10:16Ik wil deze vest als een maouwloos vest breien maar zonder minderingen in de mouwingang. Hoe moet ik dan breien als ik van boven naar beneden wil breien? Moet ik dan gewoon twee rechte delen voorkant en 1 recht deel achterpand breien?
24.01.2020 - 16:33DROPS Design answered:
Dag Zahide,
Dit vest wordt heen en weer gebreid van midden voor naar midden voor, zodat het structuurpatroon van de blaadjes mooi uitkomt. Als je hem zonder mouwen wilt, kun je ervoor kiezen om, in plaats van de gehele mouw, alleen een afwerkrandje eraan te breien, nadat je de pas hebt gebreid en het werk gesplitst is en het lijf en de mouwen apart verder gebreid worden.
26.01.2020 - 15:06Buongiorno, avete una lista delle misure per sapere esattamente quale taglia lavorare? Grazie
03.12.2019 - 09:23DROPS Design answered:
Buongiorno Valentina. Alla fine delle spiegazioni, trova un grafico con le misure. Confrontando queste misure con quelle di un capo simile, trova la misura da seguire. Buon lavoro!
04.12.2019 - 16:38Merci pour la réponse à ma question ''de losange noir'' dans A1. Peut-être serait-il bon de modifier la légende en écrivant dans la maille du tour précédent au lieu dans la maille suivante, car cela porte à confusion (en tout cas pour moi et une autre tricoteuse habituée). Gros merci encore!!!
21.10.2019 - 15:54Bonjour! Auriez-vous une vidéo qui montre comment faire la losange noire dans A1, qui dit : = 1 maille endroit en piquant sous la maille suivante. Est-ce qu'on pique en avant (ou en arrière) avant de tricoter la maille? En fait, pourriez-vous m'expliquer clairement la façon de faire; j'ai essayé plusieurs façons et je ne suis vraiment pas certaine, en plus c'est 'tordu' à tricoter. J'ai cherché une explication sur votre site et je n'ai pas trouvé. Gros merci de votre aide!!!
21.10.2019 - 01:53DROPS Design answered:
Bonjour Maryse, la vidéo a été ajoutée, il s'agit de cette technique, également parfois appelée "maille double". Bon tricot!
21.10.2019 - 11:45Jaki piękny!Spróbuję zrobić,mam nadzieję,że nie jest trudny.
18.10.2019 - 19:34Diese Jacke ist wirklich toll. Wann kommt die Anleitung dazu? Ich finde die Ärmel zu weit unten....
13.10.2019 - 19:22