
Catégories populaires
Vous cherchez un fil?


Commentaires / Questions (47)
![]() Nemtanu Anisoara a écrit:
Nemtanu Anisoara a écrit:
Si puo tradure in italiano?
09.03.2026 - 15:27DROPS Design a répondu:
Hi, the Italian version is availableHERE. Happy knitting!
08.04.2026 - 14:22
![]() Sabine a écrit:
Sabine a écrit:
Wer das Tuch auch in Big Merino (Garngruppe C) stricken möchte: meines wiegt 349 gr, ich habe 144 gr für den Zopf und 205 gr für den Hauptteil des Schals benötigt. Viel Spaß, es lohnt sich! :-)
28.09.2025 - 15:41
![]() Sabine a écrit:
Sabine a écrit:
Ein wunderschönes Tuch, das ich, um es etwas dünner zu haben, mit Drops Big Merino (Garngruppe C) gestrickt habe mit einer 6,5er Nadel und zweifarbig, so dass sich der Zopfrand noch mehr hervorhebt. Bei einer Länge von 85cm habe ich, damit sich die Spitze des Tuchs bei dieser dünneren Wolle nicht einrollt 5 verkürzte Reihen gestrickt (statt 3). Beim nächsten Mal stricke ich es wieder mit Garngruppe C mit einer 7 - 8er Nadel und mit 16 Maschen für den Zopf - freue mich schon!
28.09.2025 - 15:25
![]() Carol Maitland a écrit:
Carol Maitland a écrit:
Hi I was just answered my question by the Drops Team but my question was not really answered.I understand the increase in the first row,it’s the 4 row increase I do not understand.Where do I do this increase on the 4th row and where do I do the decrease on the 4th row, Thks again Carol.
12.09.2025 - 14:16DROPS Design a répondu:
Dear Carol, you have one 4-row increase section explained in the pattern. In this section, in ROW 1 you increase 1 stitch, by working 2 stitches in the first stitch after the marker. Then you work ROWS 2-4 with knit and A.1. Now you repeat these 4 rows, increasing always in the ROW 1 repeat, in the stitch right after the marker. That is, you increase not in ROW 4 but in every 4th row (out of rows 1-4 you increase in one of them, row 1). The decreases follow the same format, where you decrease 2 stitches after the marker every time that you repeat ROW 1 of the decreases. Happy knitting!
15.09.2025 - 01:39
![]() Carol Maitland a écrit:
Carol Maitland a écrit:
Hi I sent a question yesterday,about where to add the extra stitch in the 4 th row.Has not been answered.
10.09.2025 - 18:01DROPS Design a répondu:
Dear Carol, please see our answer above. Happy knitting!
15.09.2025 - 01:40
![]() Carol Maitland a écrit:
Carol Maitland a écrit:
Hi itsays on the shawl to increase every 4th row,where do I do this and when I decrease where do I do that. Thks Carol.c
09.09.2025 - 21:05DROPS Design a répondu:
Hi Carol, After the first 14 rows, you work 4 new rows which are then repeated onwards increasing 1 stitch in the first stitch after the marker-thread on the first of these 4 rows. The decreases begin after the short rows, and again 1 stitch is decreased straight after the marker-thread on the first of the 4 rows which are repeated onwards. Regards, Drops Team.
12.09.2025 - 11:03
![]() Carol Maitland a écrit:
Carol Maitland a écrit:
Then it says repeat 1st to 4th row,so every 4th row I add a stitch,where at the beginning. sorry my keyboard keys were stuck,thks Carol Maitland
15.08.2025 - 19:56DROPS Design a répondu:
Dear Mrs Maitland, work as previously explained under rows 1-4: you will increase 1 stitch just after A.1 on first row = you will increase 1 stitch on every 4th row. Happy knitting!
18.08.2025 - 08:15
![]() Carol Maitland a écrit:
Carol Maitland a écrit:
Hi I currently working on this pattern,have some questions. Row 2 on second part says knit until marker then A1 over the next 12 stitches,does this mean I purl them because the pattern says to purl from the wrong side. Row 3,is this the cable row.so I put 6 cable stitches at back and knit the next 6 then do the cable stitches,but have noticed that the beginning of my working yarn is at the cable end.Do I carry it at the back before knitting the 6 stitches on the cable needle.
15.08.2025 - 19:52DROPS Design a répondu:
Dear Mrs Maitland, from wrong side you will purl the stitches of A.1, on 3rd row start diagram - see in this video how to work this diagram and how to work the cable at the beginning of the row. Happy knitting!
18.08.2025 - 08:13
![]() Renate Huber a écrit:
Renate Huber a écrit:
Sehr schön gefällt mir ausgezeichnet
03.09.2024 - 15:54
![]() Monique a écrit:
Monique a écrit:
Une fois le produit fini, avec la même laine et j'ai obtenu un châle beaucoup trop long par rapport à sa largeur. Il faut peut être faire des augmentations plus rapides pour avoir un châle plus large.
09.03.2023 - 09:08
|
|||||||
Winter Cozy#wintercozyset |
|||||||
 |
 |
||||||
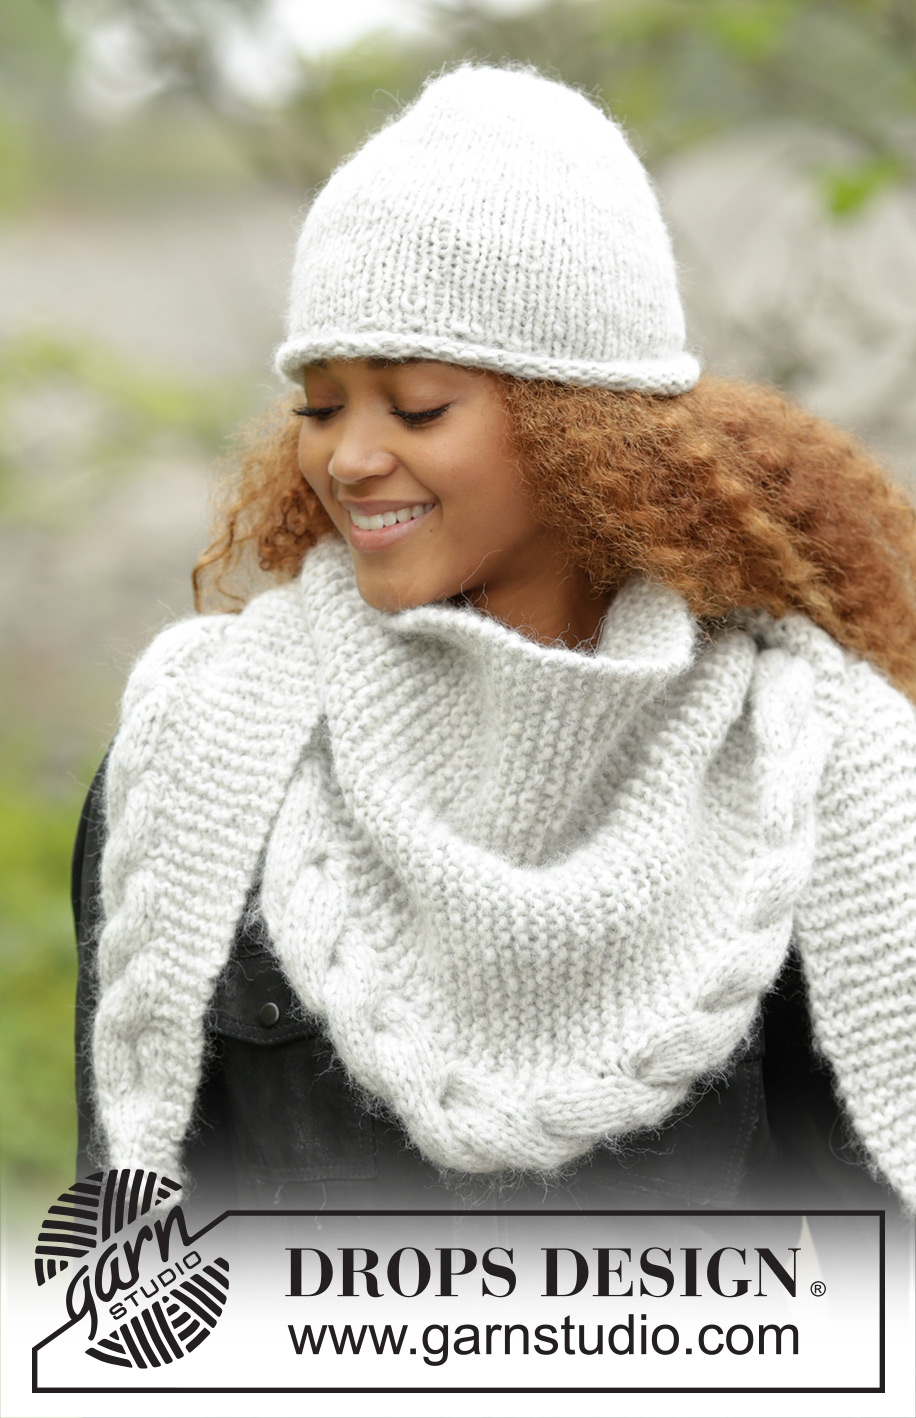
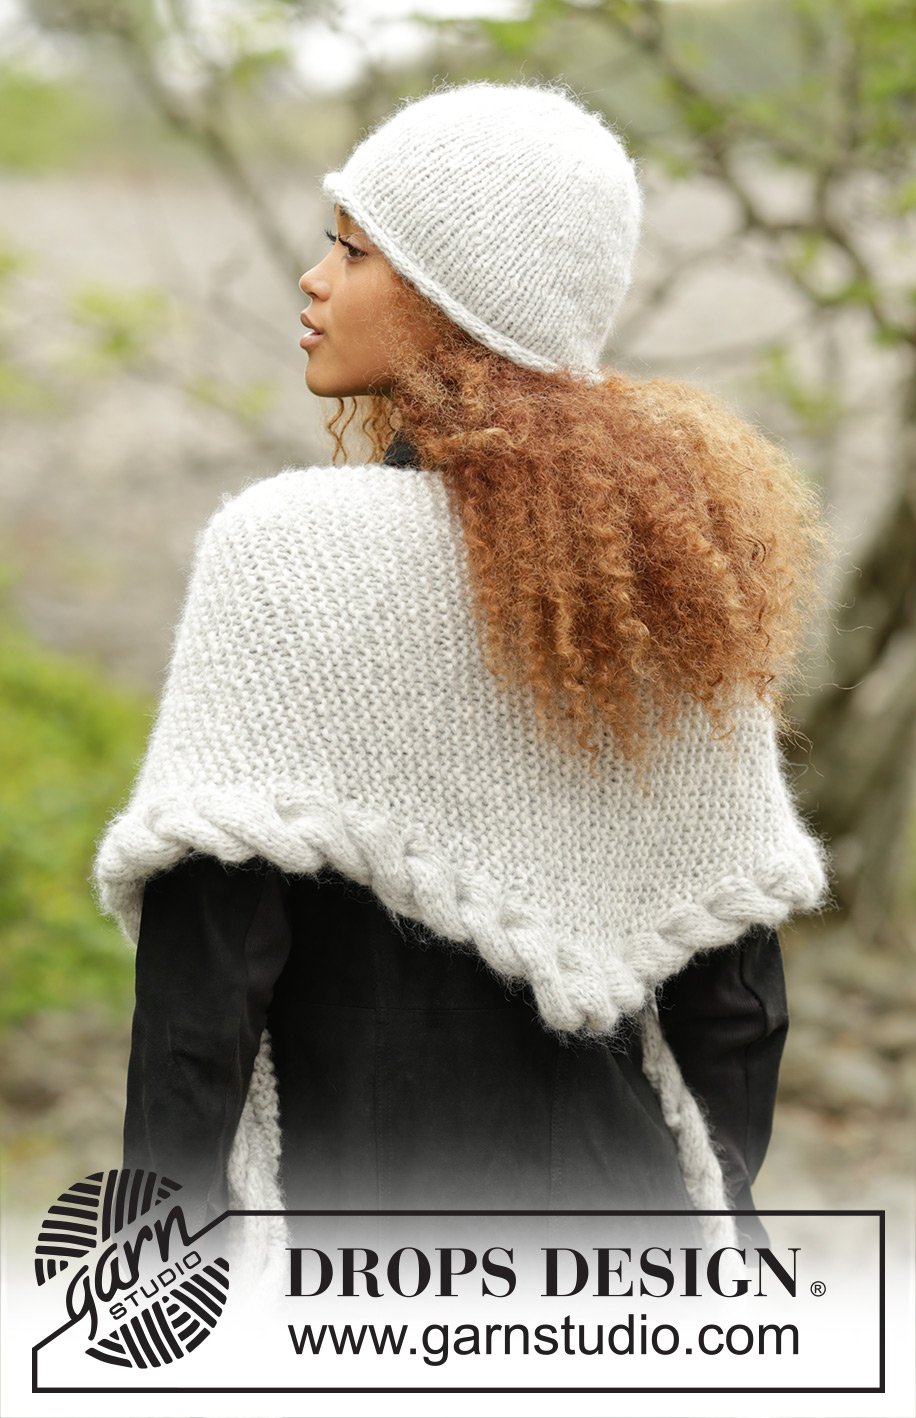
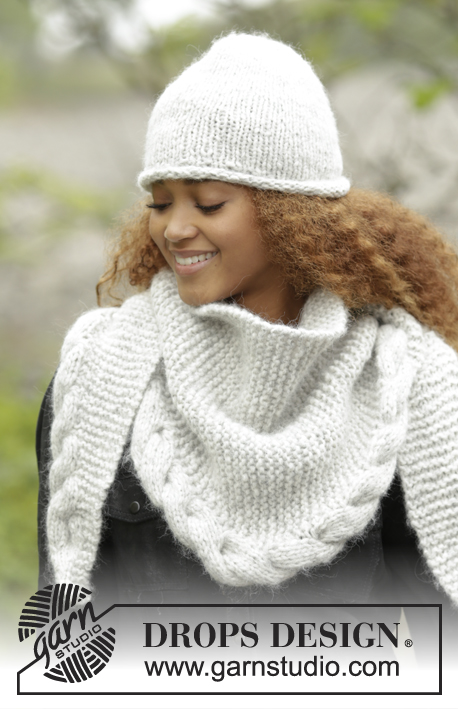
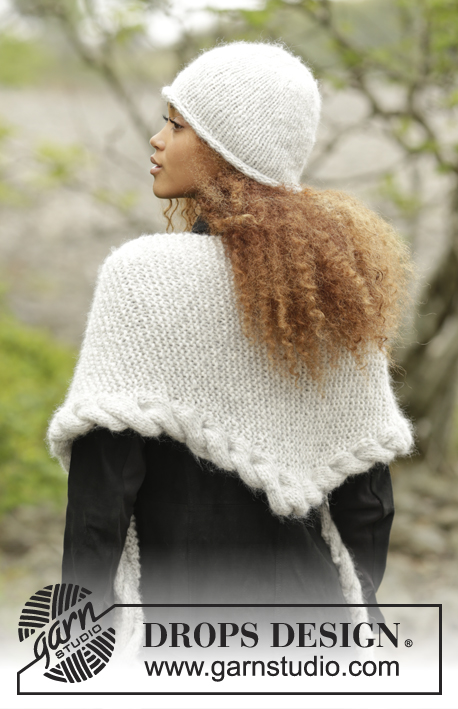
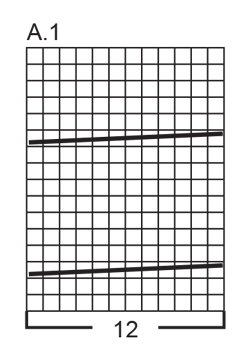
Ensemble: Bonnet DROPS en Cloud ou Air et châle tricoté dans le sens de la longueur au point mousse avec bordure torsadée, en Cloud ou Air.
DROPS 172-10 |
|||||||
|
BONNET: DIMINUTIONS: Glisser 1 m à l'end, 1 m end, passer la m glissée par-dessus la m tricotée. ---------------------------------------------------------- BONNET: Monter 56-60 m avec l'aiguille circulaire 7 en Cloud ou avec 2 fils Air. Tricoter 4 tours en jersey (= bordure roulottée). Tricoter le tour suivant ainsi: *1 m end, 1 m env*, répéter de *-* tout le tour. Tricoter encore 1 tour en tricotant les m end à l'end et les m env à l'env. Continuer ensuite en jersey jusqu'à la fin. PENSER À BIEN CONSERVER LA MÊME TENSION QUE POUR L'ÉCHANTILLON! À 21-22 cm de hauteur totale, placer 8-10 marqueurs espacés de 7-6 m chacun. Au tour suivant, diminuer 1 m après chaque marqueur - voir DIMINUTIONS (= 8-10 diminutions). Diminuer ainsi 3 fois au total tous les 2 tours, puis 2 fois tous les tours. Au tour suivant, tricoter toutes les mailles ens 2 par 2 torse à l'end (dans le brin arrière au lieu du brin avant) = il reste 8-5 m. Couper le fil et le passer dans les mailles restantes, serrer et arrêter. L'ouvrage mesure environ 26-27 cm de haut en bas (bordure roulottée comprise). ---------------------------------------------------------- CHÂLE: ASTUCE TRICOT: Le châle se tricote au point mousse avec une bordure torsadée en bas. Tricoter cette torsade sur les 12 m du bord. Ne pas tricoter de m lis dans la torsade (c'est-à-dire tricoter la m de A.1 au bord du châle en jersey sur l'endroit et sur l'envers, comme une maille normale), sinon la torsade ne va pas s'enrouler et elle n'aura pas la bonne forme. POINT FANTAISIE: Voir diagramme A.1. Les diagrammes montrent tous les rangs du point fantaisie, vus sur l'endroit. ASTUCE POUR MESURER: Mesurer le châle le long du côté sans les augmentations/ diminutions. ---------------------------------------------------------- CHÂLE: Se tricote dans le sens de la longueur. Monter 3 m avec l'aiguille circulaire 8 en Cloud ou avec 2 fils Air et tricoter ainsi: RANG 1 (= sur l'endroit): Tricoter toutes les mailles à l'end. RANG 2 (= sur l'envers): 2 m end, tricoter 2 fois la m suivante à l'end (= dans le brin avant et dans le brin arrière) = 4 m. RANG 3 (= sur l'endroit): 1 m end, 1 jeté, 3 m end = 5 m. RANG 4 (= sur l'envers): 3 m end, tricoter le jeté torse à l'env (= dans le brin arrière au lieu du brin avant), 1 m env. RANG 5 (= sur l'endroit): 2 m end, 1 jeté, 3 m end = 6 m. RANG 6 (= sur l'envers): 3 m end, tricoter le jeté torse à l'env, 2 m env. RANG 7 (= sur l'endroit): 3 m end, 1 jeté, 3 m end = 7 m. RANG 8 (= sur l'envers): 3 m end, tricoter le jeté torse à l'env, 3 m env. RANG 9 (= sur l'endroit): 4 m end, 1 jeté, 3 m end = 8 m. RANG 10 (= sur l'envers): 3 m end, tricoter le jeté torse à l'env, 4 m env. RANG 11 (= sur l'endroit): 5 m end, 1 jeté, 3 m end = 9 m. RANG 12 (= sur l'envers): 3 m end, tricoter le jeté torse à l'env, 5 m env. RANG 13 (= sur l'endroit): Tricoter 2 fois à l'end chacune des 6 premières m, placer 1 marqueur, 3 m end = 15 m. RANG 14 (= sur l'envers): 3 m end, marqueur, 12 m env. Continuer et augmenter ainsi - VOIR ASTUCE TRICOT et PENSER À BIEN CONSERVER LA MÊME TENSION QUE POUR L'ÉCHANTILLON! . RANG 1 (= sur l'endroit): Tricoter le diagramme A.1 sur les 12 premières m, tricoter 2 fois la 1ère m après le marqueur et tricoter les mailles restantes à l'end (= 1 augmentation). RANG 2 (= sur l'envers): Tricoter à l'end jusqu'au marqueur et A.1 sur les 12 dernières m. RANG 3 (= sur l'endroit): Tricoter A.1 sur les 12 premières m, marqueur, tricoter les mailles restantes à l'end. RANG 4 (= sur l'envers): Tricoter à l'end jusqu'au marqueur et A.1 sur les 12 dernières m. Répéter les rangs 1- 4 (c'est-à-dire augmenter 1 m tous les 4 rangs) jusqu'à ce qu'on ait 56 m. L'ouvrage mesure maintenant environ 81 cm - VOIR ASTUCE POUR MESURER. Pour éviter que la torsade ne soit trop serrée au niveau de la pointe, tricoter maintenant des rangs raccourcis ainsi: * Tricoter 2 rangs sur les 12 premières m de A.1, 2 rangs sur toutes les mailles comme avant mais ne pas augmenter*, répéter de *-* 3 fois au total, puis tricoter de nouveau 2 rangs sur les 12 m de A.1. Tricoter ensuite et diminuer ainsi: RANG 1 (= sur l'endroit): Tricoter A.1 sur les 12 premières m, tricoter ens à l'end les 2 premières m après le marqueur et tricoter les mailles restantes à l'end (= 1 diminution). RANG 2 (= sur l'envers): Tricoter à l'end jusqu'au marqueur et A.1 sur les 12 dernières m. RANG 3 (= sur l'endroit): A.1 sur les 12 premières m, marqueur, tricoter les mailles restantes à l'end. RANG 4 (= sur l'envers): Tricoter à l'end jusqu'au marqueur et A.1 sur les 12 dernières m. Répéter les rangs 1- 4 (c'est-à-dire diminuer 1 m tous les 4 rangs) jusqu'à ce qu'il reste 15 m (l'ouvrage mesure maintenant environ 159 cm). Tricoter ensuite ainsi: RANG 1 (= sur l'endroit): Tricoter toutes les mailles de A.1 ens 2 par 2 à l'end, marqueur, 3 m end = il reste 9 m. RANG 2 (= sur l'envers): 3 m end, 6 m env. RANG 3 (= sur l'endroit): 4 m end, 2 m ens à l'end, 3 m end = 8 m. RANG 4 (= sur l'envers): 3 m end, 5 m env. RANG 5 (= sur l'endroit): 3 m end, 2 m ens à l'end, 3 m end = 7 m. RANG 6 (= sur l'envers): 3 m end, 4 m env. RANG 7 (= sur l'endroit): 2 m end, 2 m ens à l'end, 3 m end = 6 m. RANG 8 (= sur l'envers): 3 m end, 3 m env. RANG 9 (= sur l'endroit): 1 m end, 2 m ens à l'end, 3 m end = 5 m. RANG 10 (= sur l'envers): 3 m end, 2 m env. RANG 11 (= sur l'endroit): 2 m ens à l'end, 3 m end = 4 m. RANG 12 (= sur l'envers): 4 m end. RANG 13 (= sur l'endroit): 2 m ens à l'end, 2 m end. RANG 14 (= sur l'envers): Rabattre à l'end. |
|||||||
Légende diagramme(s) |
|||||||
|
|||||||
 |
|||||||
Vous avez terminé ce modèle?Alors taguez vos photos avec #dropspattern #wintercozyset ou bien présentez-les dans la galerie #dropsfan Vous avez besoin d'aide pour ce modèle ?Vous trouverez 25 tutoriels vidéo, une rubrique commentaires/questions et plus encore en vous rendant sur la page du modèle sur garnstudio.com © 1982-2026 DROPS Design A/S. Tous droits réservés. Ce document, y compris ces sous-sections, est protégé par les droits d'auteur (copyright). Apprenez-en davantage sur ce que vous pouvez faire avec nos modèles en bas de chacune des pages de notre site. |
|||||||


Avec plus de 40 ans dans la conception de modèles tricot et crochet, DROPS Design offre l'une des plus vastes collections de modèles gratuits sur internet - traduits dans 17 langues. À ce jour, on compte 324 catalogues et 12291 modèles en français.
Nous nous efforçons de vous apporter le meilleur de ce que le tricot et le crochet peuvent vous offrir, inspiration et conseils mais également des fils de haute qualité à des prix incroyables! Vous souhaiteriez utiliser nos modèles autrement que pour un usage personnel? Vous pouvez lire ce que vous êtes autorisés à faire dans le Copyright en bas de page de chacun de nos modèles. Bon tricot!
Poster un commentaire sur le modèle DROPS 172-10
Nous aimerions connaître votre avis sur ce modèle !
Si vous souhaitez poser une question, merci de bien vouloir vérifier que vous avez choisi la bonne catégorie dans le formulaire ci-dessous afin d'accélérer la réponse. Les champs obligatoires sont indiqués par une *.