
Categorie popolari
State cercando un filato?


Commenti / Domande (102)
![]() Brandi ha scritto:
Brandi ha scritto:
If I used a 3.75mm instead of a 3mm, what would the chains be for a small size?
16.05.2016 - 03:52DROPS Design ha risposto:
Dear Brandi, check your tension: it should be like stated, otherwise you'll have two adjust your stitch count. You can always contact your personal DROPS store for more help. Happy crocheting!
16.05.2016 - 08:47Amy Talmadge ha scritto:
Hi! I was wondering, after I am fibished with my dec's am I supposed to continue to dec the rest of the chart, or just continue the chart without dec? Thanks in advance :)
25.04.2016 - 06:37DROPS Design ha risposto:
Dear Mrs Talmadage, after you have worked the dec on each side, continue following the diagram. Happy crocheting!
25.04.2016 - 10:37
![]() Cindy Thomas ha scritto:
Cindy Thomas ha scritto:
Sorry I'm unclear about my question when I finish inc row? Do I skip the last 4 and go from there or complete row and then move on after completion to dec round Second part is the 4 dc 3 dc 2 dc ( dec) is that a part of sizing? Or is it all done in succession So for repeat question I'm gonna try and do what you suggested however I'm a bit lost
12.03.2016 - 22:36DROPS Design ha risposto:
Dear Mrs Thomas, dec starts when all inc are done and piece measures 7-10 cm (see size) - then beg dec on each side (at beg of row with ch and skip sts - at end of row turn when number of sts remain before end of row) - Dec 4 dc a total of 2-3-6-8 times (= 2 times in 1st size, 3 times in 2nd size...), 3 dc 3-7-7-7 times, 2 dc 14-9-6-5 times - remember to start chart on 1st row with dec. Happy crocheting!
14.03.2016 - 08:47
![]() Cindy Thomas ha scritto:
Cindy Thomas ha scritto:
Dec question and size I began dec at end of inc row I skipped and did chain six and then followed pattern Came back around that chain six is laying on work I read tip and there is no diagonal on row one where do you put chain six Sizing is 4 3 2 seconds dcs But there are four sizes?
11.03.2016 - 20:51DROPS Design ha risposto:
Dear Mrs Thomas, to dec 4 dc, you have to turn with 6 ch, then skip first 4 dc, and continue working in 5th dc on next row (= 4 dec), to dec 3/2 dc, you turn with 5/4 ch and skip first 3/2 dc and continue working in 4th/3rd dc (= 3/2 dc dec). Happy crocheting!
12.03.2016 - 17:26
![]() Cindy Thomas ha scritto:
Cindy Thomas ha scritto:
I GOT IT TY Smiles
10.03.2016 - 17:11
![]() Cindy Thomas ha scritto:
Cindy Thomas ha scritto:
Ok here we go When inc starts ( I see your answer above ) On row two I understand one inc at beg and end but how does that add ten more for medium? That would only add 2 So I think according to medium maybe add eight more? That would be ten inc and that would add up? Adding two at row 2 beg and end But I need 169 stitches Thank you in advance Sigh
10.03.2016 - 15:46DROPS Design ha risposto:
Dear Mrs Thomas, in size M you work row 2 to 11 (10 rows) while inc 2 sts every row a total of 10 times, so that you had 149 sts + 20 sts = 169 sts (and 10 rows worked). Happy crocheting!
10.03.2016 - 16:37
![]() Cindy Thomas ha scritto:
Cindy Thomas ha scritto:
Before I get started I have one question my daughter is 34 DD So which do I do Large? The model is quite tiny And when I click on the sizing? It tries to call a number? Haha So which cup size she is also a 34 ❤️ Thank you in advance
09.03.2016 - 20:14DROPS Design ha risposto:
Dear Mrs Thomas, you will find all finished measurements at the end of the pattern, they are in cm, taken flat from side. Compare these to a similar garment she has and like the shape to find out the matching size. Check your setting in your browser, it may recognize all numbers looking like telephone as a telephone number. Happy crocheting!
10.03.2016 - 08:26
![]() Erika ha scritto:
Erika ha scritto:
Mon échantillon est aux bonnes dimensions. Mais l'ouvrage a des proportions beaucoup plus grande. 76 cm au lieu de 65 cm en largeur 9cm au lieu de 7cm en hauteur. Il doit y avoir une erreur. Car si 11 rangs font 10 cm les 53 rangs total ne peuvent pas faire 30 cm mais plutôt 48 cm (53*10/11). Merci de me ternir informée car pour le moment je mets en attente cet ouvrage. Quel domage!
01.03.2016 - 21:07DROPS Design ha risposto:
Bonjour Erika, Les explications correspondent bien au schéma: au 1er rang, on doit avoir 129 B soit approx. 65 cm dans la 1ère taille - le diagramme fait 25 rangs, soit 23 cm environ + les 7 cm avant le diagramme = 30 cm de hauteur. Bon crochet!
02.03.2016 - 08:51
![]() Natali ha scritto:
Natali ha scritto:
Hola yo el día gran lo entendí bien y lo hice lo que no entendí es el armado del cuerpo y demás, como lo puedo hacer?
09.02.2016 - 23:37DROPS Design ha risposto:
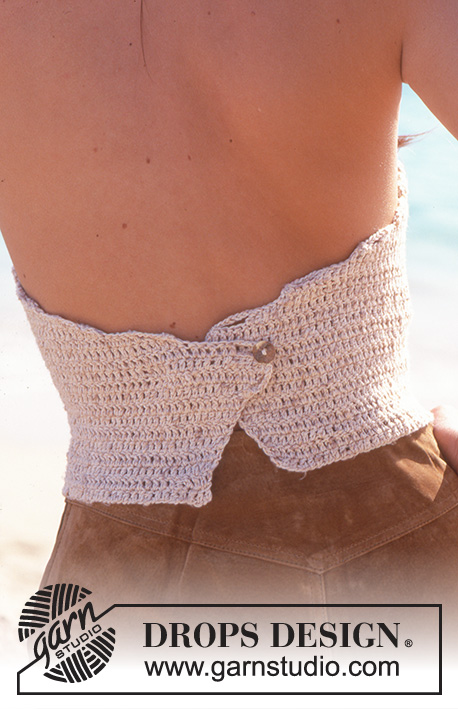
Hola Natali, se trabajan dos ojales o presillas en las dos puntas más externas del diagrama que luego se cierran en el centro de la espalda y luego se prueba la prenda para ver a que altura de cada lado debemos coser los botones para que se ajuste a nuestro contorno. Un botón irá por la parte interior y otro por la exterior ya que los extremos de la prenda se solapan en la espalda. Después se trabajara un cordón trenzado que servirá para ajustar la prenda al cuello y lo ataremos en la parte posterior de éste.
23.02.2016 - 18:21Aida ha scritto:
Hi as i start Dec on both sides as follows: 4 dc 2-3-6-8 times do i also start the diagram here or after i finish all of the decrease?
08.10.2015 - 10:22DROPS Design ha risposto:
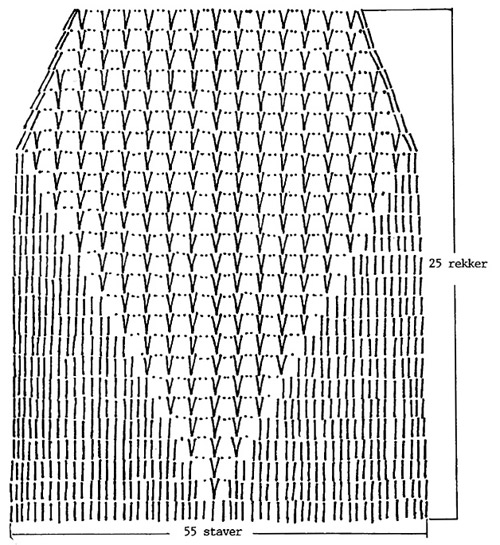
Dear Aida, start diagram when starting dec, ie at the same time as you start dec, the diagram is worked over the center 55 dc. Happy crocheting!
08.10.2015 - 17:23
|
|||||||||||||
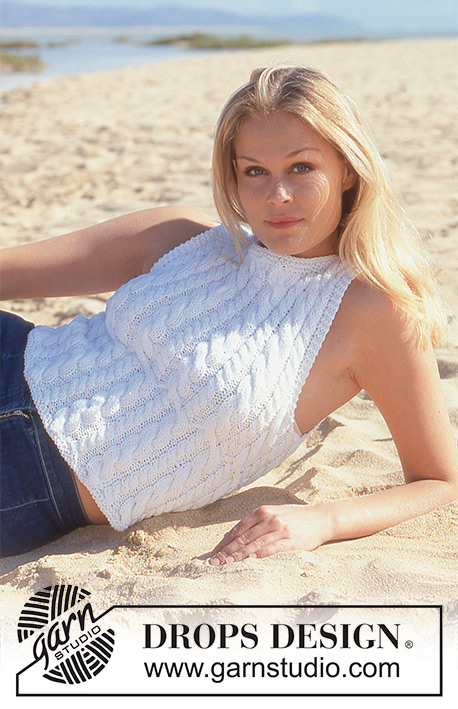
Mediterranean Love Top#mediterraneanlovetop |
|||||||||||||
 |
 |
||||||||||||
Top lavorato all'uncinetto a schiena nuda, in DROPS Safran Moulinè o Safran. Taglie: Dalla XS alla L.
DROPS 65-13 |
|||||||||||||
|
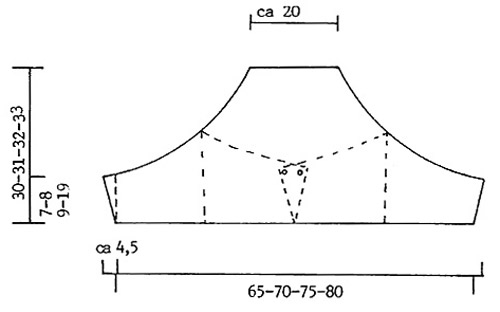
CAMPIONE: 20 maglie alte x 11 righe con l'uncinetto n° 3 mm = 10 x 10 cm. Ricordatevi che la misura dell'uncinetto è solo indicativa. MOTIVO: Vedere il diagramma. Il diagramma è lo stesso per tutte le taglie. SUGGERIMENTO PER IL LAVORO: Per diminuire 4 maglie alte: all'inizio della riga, 6 catenelle, saltare le prime 4 maglie alte sulla riga e iniziare a lavorare nella 5° maglie alte sulla riga, lavorare fino a quando rimangono 4 maglie alte, girare. Per diminuire 3 maglie alte: all'inizio della riga, 5 catenella, saltare le prime 3 maglie alte sulla riga e iniziare a lavorare nella 4° maglie alte sulla riga, lavorare fino a quando rimangono 3 maglie alte, girare. Per diminuire 2 maglie alte: all'inizio della riga, 4 catenelle, saltare le prime 2 maglie alte sulla riga e iniziare a lavorare nella 3° maglie alte sulla riga, lavorare fino a quando rimangono 2 maglie alte girare. ----------------------------------------------------------- DAVANTI e DIETRO: Avviare 170 - 183 - 196 - 210 catenelle con l'uncinetto n° 3 mm. Sulla riga successiva lavorare a maglie alte nella riga di catenelle come segue: 3 maglie alte (sostituire 1 maglia alta con 3 catenelle), * saltare 1 catenella, 3 maglie alte *, ripetere *-* (cioè lavorare 3 maglie alte su 4 catenelle) fino a quando rimangono 0-1-2-0 catenelle, lavorare 1 maglia alta in ogni cat.= 129-139-149-159 maglie alte. Fare attenzione alla tensione del lavoro - è importante non lavorare in modo troppo morbido su un capo aderente come questo. Poi lavorare a maglie alte su tutte le maglie e allo stesso tempo aumentare a ogni lato su ogni riga: 1 maglia alta a ogni lato 8-9-10-11 volte = 145-157-169-181 maglie alte. Il lavoro misura ora circa 7-8-9-10 cm. Poi diminuire a ogni lato su ogni riga - vedere il SUGGERIMENTO PER IL LAVORO - ALLO STESSO TEMPO, iniziare a lavorare il diagramma - assicurarsi di centrare correttamente il motivo - sulle 55 maglie alte centrali. Diminuire a ogni lato, come segue: 4 maglie alte 2-3-6-8 volte, 3 maglie alte 3-7-7-7 volte, 2 maglie alte 14-9-6-5 volte; proseguire poi lavorando il diagramma. Dopo aver completato il diagramma, il lavoro misura circa 30-31-32-34 cm. CONFEZIONE: Con l’uncinetto n° 3, lavorare 1 asola in cima a ogni, sul dietro, come segue: 1 maglia bassa, 2 catenelle, saltare ½ cm, 1 maglia bassa. Provarsi il capo per verificare la posizione corretta dei bottoni - attaccare 1 bottone in basso, sulla parte sinistra del dietro e 1 bottone in alto, sulla parte destra del dietro. Lavorare 3 cordini di catenelle lunghi circa. 100 cm ognuno. Intrecciarle, fare un nodo ad ogni estremità e far passare questo cordino attraverso l’ultima riga traforata in alto. |
|||||||||||||
Spiegazioni del diagramma |
|||||||||||||
|
|||||||||||||
 |
|||||||||||||
 |
|||||||||||||
Avete terminato questo modello?Allora taggate le vostre foto con #dropspattern #mediterraneanlovetop o inviatele alla #dropsfan gallery. Avete bisogno di aiuto con questo modello?Troverete 4 video tutorial, una sezione per i commenti/domande e molto altro guardando il modello su www.garnstudio.com © 1982-2026 DROPS Design A/S. Ci riserviamo tutti i diritti. Questo documento, compreso tutte le sue sotto-sezioni, è protetto dalle leggi sul copyright. Potete leggere quello che potete fare con i nostri modelli alla fine di ogni modello sul nostro sito. |
|||||||||||||


Con oltre 40 anni di esperienza nel design di modelli di maglia e uncinetto, DROPS Design offre la più estesa collezione di modelli gratuiti su internet - tradotti in 17 lingue. Ad oggi vi possiamo fornire 324 cataloghi e 12290 modelli - 9561 dei quali sono tradotti in Italiano.
Ci stiamo impegnando molto per darvi il meglio che vi possiamo offrire in termini di maglia e uncinetto, ispirazioni e consigli così come filati di grande qualità ad un prezzo incredibile! Volete utilizzare i nostri modelli per qualcosa d'altro oltre al vostro uso personale? Potete leggere tutto ciò che è consentito nel testo sul Copyright in basso su tutte le pagine dei nostri modelli. Buon lavoro!
Lasciare un commento sul modello DROPS 65-13
Noi saremmo felici di ricevere i tuoi commenti e opinioni su questo modello!
Se vuoi fare una domanda, fai per favore attenzione a selezionare la categoria corretta nella casella qui sotto per velocizzare il processo di risposta. I campi richiesti sono indicati da *.