
Categorie popolari
State cercando un filato?


Commenti / Domande (32)
![]() Hania Zozgórnik ha scritto:
Hania Zozgórnik ha scritto:
Dzien dobry. Nie moge znależć diagramu do tego wzoru. Pozdrawiam. Hania
23.06.2019 - 09:07DROPS Design ha risposto:
Witaj Haniu! Przepraszam za tak późną odpowiedź. Jeśli będziesz w przyszłości miała pytania, proszę zaznacz w formularzu PYTANIE, a nie KOMENTARZ, wtedy szybciej odpowiemy. Opis ściegu fantazyjnego M1 jest w treści wzoru: *3 rz. dżersejem prawym, 1 rz. dżersejem lewym * (widok na prawej stronie robótki). Powtarzać od *do*. A propos, czy już zagłosowałaś na nową kolekcję DROPS Jesień/Zima, zapraszamy serdecznie!
07.06.2020 - 18:10
![]() Katharina ha scritto:
Katharina ha scritto:
Hallo, wo ist das Diagramm M2?
20.01.2019 - 18:07DROPS Design ha risposto:
Liebe Katharina, Diagram M.2 finden Sie jetzt hier zusammen mit der Anleitung der Mütze. Viel Spaß beim stricken!
22.01.2019 - 15:05
![]() Rebecca Burghardt ha scritto:
Rebecca Burghardt ha scritto:
Liebes Drops- Team, die Mütze sieht wunderschön aus, toller Stil. Habe nur ein kleine Verständnis- Frage zur Anleitung: was bedeutet: " mit einem Faden jeder beiden Qualitäten..." Heißt das, die Mütze wird mit doppeltem Faden gestrickt? Vielen Dank im Voraus! Rebecca Ps. Danke, dass es Drops Design gibt:) Habe schon viele schöne Sachen von Euch gestrickt
08.11.2018 - 16:46DROPS Design ha risposto:
Liebe Frau Burghardt, ja genau, die Mütze wird mit doppeltem Faden gestrickt, bzw mit 1 Faden Alpaca + 1 Faden Kid-Silk (Mascheprobe = 22 M x 30 Reihen mit den beiden Fäden). Viel Spaß beim stricken!
09.11.2018 - 07:58Kate ha scritto:
Never mind -- I just found the pattern for the hat. Thanks!
26.10.2018 - 00:22Kate ha scritto:
I have read the pattern and all the comments, but I cannot find complete instructions for making the hat. Could you please help me with that? Thank you!
25.10.2018 - 23:53DROPS Design ha risposto:
Hi Kate, If you search for hat in the search box, the pattern for the one you want is there - pattern no: G-022b. Happy knitting!
26.10.2018 - 08:12
![]() Franca ha scritto:
Franca ha scritto:
Salve vorrei realizzare il cappello... il diagramma del motivo indica solo i ferri di andata ? nel senso che il ritorno si lavora per come si trovano grazie
18.01.2018 - 08:59DROPS Design ha risposto:
Buongiorno Franca. Nel diagramma, trova tutti i ferri del motivo, sia quelli di andata che quelli di ritorno. La prima riga viene lavorata sul rovescio del lavoro. Le prime due righe del diagramma sono spiegate in dettaglio nel testo. Buon lavoro!
18.01.2018 - 09:04
![]() Evelyn Reisner ha scritto:
Evelyn Reisner ha scritto:
Do you have additional detailed instructions for the hat in this pattern. Each time I try to make this hat I have extra st on the cast on needle. I also would need info on where to do the cabling and how, front or back. I would love to make this hat but need additional information please!
07.11.2017 - 15:09DROPS Design ha risposto:
Dear Mrs Reisner, see previous answer for diagram and number of sts. Please note that 1st row in diagram (= and every row from WS) is read from the bottom corner on the left side towards the right - read all rows from RS from the right towards the left. When diagram has been worked 1 time in height, repeat from row 1. Happy knitting!
07.11.2017 - 16:01
![]() Suzanne André ha scritto:
Suzanne André ha scritto:
Vous nous demandez si c'est un commentaire ou une question. Je suis allée sur question et n'ai jamais pu poser ma question. Le seul endroit où j'ai pu poser ma question est dans commentaire. Et que voulez-vous dire par site: ?
14.10.2017 - 20:15DROPS Design ha risposto:
Bonjour Madame André, pour que votre commentaire ou question soit publié comme il se doit, il doit être enregistré soit sous l'une ou l'autre rubrique, et comme vous l'avez fait, vous trouverez la réponse ci-dessous. Bon tricot!
16.10.2017 - 09:31
![]() Suzanne André ha scritto:
Suzanne André ha scritto:
Question: J'aimerais savoir (modèle DROPS66-15, que veut dire 3 mailles lis au point mousse?
14.10.2017 - 20:07DROPS Design ha risposto:
Bonjour Mme André, il fallait lire: R 2 (= endroit) : 1 m lis au point mousse, 5 m end, M2, 3 m end, 3 m env, 5 m end, 1 m lis au point mousse. Ce rang a été corrigé, merci. Bon tricot!
16.10.2017 - 09:30
![]() Benoist ha scritto:
Benoist ha scritto:
Merci beaucoup pour votre explication. Bonne semaine J.
29.02.2016 - 20:26
|
|
Elaine |
|
 |
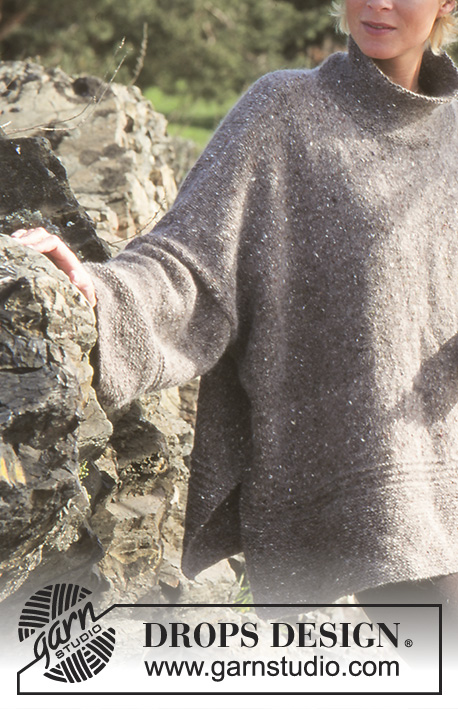 |
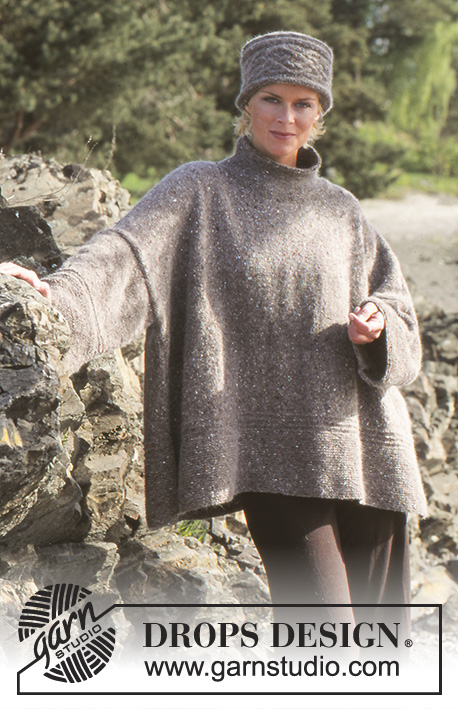
Maglione oversize lavorato ai ferri in DROPS Alpaca e DROPS Kid-Silk. Taglie: S/M - M/L - L/XL.
DROPS 66-15 |
|
|
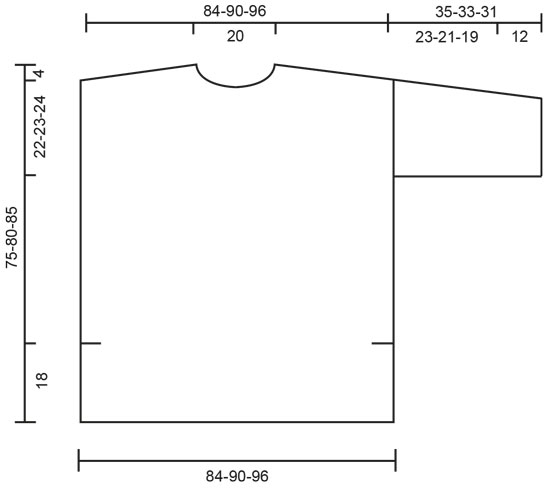
SPIEGAZIONI: M. legaccio, lavorata avanti e indietro: lavorare a dir. tutti i f. M. legaccio, lavorata in tondo: *1 giro a dir. 1 giro a rov.* Ripetere * - *. MOTIVO: Motivo 1 = * 3 f. a m. rasata, 1 f. a m. rasata rovescia * (visto dal diritto del lavoro), ripetere * - *. DAVANTI: Avviare 160-170-182 m con i ferri n° 5 e con 1 filo di ogni qualità. Lavorare a m. legaccio per 14-14-14 cm. Lavorare il motivo 1 - ripetere 3 volte in totale, ma tenere 5 m. a ogni lato a m. legaccio. Alla fine del motivo 1 (il lavoro misura circa 18 cm = questo è lo spacco a lato) aumentare 1 nuova m. a ogni lato (per le m. del bordo) = 162-172-184 m. Sui 4 f. successivi lavorare a m. rasata con 6 m. a m. legaccio da ogni lato – ci saranno 4 f. a m. legaccio sullo spacco a lato. Lavorare a m. rasata su tutte le m. fino alla fine del lavoro. Quando il lavoro misura 67-72-77 cm intrecciare le 16-16-16 m. centrali per il collo. Intrecciare a ogni bordo del collo ogni 2 ferri: 3 m. 1-1-1 volta, 2 m. 2-2-2 volte e 1 m. 4-4-4 volte. Allo stesso tempo quando il lavoro misura 71-76-81 cm intrecciare dal bordo del lato ogni 2 ferri: 12-13-14 m. 4-4-4 volte = 14-15-17 m. rimaste sulla spalla. Intrecciare quando il lavoro misura 75-80-85 cm. DIETRO: Avviare e lavorare nello stesso modo del davanti, ma intrecciare le 34-34-34 m. centrali per il collo quando il lavoro misura 73-78-83 cm, quindi intrecciare 2 m. a ogni bordo del collo sul f. successivo. Questo sarà dopo l’inizio della forma della spalla. Intrecciare tutte le m. quando il lavoro misura 75-80-85 cm. MANICA: Avviare 70-74-78 m. (incl. 1 m vivagno ad ogni lato) con i f. n° 5 e 1 filo di ogni qualità e lavorare a m. legaccio per 12 cm. Lavorare il motivo 1 – ripetere 3 volte in totale, quindi continuare a m. rasata. Alla fine della m. legaccio aumentare 1 m. a ogni lato 7-7-7 volte ogni 3-2,5-2 cm = 84-88-92 m. Quando il lavoro misura 35-33-31 cm intrecciare tutte le m. CONFEZIONE: Cucire i margini delle spalle. Riprendere circa 90-100 m. attorno al collo con i f. a doppia punta. Lavorare a m. legaccio per 4 cm, distribuire 8 diminuzioni in modo uniforme sull’ultimo f. Lavorare a m. legaccio per altri 4 cm e distribuire 8 diminuzioni in modo uniforme sull’ultimo f. Continuare con la m. legaccio fino a quando il colletto misura 12 cm, intrecciare senza stringere. Attaccare le maniche, cucire le maniche e i bordi dei lati usando le m. di vivagno come margine di cucitura - lasciare un’apertura 18 cm a ogni lato per lo spacco laterale. |
|
 |
|
Avete terminato questo modello?Allora taggate le vostre foto con #dropspattern o inviatele alla #dropsfan gallery. Avete bisogno di aiuto con questo modello?Troverete 20 video tutorial, una sezione per i commenti/domande e molto altro guardando il modello su www.garnstudio.com © 1982-2026 DROPS Design A/S. Ci riserviamo tutti i diritti. Questo documento, compreso tutte le sue sotto-sezioni, è protetto dalle leggi sul copyright. Potete leggere quello che potete fare con i nostri modelli alla fine di ogni modello sul nostro sito. |
|


Con oltre 40 anni di esperienza nel design di modelli di maglia e uncinetto, DROPS Design offre la più estesa collezione di modelli gratuiti su internet - tradotti in 17 lingue. Ad oggi vi possiamo fornire 324 cataloghi e 12245 modelli - 9515 dei quali sono tradotti in Italiano.
Ci stiamo impegnando molto per darvi il meglio che vi possiamo offrire in termini di maglia e uncinetto, ispirazioni e consigli così come filati di grande qualità ad un prezzo incredibile! Volete utilizzare i nostri modelli per qualcosa d'altro oltre al vostro uso personale? Potete leggere tutto ciò che è consentito nel testo sul Copyright in basso su tutte le pagine dei nostri modelli. Buon lavoro!
Lasciare un commento sul modello DROPS 66-15
Noi saremmo felici di ricevere i tuoi commenti e opinioni su questo modello!
Se vuoi fare una domanda, fai per favore attenzione a selezionare la categoria corretta nella casella qui sotto per velocizzare il processo di risposta. I campi richiesti sono indicati da *.