
Categorie popolari
State cercando un filato?


Commenti / Domande (103)
![]() Cristina ha scritto:
Cristina ha scritto:
Como teje el cuello con agujas circulares y va aumentando
08.02.2026 - 23:44
![]() Petra ha scritto:
Petra ha scritto:
Beste, bij het breien van de rechter mouw staat 30 cm te meten aan de onderkant op het breedste deel. Maar ik weet niet precies waar ik dit moet meten en deze afmeting staat ook niet op de afbeelding.
18.08.2025 - 15:00DROPS Design ha risposto:
Dag Petra,
Je meet dit aan de onderkant van de mouw, (dus niet aan de kant van de hals) direct na waar je de steken van het pand op een markeerder hebt gezet. Het staat inderdaad niet in de maattekening.
30.08.2025 - 10:29
![]() Dianne Blust ha scritto:
Dianne Blust ha scritto:
You say the measurements are under the sizes under the header. Not with this pattern: please look. Can you find it somewhere else?
22.08.2024 - 10:03DROPS Design ha risposto:
Dear Mrs Blust, you will find it under the header in the US -English pattern: Bust: 84-92-100-112-124-132 cm / 33"-36¼"-39½"-44"-48¾"-52". Happy knitting!
22.08.2024 - 15:43
![]() Dianne Blust ha scritto:
Dianne Blust ha scritto:
There isn’t a measurement for bust size, just hips. How can I tell what size to make?
21.08.2024 - 23:56DROPS Design ha risposto:
Dear Mrs Blust, you will find bust measurements (in inches) just below sizes under header, and all finished measurements (in cm, convert into inches here) in the chart at the bottom of the page; measure a similar garment you have and like the shape and compare these measurements to those in the chart to find out which size to choose. read more here. Happy knitting!
22.08.2024 - 08:34
![]() Lynn Reeves ha scritto:
Lynn Reeves ha scritto:
Where can I find how to do the pattern on the picture
13.07.2024 - 19:52DROPS Design ha risposto:
Dear Lynn, pattern instructions can be found directly next to the picture or by clicking on it. Happy knitting!
13.07.2024 - 21:09
![]() Regina ha scritto:
Regina ha scritto:
Can I make the arms a little longer.l
24.07.2023 - 17:20DROPS Design ha risposto:
Hi Regina, The length of the sleeves is adjustable. Just continue working to your desired length before working the side piece. Happy knitting!
25.07.2023 - 06:46
![]() Sheree Lester ha scritto:
Sheree Lester ha scritto:
Sorry to ask another one. On the diagram, I cannot see a bust measurement for the finished piece. Can you please let me know the finished measurement of the S,M,L. I am a UK size 12, bust 36", 91cm. I want it to fit like in the picture, not loose, not tight. Thanks very much
02.06.2023 - 18:18DROPS Design ha risposto:
Dear Sheree, the full bust measurement would be: 84-92-100-112-124-132 cm (the measurement is indicated at the lower part of the chart, you need to multiply it by 2). Since your bust is 91cm, then you should work the M size, which should be right, not too loose and not too tight. Take into account that the measurements and sizing are only valid if the gauge is the same as in the pattern. Happy knitting!
04.06.2023 - 19:21
![]() Sheree ha scritto:
Sheree ha scritto:
I don't understand the comment at the end of the short rows description. There are 8 rows in the short rows instructions. The repeat info says 'Repeat rows 1-8 i.e. 1 repetition = 2 rows at the top and 8 rows at the bottom. Can you please explain this last part after the 'i.e.' ? Thank you
31.05.2023 - 18:33DROPS Design ha risposto:
Dear Sheree, the pattern is worked sideways. What the i.e tries to explain is that you have 2 full rows (2 rows both at the top and the bottom) and then 6 short rows, which are all at the bottom of the piece. That's why it says than in 1 repetition you will have 2 rows at the top and 8 rows at the bottom. Happy knitting!
31.05.2023 - 20:48
![]() Susana ha scritto:
Susana ha scritto:
Hola, estoy teniendo la muestra he intentando entender el patrón. No entiendo esta parte: Después tejer la pieza del lado de la manera sig: Tejer 1 cm de ida y vuelta únicamente sobre los 68-71-74-76-78-80 pts a partir de la parte de abajo... tengo que contar los primeros 68 puntos y tejer un total de 2 cms? Y donde pongo el marcador? Tengo que levantar los puntos del lateral? Creo q ayudaria mucho si el diagrama viene "plano" para ver como evoluciona el diseño. Gracias
21.04.2023 - 19:47DROPS Design ha risposto:
Hola Susana, sí, tejes 2cm sobre los primeros 68 puntos a partir del borde inferior. Después de 1 cm, colocas el marcapuntos en la labor, en cualquier punto de la fila, para saber que esa es la mitad de la parte lateral. No tienes que levantar puntos del lateral. Trabajas sobre estos 68 puntos y después los dejas y pasas a trabajar la manga sobre el resto de puntos.
23.04.2023 - 19:15
![]() CARRÉE Sylviane ha scritto:
CARRÉE Sylviane ha scritto:
Répéter les rangs 1 à 8, c'est-à-dire 1 série = 2 rangs en haut et 8 rangs en bas. Pouvez-vous me dire si La série correspond à : 2 rang en haut, 8 rangs raccourcis, 8 rangs en bas ? Je vous remercie
16.04.2023 - 06:35DROPS Design ha risposto:
Bonjour Mme Carrée, lorsque l'on tricote les 8 rangs de la série des rangs raccourcis, on tricote 8 rangs au plus long (côté bas du top) et seulement 2 rangs en haut (côté encolure). Bon tricot!
17.04.2023 - 09:14
|
||||
Rose of May#roseofmaytop |
||||
 |
 |
|||
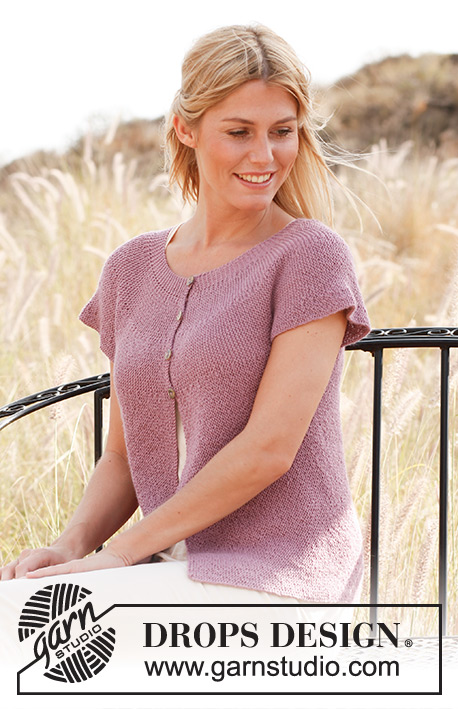
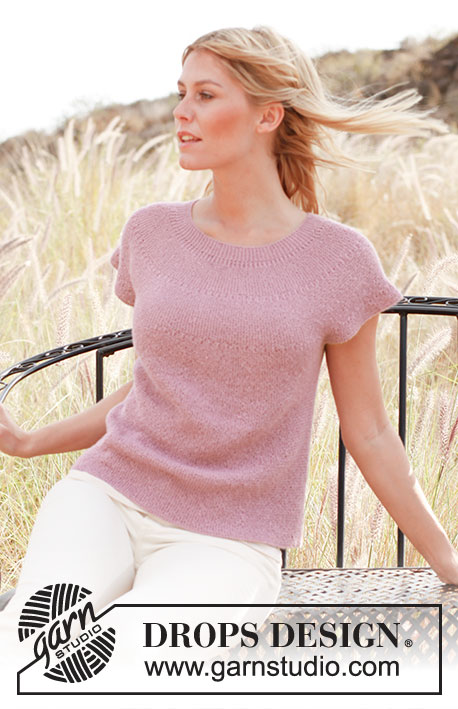
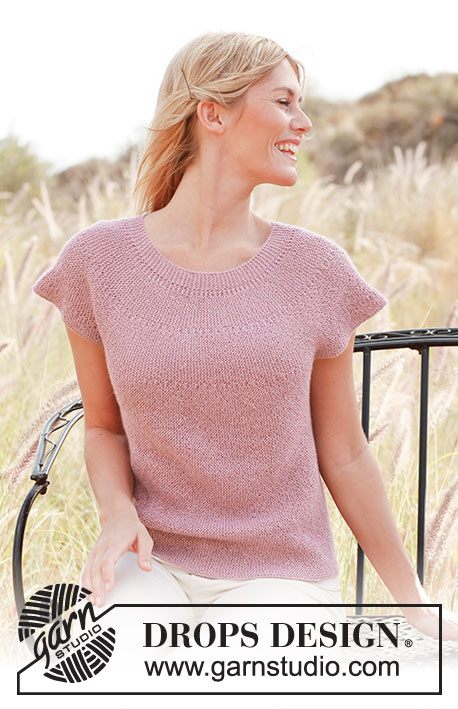
Maglietta DROPS a punto legaccio in "Alpaca". Taglie: Dalla S alla XXXL
DROPS 137-33 |
||||
|
SUGGERIMENTO:
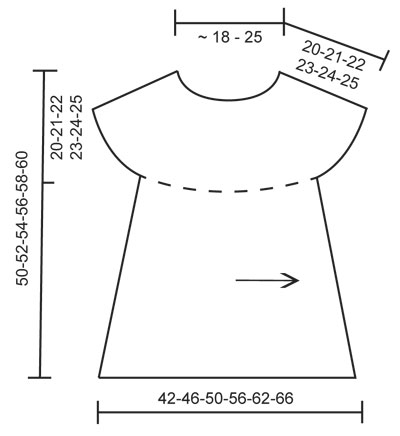
Ogni volta che si gira il lavoro al centro del lavoro, passare la prima m a dir senza lavorarla, stringere il filo e lavorare il ferro di ritorno. In questo modo non si formano dei piccoli buchi quando si lavorano i ferri accorciati. FERRI ACCORCIATI: Lavorare i ferri accorciati al centro del lavoro per dare al capo una forma leggermente ad A. Iniziare a lavorare dal bordo inferiore (= parte in basso) e proseguire verso il collo (= parte in alto) come segue: Ferro 1 (= diritto del lavoro): lavorare tutte le m a dir. Ferro 2 (= rovescio del lavoro): lavorare tutte le m a dir. Ferro 3 (= 1° ferro accorciato): lavorare 107-112-116-119-123-126 m a dir, girare il lavoro - vedere il SUGGERIMENTO sopra. Ferro 4: tornare indietro lavorando a dir. Ferro 5 (= 2° ferro accorciato): lavorare 93-98-101-103-107-109 m a dir, girare il lavoro. Ferro 6: tornare indietro lavorando a dir. Ferro 7 (=3° ferro accorciato): lavorare 75-79-81-83-85-87 m a dir, girare il lavoro. Ferro 8: tornare indietro lavorando a dir. Ripetere i ferri da 1 a 8; quindi 1 ripetizione = 2 ferri nella parte in alto e 8 ferri nella parte in basso. SUGGERIMENTO PER PRENDERE LE MISURE: Misurare il lavoro steso su una superficie piana: è importante non tirare il lavoro mentre si prendono le misure. -------------------------------------------------------- MAGLIETTA: Si lavora avanti e indietro sui ferri a punto legaccio, quindi lavorare tutti i ferri a dir. Si lavora nel senso della lunghezza, con inizio e fine al centro, sul dietro. DIETRO DESTRO: Avviare 115-120-125-129-134-138 m lente sui ferri circolari n° 3,5 con il filato Alpaca. Lavorare a FERRI ACCORCIATI - vedere spiegazioni sopra (1° ferro = diritto del lavoro). RICORDARSI LA TENSIONE DEL LAVORO! Proseguire finché il lavoro non misura ca. 20-22-24-27-30-32 cm dal ferro di avvio (misurare la parte inferiore della maglietta, quindi la parte più larga) – vedere il SUGGERIMENTO PER PRENDERE LE MISURE sopra. Lavorare il lato della maglietta come segue: lavorare 1 cm avanti e indietro solo sulle 68-71-74-76-78-80 m dal bordo inferiore. Inserire un segno (= centro del lato). Lavorare 1 cm avanti e indietro sullo stesso numero di m, e metterle in attesa su un fermamaglie (finire dopo 1 ferro sul diritto del lavoro; le m verranno riprese successivamente per il davanti). Lavorare ora la manica. MANICA DESTRA: = 47-49-51-53-56-58 m sul ferro. Lavorare avanti e indietro a ferri accorciati negli stessi punti come prima, finché la manica non misura ca. 30-31-32-33-34-35 cm (misurare la parte inferiore della manica, quindi la parte più larga); finire dopo 1 ferro sul rovescio del lavoro. DAVANTI: Lavorare le 68-71-74-76-78-80 m messe in attesa sul ferma maglie e riportarle sui ferri di lavoro (sul rovescio del lavoro) = 115-120-125-129-134-138 m. Proseguire a ferri accorciati come prima. Quando il lavoro misura ca. 21-23-25-28-31-33 cm dal segno sul lato (misurare la parte inferiore della maglietta, quindi la parte più larga), inserire un altro segno (= centro davanti). Proseguire a ferri accorciati finché il lavoro non misura ca. 20-22-24-27-30-32 cm dal segno al centro davanti (misurare la parte inferiore della maglietta, quindi la parte più larga). Lavorare ora il lato come segue: lavorare 1 cm avanti e indietro solo sulle 68-71-74-76-78-80 m dal bordo inferiore. Inserire un altro segno (= centro al lato). Lavorare 1 cm avanti e indietro sulle stesse m (finire dopo 1 ferro sul diritto del lavoro) e mettere le m in attesa su un ferma maglie. Lavorare la manica destra. MANICA SINISTRA: Lavorare come la manica destra. DIETRO SINISTRO: Lavorare le 68-71-74-76-78-80 m messe in attesa sul fermamaglie e riportarle sui ferri di lavoro (sul rovescio del lavoro) = 115-120-125-129-134-138 m. Proseguire a ferri accorciati come prima. Dopo aver lavorato lo stesso n° di ferri lavorati per il dietro destro, chiudere le m senza stringere troppo il filo. CONFEZIONE: Cucire al centro sul dietro. |
||||
Spiegazioni del diagramma |
||||
|
||||
 |
||||
Avete terminato questo modello?Allora taggate le vostre foto con #dropspattern #roseofmaytop o inviatele alla #dropsfan gallery. Avete bisogno di aiuto con questo modello?Troverete 5 video tutorial, una sezione per i commenti/domande e molto altro guardando il modello su www.garnstudio.com © 1982-2026 DROPS Design A/S. Ci riserviamo tutti i diritti. Questo documento, compreso tutte le sue sotto-sezioni, è protetto dalle leggi sul copyright. Potete leggere quello che potete fare con i nostri modelli alla fine di ogni modello sul nostro sito. |
||||


Con oltre 40 anni di esperienza nel design di modelli di maglia e uncinetto, DROPS Design offre la più estesa collezione di modelli gratuiti su internet - tradotti in 17 lingue. Ad oggi vi possiamo fornire 324 cataloghi e 12290 modelli - 9561 dei quali sono tradotti in Italiano.
Ci stiamo impegnando molto per darvi il meglio che vi possiamo offrire in termini di maglia e uncinetto, ispirazioni e consigli così come filati di grande qualità ad un prezzo incredibile! Volete utilizzare i nostri modelli per qualcosa d'altro oltre al vostro uso personale? Potete leggere tutto ciò che è consentito nel testo sul Copyright in basso su tutte le pagine dei nostri modelli. Buon lavoro!
Lasciare un commento sul modello DROPS 137-33
Noi saremmo felici di ricevere i tuoi commenti e opinioni su questo modello!
Se vuoi fare una domanda, fai per favore attenzione a selezionare la categoria corretta nella casella qui sotto per velocizzare il processo di risposta. I campi richiesti sono indicati da *.