Commenti / Domande (10)
![]() Monika Imberger ha scritto:
Monika Imberger ha scritto:
Ich habe 2 Fragen: Wie werden denn die Randmaschen gestrickt? Wenn ich den Schulterwärmer breiter haben möchte, so dass er tiefer in den Rücken geht, kann ich dann einfach Maschen hinzufügen? Aufteilung dann z. B. 18 - 12 - 18? und müsste ich dann den Schlitz länger machen oder würde sich daran nichts ändern? Ist es sinnvoll auf beiden Seiten mehr Maschen zu haben oder wäre es besser, diese dann nur auf einer Seite zu haben? Danke für die Hilfe im Voraus.
22.10.2021 - 10:32DROPS Design ha risposto:
Liebe Frau Imberger, bei diesem Modell werden alle Maschen im Perlmuster gestrickt, dh es gibt keine extra Randmaschen. Leider können wir nicht jede Anleitung nach jedem individuellen Frage anpassen und einzelne Modelle auf individuellen Wunsch hin umrechnen. Wenn sie Hilfe damit brauchen, wenden Sie sich bitte an Ihrem DROPS Laden - auch telefonisch oder per E-Mail, dort hilft man Ihnen gerne weiter. Danke im voraus für Ihr Verständnis. Viel Spaß beim stricken!
22.10.2021 - 16:50
![]() Nanamarni ha scritto:
Nanamarni ha scritto:
When you knit the first separated 14 stitches and put them on holder, how do you then start knitting the next section with no adjacent tail from the preceding stitch?
21.03.2014 - 03:08DROPS Design ha risposto:
Dear Mrs Nanamarni, when first part on the first 14 sts is done, cut the yarn and put sts aside. Work then the next 14 sts with new tail of yarn and repeat as for 1st part. Happy knitting!
23.03.2014 - 17:03
![]() DROPS Design ha scritto:
DROPS Design ha scritto:
The pattern for the shawl is right underneath the patter for the ear warmer.
07.12.2011 - 10:00Maryam ha scritto:
Please send me the pattern how to worked this shawl
07.12.2011 - 07:41
![]() Bronwen ha scritto:
Bronwen ha scritto:
Thanks for your help. I've taken a closer look at the picture and can now see the holes are folded together and the end is slotted through both
16.09.2011 - 00:29
![]() DROPS Design ha scritto:
DROPS Design ha scritto:
Hi Bronwen, in one end there are 2 holes, in the other end no holes, and that end is pulled through the 2 holes in the other side when wearing the shawl.
15.09.2011 - 22:57
![]() Bronwen Richards ha scritto:
Bronwen Richards ha scritto:
I can't understand why two holes are made in the scarf if the scarf isn't then divided into two sections at the other end that will be threaded through these holes. I would appreciate some advice
15.09.2011 - 22:27
![]() DROPS Design NL ha scritto:
DROPS Design NL ha scritto:
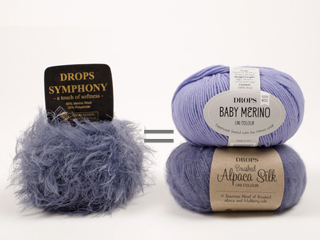
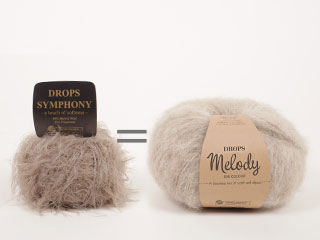
U kunt de hoeveelheid garen berekenen met behulp van de looplengtes van beide garens (zie overzicht van garens) U moet de stekenverhouding van het patroon aanhouden. Dus in dit geval moet u de naald gebruiken om 19 st x 38 nld of 15 st x 30 nld in gerstekorrel te krijgen. Maar Symphony is een veel dikkere garen dan Delight, dus ik zou een dubbele draad Delight gebruiken voor een mooier resultaat. Succes. Gr. Tine
14.07.2010 - 09:27
![]() Jacqueline ha scritto:
Jacqueline ha scritto:
Graag wil ik nr. ww-037 breien met delight, kan dat? zo ja welke naalden, hoeveel wol moet ik dan gebruiken?
13.07.2010 - 19:24
![]() Cajito ha scritto:
Cajito ha scritto:
Zajimave reseni krasneho salu
13.06.2010 - 08:05
DROPS 123-26 |
|
|
|
|
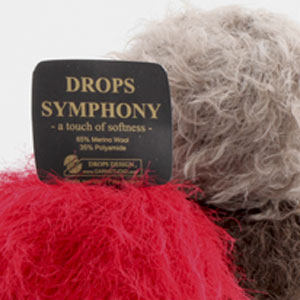
Set composto da: Fascia per la testa e scialle DROPS, a grana di riso in "Symphony".
DROPS 123-26 |
|
|
GRANA DI RISO: Ferro 1: * 1 m dir, 1 m rov *, ripetere da *-*. Ferro 2: lavorare a rov le m dir e a dir le m rov. Ripetere il ferro 2. -------------------------------------------------------- FASCIA PER LA TESTA: Si lavora avanti e indietro sui ferri. Avviare 21 m sui ferri n° 3,5 con il filato Symphony. Lavorare a GRANA DI RISO – vedere sopra ! RICORDARSI LA TENSIONE DEL LAVORO! Intrecciare le m quando il lavoro misura 48 cm. Cucire insieme bordo contro bordo al centro, sul dietro. -------------------------------------------------------- SCIALLE: Si lavora avanti e indietro sui ferri. Avviare 38 m sui ferri n° 6 con il filato Symphony. Lavorare a GRANA DI RISO – vedere sopra ! RICORDARSI LA TENSIONE DEL LAVORO! Quando il lavoro misura 16 cm, dividere il lavoro in 3 parti e proseguire come segue: Lavorare a grana di riso avanti e indietro sulle prime 14 m finché il lavoro non misura 23 cm. Mettere queste 14 m in attesa su un ferma maglie. Proseguire a grana di riso sulle 10 m successive finché le prime 2 parti non sono lunghe uguali (ATTENZIONE! Finire allo stesso ferro del motivo). Mettere in attesa queste 10 m su un ferma maglie. Lavorare a grana di riso le rimanenti 14 m finché le 3 parti non sono lunghe uguali. Al ferro successivo, lavorare a grana di riso su tutte le 38 m (le 2 aperture misurano ca. 7 cm). Proseguire a grana di riso finché il lavoro non misura 130 cm. Intrecciare le m. |
|
Avete terminato questo modello?Allora taggate le vostre foto con #dropspattern o inviatele alla #dropsfan gallery. Avete bisogno di aiuto con questo modello?Troverete 10 video tutorial, una sezione per i commenti/domande e molto altro guardando il modello su www.garnstudio.com © 1982-2026 DROPS Design A/S. Ci riserviamo tutti i diritti. Questo documento, compreso tutte le sue sotto-sezioni, è protetto dalle leggi sul copyright. Potete leggere quello che potete fare con i nostri modelli alla fine di ogni modello sul nostro sito. |


Lasciare un commento sul modello DROPS 123-26
Noi saremmo felici di ricevere i tuoi commenti e opinioni su questo modello!
Se vuoi fare una domanda, fai per favore attenzione a selezionare la categoria corretta nella casella qui sotto per velocizzare il processo di risposta. I campi richiesti sono indicati da *.