
Categorie popolari
State cercando un filato?


Commenti / Domande (18)
![]() Carolina Cabral ha scritto:
Carolina Cabral ha scritto:
Cual sera la altura de a.1 y a.2 montando 128 puntos en el patron DROPS 242-32? gracias
22.09.2024 - 18:28DROPS Design ha risposto:
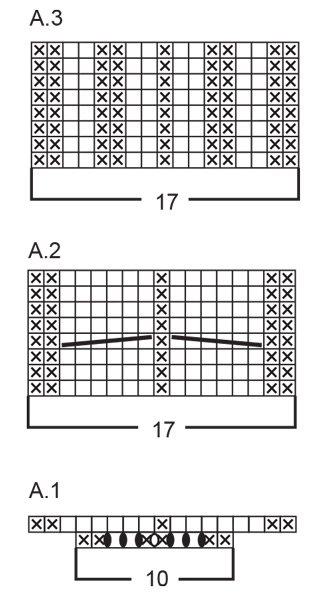
Hola Carolina, A.1 son 2 filas y A.2 son 8 filas. Primero trabajas A.1 1 vez, es decir, aumentas puntos de 10 a 17. Después trabajas A.2 sobre estos 17 puntos. 8 filas de A.2 = 1 repetición en vertical de A.2. Repite A.2 en vertical todas las veces necesarias hasta llegar a los cm del siguiente paso.
23.09.2024 - 01:42
![]() Carolina Cabral ha scritto:
Carolina Cabral ha scritto:
Hola: necesito ayuda ! para leer el patron A.1,quiero saber si lo estoy haciendo bien ? comenze desde abajo donde estan los 10 puntos con las lazadas,les agradezco su ayuda ,GRACIAS!
22.09.2024 - 18:02DROPS Design ha risposto:
Hola Carolina, aquí tienes una lección sobre cómo leer nuestros diagramas: https://www.garnstudio.com/lesson.php?id=68&cid=23. En la primera fila de A.1 tienes: 2 reveses, hebra, derecho, hebra, derecho, hebra, revés, hebra, revés, hebra, derecho, hebra, derecho, hebra, 2 reveses.
23.09.2024 - 01:39
![]() Leticia ha scritto:
Leticia ha scritto:
Hi, never mind my question earlier, i didnt notice from A1 pattern that there is an increase in the middle purl stitches :)
27.07.2024 - 18:56
![]() Leticia ha scritto:
Leticia ha scritto:
I am lost with the count just from the start, originally from all sizes it is Cast on 128-136-144. just when proceeding after the 11cm rib and begin following the increase my count is just 162-172-182(for all sizes) and not 166-176-186 stitches. where did i get wrong?
27.07.2024 - 13:28DROPS Design ha risposto:
Hi Leticia, you increase 10-12-14 stitches by doing yarn overs and 7 stitches in each A.1 diagram (7x4=28). You start with 128-136-144. The final counting will be: 1-st size 128+10+28=166, 2nd size: 136+12+28=176, 3rd size: 144+14+28=186. Happy knitting!
28.07.2024 - 16:39
![]() Ify ha scritto:
Ify ha scritto:
Hei, takk for svar på det siste spm. Har et annet når det gjelder å øke til raglan i A.2 "Fortsett økningen på hver side av A.2 på hver 2.omgang til det er økt totalt 15 ganger i alle størrelser (inkludert økningen på hver side av A.1) = 286-296" - skal det økes 15 ganger totalt? Eller skal jeg telle med omgangene, siden det står at det økes hver 2nd omgang?
25.04.2024 - 12:13DROPS Design ha risposto:
Hej igen :) det er totalt 15 gange :)
26.04.2024 - 12:05
![]() Ify ha scritto:
Ify ha scritto:
''Sett 1 merke midt på den ene skulderen, dvs midt i det ene vrangbordpartiet. '' Hvilken skulder er det, det refereres til? Eller velger man dette selv? ''Fortsett mønsteret på samme måte som forklart over, men når A.1 er strikket ferdig i høyden, strikkes A.2 over maskene i A.1. A.2 gjentas i høyden'' Hvis mønsteret over skal gjentas, hvordan blir det med kastene? Strikkes det rett eller vrang på kastet man må lage?
27.02.2024 - 12:35DROPS Design ha risposto:
Hei Ify. Dette er et merke det kun skal måles fra, så da spiller det ingen rolle hvilken skulder det er. Du øker kun første gang på vrangborden og etter det strikkes vrangborden 2 rett / 3 vrang. Det økes kun ved raglan videre. mvh DROPS Design
04.03.2024 - 11:55
![]() Rokky ha scritto:
Rokky ha scritto:
Thank you for replying me no not A1 increases I mean the Reagan 8 increase to 296 and were it said increase 15 time. When will I start to increase. is it in the rib or before A1 thank you
03.02.2024 - 16:14DROPS Design ha risposto:
Dear Rokky, first you work A.1, the rib stitches (which are for the shoulders) and the stitches in stocking stitch. On the last round of A.1, increase for the raglan as specified, on each side of the A.1 repeats. Then, since you work A.2 over A.1 and A.2 has the exact same number of stitches as the last round of A.1, the raglan increases are worked in the same spot as they were worked in A.1. You need to work the increase 14 times more (the first time was in the last round of A.1, the next 14 times are on the sides of A.2). Happy knitting!
05.02.2024 - 00:08
![]() Rokky ha scritto:
Rokky ha scritto:
Hi thank you for your help. you known I am having problems with were to increased it said I should increase at the last A1. Before and after but I can see in the knit2 and purl2 so am confess about were to increased can you help
01.02.2024 - 19:27DROPS Design ha risposto:
Dear Rocky, do you mean how to increase in A.1? On the first row in A.1 you will work the next 10 sts increasing 7 as follows: P2, YO, K1, YO, K1, YO, P1, YO, P1, YO, K1, YO, K1, YO, P2= there are now 17 sts. On the next round, knit the yarn overs twisted just as shown in A.1. On next round, work A.2 over A.1. Happy knitting!
02.02.2024 - 08:11
![]() Rokky ha scritto:
Rokky ha scritto:
Hello I need help with this pattern I knitted 12 cm after I knit2 and purl2 Yarn over 6 knit2 and A1,22 stocking stitch A1 after I had done this row I have 176 stitch on the needle but I was lost when the shoulder be can you help
29.01.2024 - 14:47DROPS Design ha risposto:
Dear Rocky, work in the larger size as follows: * Knit 2, purl 2, 1 yarn over *, work from *-* a total of 7 times (= over the next 28 sts, there are now 35 sts), knit 2, A.1 (over the next 10 sts, increasing 7 sts, there are now 17 sts), 22 stitches in stocking stitch (mid-front), A.1 (again 10 sts increased to 17 sts), * knit 2, purl 2, 1 yarn over *, work from *-* a total of 7 times (28 sts increased to 35), knit 2, A.1 (10 sts increased to 17), 22 stitches in stocking stitch (mid-back), A.1 (10 sts increased to 17) = 35+2+17+22+17+35+2+17+22+17= 186 sts. Happy knitting!
30.01.2024 - 07:52
![]() Aderonke Uwechue ha scritto:
Aderonke Uwechue ha scritto:
Hi after knitted 12 cm what is next how will I separate the front and back and the shoulder
29.01.2024 - 12:35
|
|||||||||||||||||||
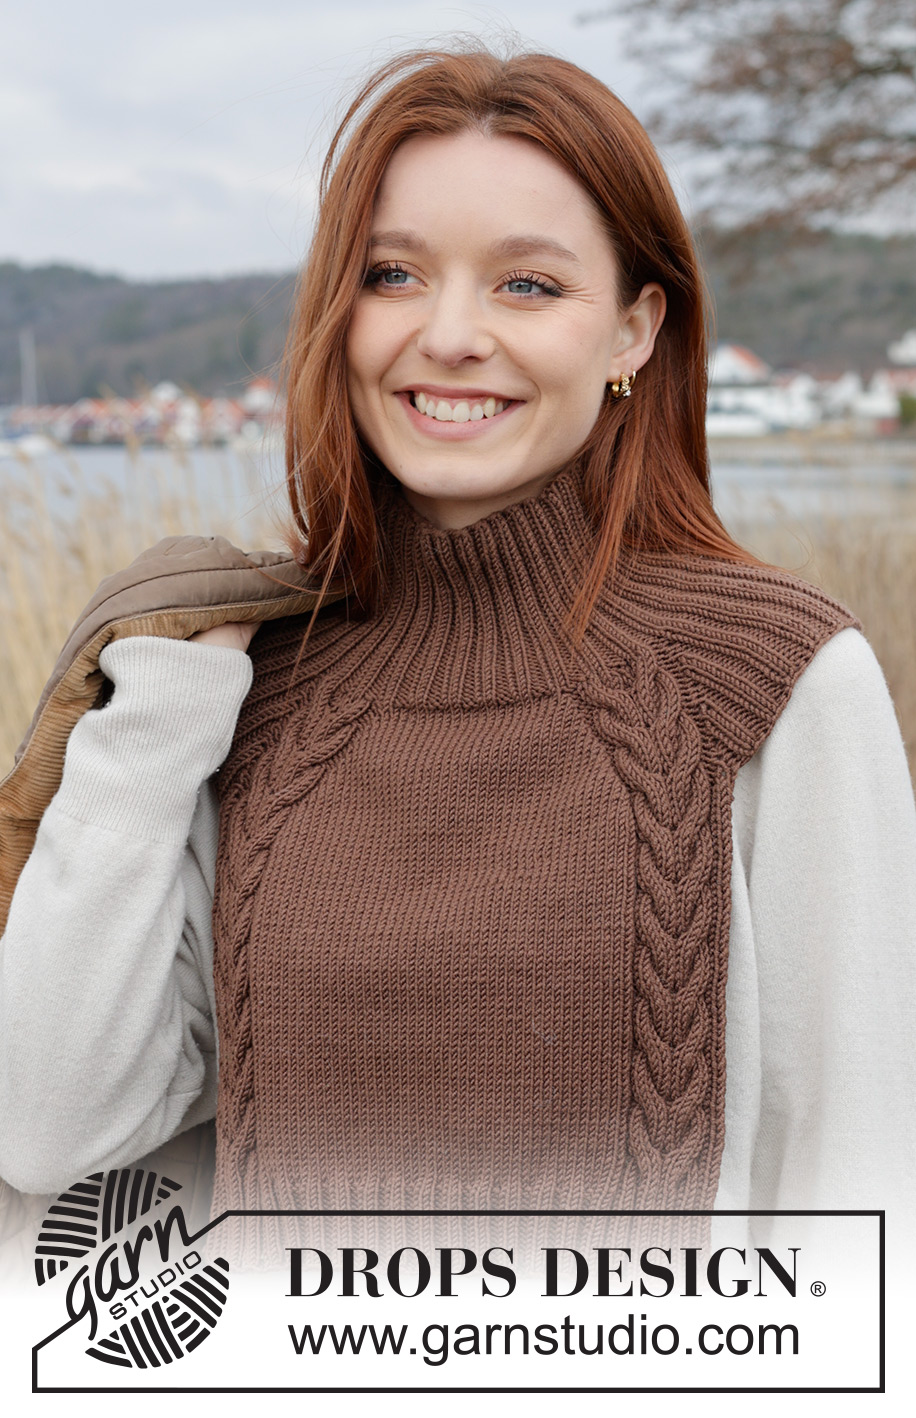
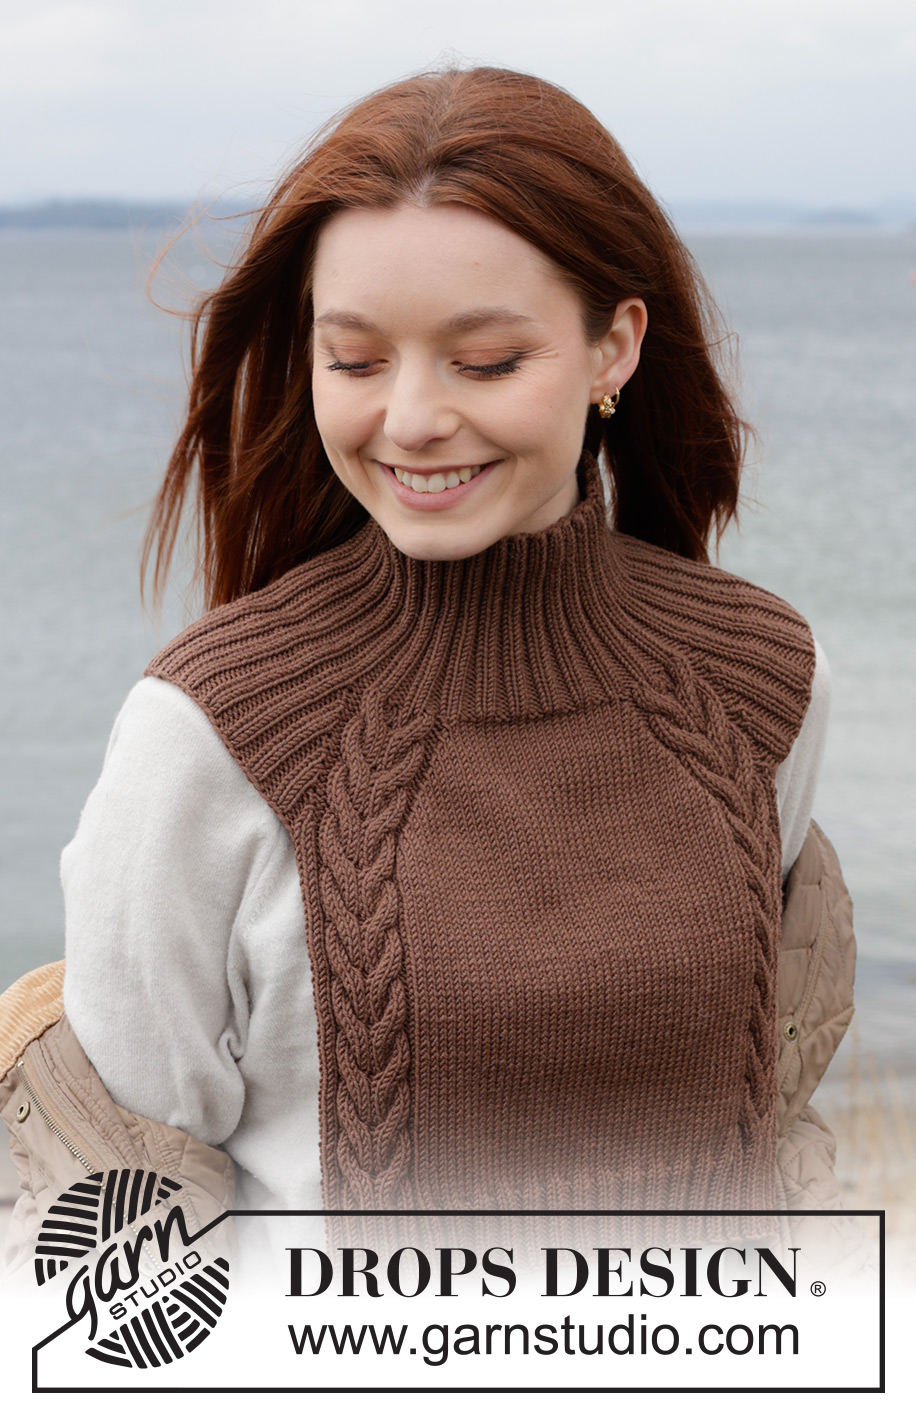
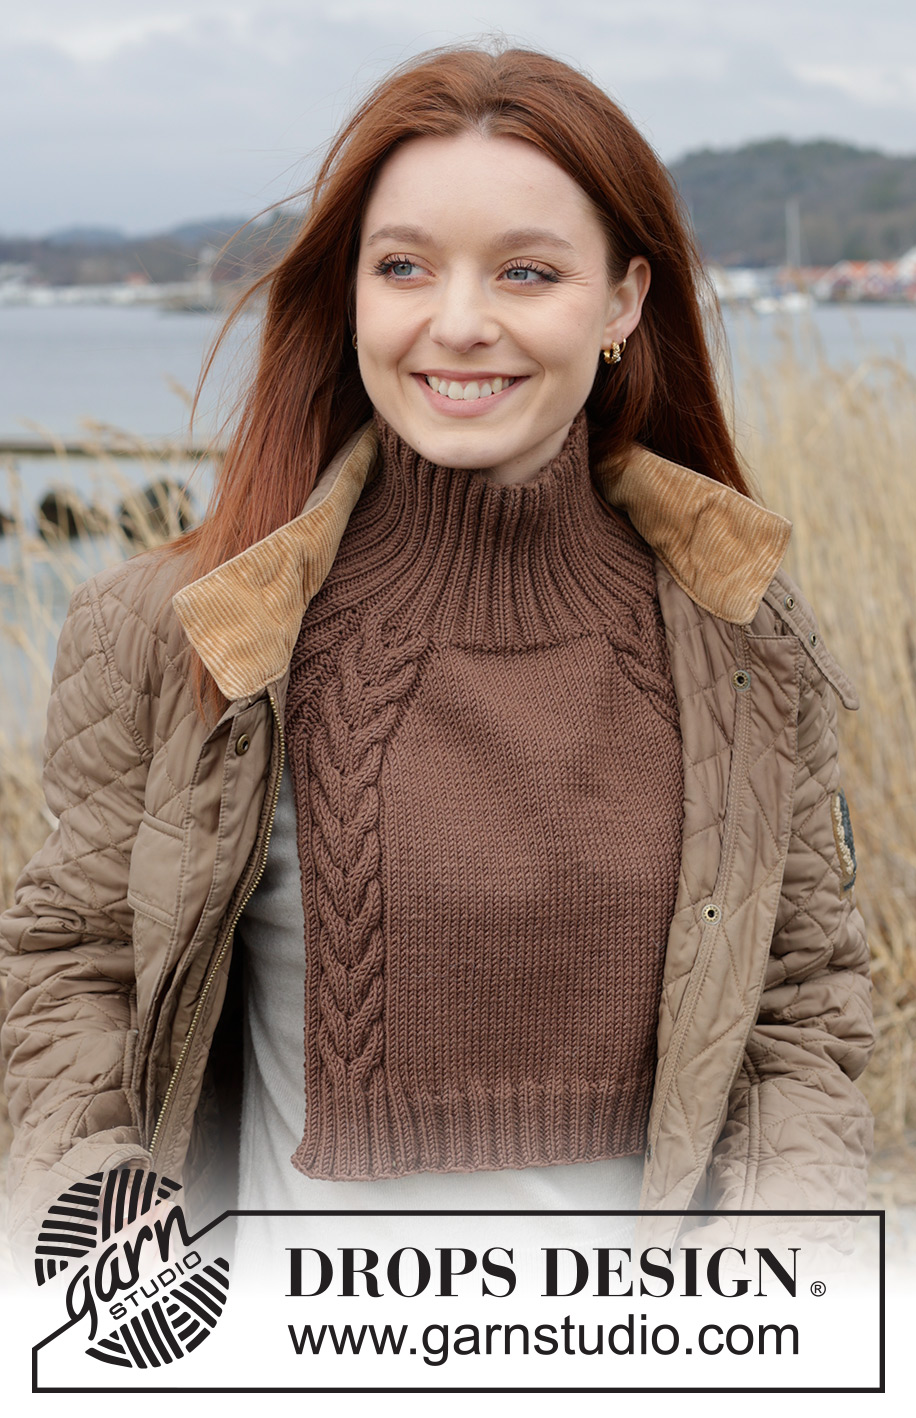
Chestnut Love Neck Warmer#chestnutloveneckwarmer |
|||||||||||||||||||
 |
 |
||||||||||||||||||
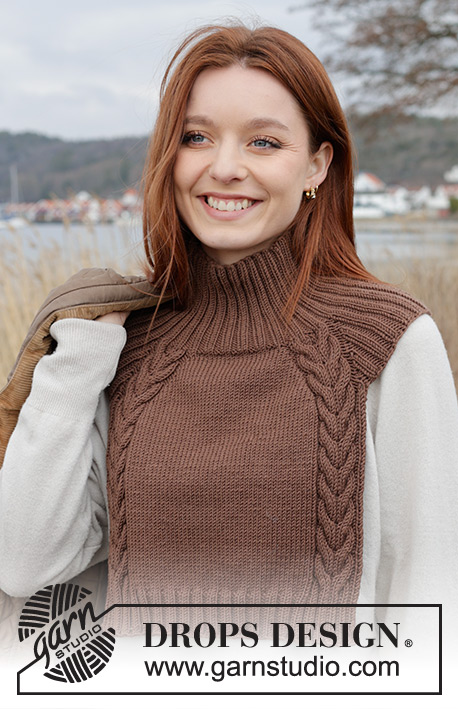
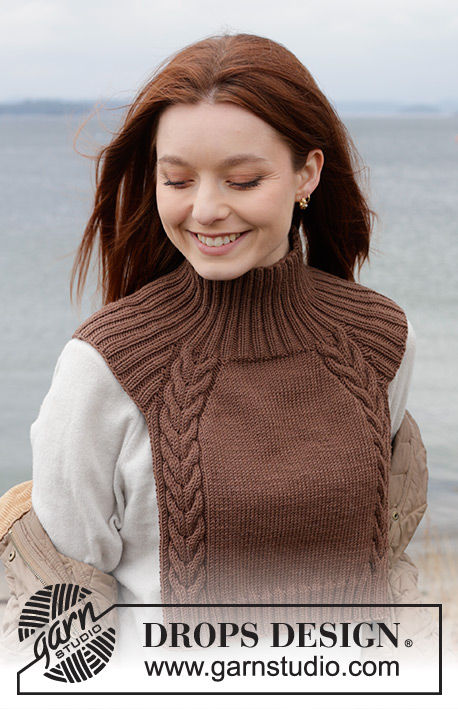
Scaldacollo lavorato ai ferri in DROPS Merino Extra Fine o DROPS Fiesta. Lavorato dall’alto in basso con raglan e trecce.
DROPS 242-32 |
|||||||||||||||||||
|
------------------------------------------------------- TECNICHE IMPIEGATE: ------------------------------------------------------- COSTA/MAGLIA LEGACCIO (avanti e indietro): Lavorare tutti i ferri a diritto. 1 costa in altezza = 2 ferri diritto. MOTIVO: Vedere i diagrammi A.1 - A.3. I diagrammi mostrano tutti i ferri del motivo visti dal diritto del lavoro. RAGLAN: Aumentare 1 maglia a ogni lato di A.1/A.2 facendo 1 gettato dopo/prima di A.1/A.2 come descritto. Sul giro/ferro successivo, lavorare i gettati come descritto sotto. Le nuove maglie vengono poi lavorate a coste su ogni spalla e a maglia rasata sul davanti/dietro. DAL DIRITTO DEL LAVORO: PRIMA DI A.1/A.2: Passare il gettato sul ferro destro a diritto, inserire il ferro sinistro e rimettere il gettato sul ferro sinistro a ritorto, lavorarlo a diritto/rovescio per evitare un buco. DOPO A.1/A.2: Lavorare a diritto/rovescio ritorto per evitare un buco. DAL ROVESCIO DEL LAVORO: PRIMA DI A.1/A.2: Lavorare a diritto/rovescio ritorto per evitare un buco. PRIMA DI A.1/A.2: Passare il gettato sul ferro destro a diritto, inserire il ferro sinistro e rimettere il gettato sul ferro sinistro a ritorto, lavorarlo a diritto/rovescio per evitare un buco. ------------------------------------------------------- INIZIO DEL LAVORO: ------------------------------------------------------- SCALDACOLLO – BREVE RIASSUNTO DEL LAVORO: Lavorato in tondo con i ferri circolari, dall’alto in basso. Aumentare per il raglan a ogni lato delle trecce sullo sprone. Poi intrecciare le maglie delle spalle. Finire lo scaldacollo dall’alto in basso, in piano con i ferri circolari. SCALDACOLLO: Avviare 128-136-144 maglie con i ferri circolari n° 3 mm e DROPS Merino Extra Fine o DROPS Fiesta. Lavorare a coste in tondo (2 maglie diritto, 2 maglie rovescio), l’inizio del giro è il dietro della spalla destro. Lavorare queste coste per 10-11-12 cm. Passare ai ferri circolari n° 4 mm. Lavorare il giro successivo come segue: * 2 maglie diritto, 2 maglie rovescio, 1 gettato *, lavorare *-* per un totale di 5-6-7 volte, 2 maglie diritto, A.1, 22 maglie a maglia rasata (centro davanti), A.1, * 2 maglie diritto, 2 maglie rovescio, 1 gettato *, lavorare *-* per un totale di 5-6-7 volte, 2 maglie diritto, A.1, 22 maglie a maglia rasata (centro dietro), A.1 = 166-176-186 maglie. Inserire 1 segnapunti al centro di una spalla (centro di una sezione a rovescio). Questo segnapunti viene usato per le misure. Continuare il motivo e gli aumenti per il raglan come descritto sotto. Leggere entrambe le sezioni prima di continuare. MOTIVO: Continuare il motivo sopra ma alla fine di A.1 lavorare A.2 su queste maglie. Ripetere A.2 in altezza. Lavorare le maglie della spalla a coste (sul 1° giro lavorare i gettati a ritorto – nessun buco, poi lavorare a coste, 2 maglie diritto, 3 maglie rovescio). FARE ATTENZIONE ALLA TENSIONE DEL LAVORO! RAGLAN: Allo stesso tempo, sull’ultimo giro di A.1 aumentare per il RAGLAN dopo/prima di ogni A.1 – leggere la descrizione sopra (iniziare aumentando all’inizio del giro dopo l’ultimo A.1 sul giro precedente – 8 aumenti). Continuare questi aumenti a ogni lato di A.2 ogni 2 giri per un totale di 15 volte per tutte le taglie (compreso il 1° aumento a ogni lato di A.1) = 286-296-306 maglie. Finire dopo un giro dispari di A.2 in modo che le trecce siano lavorate dal diritto del lavoro quando si lavora in piano. Tagliare il filo. DIVIDERE IL LAVORO PER IL DAVANTI E DIETRO: Dev’essere fatto su un giro pari di A.2. Passare le prime 3 maglie (2 maglie diritto + 1 maglia rovescio) sul ferro destro senza lavorarle. Intrecciare le 51-56-61 maglie successive senza stringere, lavorare 1 maglia a MAGLIA LEGACCIO – leggere la descrizione sopra, 2 maglie diritto, lavorare A.2, 52 maglie a maglia rasata, A.2, 2 maglie diritto, 1 maglia a maglia legaccio, mettere queste 92 maglie in sospeso per il dietro, intrecciare le 51-56-61 maglie successive, lavorare 1 maglia a maglia legaccio, 2 maglie diritto, A.2, 52 maglie a maglia rasata, A.2, 2 maglie diritto, 1 maglia a maglia legaccio = 92 maglie per tutte le taglie. DAVANTI: = 92 maglie. Continuare il motivo in piano. ALLO STESSO TEMPO sul ferro successivo dal diritto del lavoro aumentare come segue per le taglie M/L e L/XL: aumentare 1 maglia dopo A.2 all’inizio del ferro e prima di A.2 alla fine del ferro = 92-94-94 maglie. Ripetere questi aumenti per le taglie L/XL dopo aver lavorato 3 ferri senza aumenti = 92-94-96 maglie. Quando il lavoro misura 29-31-33 cm dal segnapunti sulla spalla e il ferro successivo è dal rovescio del lavoro, passare ai ferri circolari n° 3 mm. Lavorare come segue dal rovescio del lavoro: 1 maglia a maglia legaccio, 2 maglie rovescio, A.3, maglia rasata sulle 52-54-56 maglie successive e aumentare 6-8-6 maglie in modo uniforme su queste maglie, lavorare A.3, 2 maglie rovescio, 1 maglia a maglia legaccio = 98-102-102 maglie. Lavorare come segue dal diritto del lavoro: 1 maglia a maglia legaccio, 2 maglie diritto, A.3, * 2 maglie diritto, 2 maglie rovescio *, lavorare *-* per un totale di 14-15-15 volte, 2 maglie diritto, A.3, 2 maglie diritto, 1 maglia a maglia legaccio. Continuare queste coste in piano. Dopo 2 ferri aumentare 14-15-15 maglie tra A.3 al centro davanti aumentando tutte le sezioni con 2 maglie rovescio a 3 maglie rovescio (viste dal diritto del lavoro) facendo 1 gettato dopo tutte le sezioni con 2 maglie rovescio. Lavorare i gettati a ritorto sul ferro successivo per evitare buchi = 112-117-117 maglie. Continuare a lavorare fino a quando il lavoro misura circa 34-36-38 cm dal segnapunti sulla spalla (5 cm a coste). Intrecciare con diritto su diritto e rovescio su rovescio. DIETRO: Rimettere le 92 maglie in sospeso sui ferri circolari n° 4 mm e lavorare nello stesso modo del davanti. |
|||||||||||||||||||
Spiegazioni del diagramma |
|||||||||||||||||||
|
|||||||||||||||||||
 |
|||||||||||||||||||
Avete terminato questo modello?Allora taggate le vostre foto con #dropspattern #chestnutloveneckwarmer o inviatele alla #dropsfan gallery. Avete bisogno di aiuto con questo modello?Troverete 22 video tutorial, una sezione per i commenti/domande e molto altro guardando il modello su www.garnstudio.com © 1982-2026 DROPS Design A/S. Ci riserviamo tutti i diritti. Questo documento, compreso tutte le sue sotto-sezioni, è protetto dalle leggi sul copyright. Potete leggere quello che potete fare con i nostri modelli alla fine di ogni modello sul nostro sito. |
|||||||||||||||||||


Con oltre 40 anni di esperienza nel design di modelli di maglia e uncinetto, DROPS Design offre la più estesa collezione di modelli gratuiti su internet - tradotti in 17 lingue. Ad oggi vi possiamo fornire 324 cataloghi e 12290 modelli - 9561 dei quali sono tradotti in Italiano.
Ci stiamo impegnando molto per darvi il meglio che vi possiamo offrire in termini di maglia e uncinetto, ispirazioni e consigli così come filati di grande qualità ad un prezzo incredibile! Volete utilizzare i nostri modelli per qualcosa d'altro oltre al vostro uso personale? Potete leggere tutto ciò che è consentito nel testo sul Copyright in basso su tutte le pagine dei nostri modelli. Buon lavoro!
Lasciare un commento sul modello DROPS 242-32
Noi saremmo felici di ricevere i tuoi commenti e opinioni su questo modello!
Se vuoi fare una domanda, fai per favore attenzione a selezionare la categoria corretta nella casella qui sotto per velocizzare il processo di risposta. I campi richiesti sono indicati da *.