
Categorie popolari
State cercando un filato?


Commenti / Domande (16)
![]() Sharon Hunt-Edwards ha scritto:
Sharon Hunt-Edwards ha scritto:
Hello, I would have worked the pattern as written until my Polaris yarn became scrap yarn and it would not have worked. Hopped onto ravelry got som help and am finished the increases after trying for about 3 days and am not a beginner knitter. Have knitted complicated lace patterns . Am one happy knitter. So I would agree with FS that the pattern as written is notcorrect.
27.02.2024 - 19:30
![]() FS ha scritto:
FS ha scritto:
Sorry but you are wrong. Try knitting it or charting it and you will see. (k3 yo k1 k1 yo) x3 is 15 sts not 12 and doesn't put the yo either side of the markers. k3 yo k1 sm k1 yo k2 yo k1 sm k1 yo k2 yo k1 sm will work but is 5 increases not 6. There needs to be k1 yo after the 1st/last marker as well. Either you do this at the start of round 1 or you go into round 2 and do it there. In this case the pattern needs to specify that.
27.02.2024 - 18:55
![]() FS ha scritto:
FS ha scritto:
The instructions for round 1 do not work. This has been mentioned above by Sharon HUnt. Your response to her question does not work either. In fact, it is even more incorrect. Round 1 should be * K1, yo, k to 1 st before marker, yo, k1 * repeat from * to * three times in total. In your reply to her question about the stitch count of the smaller size you say increase twice but the pattern says only once
27.02.2024 - 11:54DROPS Design ha risposto:
Dear Fs, in the previous answer, the markers were supposed to be inserted after the first 4 sts then after every 4th stitch, then you increase on each side of 2 sticches (where the marker is between these both stitches), so that you work: *K3, YO, K1 (last of the 4th st before 1st marker), K1 (first of the 4 sts after marker), YO*, after you have worked from *-* you have 3 sts left before next marker, repeat from *-*. On next repeat, you will work the same way with 1 extra st before each increase, ie; *K4, YO, K2 (with marker between both K2), YO*, and so on. Happy knitting!
27.02.2024 - 13:39
![]() Sharon Hunt-Edwards ha scritto:
Sharon Hunt-Edwards ha scritto:
As the increases er completed on row 2. The marker remains at its original position? Correct. Thanks
26.02.2024 - 11:36DROPS Design ha risposto:
Dear Mrs Hunt-Edwards, let the marker follow piece so that the increase will be worked on either side of the markers (on each side of the 2 sts with the marker inbetween); work the rounds 1+2 a total of 4-5 times, this means you will work a total of 8-10 rows increasing every other round (every time you work round 2). Happy knitting!
26.02.2024 - 13:58
![]() Sharon Hunt ha scritto:
Sharon Hunt ha scritto:
Hello is there a mistake in this pattern. The pattern says to knit row 1 and to 4-5 times and the amount of sts on the needle should be 42. Then ie says further to knit 1 more time and the sts count is 40. Last part of the increase says the final stitch count is 40. Which is it? Please note this is an additional question. Hope i don’t be designated as as a spammer. Am make the largest size.
26.02.2024 - 06:59DROPS Design ha risposto:
Dear Mrs Hunt, in the first size you get 36 sts then increase only 4 sts (at 2 markers only) to get 40 sts; but in the 2nd size, you get 42 sts after the increases are done. So in the larger size when you get 42 sts just work without increasing anymore until piece measure 22 cm. Happy knitting!
26.02.2024 - 10:03
![]() Sharon HUnt ha scritto:
Sharon HUnt ha scritto:
Hello Drops am not understanding roun one in this pattern. The pattern says to knit until l sts before the maker, make 1 yarn over, knit 2, make 1 yarn over*, repeat from *-* I end up on the next group of sts. without completing the repeat. Seems like something is not quite correct here. Not sure what am doing wrong. Thanks for your help.
25.02.2024 - 12:47DROPS Design ha risposto:
Dear Mrs Hunt, you have inserted 3 markers like this (4 sts, 1 marker) x 3; work now as follows: (knit 3, 1 yo, k2 (marker is between these 2 sts), YO), repeat from (to) to the end of the round. Happy knitting!
26.02.2024 - 09:26
![]() Luisa ha scritto:
Luisa ha scritto:
C’è un errore: GIRO 1: * lavorare a diritto fino a quando rimane 1 maglia prima del segnapunti, 1 gettato, 2 maglie diritto, 1 gettato *, ripetere *-* fino alla fine del giro (6 aumenti). sono 5 aumenti non 6, manca il gettato dopo la prima maglia del giro
23.01.2024 - 20:33DROPS Design ha risposto:
Buonasera Luisa, gli aumenti sono corretti, si lavorano 3 ripetizioni sul giro. Buon lavoro!
17.03.2024 - 19:00
![]() Emmanuelle Poirier ha scritto:
Emmanuelle Poirier ha scritto:
Concernant la grosseur de l'aiguille, vous mentionner des aiguilles no 12. Est-ce que vos mesure sont en mm ou en us? Car je cherche des 12us et ne trouve pas cette grosseur. Merci
27.01.2023 - 12:46DROPS Design ha risposto:
Bonjour Mme Poirier, dans les modèles français, c'est le système métrique qui a été retenu pour la taille des aiguilles - vous pouvez filtrer les modèles par nombre de mailles pour 10 cm (plus simple car la taille des aiguilles dépend aussi de la tension de chacune). Bon tricot!
27.01.2023 - 14:23
![]() Mari ha scritto:
Mari ha scritto:
Når jeg vrenger lua til rettsiden på slutten, så "hopper" den fire cm lange, vrange stripen som er strikket etter den første vrengingen med opp og er synlig under vrangborden. Hvordan unngår dere det?
28.12.2022 - 21:53DROPS Design ha risposto:
Hej Mari, gør det noget? ... du kan evt strikke en vrangpind inden du vender, da vil det blive en glatpind i kanten.
04.01.2023 - 12:18
![]() Laura ha scritto:
Laura ha scritto:
Cuando aumento me quedan agujeros en las lazadas, el patrón es así o lo estoy haciendo mal? Si lo estoy haciendo mal, qué puedo hacer para que no queden agujeros? Gracias de antemano
25.10.2022 - 19:16DROPS Design ha risposto:
Hola Laura, para evitar que se formen agujeros hay que tener el hilo muy tenso al trabajar las lazadas.
06.11.2022 - 23:46
|
|
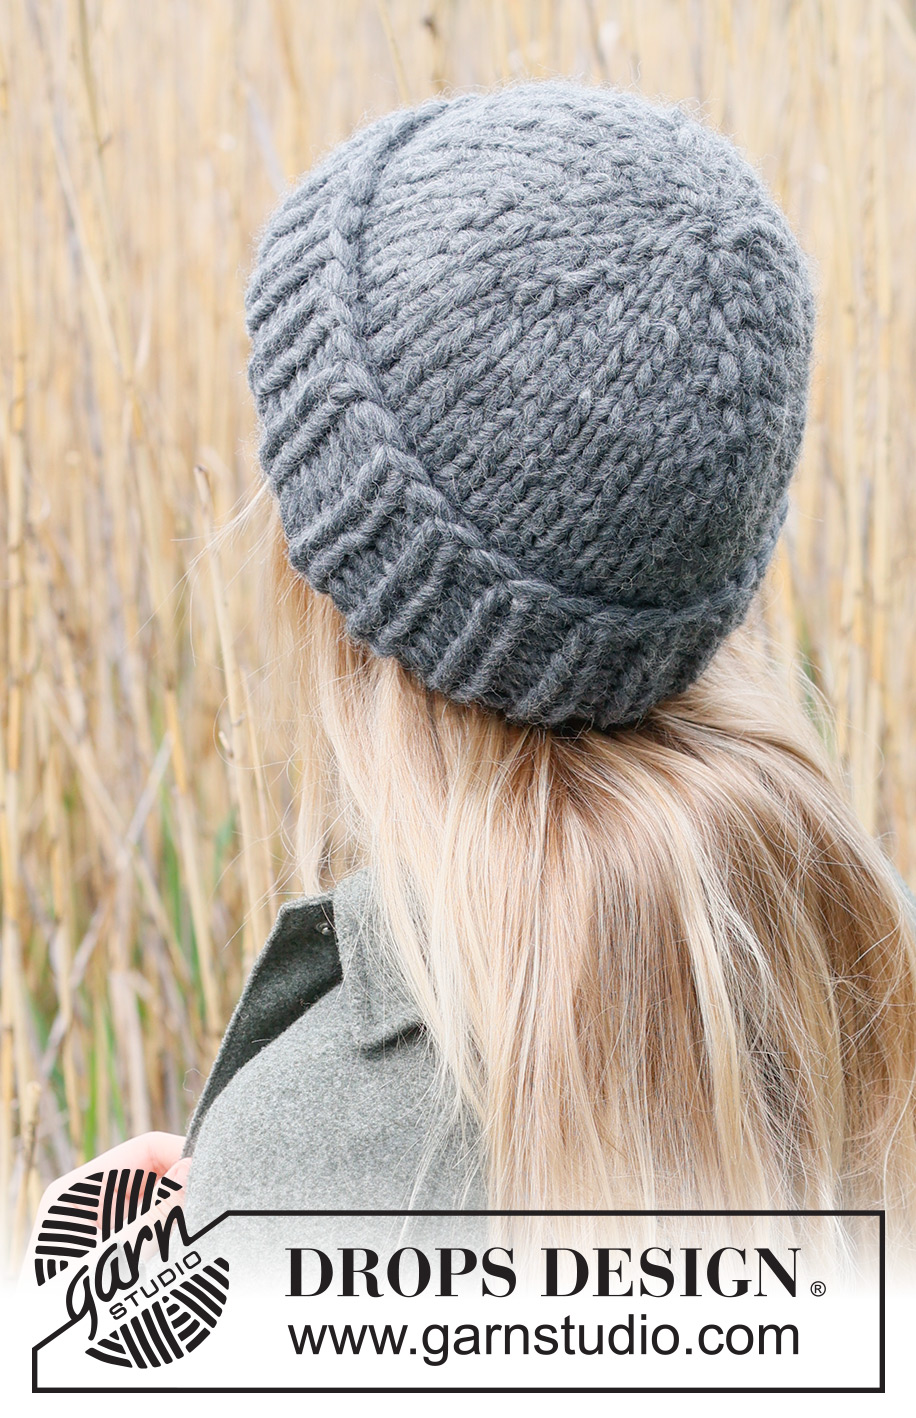
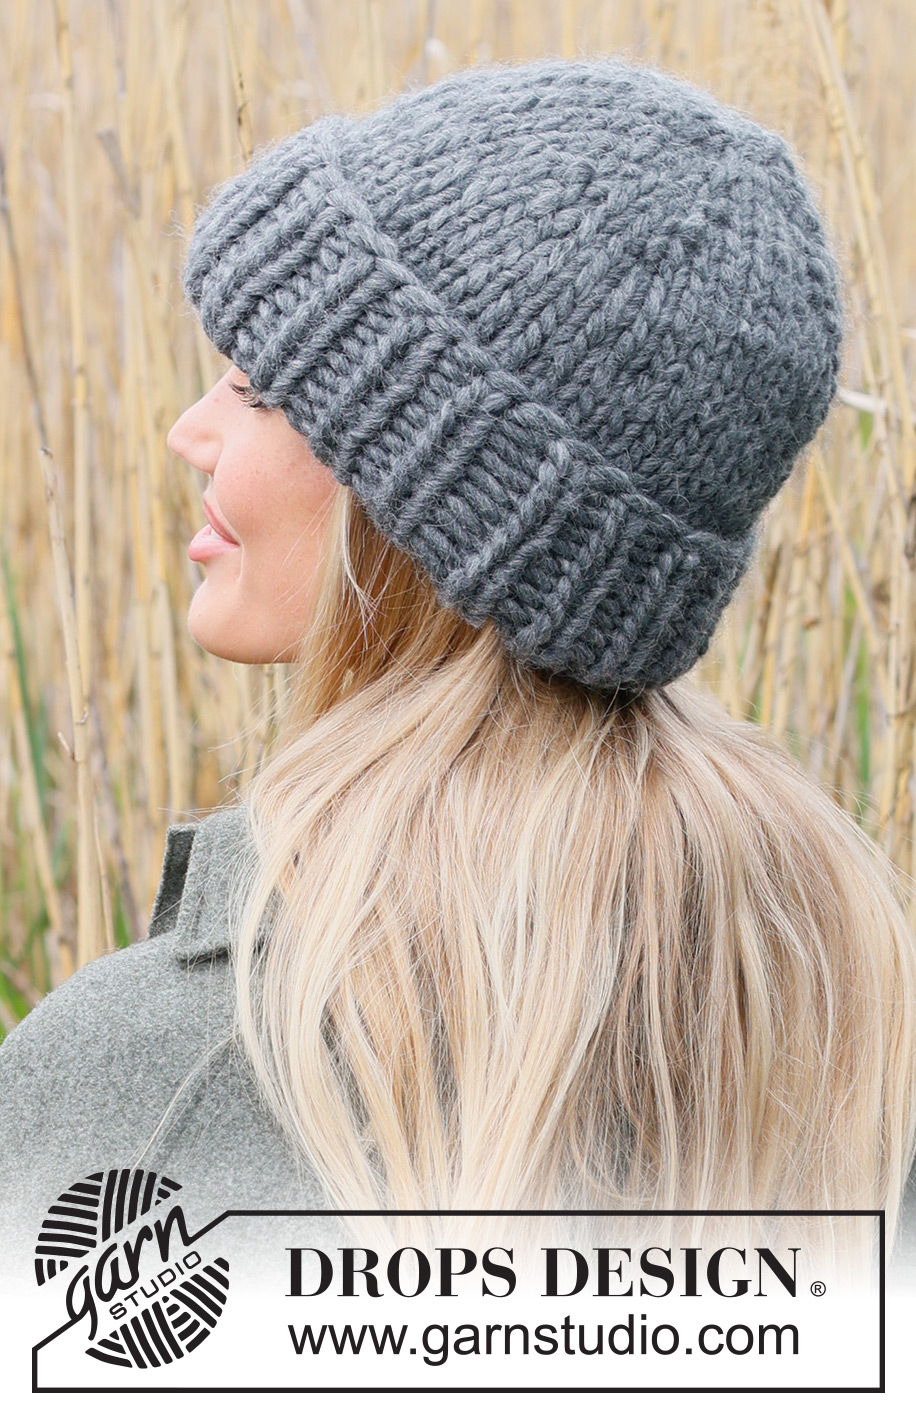
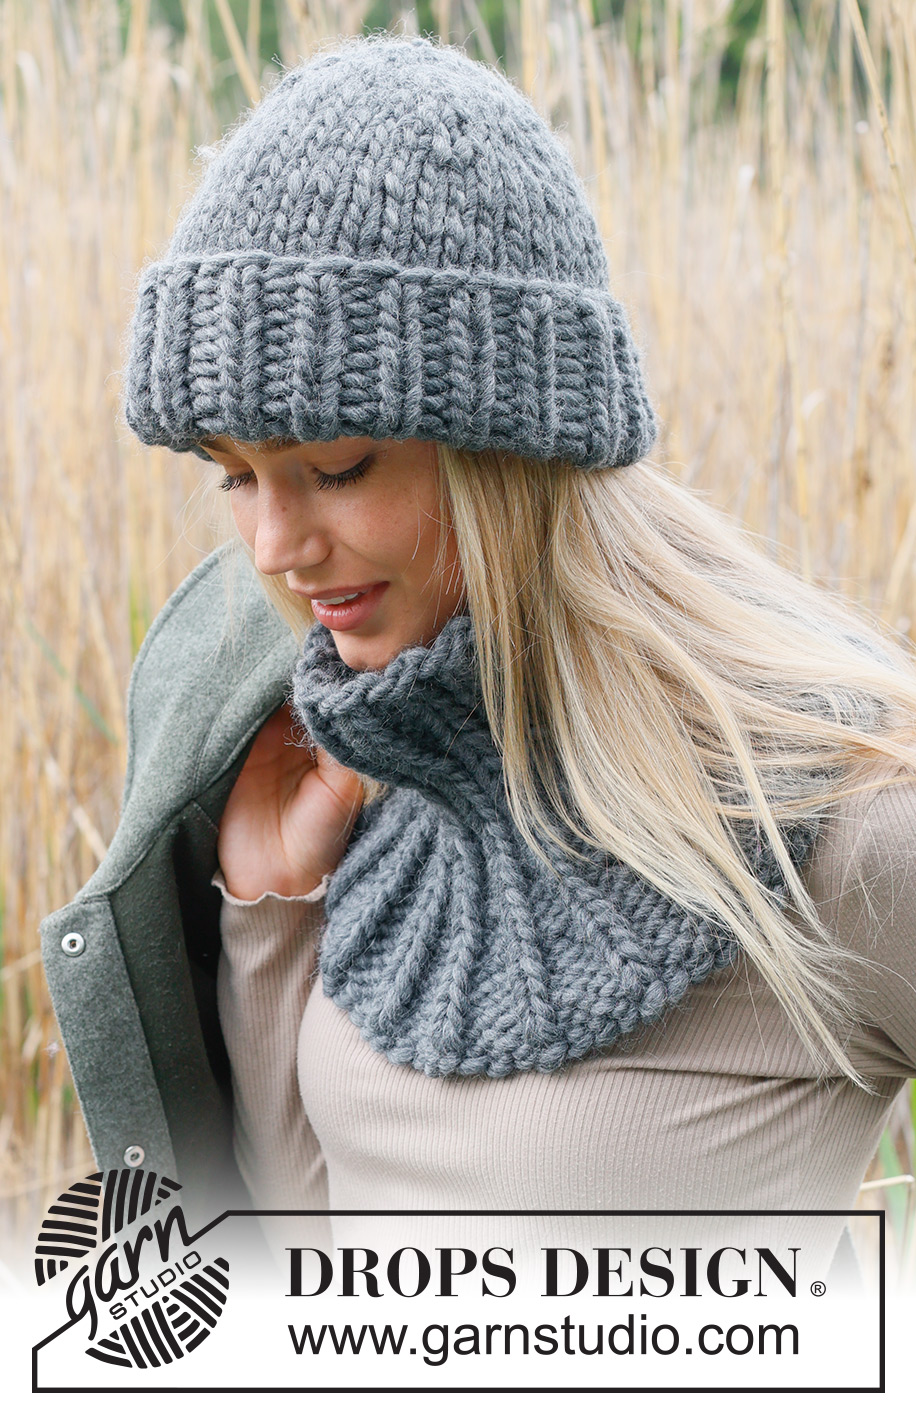
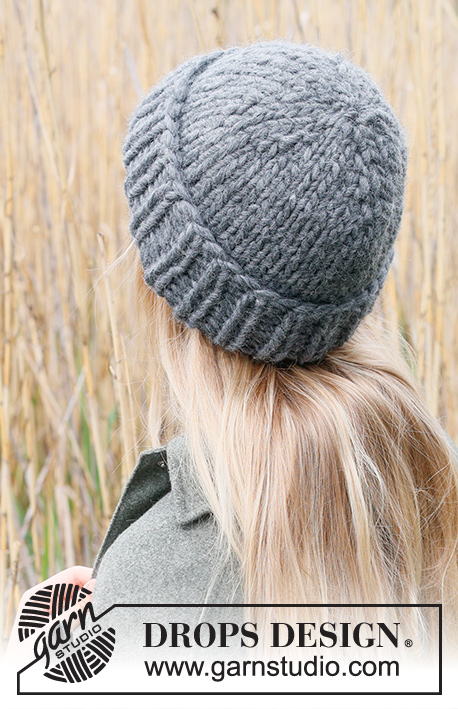
Polar Night Hat#polarnighthat |
|
 |
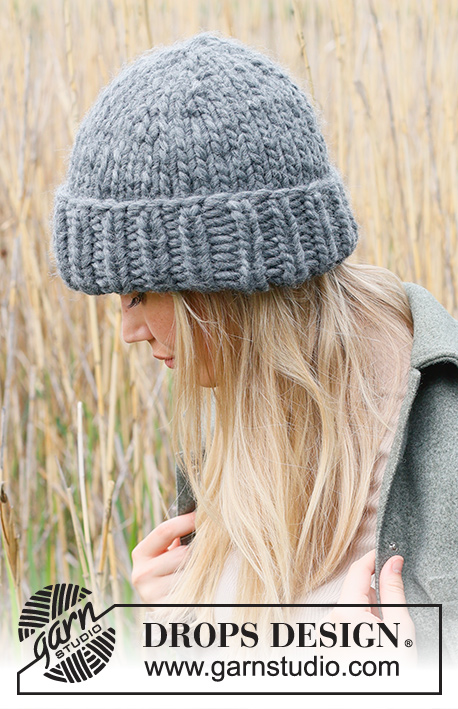 |
Cappello lavorato ai ferri in DROPS Polaris. Lavorato dall’alto in basso a maglia rasata e bordo a coste.
DROPS 234-34 |
|
|
------------------------------------------------------- TECNICHE IMPIEGATE: ------------------------------------------------------- CAPPELLO – BREVE RIASSUNTO DEL LAVORO: Lavorato in tondo, dall’alto in basso. CAPPELLO: Avviare 12 maglie con i ferri a doppia punta usando i ferri n° 12 mm e DROPS Polaris – lasciare l’estremità di circa 20 cm; da usare in seguito durante la confezione. Inserire 3 segnapunti con 4 maglie tra ogni segnapunti. GIRO 1: * lavorare a diritto fino a quando rimane 1 maglia prima del segnapunti, 1 gettato, 2 maglie diritto, 1 gettato *, ripetere *-* fino alla fine del giro (6 aumenti). GIRO 2: * lavorare a diritto fino al gettato, prendere il gettato sul ferro e rimetterlo sul ferro a ritorto, poi lavorarlo a diritto nel filo davanti (maglia ritorta verso destra), 2 maglie diritto, lavorare a diritto nel filo dietro del gettato successivo (maglia ritorta verso sinistra) *, ripetere *-* fino alla fine del giro. Ripetere i ferri 1 e 2 per un totale di 4-5 volte = 36-42 maglie. Il lavoro misura circa 8-10 cm. FARE ATTENZIONE ALLA TENSIONE DEL LAVORO! TAGLIA S/M: Lavorare i giri 1 e 2 un’altra volta ma aumentare solo all’altezza di 2 dei segnapunti = 40 maglie. ENTRAMBE LE TAGLIE: = 40-42 maglie. Continuare a maglia rasata ma senza ulteriori aumenti fino a quando il lavoro misura 21-22 cm. Risvoltare il cappello e lavorare a diritto dal rovescio del lavoro per 4 cm. Passare ai ferri a doppia punta n° 10 mm. Lavorare a coste (1 maglia diritto, 1 maglia rovescio) per 8 cm. Intrecciare con diritto su diritto e rovescio su rovescio facendo in modo che il bordo di chiusura non sia tirato. Il cappello misura circa 33-34 cm dal bordo di avvio. Risvoltare il cappello sul diritto del lavoro e piegare le coste verso l’esterno. CONFEZIONE: Usare l’estremità per chiudere l’apertura in cima al cappello. |
|
Avete terminato questo modello?Allora taggate le vostre foto con #dropspattern #polarnighthat o inviatele alla #dropsfan gallery. Avete bisogno di aiuto con questo modello?Troverete 19 video tutorial, una sezione per i commenti/domande e molto altro guardando il modello su www.garnstudio.com © 1982-2026 DROPS Design A/S. Ci riserviamo tutti i diritti. Questo documento, compreso tutte le sue sotto-sezioni, è protetto dalle leggi sul copyright. Potete leggere quello che potete fare con i nostri modelli alla fine di ogni modello sul nostro sito. |
|


Con oltre 40 anni di esperienza nel design di modelli di maglia e uncinetto, DROPS Design offre la più estesa collezione di modelli gratuiti su internet - tradotti in 17 lingue. Ad oggi vi possiamo fornire 324 cataloghi e 12290 modelli - 9561 dei quali sono tradotti in Italiano.
Ci stiamo impegnando molto per darvi il meglio che vi possiamo offrire in termini di maglia e uncinetto, ispirazioni e consigli così come filati di grande qualità ad un prezzo incredibile! Volete utilizzare i nostri modelli per qualcosa d'altro oltre al vostro uso personale? Potete leggere tutto ciò che è consentito nel testo sul Copyright in basso su tutte le pagine dei nostri modelli. Buon lavoro!
Lasciare un commento sul modello DROPS 234-34
Noi saremmo felici di ricevere i tuoi commenti e opinioni su questo modello!
Se vuoi fare una domanda, fai per favore attenzione a selezionare la categoria corretta nella casella qui sotto per velocizzare il processo di risposta. I campi richiesti sono indicati da *.