
Populaarsed kategooriad
Otsid lõnga?


















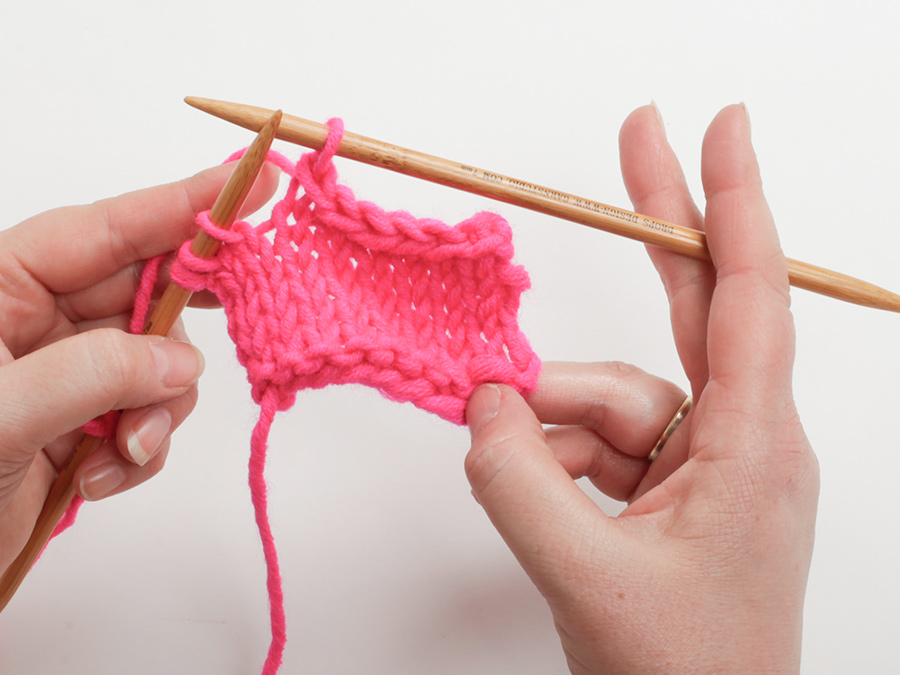
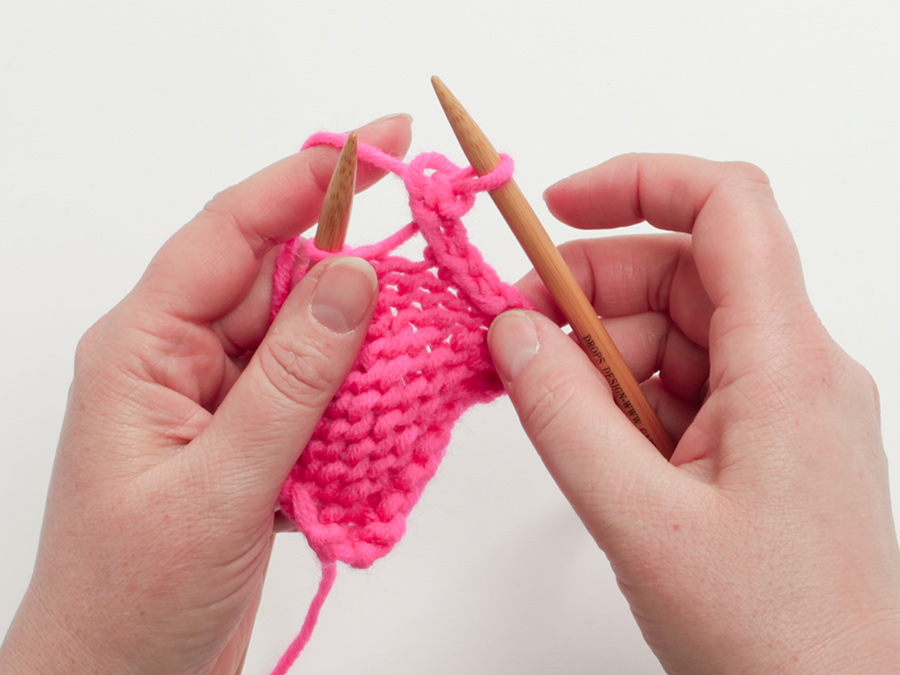
Kommentaarid / Küsimused (631)
 Heike kirjutas:
Liebes DropsTeam, wenn es beim Rückenteil heißt "die nächste Reihe ist die 7. Reihe", bedeutet das bitte, dass die 7. Reihe die Abkettreihe ist? Vielen Dank im Voraus für die Hilfe! Schöne Grüße aus Bayern Heike
23.10.2026 - 22:58DROPS Design vastas:
Liebe Heike, ja genau, beim Stricken der 7. Reihe wird abgekettet, dabei wird gleichzeitig abgenommen, wie im TIPP ZUM ABKETTEN beschrieben. Viel Spaß beim Stricken!
24.10.2026 - 09:04
 Tania kirjutas:
Hi, Would it also work if I bind off the 6 sts for armhole on Chart Row 3 or 7? This is my first sweater and I’m trying to visualize how this works. If Row 3 or 7 would not work, please explain why. Thank you so much.
22.10.2026 - 13:33DROPS Design vastas:
See answer below, if it doesn't help just feel free to tell us more on where you are stuck. Thanks for your comprehension.
23.10.2026 - 06:30
 Tania kirjutas:
Hi, Would it also work if I bind off the 6 sts for armhole on Chart Row 3 or 7? This is my first sweater and I’m trying to visualize how this works. If Row 3 or 7 would not work, please explain why. Thank you so much.
22.10.2026 - 06:00DROPS Design vastas:
Dear Tania, you can bind off the 6 sts for armholes on a row 3 or on a row 7 but just make sure the next row is worked from WS when you start back piece and front piece separately so that cables will still be worked from RS. Happy knitting!
23.10.2026 - 05:52
Tania kirjutas:
Hi, Which chart row number should the “cast off 6 sts for each armhole each side” be on so that I will be set up to stay in pattern and be on the Right Side when I need to do a cable row?
21.10.2026 - 23:43DROPS Design vastas:
Hi Tania, You need to bind off while working row 1 or 5 in the charts, so you work subsequent cables from the right side. Regards, Drops Team.
22.10.2026 - 05:35
 Marianna kirjutas:
La parte dietro è lavorata come il davanti?
21.10.2026 - 12:42DROPS Design vastas:
Buongiorno Marianna, i motivi vengono lavorati anche sul dietro. Buon lavoro!
31.10.2026 - 15:33
Tania kirjutas:
When working the charts back and forth, how do you knit the cable patterns on the wrong side? Thank you!
18.10.2026 - 21:02DROPS Design vastas:
Dear Tania, when you work the charts back and forth the odd numbered rows are worked on the right side, while the even numbered rows are worked from the wrong side. All cable rows are on right side rows (row 3 on the charts, row 7 as well in M.1 and M.3). Wrong side rows are worked opposite as seen, so you read them from left to right and purl the stitches on white square symbols or knit them on black square symbols. However, when looking at the cable from the right side, the stitches worked in the wrong side will be seen as shown in the chart (the white squares as knitted, the black squares as purled) so the cable pattern will look the same as it did when you worked in the round; this is the reason why charts back and forth are read and worked in the opposite way on wrong side rows. Happy knitting!
18.10.2026 - 21:11
Tania kirjutas:
After casting off for armholes, how do you knit back and forth and stay in the cable pattern?
18.10.2026 - 16:53DROPS Design vastas:
Dear Tania, the cast off for the armholes is worked over the section in M.2, so it won't affect the cable pattern. On the other hand, when you work back and forth the charts are read differently; the rows on the right side (including the rows with the cables) are worked as before. But the rows on the wrong side are worked opposite to how they are seen (so a knit row in a wrong side row would need to be purled, so that it looks like a knitted row from the right side). Therefore, the pattern will be maintained as you work back and forth. Happy knitting!
18.10.2026 - 20:41
Tania kirjutas:
I need a video on how to “bind off 6 sts for armhole each side”, please. I also need a video on how to work the Back Piece, please.
17.10.2026 - 22:50DROPS Design vastas:
Dear Tania, there is no complete video tutorial for this pattern. For the armholes you work as follows: Cast off the first 3 stitches, work over the front piece stitches until there are 3 stitches left before the next marker, cast off 3 stitches before the marker and 3 stitches after the marker. Now continue working the remaining stitches over the back piece until there are 3 stitches left before the 1st marker (the final 3 stitches on the round), cast off these last 3 stitches. Then, continue only over the back piece, working back and forth over all stitches and casting off 2 stitches (and later on 1 stitch) at the beginning of each row; casting off 2 stitches at the beginning of a right side row and 2 stitches at the beginning of a wrong side row counts as casting off 1 time. Happy knitting!
18.10.2026 - 20:07
Kayla kirjutas:
Hello! I am currently casting off for armhole shaping on a L and am struggling with the instructions. “Bind off to shape the armhole each side at beg of every row: 2 sts 2 times and 1 st 3 times = 128 sts. Continue in pattern.” When it states beginning of every row is it meaning Dec on each side of needle or only when you turn your work? Also, are the Dec worked all together in the same row or one set per row? Thank you so much!
13.10.2026 - 01:48DROPS Design vastas:
Dear Kayla, you will cast off the stitches at the beginning of each row from both right side and wrong side, so in L cast off 2 stitches at the beg of next 4 rows (= 2 sts 2 times each side) and 1 stitch at the beginning of next 6 rows (1 st 3 times each side). Happy knitting!
13.10.2026 - 09:39
AnneLise Eikeland kirjutas:
Hei Jeg får ikke maskeantallet til og stemme Strikker i XL str. Strikkerførst forklart til 8 masker N este over 52 m neste over 16 m Neste 52 m så de siste 8 maskene Det blir 136 masker Jeg masker da til overs XL er 312 masker tilsamme
09.10.2026 - 15:28DROPS Design vastas:
Hei AnneLise. I str. XL legges det opp 290 masker, når vrangborden måler 5 cm økes det 22 makser = 290 + 22 = 312 masker. Sett 2 merketråder, ved start og ved maske 156. Så strikkes det slik: M.2 over de første 8 m + M.3 (= 8 m) + M.4 (10 m) + M.3 (=8 m) + M.4 (= 10 m) + M.3 (=8 m) + M.1 over de neste 52 m + M.3 (= 8 m) + M.4 (10 m) + M.3 (=8 m) + M.4 (= 10 m) + M.3 (=8 m) + M.2 over de neste 16 m + M.3 (= 8 m) + M.4 (10 m) + M.3 (=8 m) + M.4 (= 10 m) + M.3 (=8 m) + M.1 over de neste 52 m + M.3 (= 8 m) + M.4 (10 m) + M.3 (=8 m) + M.4 (= 10 m) + M.3 (=8 m) + M.2 over de siste 8 m = 312 masker. mvh DROPS Design
12.10.2026 - 14:01
|
|||||||||||||||||||
Dreams of Aran#dreamsofaransweater |
|||||||||||||||||||
 |
 |
||||||||||||||||||
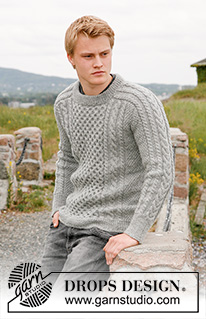
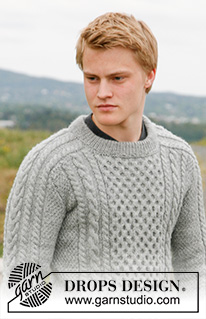
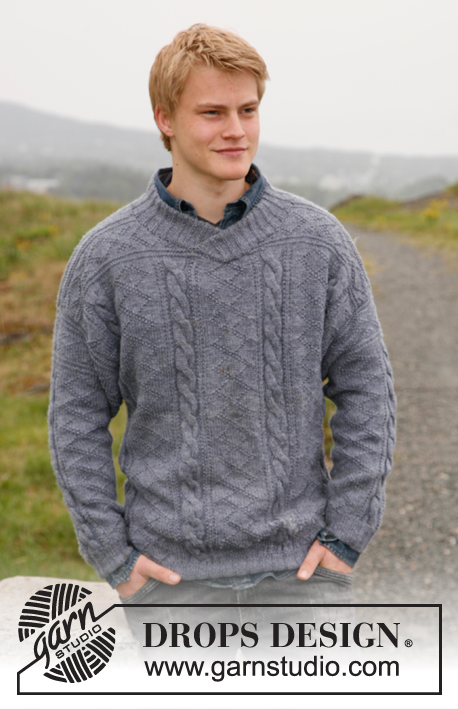
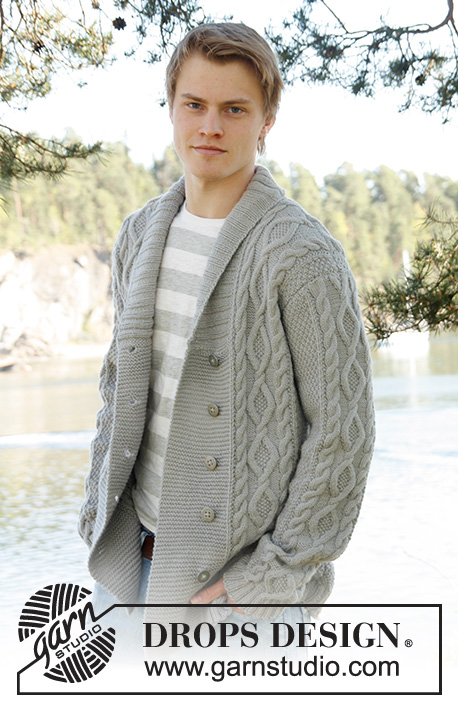
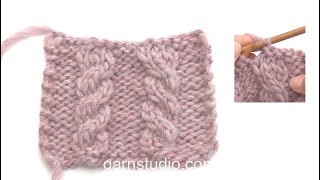
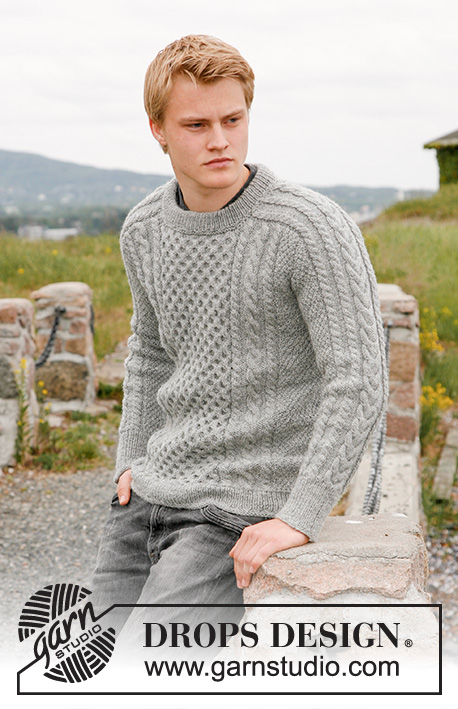
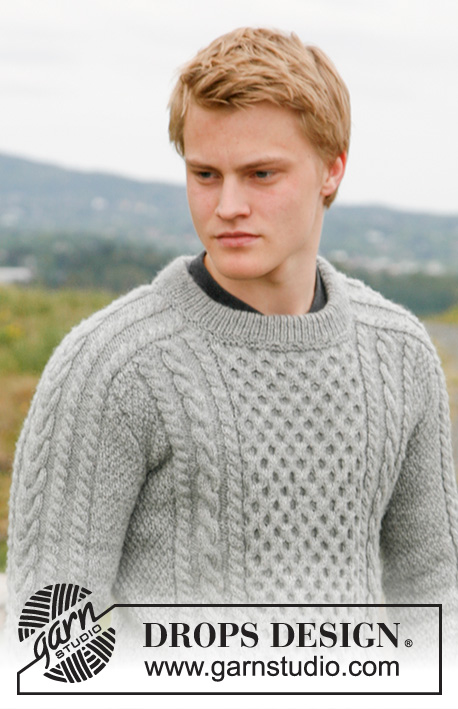
DROPS Karisma või Puna või Merino Extra Fine lõngast kootud palmikutega meeste džemper suurustele 13/14 aastasele kuni XXXL.
DROPS 135-3 |
|||||||||||||||||||
|
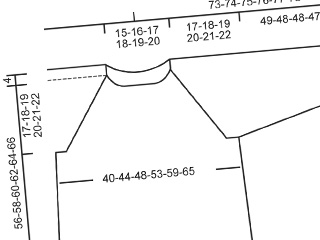
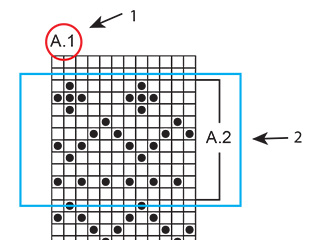
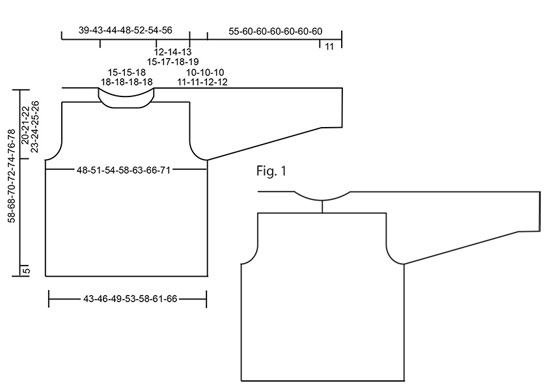
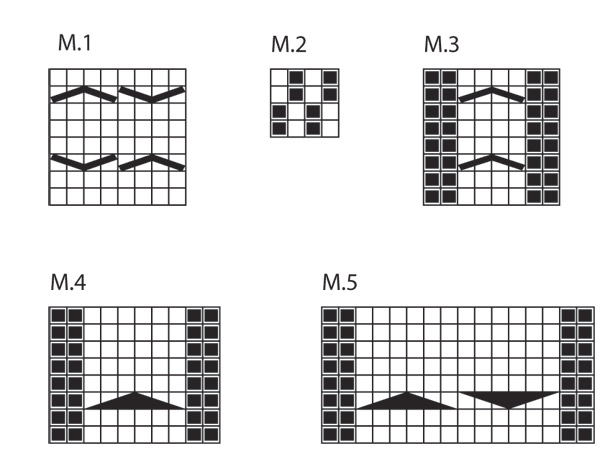
RIPSKUDE (ringselt kududes): koo 1 ring parempidi, 1 ring pahempidi. MUSTER Vaata skeeme M.1 – M.5. Skeemid on antud vaadatuna töö paremalt poolt. KAHANDAMISE NIPP Koo 1 silmus skeemi järgi, koo 2 silmust kokku, tõsta esimene silmus üle = 2 kahandatud silmust. Kahanda erinevates skeemides järgmiselt: M.1 (= 44-44-52-52-52-52-52 silmust): 10-10-12-12-12-12-12 silmust. M.3 (= 8 silmust): 2 silmust. M.4 (= 10 silmust): 3 silmust. M.5 (= 16 silmust): 6 silmust. -------------------------- KAMPSUN - LÜHIKE KOKKUVÕTE: Varrukad kootakse alt üles, jätkatakse üle õla, seljaosa keskkohani. Esiosal kahandatakse silmuseid õla peal kaelaaugu jaoks ja väike osa õlal jätkub seljaosale, mis hiljem õmmeldakse kokku seljaosa keskel, st. seljaosa on kõrgem, kui esiosa – vaata joonis 1. KEHAOSA Kootakse ringselt. Loo 3,5 mm ringvarrastele 208-230-250-270-290-310-330 silmust. Koo 4 ringi RIPSKOES – vaata ülevalt – edasi koo soonikut 1 pr/1 ph. Kui on kootud 5 cm, koo 2 ringi ripskoes, SAMAL AJAL viimasel ringil kasvata võrdsete vahedega 20-10-6-6-22-18-18 silmust = 228-240-256-276-312-328-348 silmust. Paigalda 2 SM-i - esimene rea algusesse ja teine pärast 114-120-128-138-156-164-174 silmust (= mõlemad servad). Vaheta 4 mm ringvarraste vastu ja koo MUSTRIT järgmiselt – vaata ülevalt: SUURUSED 13/14 – L: koo skeemi M.2 muster esimesed 9-12-12-17 silmust, M.3 muster, M.4 muster, M.3 muster, M.1 muster järgmised 44-44-52-52 silmust, M.3 muster, M.4 muster, M.3 muster, M.2 muster järgmised 18-24-24-34 silmust, M.3 muster, M.4 muster, M.3 muster, M.1 muster järgmised 44-44-52-52 silmust, M.3 muster, M.4 muster, M.3 muster, M.2 muster viimased 9-12-12-17 silmust. SUURUSED XL-XXXL: koo skeemi M.2 muster esimesed 8-12-17 silmust, M.3 muster, M.4 muster, M.3 muster, M.4 muster, M.3 muster, M.1 muster järgmised 52-52-52 silmust, M.3 muster, M.4 muster, M.3 muster, M.4 muster, M.3 muster, M.2 muster järgmised 16-24-34 silmust, M.3 muster, M.4 muster, M.3 muster, M.4 muster, M.3 muster, M.1 muster järgmised 52-52-52 silmust, M.3 muster, M.4 muster, M.3 muster, M.4 muster, M.3 muster, M.2 muster viimased 8-12-17 silmust. JÄLGI KOETIHEDUST! Jätka niimoodi mustriga. SAMAL AJAL, kui on kootud 9 cm, kasvata 1 silmus mõlemal pool mõlemat SM-i (edasi koo kasvatatud silmus skeemi M.2 mustrisse). Korda kasvatust iga 6-8-8-9-9-9-10 cm järel kokku 5 korda = 248-260-276-296-332-348-368 silmust. Kui on kootud 38-47-48-49-50-51-52 cm, koo maha mõlemal serval 6 silmust käeaukude jaoks (= 3 silmust mõlemal pool SM-i) ja lõpeta iga osa eraldi (jälgi, et palmikute keeramised on töö PP peale töö kaheks jagamist). SELJAOSA = 118-124-132-142-160-168-178 silmust. Koo ringvarrastel edasi-tagasi. Koo maha käeaukude kujundamiseks mõlemal serval iga rea alguses: 2 silmust 2-2-2-2-2-3-4 kord ja 1 silmus 1-1-2-3-4-4-5 korda = 108-114-120-128-144-148-152 silmust. Jätka mustriga. Kui on kootud 49-59-61-63-65-67-69 cm (kohanda nii, et järgmine rida on skeemide M.1, M.3 ja M.4 mustrite 7. rida) koo maha, SAMAL AJAL kahanda 24-24-26-26-36-36-36 silmust – vaata KAHANDAMISE NIPPI! ESIOSA = 118-124-132-142-160-168-178 silmust. Koo maha käeaukude jaoks samamoodi, nagu on kirjeldatud seljaosas. Kui on kootud 46-56-58-60-62-64-66 cm (kohanda nii, et järgmine rida on skeemi M.1 mustri esimene või 5. rida), koo maha kaelaaugu jaoks keskmised 40-40-48-48-48-48-48 silmust, SAMAL AJAL kahanda võrdsete vahedega neil silmustel 10-10-12-12-12-12-12 silmust – vaata KAHANDAMISE NIPPI! Nüüd lõpeta mõlemad õlad eraldi. Järgmisel real koo maha kaelakaare jaoks 2 silmust. Kui on kootud 49-59-61-63-65-67-69 cm (võrdle seljaosaga), koo silmused maha, SAMAL AJAL kahanda 7-7-7-7-12-12-12 silmust – vaata KAHANDAMISE NIPPI! PAREM VARRUKAS Kootakse ringselt. Loo 3,5 mm sukavarrastele 56-58-60-62-64-66-68 silmust. Koo 4 ringi ripskoes ja edasi koo soonikut 1 pr/1 ph, kuni töö kõrgus on 10 cm. Koo 2 ringi ripskoes, SAMAL AJAL viimasel real kasvata võrdsete vahedega 2 silmust = 58-60-62-64-66-68-70 silmust. Paigalda SM rea algusesse. Vaheta 4 mm sukavarraste vastu ja järgmisel real koo mustrit järgmiselt: skeemi M.2 muster esimesed 5-6-7-8-9-10-11 silmust, M.3 muster 2 korda, M.5 muster, M.3 muster 2 korda, M.2 muster viimased 5-6-7-8-9-10-11 silmust. Jätka mustriga samamoodi. SAMAL AJAL, kui on kootud 13-12-13-12-12-14-13 cm, kasvata 1 silmus mõlemal pool SM-i. Edasi koo kasvatatud silmused skeemi M.2 mustrisse. Korda kasvatusi iga 2-2,5-2-2-2-1,5-1,5 cm järel kokku 14-15-16-17-18-19-20 korda = 86-90-94-98-102-106-110 silmust. Kui on kootud 45-50-50-49-49-48-48 cm, koo maha 6 silmust kaenlaaugus (= 3 silmust mõlemal pool SM-i) ja lõpeta kududes edasi-tagasi (jälgi, et palmikukeerud tulevad töö paremale poole). Koo maha varruka õlaosa jaoks mõlemal serval iga rea alguses: 2 silmust 2-4-6-7-9-10-12 korda ja 1 silmus 12-10-8-8-6-6-4 korda = 48 silmust jääb vardale kõikidel suurustel. Töö kõrgus on 55-60-60-60-60-60-60 cm. EDASI MÕÕDA SIIT! Koo allesjäänud silmused skeemi järgi, kuni töö kõrgus on 12-14-13-15-17-18-19 cm. Nüüd koo maha varruka paremalt küljelt, iga rea alguses töö PP järgmiselt: 24 silmust 1 kord (SAMAL AJAL kahanda võrdsete vahedega 7 silmust mahakudumise real, st. koo 14-nel silmusel 24-st 2 pr kokku enne kui kood maha), 3 silmust 2 korda. Koo 3 rida ilma kahanduseta. Järgmisel real koo maha 1 silmus = 17 silmust jääb kõikidel suurustel. Jätka, kuni töö kõrgus on 19-21-22-24-26-27-28 cm. Koo silmused maha, SAMAL AJAL kahanda võrdsete vahedega 4 silmust mahakudumise real. Kogu varruka kõrgus on umbes 74-81-82-84-86-87-88 cm. VASAK VARRUKAS Koo nagu parem varrukas, ainult koo ülevalt maha vastaspoolel, st. iga rea alguses töö VP. ÜHENDAMINE Ühenda paika varrukad. Õmble kehaosa õlasilmused skeemi M.3 mustris varruka külgedele (õmble mööda silmuste välimisi aasasid). Ühenda varrukaülaosad kukla tagant kinni ja õmble seljaosa külge. KRAE Korja üles 3,5 mm väiksematele ringvarrastele 94-94-108-108-108-108-108 silmust ümber kaelakaare. Koo 4 ringi ripskoes, SAMAL AJAL viimasel real kasvata võrdsete vahedega 22-22-26-26-26-26-26 silmust = 116-116-134-134-134-134-134 silmust. Koo soonikut 1 pr/1 ph. Kui soonik on 8 cm, koo 2 ringi ripskoes. Koo silmused maha. Muura kaelus kahekorra töö pahemale poole ja kinnita. |
|||||||||||||||||||
Skeemi seletused |
|||||||||||||||||||
|
|||||||||||||||||||
 |
|||||||||||||||||||
 |
|||||||||||||||||||
Kas oled teinud seda mustrit?Lisa oma piltidele viide #dropspattern #dreamsofaransweater või saada link projektile meie #dropsfan galeriisse. Vajad abi selle mustriga?Garnstudio.com kodulehel on 13 õppevideot, küsimuste/vastuste osa ja muudki. © 1982-2026 DROPS Design A/S. Kõik õigused kaitstud. See dokument, ning selle alajaotused on kaitsud autoriõigustega. Loe rohkem, mida meie mustritega võib teha, iga mustrilehe alt meie kodulehel. |
|||||||||||||||||||

Tegeledes üle 40 aasta kudumise ja heegeldamise disainidega, pakub DROPS Design ühte suurimat tasuta mustrite kollektsiooni internetis - tõlgituna 17 keelde. Tänaseks on meil 333 kataloogi ja 12537 mustrit - millest 9698 on tõlgitud Eesti keelde.
Me anname endast parima, et tuua teieni kõike mida kudumine ja heegeldamine võib pakkuda - inspiratsiooni, nõuandeid ning ka kvaliteetseid lõngu parima hinnaga! Soovid kasutada mustreid muukski, kui ainult oma tarbeks? Loe infot meie Copyright osas iga lehekülje all. Rõõmsat loomist!
Jäta kommentaar mustrile DROPS 135-3
Ootame kommentaare selle mustri kohta!
Kui soovid midagi küsida, siis kiiremaks vastuse saamiseks veendu, et valid õige kategooria alloleval formil. Vajaliku väljad *.