
Categorias populares
Procura um fio?


Comentários / Perguntas (100)
![]() Fatma escreveu:
Fatma escreveu:
Hei det var en perfekt side men noen språk mangler foreksempel jeg er tyrkere hvis liger tyrkisk språk det blir mere fordele. Jeg følger om hyggelig strike side takk skal du ha 💐
20.12.2024 - 01:54
![]() Ginette Gagné escreveu:
Ginette Gagné escreveu:
Est-ce que je peux remplacer les côtes anglaises par des fausses côtes anglaises
24.11.2024 - 16:19DROPS Design respondeu:
Bonjour Mme Gagné, probablement, pensez juste à bien vérifier votre tension en largeur mais aussi en hauteur et adaptez si besoin les augmentations en fonction de votre tension en hauteur si elle est différente pour bien conserver les bonnes proportions. Bon tricot!
25.11.2024 - 09:21
![]() Conni Lindberg Andersen escreveu:
Conni Lindberg Andersen escreveu:
Har svært ved at tyde A1 de fire omgange, det er vel alle omgange fra retsiden og ikke kun de 2 første omgange? Hilsen fra Conni
14.10.2024 - 10:56DROPS Design respondeu:
Hej Conni, øverst i opskriften kan du klikke på Videoer, her finder du videoer med diagrammerne til denne vest :)
18.10.2024 - 08:31
![]() Cornelia Becker escreveu:
Cornelia Becker escreveu:
Hallo, wenn ich die 9cm der Halsblende im Patentmuster gestrickt habe! In welcher Reihe beginne ich bei A1, A2 und A3 zu stricken?
10.10.2024 - 23:15DROPS Design respondeu:
Liebe Frau Becker, beachten Sie, daß A.1 nach einer Reihe wie die letzte Reihe A.1a gestrickt wurde; dann beginnen Sie A.1a, A.2 und A.3 bei der 1. Reihe. Viel Spaß beim Stricken!
11.10.2024 - 08:09
![]() Cornelia Becker escreveu:
Cornelia Becker escreveu:
Hallo, ich möchte dieses Modell im zweifarbigen Patent in Größe xxl stricken! Wieviel Wolle benötige ich pro Farbe?
28.09.2024 - 17:50DROPS Design respondeu:
Liebe Frau Becker, da wir dieses Modell nur einfarbig gestrickt haben, haben wir nur dafür diese Erfahrung; gerne kann Ihnen aber damit Ihr DROPS Händler - auch per Telefon oder per E-Mail - weiterhelfen. Viel Spaß beim Stricken!
30.09.2024 - 08:01
![]() Inga escreveu:
Inga escreveu:
I am still having trouble. My math is off. If I start before increasing with 64 stitches increase A 2 and 3 equals 12 increases then A 2a and A3a x11 equals 44 stitches, this ís 120 stitches. I am assuming that I have it correct. 4 increases per round. Please help.
24.06.2024 - 18:09DROPS Design respondeu:
Dear inga, you will increase 2 sts on every increase row in A.2a and A.3a, before A.2a you increase 2 times 2 stitches (= 4 sts) then you repeat 11 times A.2a where you will then increase 2 sts x 11 (= 22 sts), as you work A.2a/A.3a a total of 4 times in the round, you will increase a total of 22 sts 4 times = 104 sts in total + the 64 sts at the beg = 168 stitches. Happy knitting!
25.06.2024 - 08:49
![]() Alice Dolleris escreveu:
Alice Dolleris escreveu:
Super model let at gå til
21.06.2024 - 13:52
![]() Inga escreveu:
Inga escreveu:
I know how to do the increase. Not sure how this chart is put together. 1 vertically and so on. All charts I have ever worked with have a clear row and I feel this one does no. I am about to toss this project.
19.06.2024 - 18:43DROPS Design respondeu:
Dear Inga the charts shows a repeat of the pattern. Verically means the rows above each other. Please remember, that helping over the internet is difficult, because we cannot see your project, thus it sometimes hard to figure out what might be the problem. This is why you can always ask for help (either is person or over the phone) in the store where you bought your DROPS yarn from. Happy Crafting!
20.06.2024 - 00:34
![]() Inga escreveu:
Inga escreveu:
I an an experienced knitter with dozens of sweaters under my belt. However I can’t figure this pattern. The increase is not adding up. I have unraveled the piece five times, following the pattern anyway I possibly can. I am about to give up on it. Please if you can clarify the increases and “vertically “ I have never been this lost in any pattern, stranded, lace or any other Thanks
19.06.2024 - 13:32DROPS Design respondeu:
Dear Inga, maybe this video and the 2nd part here can help you understanding how to work the increases in the English rib to this pattern? Happy knitting!
19.06.2024 - 16:23
![]() Inga escreveu:
Inga escreveu:
I am unable to understand the beginning of the yoke. Please help, I can not get the stitches to add up.
07.06.2024 - 16:51DROPS Design respondeu:
Dear Inga, which size are you working? For example, for the smallest size, you should have 56 stitches at the beginning of the yoke. Then you work the first row as follows: A.1 3 times, A.2 once, A.1 7 times, A.3 once, A.1 5 times, A.2 once, A.1 7 times, A.3 once and finish with A.1 twice. A.1 to A.3 are the charts, which you can find below. Since all charts have only 2 stitches in the first row, if you add up the numbers, it gives you 56 stitches, so it's correct. You can check the following lesson for more information on reading knitting charts: https://www.garnstudio.com/lesson.php?id=68&cid=19. Happy knitting!
09.06.2024 - 22:52
|
||||||||||||||||||||||||||||
Easy Over#easyovervest |
||||||||||||||||||||||||||||
 |
 |
|||||||||||||||||||||||||||
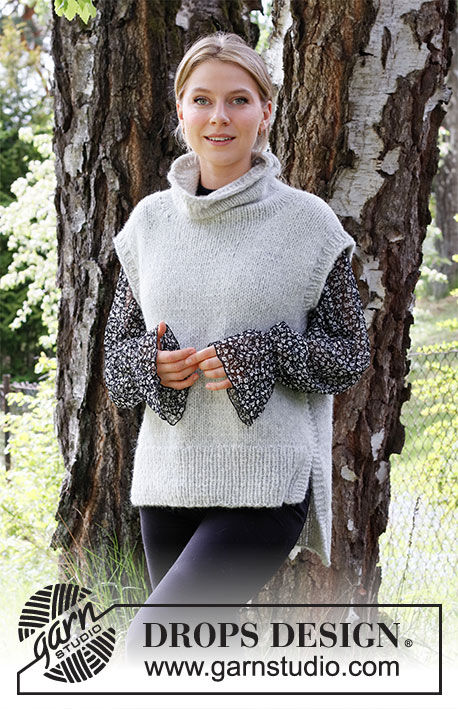
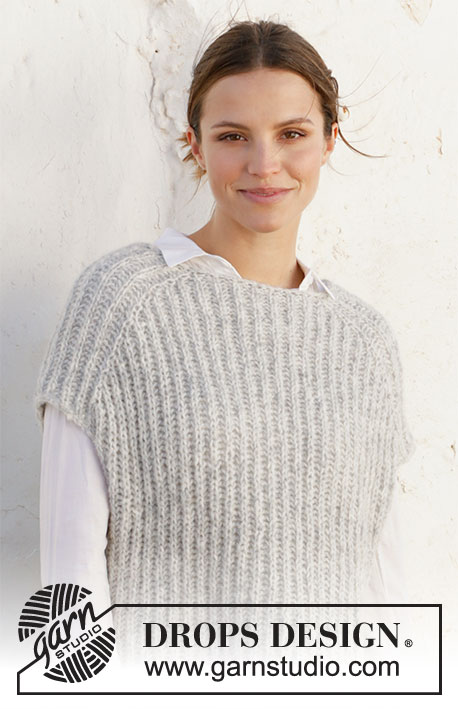
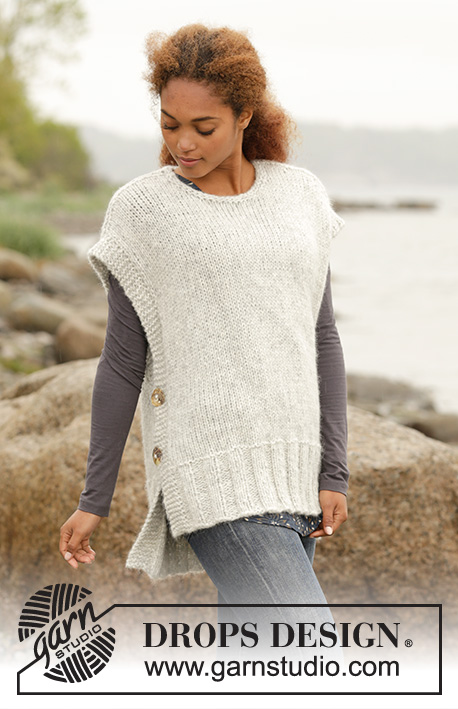
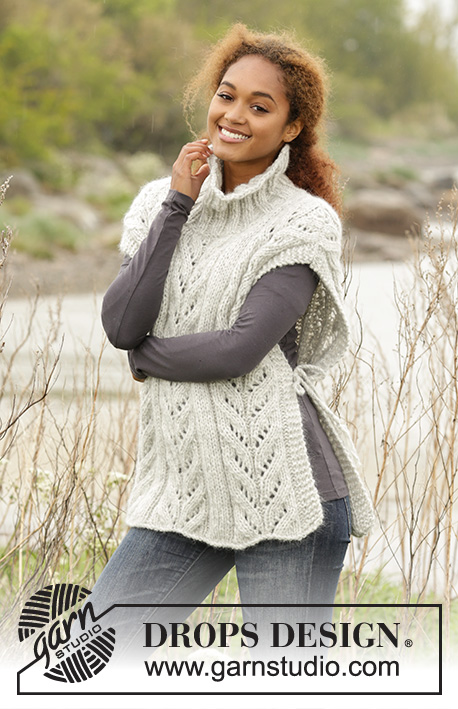
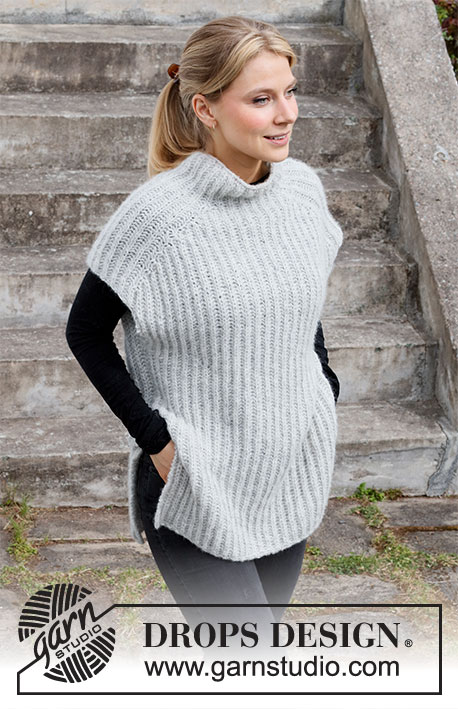
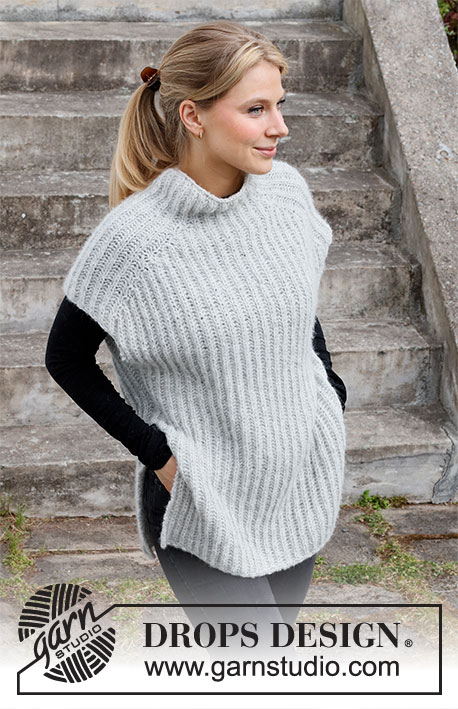
Colete tricotado de cima para baixo, em canelado inglês, em DROPS Air. Do XS ao XXL
DROPS 217-13 |
||||||||||||||||||||||||||||
|
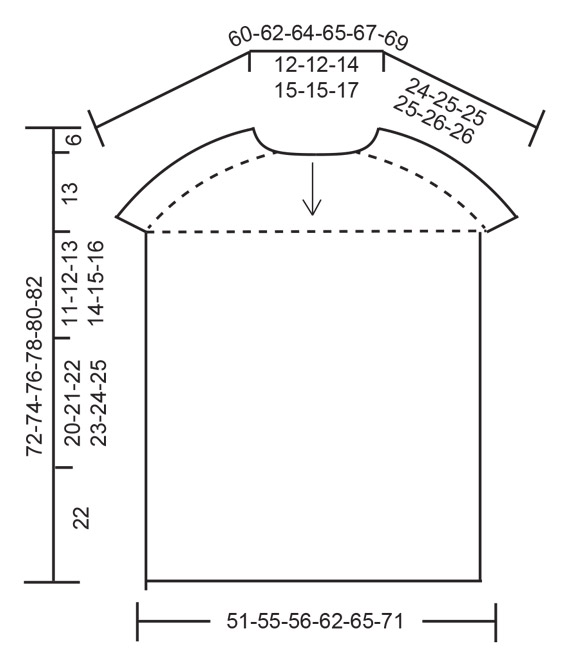
------------------------------------------------------- TÉCNICAS USADAS: ------------------------------------------------------- PONTO JARRETEIRA (em idas e voltas): Tricotar todas as carreiras em meia. 1 barra jarreteira = tricotar 2 carreiras meia. PONTO FANTASIA: Ver os diagramas A.1 a A.4 (tricotam-se em canelado inglês). DIMINUIÇÕES (a intervalos regulares): Para calcular quando diminuir, contar o número total de malhas (por ex. 62 malhas) e dividi-lo pelo número de diminuições a fazer (por ex. 10) = 6.2. Para diminuir neste exemplo, vai-se tricotar juntamente em liga cerca de cada 5.ª e 6.ª malha. ------------------------------------------------------- A PEÇA COMEÇA AQUI: ------------------------------------------------------- COLETE - SUMÁRIO DA PEÇA: Tricotar o gola e o encaixe de cima para baixo, em redondo na agulha circular a partir do meio das costas. Aumenta-se para os ombros e divide-se então a peça para terminar a frente e as costas separadamente. GOLA: Montar 66-66-70-74-74-78 malhas com a agulha circular 6 mm em Air. Tricotar 1 volta liga diminuindo 10 malhas a intervalos regulares – ver DIMINUIÇÕES = 56-56-60-64-64-68 malhas. Continuar com a agulha circular 7 mm e tricotar A.1 em todas as malhas até a peça medir 9 cm. ENCAIXE: Tricotar, então, da seguinte maneira: A.1 (= 2 malhas) por cima das 6-6-6-8-8-8 primeiras malhas (= metade das costas), A.2 (= 2 malhas), A.1 por cima das 14 malhas seguintes, A.3 (= 2 malhas) (= ombro), A.1 por cima das 10-10-12-14-14-16 malhas seguintes (= frente), A.2 por cima das 2 malhas seguintes, A.1 por cima das 14 malhas seguintes, A.3 por cima das 2 malhas seguintes (= ombro), e A.1 por cima das 4-4-6-6-6-8 últimas malhas (= metade das costas). MANTER A MESMA TENSÃO DA INDICADA PARA A AMOSTRA! Quando A.1 estiver terminado, repetir A.1a em altura. Quando 2 e A.3 estiverem terminados, repetir A.2a e A.3a em altura, ou seja, continuar a aumentar a cada 6 carreiras - tricotar os aumentos em canelado inglês. Quando A.2a e A.3a tiverem sido tricotados 8-9-9-10-11-12 vezes em altura ao todo, temos 136-144-148-160-168-180 malhas. Tricotar A.1a em todas as malhas até a peça medir 24-25-25-25-26-26 cm na parte mais comprida (medir ao longo do ombro) - ajustar a altura para que a carreira seguinte seja uma carreira de malhas liga. Dividir, então, a peça para a frente e as costas e arrematar as malhas dos ombros da seguinte maneira: Tricotar 26-28-28-32-34-36 malhas em canelado inglês, 1 malha em ponto jarreteira – ver acima (= metade das costas), arrematar as 15 malhas seguintes (arrematar as laçadas como se fossem malhas), 1 malha em ponto jarreteira, tricotar 51-55-57-63-67-73 malhas em canelado inglês, 1 malha em ponto jarreteira (= frente), arrematar as 15 malhas seguintes (arrematar as laçadas como se fossem malhas), 1 malha em ponto jarreteira e tricotar as 25-27-29-31-33-37 últimas malhas em canelado inglês (= metade das costas). Cortar o fio. Deixar as malhas da frente na agulha. COSTAS: = 53-57-59-65-69-75 malhas. Tricotar pelo direito da seguinte maneira: Tricotar 1 malha em ponto jarreteira, A.4 (= 2 malhas) até restar 1 malha (ou seja, o canelado inglês começa e termina com 1 malha liga do canelado inglês), e terminar com 1 malha em ponto jarreteira. Continuar desta maneira em idas e voltas. Quando a peça medir 11-12-13-14-15-16 cm, colocar 1 marcador de cada lado da peça – irá servir para marcar a costura do lado. Quando a peça medir 66-68-70-72-74-76 cm a partir do decote, arrematar em meia - arrematar as laçadas como se fossem malhas (para evitar que as malhas arrematadas fiquem demasiado apertadas). FRENTE: Tricotar as 53-57-59-65-69-75 malhas da frente como as das costas. MONTAGEM: Começando no marcador do lado, costurar as costas e a frente a partir do marcador descendo cerca de 20-21-22-23-24-25 cm. Os 22 cm da parte de baixo = fendas dos lados. |
||||||||||||||||||||||||||||
Explicações do diagrama |
||||||||||||||||||||||||||||
|
||||||||||||||||||||||||||||
 |
||||||||||||||||||||||||||||
 |
||||||||||||||||||||||||||||
Terminou este projecto?Então, identifique as suas fotos com as tags #dropspattern #easyovervest ou mostre-as na galeria #dropsfan. Precisa de ajuda para este modelo?Encontrará 19 turotiais em vídeo, uma rubrica Comentários/Perguntas e muito mais ao visitar a página do modelo em www.garnstudio.com © 1982-2026 DROPS Design A/S. Todos os direitos reservados. Este documento, incluuindo as suas su-secções, tem copyrights. Saia mais o que pode fazer com os nossos modelos no fim de cada uma das páginas do nosso site. |
||||||||||||||||||||||||||||


Com mais de 40 anos no design de modelos de tricô e de croché, a DROPS Design oferece uma das mais vastas colecções demodelos gratuitos na Internet - traduzidos em 17 línguas. Neste dia de hoje, temos 324 catálogos e 12290 modelos - dos quais 12271 estão traduzidos em português.
Trabalhamos com muito empenho para lhe proporcionar o melhor que o tricô e o croché têm para oferecer, para lhe fornecer inspiração e conselhos bem como fios da mais elevada qualidade a preços incríveis! Gostaria de usar os nossos modelos para outros fins que não uso pessoal? Pode ler o que lhe é permitido fazer no Copyright texto que se encontra na parte de baixo de todos os nossos modelos. Bom tricô! Bom croché!
Deixe um comentário acerca do modelo DROPS 217-13
Gostaríamos muito de saber o que tem a dizer-nos acerca deste modelo!
Se deixar uma pergunta acerca do modelo, certifique-se de que escolhe a categoria adequada no formulário abaixo para acelerar o processo relativo à resposta. Os campos obrigatórios estão assinalados com um *.