
Categorias populares
Procura um fio?


Comentários / Perguntas (16)
![]() Sharon escreveu:
Sharon escreveu:
Any suggestion on how I could make this a bit wider? This was a funn project. Instruction was easy to follow. S
06.12.2021 - 16:33DROPS Design respondeu:
Hi Sharon, If you cast on more stitches then the head band will be wider. Just make sure the number of stitches is divisible by 3 + 2. Happy knitting!
07.12.2021 - 07:03
![]() Stephanie Bedard escreveu:
Stephanie Bedard escreveu:
Hi there, I am stuck at the middle part! Here’s the part of the pattern I’m having issues with: ROW 5: K 1 edge st, * 1 YO, K 2 in next st *, repeat from *-* 4 times in total and finish with K 1 edge st = 14 sts on needle I had 6 sts on my needle as mentioned after decreasing on row 1 as expected, but when increasing at row 5, I am left with only 11 sts and not 14. Is there any troubleshooting possible here ? Thank you!!
03.12.2021 - 18:29DROPS Design respondeu:
Dear Stephanie, you have 2 edge stitches on each side + 4 YO + 2x4=8 sts. So in total you have 14 stitches. You k2 in each of the 4 sts between the edge stitches, so you increase one stitch in each stitch. Happy knitting!
05.12.2021 - 17:27
![]() Sharon escreveu:
Sharon escreveu:
What is the correct size needles to make the headband. A size 10,75 give a head band hard like a board. This cannot be the correct needles. Is the size give in the pattern correct.
26.11.2021 - 18:29DROPS Design respondeu:
Dear Sharon, everyone knits with a different gauge, Pleade make a swatch and use the needles with which you can achieve the knitting tension goven in the pattern. Happy Stitching!
28.11.2021 - 00:26
![]() Sharon escreveu:
Sharon escreveu:
Hi, looking to start the headband an am confused on how to join the back invisible using kitichner stitch. The first time I made this 3 needle bind off was the solution but it was not invisible and an unhappy with the results. The one am working on now is a Christmas gift so it has to be prefect. So my question again is how do I kitichner the back to make it invisible? Thanks for your response.
26.11.2021 - 09:33DROPS Design respondeu:
Dear Sharon, this video shows how to sew together patterns such as rib in this pattern and should help you to finish your piece. Happy finishing!
26.11.2021 - 15:46
![]() Pru escreveu:
Pru escreveu:
Hello- on knitting the headband as per the instructions...i get a 'seed stitch' pattern...ive ripped out and started 5 times now...am i reading this wrong? please help me...thank you!!
07.12.2019 - 22:19DROPS Design respondeu:
Dear Pru, check your number of stitches (you should have 14) and remember to work with 1 edge stitch in garter stitch in each side.On row 1, work: K1 (edge st), then (K1, P1, K1) until 1 stitch remain, K the last st. On row 2, work: K1 (edge st), then repeat: (P1, K1, P1) until last st remain, K last st. Repeat rows 1 and 2. Happy knitting!
09.12.2019 - 08:54
![]() Tanja Kroczek escreveu:
Tanja Kroczek escreveu:
Hallo Zusammen! Ich stricke gerade das Stirnband. Nach dem 1. Absatz "Wie folgt weiterstricken" steht unter dem 1. Punkt: 6 Maschen übrig, was passiert damit?
02.02.2019 - 12:16DROPS Design respondeu:
Liebe Frau Kroczek, bei der 1. Hin-Reihe hier nehmen Sie Maschen ab (= 2 M so abheben als würden sie re zusgestr, 1 M re, die 2 abgehobenen M überziehen), am Ende dieser Reihe sind es nur noch 6 Maschen auf der Nadel. Viel Spaß beim stricken!
04.02.2019 - 11:06
![]() Nagymama escreveu:
Nagymama escreveu:
Pedig automatával könnyebb és mindenekelőtt pontosabb lenne a fordítás! Egyszer kell jól beprogramozni, és onnantól kezdve nem hibázik. Nem úgy, mint... na mindegy, szóval a leírás még mindig nem jó, mert van ám 6. meg 7. sora is. Hogy a helyesírásról meg az elírásokról ne is beszéljünk. :(
01.10.2018 - 09:39
![]() Nagymama escreveu:
Nagymama escreveu:
Már megint rossz a magyar leírás. Nem ez az első eset. Tessenek már végiggondolni, hogy ha a fejpántnál ezt a két sort váltogatjuk, akkor abból milyen minta lesz!
30.09.2018 - 09:34DROPS Design respondeu:
Kedves Nagymama! Köszönjük, hogy felhívta a figyelmünket a hibára, ami így javításra is került. A fordításokat nem automata készíti, így sajnos, a legnagyobb odafigyelés mellett is előfordulhatnak hibák. Célunk, hogy minél pontosabb minták legyenek a weboldalon, ezért mindig köszönettel vesszük, ha jelzést kapunk egy-egy javítani valóról. Sikeres kézimunkázást!
30.09.2018 - 14:52
![]() Gail Thorpe escreveu:
Gail Thorpe escreveu:
Thank you for your help on pattern #164-27. The tutorial is very helpful. I have another question. I knit the piece in Polaris yarn. Should I block it before I sew it together? The yarn is so plush and heavy that it seems daunting to plunge it under water. Will it be okay to do so? Please give me some detailed instructions. Thank you.
16.06.2017 - 01:11DROPS Design respondeu:
Dear Mrs Thorpe, some knitters block every piece, some others don't. Feel free to contact your DROPS store even per mail or telephone they will have some more individual tipps for you. Happy knitting!
16.06.2017 - 09:12
![]() Anne escreveu:
Anne escreveu:
Que veux dire, pour le rang 2 du tour de cou: i m lis à l'end. Que veux dire lis???je n'ai jamais pu trouver l'explication! Merci
01.03.2017 - 19:52DROPS Design respondeu:
Chere Anne, 1 maille lis est la premiere maille du rang. Parfois elle est tricotee autrement que les autres mailles pour que le bord du tricot soit esthetique et facile a assemler a la fin. Bon tricot!
01.03.2017 - 20:27
|
|
What A Sight!#whatasightset |
|
|
|
|
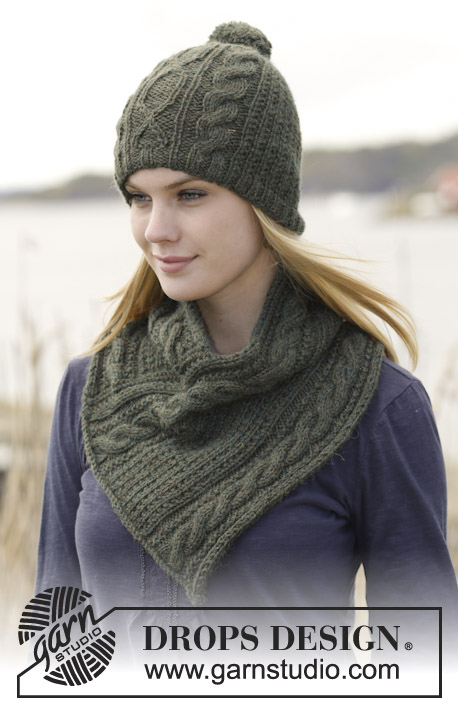
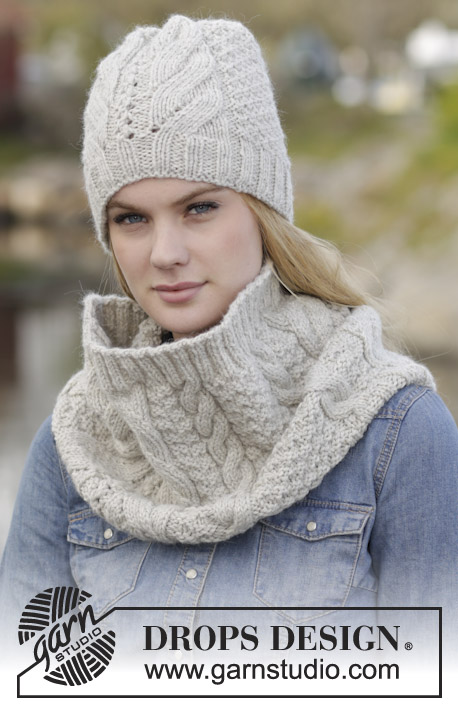
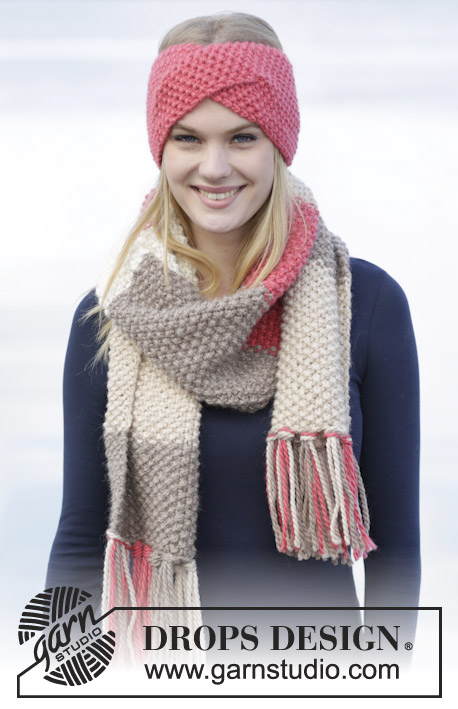
Conjunto DROPS: Fita de cabelo e gola em canelado/barra, em ”Polaris”.
DROPS 164-27 |
|
|
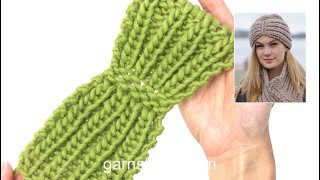
---------------------------------------------------------- NOTA: Existem termos diferentes de tricô e croché em português de Portugal e do Brasil. Malha = Ponto Canelado = Barra Ponto Jarreteira = Cordões de Tricô Ponto Liga = Ponto Tricô Croché : mpa – meio ponto alto pa – ponto alto pad – ponto alto duplo pat – ponto alto triplo pb – ponto baixo pbx – ponto baixíssimo pc – ponto corrente ---------------------------------------------------------- FITA DE CABELO: Montar 14 ms/pts com as agulhas 7 mm em Polaris e tricotar da seguinte maneira: CARREIRA 1 (= pelo avesso): 1 m/p ourela em meia, *1 m/p meia, 1 m/p liga/tricô, 1 m/p meia*, repetir de * a * 4 vezes ao todo e terminar com 1 m/p ourela em meia. CARREIRA 2 (= pelo direito): 1 m/p ourela em meia, *1 m/p liga/tricô, 1 m/p meia, 1 m/p liga/tricô*, repetir de * a * 4 vezes ao todo e terminar com 1 m/p ourela em meia. Repetir as carreiras 1 e 2 até a peça medir cerca de 23 cm - ajustar a altura para que a carreira seguinte seja pelo direito. NÃO ESQUECER DE MANTER A MESMA TENSÃO DA INDICADA PARA A AMOSTRA! Tricotar então da seguinte maneira: CARREIRA 1 (= pelo direito): 1 m/p ourela em meia, *deslizar 2 ms/pts como se fosse tricotá-las juntamente em meia, 1 m/p meia, passar as ms/pts deslizadas por cima da m/p tricotada *, repetir de * a * 4 vezes ao todo e terminar com 1 m/p ourela em meia = restam 6 ms/pts. CARREIRA 2 (= pelo avesso): Tricotar todas as ms/pts em meia. CARREIRA 3: Tricotar todas as ms/pts em meia. CARREIRA 4: Tricotar todas as ms/pts em meia. CARREIRA 5: 1 m/p ourela em meia, *1 laçada, tricotar 2 vezes a m/p seguinte em meia (= alternadamente na alça de trás e na alça da frente*, repetir de * a * 4 vezes ao todo e terminar com 1 m/p ourela em meia = 14 ms/pts. CARREIRA 6: 1 m/p ourela em meia, *1 m/p meia, 1 m/p liga/tricô, 1 m/p meia*, repetir de * a * 4 vezes ao todo e terminar com 1 m/p ourela em meia - NOTA: Tricotar as laçadas torcidas (= na alça de trás e não na alça da frente) na carreira seguinte, para evitar buracos. CARREIRA 7: 1 m/p ourela em meia, *1 m/p liga/tricô, 1 m/p meia, 1 m/p liga/tricô*, repetir de * a * 4 vezes ao todo e terminar com 1 m/p ourela em meia. Repetir as carreiras 6 e 7 até a peça medir cerca de 48 cm (ou o comprimento desejado) e arrematar as ms/pts como elas se apresentam. Unir a fita de cabelo a meio da parte de trás com a técnica de grafting para que a costura seja invisível. ---------------------------------------------------------- GOLA: PONTO JARRETEIRA (em idas e voltas): Tricotar todas as carreiras em meia. 1 barra jarreteira = 2 carreiras meia. DICA MUDANÇA DE NOVELO: Para mudar de novelo em Polaris, dividir o fio do novelo que acabou em 2 nos 15 últimos cm – cortar uma das 2 partes e fazer o mesmo no princípio do novo novelo. Unir os 15 primeiros e os 15 últimos cm, colocando um fio por cima do outro, para que o novo fio tenha uma espessura igual e continuar a tricotar – isto faz com que obtenha uma mudança de novelo invisível. ---------------------------------------------------------- GOLA: Tricota-se em idas e voltas e, depois, une-se com uma costura no fim. Montar 18-21 ms/pts com as agulhas 10 mm em Polaris. Tricotar 2 barras em ponto jarreteira - ver acima. Continuar então em canelado/barra da seguinte maneira: CARREIRA 1 (= pelo direito): 2 ms/pts meia, *2 ms/pts liga/tricô, 1 m/p meia*, repetir de * a * até restar 1 m/p e terminar com 1 m/p meia. CARREIRA 2 (= pelo avesso): 1 m/p ourela em meia, *1 m/p liga/tricô, 2 ms/pts meia *, repetir de * a * até restarem 2 ms/pts, terminar com 1 m/p liga/tricô e 1 m/p ourela em meia. Repetir as carreiras 1 e 2. NÃO ESQUECER DE MANTER A MESMA TENSÃO DA INDICADA PARA A AMOSTRA e VER DICA MUDANÇA DE NOVELO. A 23-26 cm de altura total, colocar 1 marcador na 1.ª m/p na agulha (visto pelo direito). Tricotar até a peça medir 86-88 cm, Tricotar 2 barras jarreteira e arrematar todas as ms/pts em meia pelo direito. MONTAGEM: Dobrar a gola para que as ms/pts arrematadas fiquem contra o lado, entre a carreira de montagem e o marcador e costurar orla com orla. |
|
Terminou este projecto?Então, identifique as suas fotos com as tags #dropspattern #whatasightset ou mostre-as na galeria #dropsfan. Precisa de ajuda para este modelo?Encontrará 19 turotiais em vídeo, uma rubrica Comentários/Perguntas e muito mais ao visitar a página do modelo em www.garnstudio.com © 1982-2026 DROPS Design A/S. Todos os direitos reservados. Este documento, incluuindo as suas su-secções, tem copyrights. Saia mais o que pode fazer com os nossos modelos no fim de cada uma das páginas do nosso site. |


Com mais de 40 anos no design de modelos de tricô e de croché, a DROPS Design oferece uma das mais vastas colecções demodelos gratuitos na Internet - traduzidos em 17 línguas. Neste dia de hoje, temos 324 catálogos e 12290 modelos - dos quais 12271 estão traduzidos em português.
Trabalhamos com muito empenho para lhe proporcionar o melhor que o tricô e o croché têm para oferecer, para lhe fornecer inspiração e conselhos bem como fios da mais elevada qualidade a preços incríveis! Gostaria de usar os nossos modelos para outros fins que não uso pessoal? Pode ler o que lhe é permitido fazer no Copyright texto que se encontra na parte de baixo de todos os nossos modelos. Bom tricô! Bom croché!
Deixe um comentário acerca do modelo DROPS 164-27
Gostaríamos muito de saber o que tem a dizer-nos acerca deste modelo!
Se deixar uma pergunta acerca do modelo, certifique-se de que escolhe a categoria adequada no formulário abaixo para acelerar o processo relativo à resposta. Os campos obrigatórios estão assinalados com um *.