
Categorias populares
Procura um fio?


Comentários / Perguntas (6)
![]() Jackie escreveu:
Jackie escreveu:
Make sure you have the stitch markers in place. Think of M1a chart as the 1st stitch, then repeat M1b 3 times, so you reach the 2nd stitch marker or the half way point. Now M1a becomes your next stitch and then repeat M1b another 3 times. When you come to the 6th row of the pattern remember to put in that stitch from M1a after each stitch marker. The M1a chart is the line of stitches you will use to crochet into when you make the border. Good luck. Jackie
14.11.2023 - 17:54
![]() Kelly Robertson escreveu:
Kelly Robertson escreveu:
I would call myself an intermediate knitter. I understood the pattern right away. I am not putting anyone down in anyway, I just want to help. I am taking pictures as I progress if they are any use to you. I think people just need to see the start of it in picture form. And then they will say ahhhh now I get it!!! So easy and cute. I want others to be able to whip these up :)
10.01.2023 - 23:42
![]() Paula escreveu:
Paula escreveu:
I have tried all ways to use this pattern but cannot make any sense. I have even tried to mark out on a graph.
14.12.2019 - 18:34DROPS Design respondeu:
Dear Paula, should you need any individual assistance, you are welcome to contact the store where you bought the yarn, even per mail or telephone. Happy knitting!
16.12.2019 - 09:40
![]() Patti escreveu:
Patti escreveu:
I am an experienced knitter, but this pattern does not make sense. I understand that it is double side, but it does work woth the diagram. Is there just a written pattern for row to row and you could just sew both sides together or crochet them together with the crochet edging?
11.12.2019 - 03:02DROPS Design respondeu:
Dear Patti, you will work the potholder in the round, ie cast on 74 stitches and then work the diagrams in the round as follows: M.1A (= first stitch at beg of each round = side of piece), repeat M.1B a total of 3 times (= snowmenn) = 1 st + 3x 12 sts= 37 sts. Then repeat one more time M.1A (= 38th stitch = other side of potholder) and M.1B. When piece is knitted, just crochet the 2 rounds for the edge around whole potholder (working in cast-on edge, sides and cast off edge). But you can just sew bottom and top without crochet edge if your rather. Happy knitting!
11.12.2019 - 08:45
![]() Salli Bordfeld escreveu:
Salli Bordfeld escreveu:
Is there a tutorial for this pattern? I am an experienced knitter but can’t figure out the pattern whatsoever! How can you knit a circular way for a flat cloth? Also casting on 74 stitches doesn’t seem To work out w the graph of stitches!
07.09.2019 - 06:24DROPS Design respondeu:
Dear Sali, this is a double-side pot holder, so you'll knit it in the round, then fold it and work a crochet finishing border through both layers. Happy crafting!
08.09.2019 - 10:47
![]() Marit Haug escreveu:
Marit Haug escreveu:
Jeg forsøker å strikke disse grytelappene, men jeg sliter med å forstå mønsteret.Jeg får det ikke til å stemme.For det første , er det " snømenn" på begge sider av grytekluter? For det andre, skal både mønster M1A og M1B fortsette rundt det hele.For hvis jeg starter på M1A på 6 omgang blir det fire hvite masker først.Er det riktig? Gjentar jeg dette omgangen rundt ,stemmer det ikke på neste omgang. Jeg er ingen dreven strikker.😄
05.01.2019 - 15:37DROPS Design respondeu:
Hei Marit. Ja, det er snømenn på begge sider: Du strikker M.1A (=1 m) og så gjentas M.1B 3 ganger = 37 m (den ene siden av grytekluten). Så gjentar du dette mønsteret 1 gang til. Du fortsetter slik oppover, med M.1A over maskene med merker i. På 6 omgang vil du få 4 m med hvit etter hverandre akkurat i overgangen mellom A.1A og A.1B (starten og midten av omgangen). Du vil avslutte 6 omgang med 3 hvite og 1 rød m, og videre starte 7 omgang med 1 hvit, 1 rød, 1 hvit, 3 rød osv. mønsteret vil derfor «brytes» i overgangen mellom A.1A og A.1B. Husk at du skal brette arbeidet ved merkene så dette vil ikke synes like godt når det er ferdig. God fornøyelse.
07.01.2019 - 09:56
|
||||||||||||||||
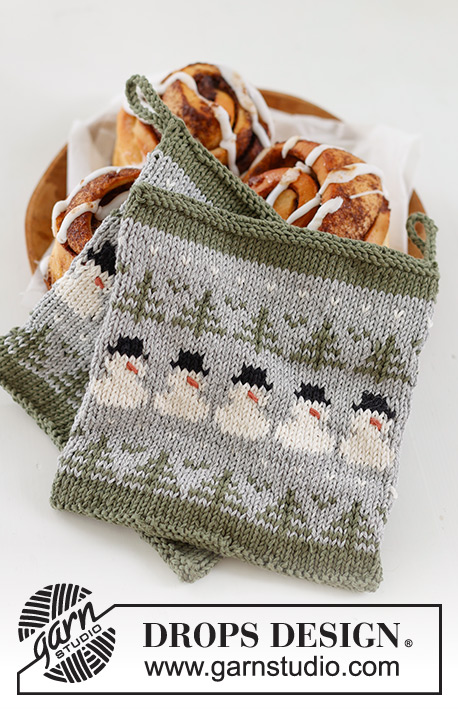
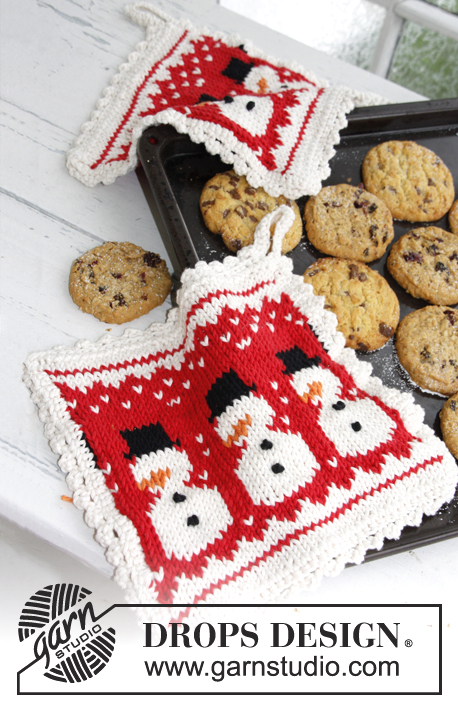
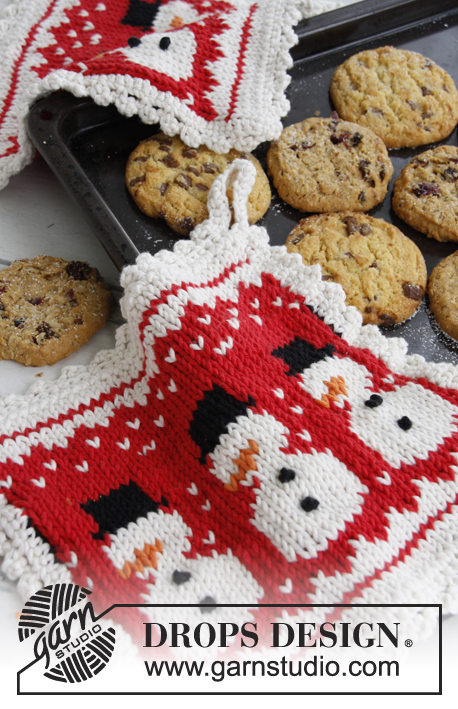
3 Little Snowmen#3littlesnowmenpotholders |
||||||||||||||||
 |
 |
|||||||||||||||
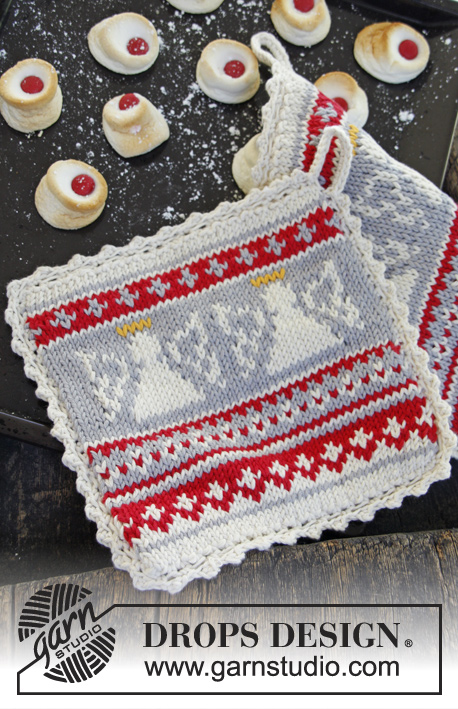
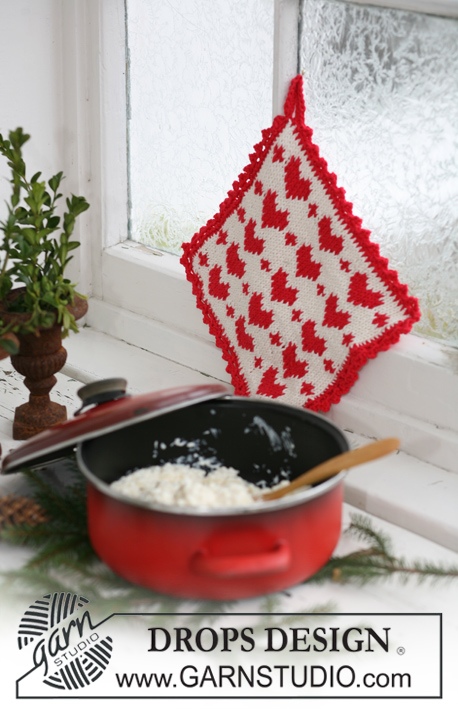
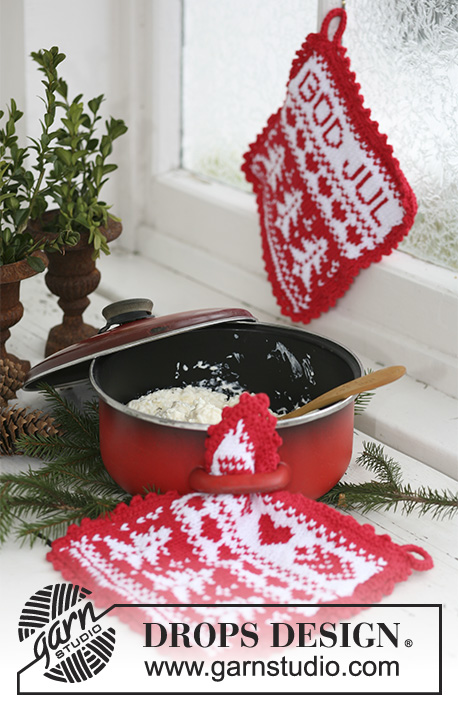
Pegas jacquard DROPS, para o Natal, em "Paris".
DROPS Extra 0-792 |
||||||||||||||||
|
-------------------------------------------------------- NOTA: Existem termos diferentes de tricô e croché em português de Portugal e do Brasil. Malha = Ponto Canelado = Barra Ponto Jarreteira = Cordões de Tricô Ponto Liga = Ponto Tricô Croché : mpa – meio ponto alto pa – ponto alto pad – ponto alto duplo pat – ponto alto triplo pb – ponto baixo pbx – ponto baixíssimo pc – ponto corrente -------------------------------------------------------- JACQUARD : Ver os diagramas M.1A e M.1B. PONTO DE NÓ : Passar a agulha com o fio, enfiando-a do avesso em direção ao direito da peça, na m/p onde o nó deve ficar. Encostar a ponta da agulha contra a peça e enrolar 2 vezes o fio, puxando-o bem, à volta da ponta da agulha. Passar a agulha por estas argolas para que o fio forme um nó duplo. Enfiar a agulha tão perto quanto possível *a m/p por onde saiu o fio (e não exatamente no mesmo local, senão o nó vai passar de banda) e fixar o nó pelo avesso – ver Fig.1. -------------------------------------------------------- PEGA : Tricota-se em redondo na agulha circular. Montar 74 ms/pts com a agulha circular 4 mm e o fio natural. Colocar 1 marcador na 1.ª m/p, no princípio da carreira, e 1 outro marcador na 38.ª m/p (= lado da pega). Continuar da seguinte maneira : tricotar * 1 vez M.1A, 3 vezes diagrama M.1B *, repetir de * a * num total de 2 vezes. Continuar até M.1A e M.1B terem sido tricotados 1 vez em altura. Arrematar com o fio natural. Bordar a preto, em ponto de nós, ao nível da estrela do diagrama. Dobrar a pega para que as ms/pts com os marcadores fiquem nos lados. ORLA EM CROCHÉ : Fazer a seguinte orla a toda a volta da pega, com o fio natural e a agulha de croché 4 mm, pelo direito da peça, enfiando a agulha de croché nas 2 partes. Começar no canto superior esquerdo, e continuara toda a volta da pega da seguinte maneira : CARREIRA 1 : Crochetar 1 pb no canto, depois, 1 pb em cada m/p em toda a carreira, terminar com 14 pc para a pega. Unir a pega com 1 pbx no pb do canto, no princípio da carreira. CARREIRA 2 : * 3 pc, 1 pb no 1.º desses 3 pc (= 1 picot), saltar 2 pb, 1 pb no pb seguinte *, repetir de * a * e terminar com 14 pb à volta da pega, e 1 pbx no pbx do princípio da carreira precedente. Cortar e arrematar o fio. |
||||||||||||||||
Explicações do diagrama |
||||||||||||||||
|
||||||||||||||||
 |
||||||||||||||||
Terminou este projecto?Então, identifique as suas fotos com as tags #dropspattern #3littlesnowmenpotholders ou mostre-as na galeria #dropsfan. Precisa de ajuda para este modelo?Encontrará 13 turotiais em vídeo, uma rubrica Comentários/Perguntas e muito mais ao visitar a página do modelo em www.garnstudio.com © 1982-2026 DROPS Design A/S. Todos os direitos reservados. Este documento, incluuindo as suas su-secções, tem copyrights. Saia mais o que pode fazer com os nossos modelos no fim de cada uma das páginas do nosso site. |
||||||||||||||||


Com mais de 40 anos no design de modelos de tricô e de croché, a DROPS Design oferece uma das mais vastas colecções demodelos gratuitos na Internet - traduzidos em 17 línguas. Neste dia de hoje, temos 325 catálogos e 12298 modelos - dos quais 12279 estão traduzidos em português.
Trabalhamos com muito empenho para lhe proporcionar o melhor que o tricô e o croché têm para oferecer, para lhe fornecer inspiração e conselhos bem como fios da mais elevada qualidade a preços incríveis! Gostaria de usar os nossos modelos para outros fins que não uso pessoal? Pode ler o que lhe é permitido fazer no Copyright texto que se encontra na parte de baixo de todos os nossos modelos. Bom tricô! Bom croché!
Deixe um comentário acerca do modelo DROPS Extra 0-792
Gostaríamos muito de saber o que tem a dizer-nos acerca deste modelo!
Se deixar uma pergunta acerca do modelo, certifique-se de que escolhe a categoria adequada no formulário abaixo para acelerar o processo relativo à resposta. Os campos obrigatórios estão assinalados com um *.