
Categorias populares
Procura um fio?


Comentários / Perguntas (102)
![]() Edith escreveu:
Edith escreveu:
Ik lees dat het achterpand geheel in stokjes wordt gehaakt, maar dat klopt toch niet met de foto’s? Die gaatjes maken de bolero juist zo leuk! Ik begrijp het niet … Kunt u mij helpen?
18.05.2022 - 15:35DROPS Design respondeu:
Dag Edith,
Dat klopt inderdaad wat je zegt. Een gedeelte van het achterpand is in stokjes. Daarna wordt er rondom de stokjes gehaakt. Zie ook mijn antwoord op je vorige vraag hierover.
19.05.2022 - 20:59
![]() Edith escreveu:
Edith escreveu:
Hallo! Even een vraagje: wordt deze bolero van onder naar boven gehaakt of juist andersom? Bij voorbaat dank voor uw reactie.
18.05.2022 - 14:58DROPS Design respondeu:
Dag Edith,
Het achterpand in stokjes wordt eerst van onder naar boven gehaakt. Daarna wordt er rondom gehaakt in kantpatroon waarbij aan de zijkanten van het lapje van stokjes de armsgaten komen.
19.05.2022 - 20:58
![]() Ilse Keuppens escreveu:
Ilse Keuppens escreveu:
Het volgende: het meerderen bij de rand is mij niet duidelijk. Ik heb gehaakt toer 1 , 2 en 3 deze herhaald en ben nu op 5 cm met toer 3 ( de vasten). Dit met 248 vasten op de toer. Echter als ik in 3x (op 5 cm 10 cm en 15 cm ) moet meerderen tot 356v Dan moet ik in toer 6 ( op 5cm) met 36 v in die toer gaan meerderden ? Klopt dit? Ik ben nog maar een beginneling in het haken van kleding patronen en het meerderen is dus moeilijk, kunt u dit aan mij uitleggen? Mvg ilse
20.11.2019 - 22:50
![]() Sarah Ulkan escreveu:
Sarah Ulkan escreveu:
Ein wirklich schöner Poncho , habe ihn in der Farbe Aubergine gehäkelt und die Anleitung war für mich als Anfängerin wirklich gut zu verstehen Ideal für schöne Sommertage
30.07.2019 - 14:58
![]() CHAILLOU escreveu:
CHAILLOU escreveu:
Bonjour, je souhaite réaliser ce modèle pour ma fille taille S/M, pourriez-vous me confirmer que le nombre de pelotes à commander est bien de 6 pour un total de 300 gr? Cela me paraît beaucoup pour ce modèle !
30.03.2019 - 09:15DROPS Design respondeu:
Bonjour Mme Chaillou, tout à fait, il faut bien 300 g DROPS Muskat pour ce boléro en taille S/M. Bon crochet!
01.04.2019 - 12:06
![]() Marya escreveu:
Marya escreveu:
Hallo, ik zou graag weten hoe ik weet welke maat ik moet hebben. Is er ergens een tabel met cm. maten en welke maat dit is? Bedankt, Marya.
27.02.2019 - 23:31DROPS Design respondeu:
Dag Marya,
De afmetingen staan in de tekening onderaan elk patroon aangegeven per maat. Voor het kiezen van de juiste maat is het het handigst om een bestaand kledingstuk (bijv. een vest of trui) die je lekker zet erbij te maken en daarvan de maten te vergelijken. Voor dit patroon is dat misschien wat lastiger , maar als je een bestaand kledingstuk vergelijkt met een paar andere patronen op onze site, en je komt op bijv. maat L uit, dan kun je voor dit patroon ook maat L aanhouden. (Er rekening mee houdend dat voor dit patroon vooral de schouders, buste, etc, maatgevend zijn.)
28.02.2019 - 10:15
![]() Kay Christian escreveu:
Kay Christian escreveu:
I love this pattern, but I need sleeves. is there anyway I can add them to this pattern. Or do you have another pattern like this with sleeves. Thank you for your time.
09.05.2017 - 03:45DROPS Design respondeu:
Dear Kay, I would look for a crochet cardigan, maybe a circle one, that have the sleeves crocheted from the body to the cuff, like the 177/10 or 168/12 (that has lacy sleeves) or, the 165/40, (that has more solid sleeves), and crochet the sleeves according to those instructions. I hope this helped. Happy Crocheting!
09.05.2017 - 08:14
![]() Susie escreveu:
Susie escreveu:
It has been mentioned how to determines size using a diagram near at the end of the pattern. Is it determined by laying garment flat and measuring the back? Or is it from front lapel around to the opposite front lapel? If the latter is true, then why is that considered as size XXXL? That is closer to an XL or XXL in US sizes. It would be helpful if you could clarify which way to measure the garment: either flat across the back, or flat from lapel to lapel. Thank you.
27.06.2016 - 14:51DROPS Design respondeu:
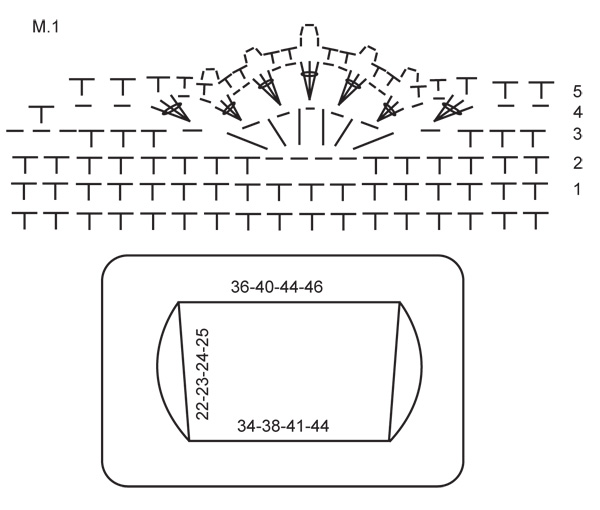
Dear Suzie, the measurements at the bottom of back piece apply to width on back piece only (without edge), ie 44 cm in larger size at the bottom of back piece and 46 cm at the top of back piece after inc. Click here to convert into inches. Compare to a similar garment you have and like the shape to find out the matching size. Read more about sizing on same link as before. Happy crocheting!
27.06.2016 - 17:44
![]() Linda Lueders escreveu:
Linda Lueders escreveu:
I followed the instructions for the first two rows of the back piece. When I lay it flat it makes a circle. This can't be correct. What have I done incorrectly?
20.05.2016 - 03:12DROPS Design respondeu:
Dear Mrs Lueders, back piece is worked back and forth from bottom up. After you have made the fundation chain (78-99, see size), work first row without joining with a sl st, just work back and forth in rows. Happy crocheting!
20.05.2016 - 10:39
![]() Sara Stevens escreveu:
Sara Stevens escreveu:
On the last round of the edging, are you supposed to skip the last sc of the previous round?
08.05.2016 - 01:45DROPS Design respondeu:
Dear Mrs Stevens, after the last sc on round 5 in M.1, start diagram from 1st st again, ie (skip last sc in repeat) and work 1 sc around next 2-ch-space. Happy crocheting!
09.05.2016 - 10:35
|
|||||||||||||
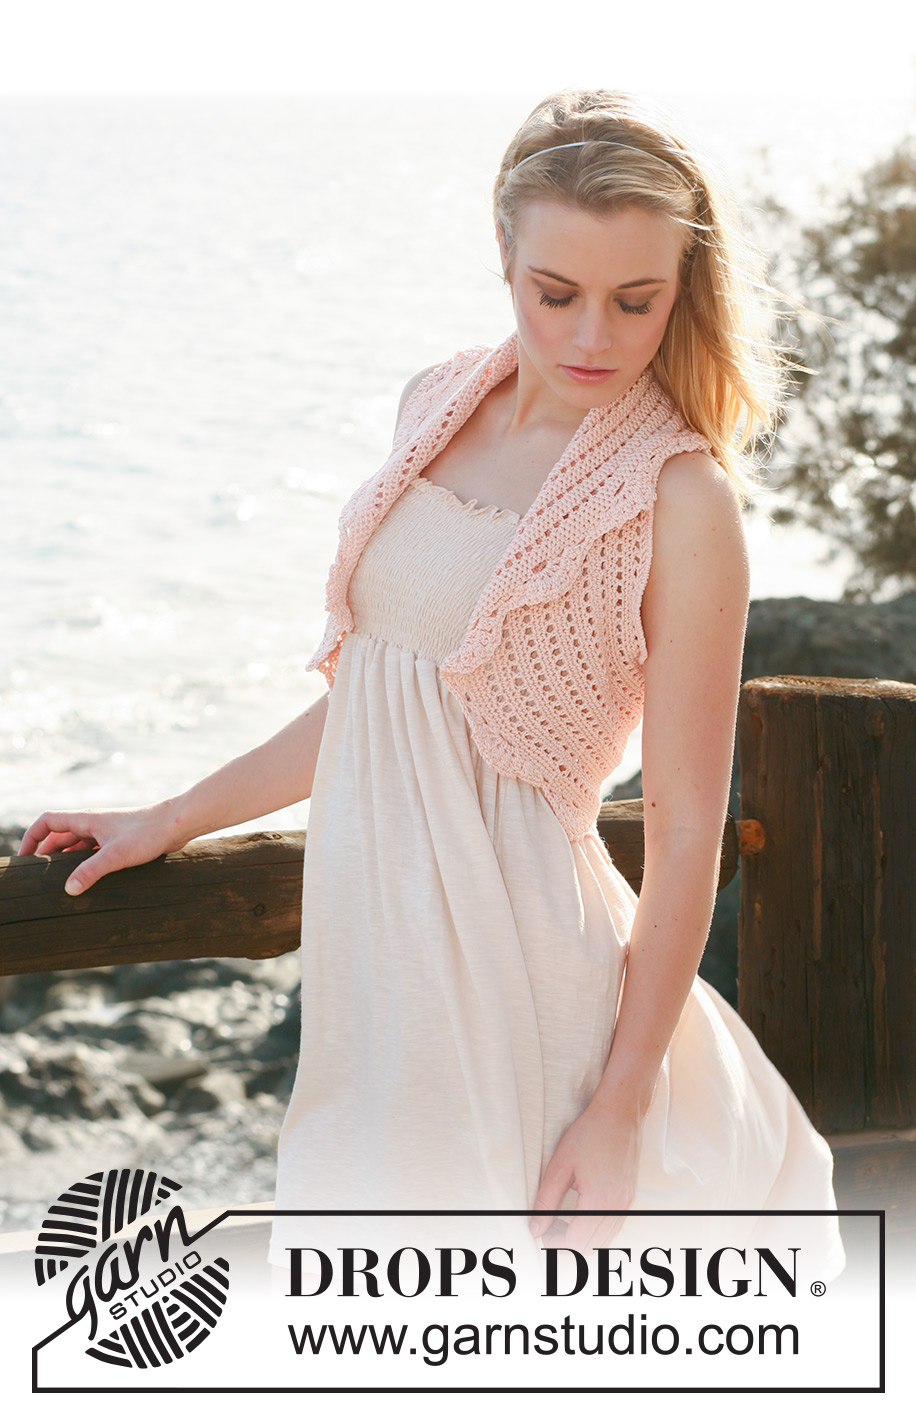
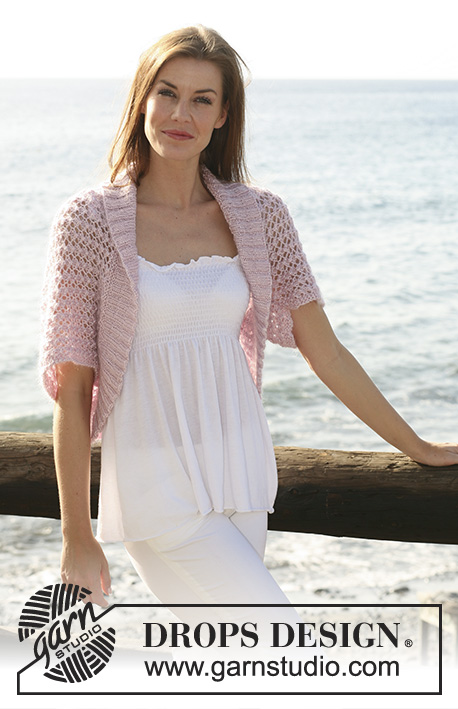
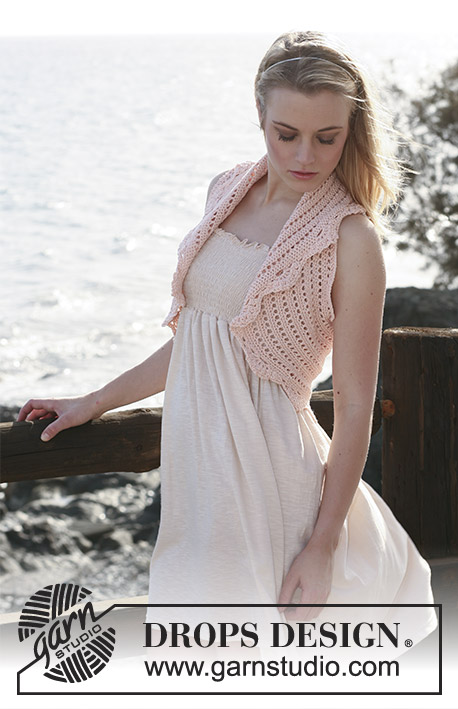
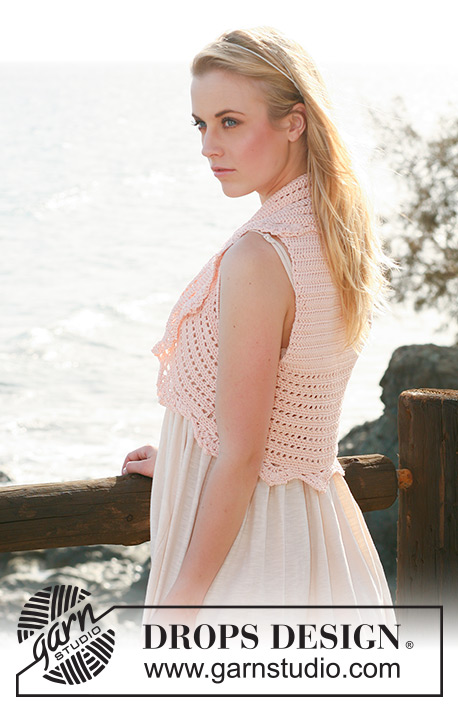
Peach Perfection#peachperfectionbolero |
|||||||||||||
 |
 |
||||||||||||
Colete DROPS em croché em ”Muskat”. Do S ao XXXL. DROPS design: Modelo no R-559
DROPS 119-22 |
|||||||||||||
|
-------------------------------------------------------- NOTA: Existem termos diferentes de tricô e croché em português de Portugal e do Brasil. TRICÔ : Malha = Ponto Canelado = Barra Ponto Jarreteira = Cordões de Tricô Ponto Liga = Ponto Tricô CROCHÉ : mpa – meio ponto alto pa – ponto alto pad – ponto alto duplo pat – ponto alto triplo pb – ponto baixo pbx – ponto baixíssimo pc – ponto corrente -------------------------------------------------------- DICA CROCHÉ : Costas : Substituir o 1.º pb de cada carreira por 1 pc. Orla : Substituir o 1.º pb de cada carreira por 1 pc. Terminar cada carreira com 1 pbx no último pc da carreira precedente. Substituir o 1.º pa de cada carreira por 3 pc. Terminar cada carreira com 1 pbx no último pc do princípio da carreira precedente. AUMENTOS : Aumentar, crochetando 2 pontos no mesmo ponto. ------------------------------------------------------------ ------------------------------------------------------------ COSTAS : Com o fio Muskat e a agulha de croché 4 mm, montar frouxamente uma corrente de 78-86-94-99 pc. Crochetar 1 pa no 4.º pc a partir da agulha de croché, *1 pa em cada um dos 3 pc seguintes, saltar 1 pc *, repetir de * a * e terminar com 1 pa em cada um dos 2-2-2-3 últimos pc = 58-64-70-74 pa. Continuar em pa (= 1 pa em cada pa). A 7 cm de altura total, aumentar 1 pa de cada lado – ver AUMENTOS - e repetir estes aumentos a 15 cm de altura total = 62-68-74-78 pa. Continuar até 22-23-24-25 cm de altura total. ORLA : Crochetar 1 pa em cada pa ao longo da parte de cima das costas, e, depois, crochetar 56-58-60-64 pc, 1 pa em cada pa ao longo da parte de baixo das costas, 56-58-60-64 pc e unir com 1 pbx no 1.º pa da parte de cima das costas. Crochetar, depois, 1 pa em cada pa das costas e, em cada corrente, crochetar 42-44-46-48 pa = 204-220-236-248 B. Continuar em redondo da seguinte maneira : 1.ª CARREIRA : 1 pa no 1.º pa, *1 pc, saltar 1 pa, 1 pa no pa seguinte *, repetir de * a * e terminar com 1 pc, saltar 1 pa, 1 pbx no pa do princípio da carreira. 2.ª CARREIRA : 1 pb em cada pa e 1 pb em cada pc. 3.ª CARREIRA : 1 pb em cada pb. Repetir estas 3 carreiras e, AO MESMO TEMPO, a 5, 10 e 15 cm (ajustar a altura para que coincida com uma carreira de pb), distrbuir 34-34-34-36 pb – VER AUMENTOS = 306-322-338-356 pb. A 17-18-19-20 cm de altura total (ajustar para que a carreira seginte seja uma carreira de pb), crochetar 1 carreira de pb e, AO MESMO TEMPO, distribuir 0-1-2-1 aumento = 306-323-340-357 pb. Continuar com M1. NOTA : Começar na carreira 1 do diagrama. Crochetar 1 vez M1 em altura, cortar e arrematar o fio. |
|||||||||||||
Explicações do diagrama |
|||||||||||||
|
|||||||||||||
 |
|||||||||||||
Terminou este projecto?Então, identifique as suas fotos com as tags #dropspattern #peachperfectionbolero ou mostre-as na galeria #dropsfan. Precisa de ajuda para este modelo?Encontrará 8 turotiais em vídeo, uma rubrica Comentários/Perguntas e muito mais ao visitar a página do modelo em www.garnstudio.com © 1982-2026 DROPS Design A/S. Todos os direitos reservados. Este documento, incluuindo as suas su-secções, tem copyrights. Saia mais o que pode fazer com os nossos modelos no fim de cada uma das páginas do nosso site. |
|||||||||||||


Com mais de 40 anos no design de modelos de tricô e de croché, a DROPS Design oferece uma das mais vastas colecções demodelos gratuitos na Internet - traduzidos em 17 línguas. Neste dia de hoje, temos 324 catálogos e 12290 modelos - dos quais 12271 estão traduzidos em português.
Trabalhamos com muito empenho para lhe proporcionar o melhor que o tricô e o croché têm para oferecer, para lhe fornecer inspiração e conselhos bem como fios da mais elevada qualidade a preços incríveis! Gostaria de usar os nossos modelos para outros fins que não uso pessoal? Pode ler o que lhe é permitido fazer no Copyright texto que se encontra na parte de baixo de todos os nossos modelos. Bom tricô! Bom croché!
Deixe um comentário acerca do modelo DROPS 119-22
Gostaríamos muito de saber o que tem a dizer-nos acerca deste modelo!
Se deixar uma pergunta acerca do modelo, certifique-se de que escolhe a categoria adequada no formulário abaixo para acelerar o processo relativo à resposta. Os campos obrigatórios estão assinalados com um *.