
Beliebte Kategorien
Suchen Sie nach einem Garn?


Kommentare / Fragen (73)
![]() SandraB hat geschrieben:
SandraB hat geschrieben:
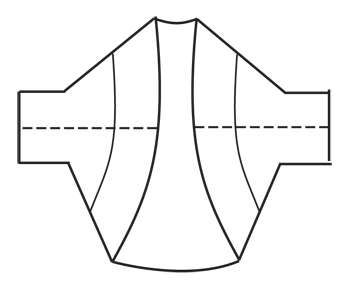
Hallo! Ik wil graag dit patroon maken. Heb nog niet zovaak kleren gehaakt. Daarom begrijp ik de tweede tekening met de maten niet zo goed. Hoe moet ik die zien?
01.07.2017 - 08:37DROPS Design hat geantwortet:
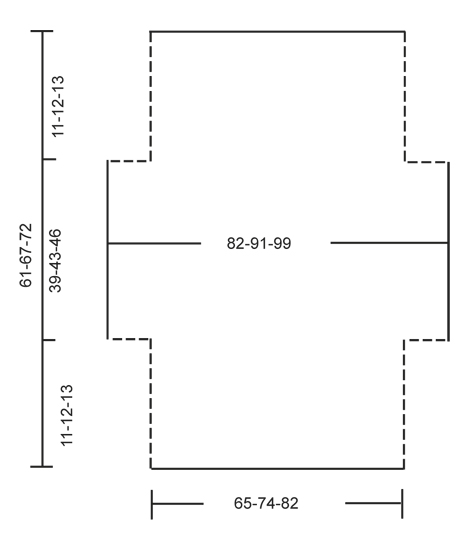
Hoi Sandra, In de tweede tekening zie je het werk wanneer je klaar bent met haken, maar nog niet in elkaar genaaid hebt. Het kledingstuk wordt op de horizontale lijn dubbel gevouwen en op op de stippellijnen aan elkaar gehaakt.
01.07.2017 - 12:01
![]() Elizabeth Baker hat geschrieben:
Elizabeth Baker hat geschrieben:
I have finished my 21 1/2 inches and pattern says to not work 12 stitches on either side how then do I start my next row
21.05.2017 - 19:07DROPS Design hat geantwortet:
Dear Mrs Baker, work next row until 12 sts remain, turn and work next row until 12 sts remain, turn and work next row. You will have now 12 sts unworked on each side. Happy crocheting!
22.05.2017 - 09:54
![]() Elizabeth Baker hat geschrieben:
Elizabeth Baker hat geschrieben:
I have finished my 21 1/2 inches and pattern says to not work 12 stitches on either side, how do I start next row?
20.05.2017 - 19:02
![]() Elizabeth Baker hat geschrieben:
Elizabeth Baker hat geschrieben:
After I have finished row 8 to continue do I start with A1 or A2 to repeat
01.05.2017 - 16:43DROPS Design hat geantwortet:
Dear Mrs Baker, after you have worked A.2 1 time in height, repeat A.2 from row 1. Happy croccheting!
02.05.2017 - 11:48
![]() Elizabeth Baker hat geschrieben:
Elizabeth Baker hat geschrieben:
After I have finished row 8 do I start with row A1 or A2
01.05.2017 - 16:20DROPS Design hat geantwortet:
Dear Elizabeth, after row 8, you should continue and repeat pattern A.2. I hope this helps. Happy crocheting!
06.05.2017 - 11:06
![]() GB hat geschrieben:
GB hat geschrieben:
Hi, in the pattern directions it says the picot has a DC in the first of the chain 3s, but the video shows a sc instead. Could you clarify please? Thanks!
15.04.2017 - 17:14DROPS Design hat geantwortet:
Dear GB, you should work 1 dc in 1st of the 3 ch as explained in the pattern and not 1 sc as worked in the video, thanks for noticing. Happy crocheting!
19.04.2017 - 15:24
![]() Mary Ancira hat geschrieben:
Mary Ancira hat geschrieben:
The letter sizes, (example- S, M, L,) are not showing what size the bust is like it normally does. Should I assume the sizes are the same on all the patterns?
03.04.2017 - 10:24DROPS Design hat geantwortet:
Dear Mrs Ancira, you will find at the bottom of the pattern a measurement chart with measurements for each size in cm, taken flat from side to side. Compare these to a similar garment you have and like the shape to find out the matching size. Read more about sizing and convert into inches here. Happy crocheting!
03.04.2017 - 11:25
![]() Stephanie hat geschrieben:
Stephanie hat geschrieben:
Bonjour je ne comprends pas l'augmentation, au rang 6 avec l'ajout de maille en l'air que l'on crochete apres avec une bride un ml une bride et ensuite crochete le reste comment ? c'est la que je saisis pas , parce que logiquement on serait sur le rang 7 mais ensuite encore au rang 7 ,pouvez vous m'expliquer merci
14.02.2017 - 00:10DROPS Design hat geantwortet:
Bonjour Stéphanie, la 1ère augmentation sur le côté se fait à la fin du rang 5 (= le rang suivant sera le rang 6), on crochète 14 ml à la fin de ce rang, on tourne, on crochète 11B, puis le rang 6 de A.2 et on crochète 15 ml à la fin du rang 6, on tourne, on crochète 1B, 1 ml sur les nouvelles ml et on continue le rang 7 comme A.2. Puis on continue A.2 sur toutes les mailles. Bon crochet!
14.02.2017 - 09:32
![]() Jasmine hat geschrieben:
Jasmine hat geschrieben:
Dear Jasmine, "on row 1 in A.1 work 1 dc in each st," So since I have 92 stitches in A.1 I need to do 92 DC stitches all the way across?
21.01.2017 - 03:45DROPS Design hat geantwortet:
Dear Jasmine, you should have 92 dc on first row, then work: A.1A (= 4 sts), repeat A.1B a total of 7 times (= 7 x 12 sts), and finish with A.1C (= 4 sts), ie: 3 + (x12=84) + 4= 91 sts. Happy crocheting!
23.01.2017 - 09:29Leonore hat geschrieben:
This pattern doesnt make any sence. Row one is clear to work. From there on i dont understand anything! Please write out the pattern. I dont work with diagrams or whatever this confusuon is called. Please help!
17.12.2016 - 18:45DROPS Design hat geantwortet:
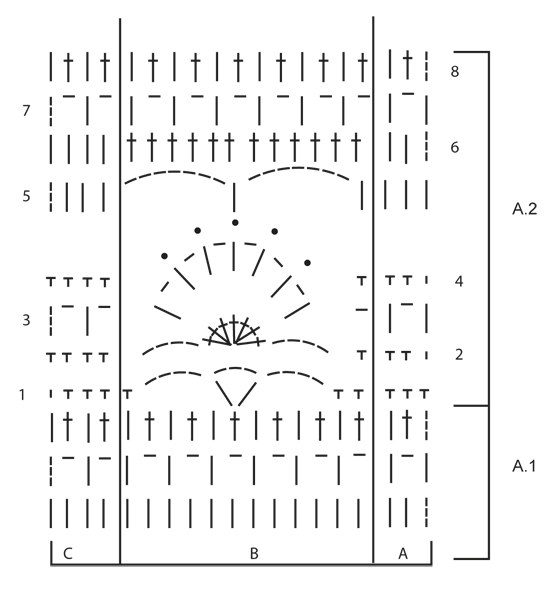
Dear Leonore, there is only diagram to this pattern, start reading diagram from the bottom corner on the right side and read towards the left from RS and from left to right from WS. Each symbol represents 1 st/group of sts. work A.1A (= 3 sts), then repeat A.1B (= 12 sts) and finish with A.1C (= 4 sts). You are welcome to contact your DROPS store for any further individual assistance. Happy crocheting!
19.12.2016 - 09:17
|
||||||||||||||||
Blue Wonder#bluewondershoulderpiece |
||||||||||||||||
 |
 |
|||||||||||||||
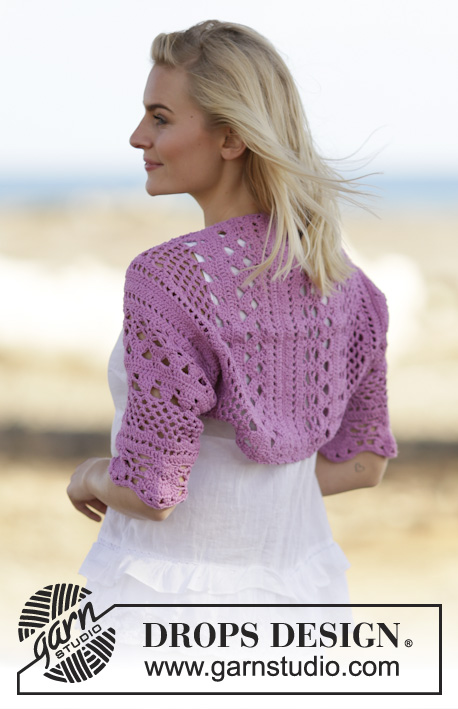
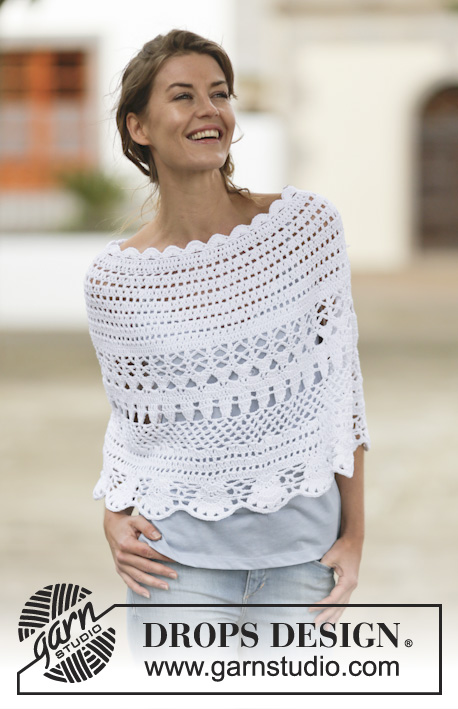
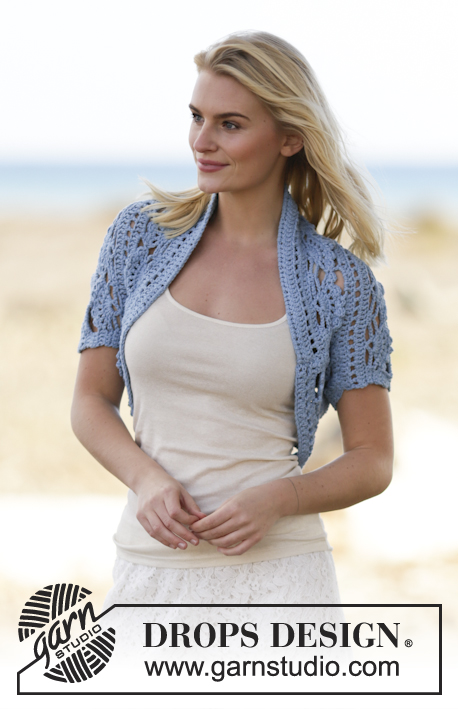
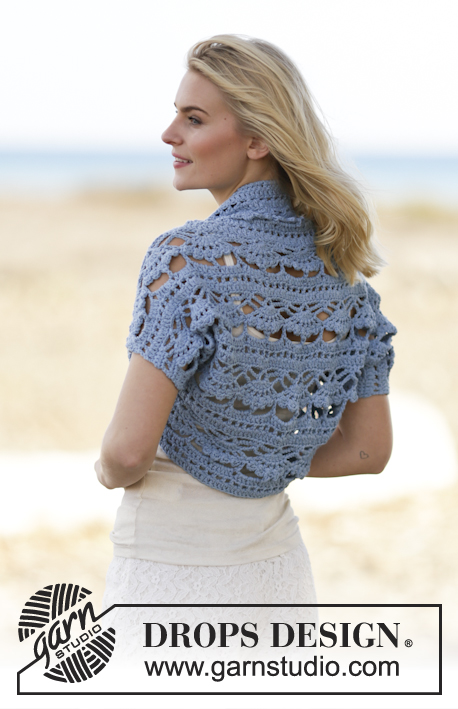
Gehäkelter DROPS Bolero in ”Paris”. Größe S-XXXL.
DROPS 162-34 |
||||||||||||||||
|
MUSTER: Siehe Diagramme A.1 und A.2. ------------------------------------------------------------- BOLERO: 110-125-139 Luft-M (Lm) mit Häkelnadel Nr. 5 mit Paris anschlagen. 1. R: 1 Stäbchen (Stb) in die 4. Lm ab der Nadel (= 3 Lm + 1 Stb = 2 Stb), je 1 Stb in die nächsten 4-1-3 Lm, * 1 Lm überspringen, je 1 Stb in die nächsten 5 Lm, *, von *-* wdh = 91-103-115 Stb. 2. R: Nun nach Diagramm A.1 wie folgt häkeln: A.1 A, A.1 B insgesamt 7-8-9 x in der Breite, enden mit A.1 C. Wenn A.1 1 x in der Höhe gehäkelt wurde, A.2 in der Höhe wdh. GLEICHZEITIG bei einer Gesamtlänge von ca. 11-12-13 cm (daran angepasst, dass die nächste R die 6. R von A.2 ist) 14 Lm am Ende der R häkeln (= 5. R). Wenden und 1 Stb in die 4. Lm ab der Nadel, dann je 1 Stb in die nächsten 10 neuen Lm. Mit der 6. R von A.2 weiterhäkeln, am Ende der R 15 Lm häkeln. Wenden und 1 Stb in die 7. Lm ab der Nadel, * 1 Lm, 1 Lm überspringen, 1 Stb in die nächste Lm *, von *-* über die nächsten 9 neuen Lm wdh, enden mit 1 Lm. Die R im Muster A.2 zu Ende häkeln. In der nächsten R wie zuvor bis zu den neuen M am Ende der R häkeln, dann 1 Stb um jede Lm und 1 Stb in jedes Stb häkeln. Beidseitig wurden nun je 12 Stb zugenommen (= 115-127-139 Stb). Nun die 8. R von A.2 wie folgt häkeln: A.2 A, A.2 B insgesamt 9-10-11 x, enden mit A.2 C. Bei einer Gesamtlänge von ca. 50-55-59 cm (daran angepasst, dass die nächste R die 7. R ist) beidseitig nicht mehr über die je 12 Stb häkeln (= 91-103-115 Stb). Wie folgt über die übrigen M häkeln: A.2 A, A.2 B insgesamt 7-8-9 x, enden mit A.2 C. In dieser Weise weiterhäkeln, bis die Arb eine Gesamtlänge von ca. 61-67-72 cm hat, daran angepasst, dass ein ganzer Rapport von A.2 gehäkelt wurde. Den Faden abschneiden und vernähen. FERTIGSTELLEN: Die Seiten- und Ärmelnähte jeweils ohne Unterbrechung innerhalb 1 Rand-M schließen. |
||||||||||||||||
Erklärungen zum Diagramm |
||||||||||||||||
|
||||||||||||||||
 |
||||||||||||||||
 |
||||||||||||||||
 |
||||||||||||||||
Haben Sie diese Anleitung nachgearbeitet?Dann taggen Sie Ihre Fotos mit #dropspattern #bluewondershoulderpiece oder schicken Sie sie an die #dropsfan Galerie Brauchen Sie Hilfe bei dieser Anleitung?Sie finden 7 Videotutorials, einen Kommentar/Fragen-Bereich und vieles mehr, wenn sie die Anleitung bei garnstudio.com aufrufen. © 1982-2026 DROPS Design A/S. Wir besitzen alle Rechte. Dieses Dokument, einschließlich aller Untersektionen, hat Urheberrechte. Mehr dazu, was Sie mit unseren Anleitungen machen können, finden Sie ganz unten auf der Seite zu jeder Anleitung. |
||||||||||||||||


Mit über 40 Jahren Tätigkeit im Entwerfen von Strick- und Häkelmustern bietet Ihnen DROPS Design eine der umfangreichsten Sammlungen von kostenlosen Anleitungen im Internet - in 17 Sprachen übersetzt. Zum jetzigen Zeitpunkt haben wir insgesamt 324 Handarbeitshefte und 12291 Anleitungen auf Deutsch. 12203
Unser Ziel ist es, Ihnen die besten Angebote zum Stricken und Häkeln, Inspirationen und Ratschläge sowie qualitativ hochstehende Garne zu unglaublichen Preisen zu bieten! Möchten Sie unsere Anleitungen nicht nur für den persönlichen Gebrauch nutzen? Unsere Copyright Bedingungen finden Sie bei allen unseren Anleitungen ganz unten auf der jeweiligen Seite. Viel Spaß beim Handarbeiten!
Kommentieren Sie die Anleitung DROPS 162-34
Wir würden gerne Ihre Meinung zu diesem Modell erfahren!
Wenn Sie eine Frage stellen möchten, prüfen Sie bitte, dass Sie die richtige Kategorie im unten stehenden Formular gewählt haben - so bekommen Sie schneller eine Antwort. Die obligatorischen Felder sind mit einem * gekennzeichnet.