
Beliebte Kategorien
Suchen Sie nach einem Garn?


Kommentare / Fragen (59)
Sandra hat geschrieben:
I'm a beginner and the finished product was too tight at the end. What did I do wrong?
12.12.2018 - 15:21DROPS Design hat geantwortet:
Dear Sandra, did you get the correct tension? You should have 17 dc (UK)/ sc (US) = 10 cm/4" in width - and keep the same tension while working the hat. Happy crocheting!
12.12.2018 - 16:10Libby hat geschrieben:
Hi, first of all great pattern it comes out really good! My question is, do I keep decrease as I go along from the black or do I decrease only once in the black row in this pattern? I hope you understand my question
14.11.2018 - 14:24DROPS Design hat geantwortet:
Dear Libby, you decrease only 1 time 12-14 sts on one round (the first round after the 3 rounds with medium brown) = there are now 76-82 sts continue working the last 6 rounds without decreasing anymore. Happy crocheting!
14.11.2018 - 15:04
![]() Angelina hat geschrieben:
Angelina hat geschrieben:
How do I stop the spiral? There's not obvious transition from the beginning of the spiral to the end, so I can't tell where to put my sl st before I change colors.
16.08.2018 - 02:12DROPS Design hat geantwortet:
Dear Angelina, for a nicer transition for the stripes, add a marker in the first st of every round and let the marker follow the piece so that you can sl st the last st with first colour in this stitch. You can also continue working in the round in a spiral with the new colour, the transition will be quite smooth. Happy crocheting!
16.08.2018 - 09:37Lyn hat geschrieben:
Thanks for your prompt reply and video. I understand working in the round but it doesn't work the same in a spiral for me. Is the jog unavoidable in this situation
23.05.2018 - 15:02DROPS Design hat geantwortet:
Dear Lynn, when working stripes, stop the spiral and join in the round with the technique shown in the video will avoid you a jog at the beg of round. Happy crocheting!
23.05.2018 - 16:07Lyn hat geschrieben:
I am failing to be able to join my spiral stripes without the "jog" despite reading an earlier comment you made. "before changing colour you can join with a sl st with the new colour and continue as before without joining until next stripe, you will then avoid a jog at the back of hat" It sounds simple enough but not working for me. Can you suggest what I'm missing in the interpretation n explain again
23.05.2018 - 14:24Lyn hat geschrieben:
I'm failing to be able to join my spiral stripes without the "jog" despite reading your earlier answer to Lori. I'm obviously not interpreting something correctly "before changing colour you can join with a sl st with the new colour and continue as before without joining until next stripe, you will then avoid a jog at the back of hat" It sounds simple enough but it's not working for me..any suggestions what I'm missing.
23.05.2018 - 14:18DROPS Design hat geantwortet:
Dear Lynn, this video shows how to change colour at the end of round, ie work the beg of st with first colour (same of the round you are finishing) and make the last pull through with the colour used on next round. Happy crocheting!
23.05.2018 - 14:39
![]() Lori hat geschrieben:
Lori hat geschrieben:
Because the rows are worked in a spiral, my stripes are not straight at the join. Any advice?
06.04.2018 - 06:21DROPS Design hat geantwortet:
Dear Lori, before changing colour you can join with a sl st with the new colour and continue as before without joining until next stripe, you will then avoid a jog at the back of hat. Happy crocheting!
06.04.2018 - 08:47
![]() Sciakath hat geschrieben:
Sciakath hat geschrieben:
I have made two of these now and am on my third -- and I NEVER usually repeat a pattern! These beanies have such a nice weight to them -- not too bulky. I used yarn I had in my stash (Loops & Threads Impeccable) and it worked great. Thanks for the EXCELLENT pattern!
04.03.2018 - 22:12Margarita Lucero Apolonio hat geschrieben:
Podría mandarme el patrón de este gorro
19.03.2017 - 06:55DROPS Design hat geantwortet:
Hola Margarita. Con este línk puedes descargar el patrón gratis: https://www.garnstudio.com/pattern.php?id=6379&cid=23
27.03.2017 - 20:49Danielle hat geschrieben:
It seems to me that this is worked in single crochet, am I wrong?
27.01.2017 - 21:58DROPS Design hat geantwortet:
Dear Danielle, you are right, this hat is worked in sc, crocheting in back loop of sts. See US-English pattern here. Happy crocheting!
30.01.2017 - 10:33
|
|
Carmel |
|
 |
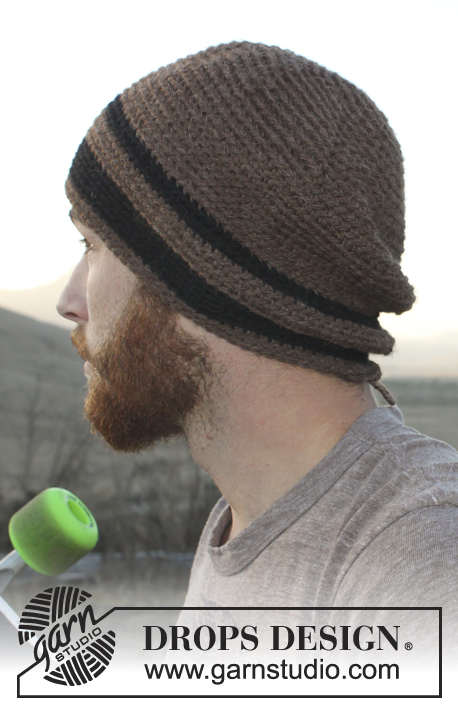 |
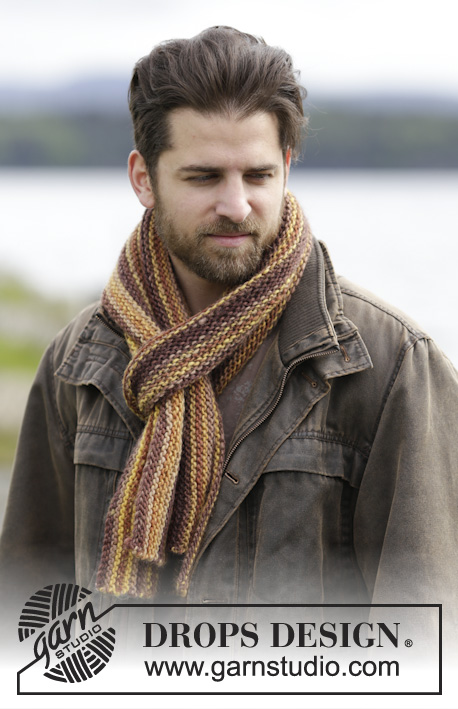
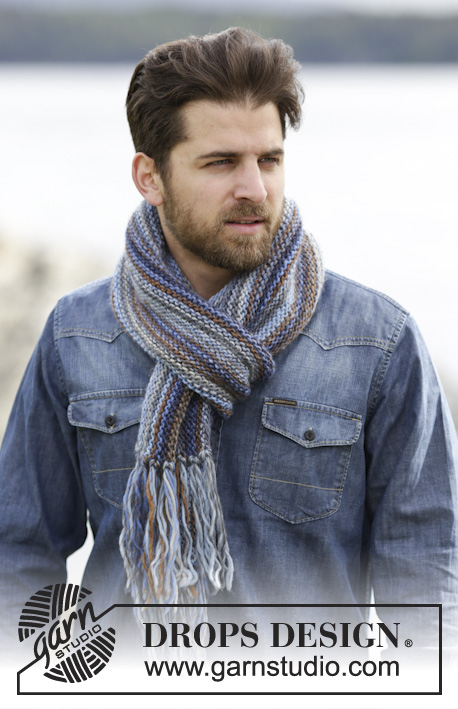
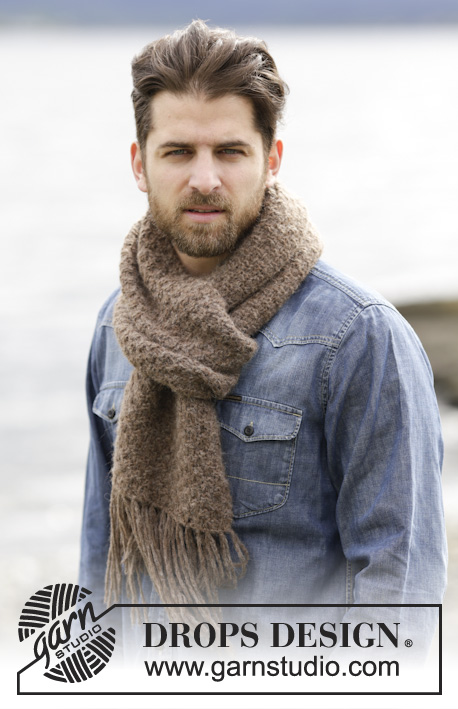
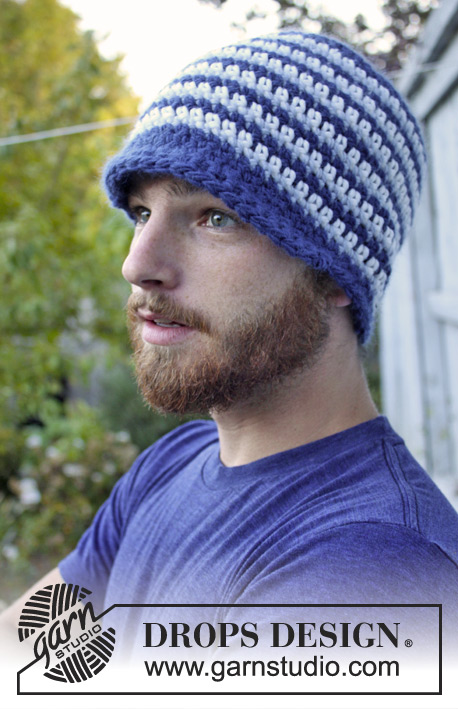
Gehäkelte DROPS Herrenmütze in „Nepal“. Größe: S-XL
DROPS Extra 0-980 |
|
|
HÄKELINFO, SPIRALFÖRMIG IN RUNDEN HÄKELN: Nach der letzten fM der Rd direkt mit der nächsten Rd fortfahren und 1 fM in die nächste fM (= erste fM der vorherigen Runde) häkeln. BEMERKUNG: Markieren Sie den Anfang der Runde zwischen der letzten M der Rd und der nächsten M der folgenden Rd und lassen Sie die Markierung der Arbeit folgen. Damit sich die Strukturstreifen ergeben häkelt man nur in das hintere Maschenglied. MAGIC CIRCLE: Die Arbeit startet in dieser Technik um ein Loch in der Mitte zu vermeiden (statt eines Lm-Rings). Halten Sie das Ende des Fadens fest und wickeln Sie den Faden einmal um Ihren LINKEN Zeigfinger um eine Schlinge zu erhalten. Halten Sie die Schlinge nun mit dem LINKEN Daumen und Mittelfinger, während der Faden über den linken Zeigefinger läuft. Den Faden mit der Nadel durch die Schlaufe holen und 1 Lm häkeln dann fM um die Garnschlaufe häkeln. Wenn Sie die gewünschte Anzahl fM haben, den Kreis zusammenziehen. Das Fadenende auf der Rückseite fixieren. Weiter SPIRALFÖRMIG IN RUNDEN häkeln. TIPP ZUR ABNAHME: Ca. jede 7./8.fM - 6./7.fM pro Runde zusammenhäkeln. 2 fM wie folgt zusammen abmaschen: Die Nadel in die erste fM einführen, den Faden holen, die Nadel in die nächste fM einführen, den Faden holen, einen Umschlag machen und diesen durch alle Schlingen auf der Nadel ziehen. -------------------------------------------------------- MÜTZE: Mit Nadel 5 und mittelbraun einen MAGIC CIRCLE häkeln - siehe oben - oder 4 Lm häkeln und mit 1 Kett-M in die 1. Lm zu einem Ring schließen. Weiter siehe HÄKELINFO! RUNDE 1: 8 fM um den MAGIC CIRCLE oder den Lm-Ring häkeln. Ab hier häkelt man nur noch in das hintere Maschenglied. 2. RUNDE: 2 fM in jede fM = 16 fM. 3. RUNDE: * 1 fM in die erste fM, 2 fM in die nächste fM *, von * - * wdh = 24 fM. 4. RUNDE: * 1 fM in die nächsten 2 fM, 2 fM in die nächste fM *, von * - * wdh = 32 fM. 5. RUNDE: 1 fM in jede fM = 32 fM. ACHTEN SIE BITTE AUF DIE MASCHENPROBE! 6. RUNDE: * 1 fM in die nächsten 3 fM, 2 fM in die nächste fM *, von * - * wdh = 40 fM. 7. RUNDE: * 1 fM in die nächsten 4 fM, 2 fM in die nächste fM *, von * - * wdh = 48 fM. 8. RUNDE: * 1 fM in die nächsten 5 fM, 2 fM in die nächste fM *, von * - * wdh = 56 fM. 9. RUNDE: * 1 fM in die nächsten 6 fM, 2 fM in die nächste fM *, von * - * wdh = 64 fM. 10. RUNDE: * 1 fM in die nächsten 7 fM, 2 fM in die nächste fM *, von * - * wdh = 72 fM. 11. RUNDE: * 1 fM in die nächsten 8 fM, 2 fM in die nächste fM *, von * - * wdh = 80 fM. 12. RUNDE: * 1 fM in die nächsten 9 fM, 2 fM in die nächste fM *, von * - * wdh = 88 fM. Die Aufnahmen für Größe S/M enden hier, weiter fM in Runden häkeln. 13. RUNDE: * 1 fM in die nächsten 10 fM, 2 fM in die nächste fM *, von * - * wdh = 96 fM. Die Aufnahmen für Größe L/XL enden hier, weiter fM in Runden häkeln. Nach 12-15 cm weiterhin fM häkeln und wie folgt die Farbe wechseln: 2 Rd schwarz, 3 Rd mittelbraun, 1 Rd schwarz und in dieser Rd mit schwarz gleichmäßig verteilt 12-14 fM abn – SIEHE TIPP ZUR ABNAHME (= 76-82 fM übrig), 4 Rd schwarz und 2 Rd mittelbraun häkeln. Nun misst die Mütze ca. 20-23 cm von oben gemessen. Den Faden abschneiden und vernähen. |
|
Haben Sie diese Anleitung nachgearbeitet?Dann taggen Sie Ihre Fotos mit #dropspattern oder schicken Sie sie an die #dropsfan Galerie Brauchen Sie Hilfe bei dieser Anleitung?Sie finden 7 Videotutorials, einen Kommentar/Fragen-Bereich und vieles mehr, wenn sie die Anleitung bei garnstudio.com aufrufen. © 1982-2026 DROPS Design A/S. Wir besitzen alle Rechte. Dieses Dokument, einschließlich aller Untersektionen, hat Urheberrechte. Mehr dazu, was Sie mit unseren Anleitungen machen können, finden Sie ganz unten auf der Seite zu jeder Anleitung. |
|


Mit über 40 Jahren Tätigkeit im Entwerfen von Strick- und Häkelmustern bietet Ihnen DROPS Design eine der umfangreichsten Sammlungen von kostenlosen Anleitungen im Internet - in 17 Sprachen übersetzt. Zum jetzigen Zeitpunkt haben wir insgesamt 324 Handarbeitshefte und 12291 Anleitungen auf Deutsch. 12203
Unser Ziel ist es, Ihnen die besten Angebote zum Stricken und Häkeln, Inspirationen und Ratschläge sowie qualitativ hochstehende Garne zu unglaublichen Preisen zu bieten! Möchten Sie unsere Anleitungen nicht nur für den persönlichen Gebrauch nutzen? Unsere Copyright Bedingungen finden Sie bei allen unseren Anleitungen ganz unten auf der jeweiligen Seite. Viel Spaß beim Handarbeiten!
Kommentieren Sie die Anleitung DROPS Extra 0-980
Wir würden gerne Ihre Meinung zu diesem Modell erfahren!
Wenn Sie eine Frage stellen möchten, prüfen Sie bitte, dass Sie die richtige Kategorie im unten stehenden Formular gewählt haben - so bekommen Sie schneller eine Antwort. Die obligatorischen Felder sind mit einem * gekennzeichnet.