
Popular categories
Looking for a yarn?


Comments / Questions (46)
![]() Lena Erlandsson wrote:
Lena Erlandsson wrote:
Stickat 149-32 "Verdi", behöver hjälp med hur jag syr ihop den. Vänlig hälsning Lena
03.11.2024 - 20:43DROPS Design answered:
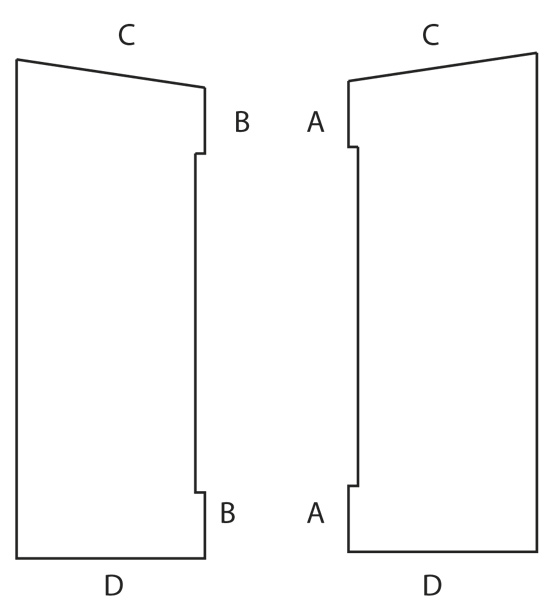
Hei Lena. Er enkelt forklart med målskissen og teksten under MONTERING (Se målskisse. Sy A til A og B til B. Sy D til D. Sy C til C). Om det ikke hjelper, gi oss nærmere beskrivelse på hva / hvor du har problemer med. mvh DROPS Design
04.11.2024 - 13:24
![]() Natalie Paquet wrote:
Natalie Paquet wrote:
I just started this project. I've restarted it a few times now. My work looks like it's all in garter stitch. The pics look like stockinette stitch. Is it the same row repeated over and over? K7, P4K4 repeat to last 4 sts, K4 therefore end with K8. This row repeated over and over give it a garter stitch look. Am I reading this pattern completely wrong?
10.09.2019 - 20:17DROPS Design answered:
Dear Mrs Paquet, you will work rib K4/P4 with 3 stitches in garter st in one side (beg of row from RS) and 4 sts in garter st on the other side (end of row from RS), ie from RS work: K3, K4, repeat P4, K4 until 4 sts remain and end with K4. From WS work K over K and P over P, starting with K4 and ending the row with K3. Happy knitting!
11.09.2019 - 07:51
![]() Petra wrote:
Petra wrote:
Was heißt 3 M kraus rechts stricken bzw. 4 M kraus rechts stricken?
05.03.2019 - 20:47DROPS Design answered:
Liebe Petra, am Anfang der Hinreihen stricken Sie 3 Maschen kraus rechts (= diese 3 Maschen werden jede Reihe rechts gestrickt), am Anfang der Hinreihen stricken Sie 4 Maschen kraus rechts (= diese 4 Maschen werden jede Reihe rechts gestrickt). Inzwischen stricken Sie die Maschen im Bündchen: 4 M re, *4 li, 4 re*, von *-* wiederholen. Viel Spaß beim stricken!
06.03.2019 - 09:25
![]() Cecilia wrote:
Cecilia wrote:
Salve vorrei realizzarlo ma con maniche,da quale modelli posso ricavarle.grazie
26.01.2018 - 17:25DROPS Design answered:
Buongiorno Cecilia, per questo tipo di aiuto può chiedere consiglio al suo rivenditore DROPS di fiducia. Buon lavoro!
25.07.2018 - 14:50Christine Stewart wrote:
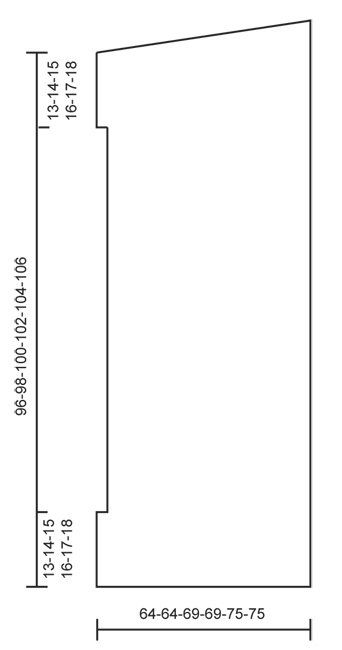
I am about to start knitting this and have absolutely no clue as to what size I should use. Because of the construction method the measurements on the diagram don't help either. I can't find anything on your website that gives even a rough guide as to what would be the appropriate sizes for S to XXXL. Is the finished bust measurement 4 x the width - between 64 and 75cm? That doesn't sound right. How much ease is allowed? Can you please help? Christine in Australia
23.04.2016 - 11:38DROPS Design answered:
Dear Mrs Stewart, you will find in the measurement chart the finished measurements that will help you to find out the matching sizes: D = cast on row (middle line at the bottom of back piece), C = cast off row (middle line at the top of back piece) - both A and B are respect. armholes. You can then find easily the matching size. Happy knitting!
25.04.2016 - 09:53
![]() Sonja wrote:
Sonja wrote:
Hoi Ben met het patroon bezig en net gestart met de verkorte toeren ... heb dit nog nooit gedaan nu mijn vraagje ... de 18steken van de 1ste naald moet je deze gewoon in rij 2 overbreien of blijven deze ongebreid staan .. Mvg Sonja
19.10.2015 - 18:48DROPS Design answered:
Hoi Sonja. Je breit eerst tot er 8 st over is, keren en brei terug. Dan tot er 16 st over is, keer en brei terug enzovoort. Dus je breit steeds heen en weer over 8 st minder voor elke keer. Als er 19 st over zijn op de nld, brei je 2 ribbels (4 nld) over alle st (dus ook over de st, die je eerder liet staan).
20.10.2015 - 16:04
![]() Evelyn Erens wrote:
Evelyn Erens wrote:
Ich würde mir gerne diese Jacke stricken aber leider ist diese wolle nicht mehr zu bekommen.Welche Garnalternative können sie mir empfehlen ?
24.07.2015 - 10:44DROPS Design answered:
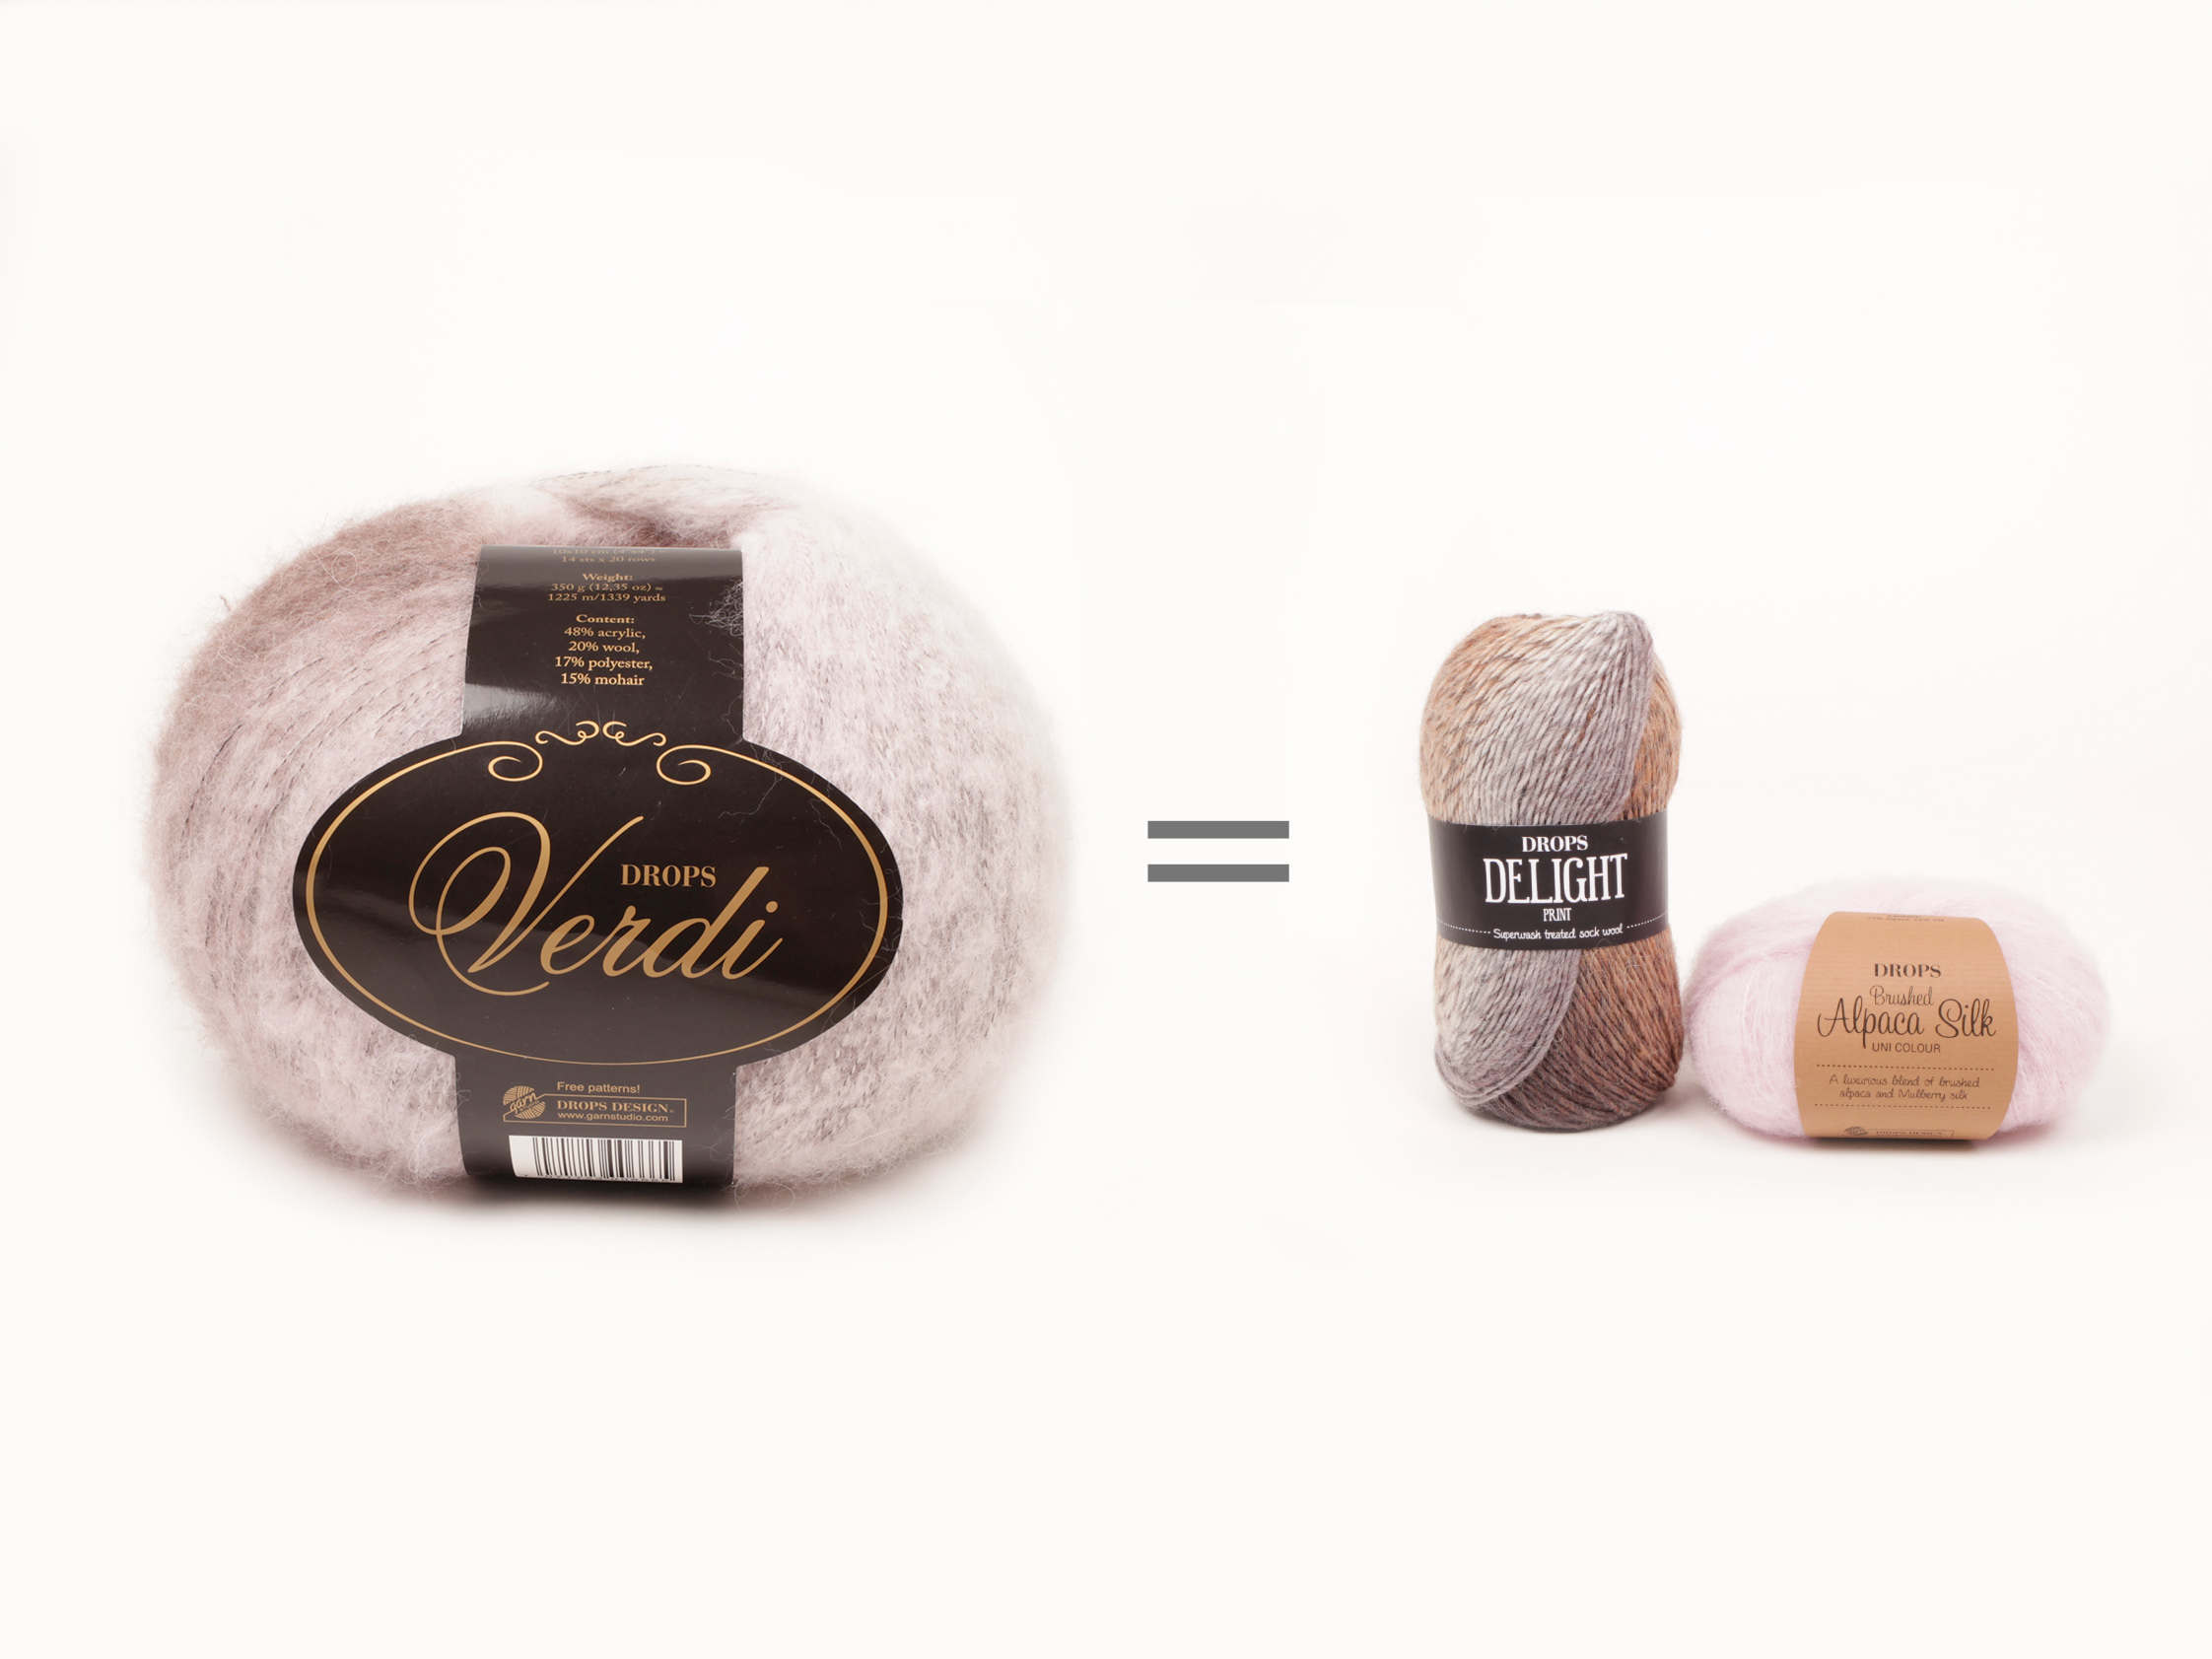
Unsere Garne sind in Garngruppen aufgeteilt. Verdi gehörte in Gruppe D, Sie können also Garne dieser Gruppe für die Jacke verwenden. Alternativ können Sie Garne der Garngruppe A dreifach nehmen oder Garne der Garngruppe B zweifach. Um den Flauschcharakter zu erhalten, könnten Sie z.B. Kid-Silk aus Garngruppe A dreifach nehmen, oder 2 fäden Kid-Silk mit 1 Faden Alpaca kombinieren. Wichtig ist stets, dass die Maschenprobe stimmt, außerdem müssen Sie anhand der Originalgarns die benötigte Meterzahl berechnen und dies dann auf das Ersatzgarn umrechnen, damit Sie die passende Menge Garn kaufen.
28.07.2015 - 13:36
![]() Janin wrote:
Janin wrote:
Also wird der Anschlagrand nicht mitgemessen? Ist das richtig?
19.01.2015 - 22:03DROPS Design answered:
Doch, Sie messen ab dem Anschlagrand, also ab da, wo das Strickstück beginnt. Alles, was Sie bis dahin gestrickt haben, wird gemessen.
21.01.2015 - 21:59
![]() Janin wrote:
Janin wrote:
Ich glaub die Vorderseite ist doch die Hinreihe. :-) wie messe ich die ersten 15 cm ab, komplett mit rand abmessen? Freue mch sehr über Ihre Hilfe. Werde mich bestimmt noch ein paar mal melden. Spätestens dann wenn es um die verkürzten Reihen geht ;-)
18.01.2015 - 21:17DROPS Design answered:
Die cm-Angaben beziehen sich immer alle auf den Anschlagrand. Sie messen immer in Strickrichtung ab dem Anschlag. Zu den verkürzten R können Sie sich am besten vorher ein Video anschauen, im Kopf neben dem Foto unter "Videos", probieren Sie die verkürzten R vorher an einem Probestück aus. Sie sind einfacher, als man denkt. :-) Und fragen Sie gerne wieder, nichts ist blöder, als beim Stricken in Frust zu versinken, weil man etwas nicht versteht... :-)
19.01.2015 - 10:25
![]() Janin wrote:
Janin wrote:
Heisst von der Vorderseite aus gesehen das es die Rückreihe ist also das der Anfangsfaden links liegt? Hab ich das richtig verstanden, dass nach den ersten 15 cm nur die letzte Randmasche abnehmen muss? Warum wird dann nach 85 cm eine neue Masche angeschlagen? Warum? Vielen Dank im Voraus für Ihre Bemühungen und Ihr Verständnis
18.01.2015 - 20:47DROPS Design answered:
"Von der Vorderseite aus gesehen" soll bedeuten, dass die letzte M gemeint ist, wenn das Gestrick mit der Vorderseite zu Ihnen zeigt. Somit also die letzte M einer Hin-R oder die erste M einer Rück-R. Die 15 cm messen Sie ab dem Anschlagrand. Und genau, Sie nehmen nur diese 1 M ab. Diese Abnahme und hinterher wieder Zunahme ist für die Armausschnitte - im Diagramm die "Vorsprünge" A und B (das Teil mit A ist das linke Teil). Das ist im Diagramm zur besseren Darstellung nicht ganz maßstäblich gezeichnet.
19.01.2015 - 10:24
|
|
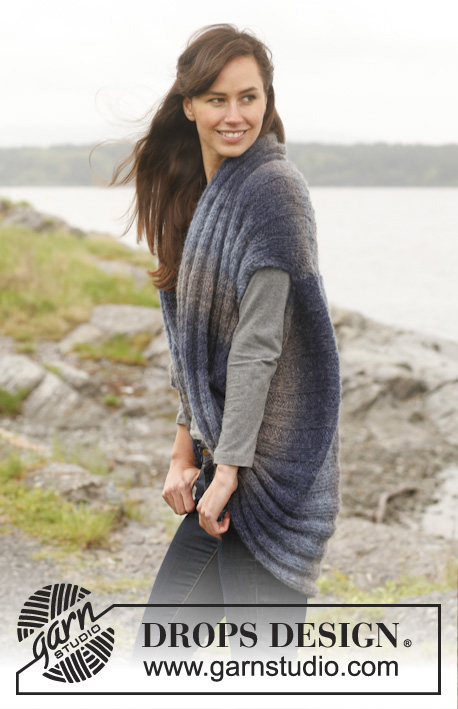
Blue Nile#bluenilejacket |
|
 |
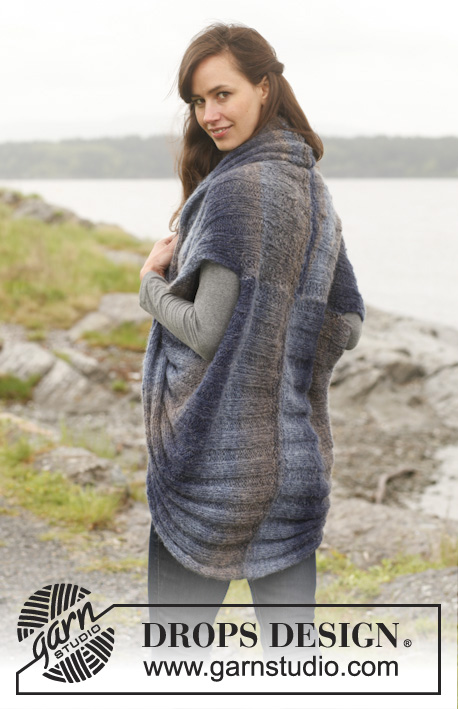 |
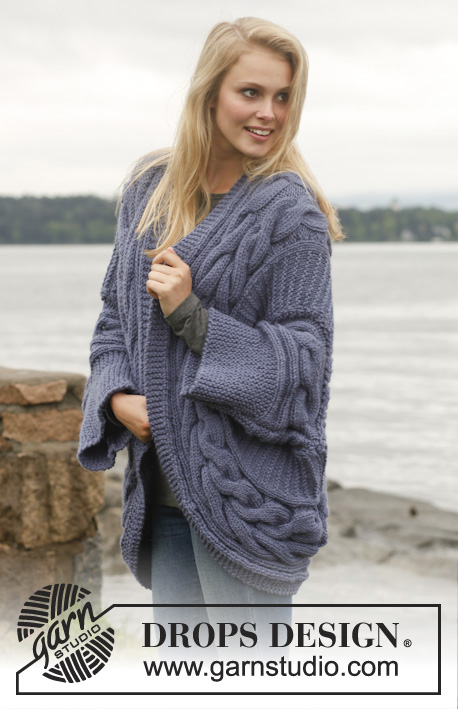
Knitted DROPS jacket in "Verdi". Size: S - XXXL.
DROPS 149-32 |
|
|
GARTER ST (back and forth on needle): K all rows. 1 ridge = 2 rows K. -------------------------------------------------------- JACKET: Piece is worked back and forth in 2 parts and sewn tog when finished. LEFT PART: Left back and front piece are worked in one from mid back of back. Worked back and forth on circular needle to make room for all the sts. Cast on 91-91-99-99-107-107 sts on circular needle size 6 mm with Verdi. Work 2 ridges in GARTER ST - see explanation above. Work next row as follows (from RS): 3 edge sts in garter st, K 4, * P 4, K 4 *, repeat from *-* over the next 80-80-88-88-96-96 sts, 4 edge sts in garter st. When piece measures 13-14-15-16-17-18 cm, dec the last edge st on row (seen from RS) = 90-90-98-98-106-106 sts. Continue pattern. When piece measures 83-84-85-86-87-88 cm, cast on a new edge st at the end of row (seen from RS) = 91-91-99-99-107-107 sts. Work until piece measures 96-98-100-102-104-106 cm. Continue pattern, AT THE SAME TIME work short rows over piece as follows – 1st row = from RS: Work until 8 sts remain on row, turn and work back. Work until 16 sts remain on row, turn and work back. Continue with short rows, every time you work from RS, work 8 sts less than on previous short row. Continue with short rows until there is 19 sts left on needle, now work 2 ridges over all sts, cast off. RIGHT PART: Work as left part but reversed, work 1st row with pattern as follows – from RS: 4 edge sts in garter st, K 4, * P 4, K 4 *, repeat from *-* over the next 80-80-88-88-96-96 sts, 3 edge sts in garter st. When piece measures 13-14-15-16-17-18 cm, dec first edge st on row (seen from RS). When piece measures 83-84-85-86-87-88 cm, cast on a new edge st at beg of row (seen from RS). When working short rows, start from WS. ASSEMBLY: See measurement chart. Sew A against A and B against B. Sew D against D. Sew C against C. |
|
|
|
|
|
Have you finished this pattern?Tag your pictures with #dropspattern #bluenilejacket or submit them to the #dropsfan gallery. Do you need help with this pattern?You'll find 12 tutorial videos, a Comments/Questions area and more by visiting the pattern on garnstudio.com. © 1982-2025 DROPS Design A/S. We reserve all rights. This document, including all its sub-sections, has copyrights. Read more about what you can do with our patterns at the bottom of each pattern on our site. |
|


With over 40 years in knitting and crochet design, DROPS Design offers one of the most extensive collections of free patterns on the internet - translated to 17 languages. As of today we count 314 catalogues and 11822 patterns translated into English (UK/cm).
We work hard to bring you the best knitting and crochet have to offer, inspiration and advice as well as great quality yarns at incredible prices! Would you like to use our patterns for other than personal use? You can read what you are allowed to do in the Copyright text at the bottom of all our patterns. Happy crafting!
Post a comment to pattern DROPS 149-32
We would love to hear what you have to say about this pattern!
If you want to leave a question, please make sure you select the correct category in the form below, to speed up the answering process. Required fields are marked *.