Commenti / Domande (56)
![]() Beth Weber ha scritto:
Beth Weber ha scritto:
They remind me of Mucklocks, very comfy
04.01.2016 - 11:06
![]() LAURENT LYDIA ha scritto:
LAURENT LYDIA ha scritto:
Je voudrai les faire pour une enfant en taille 26-27, longueur de pied 17 cm, comment je peux faire pour connaître le nombre de points à faire ?
24.11.2015 - 08:45DROPS Design ha risposto:
Bonjour Mme Laurent, nous ne sommes malheureusement pas en mesure d'adapter chaque modèle à chaque demande individuelle, pour toute aide personnalisée, merci de bien vouloir contacter votre magasin DROPS. Bon crochet!
24.11.2015 - 09:31
![]() Terri ha scritto:
Terri ha scritto:
On slipper,it says continue as before until piece measures 10-11-12inch,what part am i to continue? thank you
23.10.2015 - 12:38DROPS Design ha risposto:
Dear Terri, measure from the beg of the slipper part. Then work the upper foot with increase on the mid top of foot, and then dec Happy crocheting!
23.10.2015 - 15:27
![]() Terri ha scritto:
Terri ha scritto:
Is there a how to video
23.10.2015 - 05:03DROPS Design ha risposto:
Dear Terri, you will find several video to the basic techniques under tab "videos" on the right side of the picture, but there is no video yet specific to this pattern, your request has been forwarded. While a new video comes, you are welcome to contact your DROPS store for any individual assistance, they will help you even per mail or telephone. Happy crocheting!
23.10.2015 - 09:25
![]() Nancy Altman ha scritto:
Nancy Altman ha scritto:
Bless you for sharing such wonderful patterns!! People like you make the world a nicer place!
07.09.2015 - 16:52
![]() Kayla ha scritto:
Kayla ha scritto:
For the end of the foot part what does it mean measure the piece is folded double? Also for stitching it together where do you start the process from? Thank you Kayla
07.02.2015 - 21:05DROPS Design ha risposto:
Dear Kayla, fold slipper so that you get end/beg of rows facing (sew along back of leg), the 7 tr worked in the middle ch will be on the top of foot - then continue with the seam tog under foot (the last row will be folded double and you will sew sts tog under foot). Happy crocheting!
08.02.2015 - 19:06Kim ha scritto:
A noticeable hole forms under the 7 tr stitches in row 2 of the foot. I have tried working the triples in the single chain and around the chain. Any suggestions? I am using a yarn equivalent purchased in Canada.
04.02.2015 - 17:47DROPS Design ha risposto:
Dear Kim, a small hole will appear when working the 7 tr in the ch from previous row. Happy crocheting!
05.02.2015 - 08:47
![]() Kelly Dalessandro ha scritto:
Kelly Dalessandro ha scritto:
I have a friend that would LOVE these but her shoes size is a woman's 14.is there any way you could tell me how to make this but larger to fit her feet?
03.02.2015 - 00:53DROPS Design ha risposto:
Dear Mrs Dalessandro, you may work more inc row (row 3 an 4) adjusting to the foot length - remember you can get any individual assistance from your DROPS store. Happy crocheting!
03.02.2015 - 09:41
![]() Paettrah ha scritto:
Paettrah ha scritto:
Hallo, kann es sein, dass die Beschreibung der Umschlagkante oben falsch ist? Ich finde auf dem Bild sieht es eher aus wie Reihen aus Stäbchen. Dafür spricht auch, dass der obere Teil des Schuhs (weiß/grau) das gleiche Muster auf weist..
28.01.2015 - 12:01DROPS Design ha risposto:
Die Anleitung ist richtig, der Rand wird quer mit festen M gehäkelt. Die festen M des Randes mögen etwas stäbchenähnlich erscheinen, weil sie in Hin- und Rück-R gehäkelt sind. Den Schuh häkeln Sie dann in eine der Längskanten des Randes, also im 90-Grad-Winkel zum Rand.
28.01.2015 - 13:30
![]() Kris ha scritto:
Kris ha scritto:
Where it says a total of 6 inches does that include the cuff also? so should the whole thing measure 6 inches or 6 inches after the add?
28.01.2015 - 04:10DROPS Design ha risposto:
Dear Kris, measure from the beg of the slipper part. Happy crocheting!
28.01.2015 - 11:25
Lucky Wanderer |
|
|
|
|
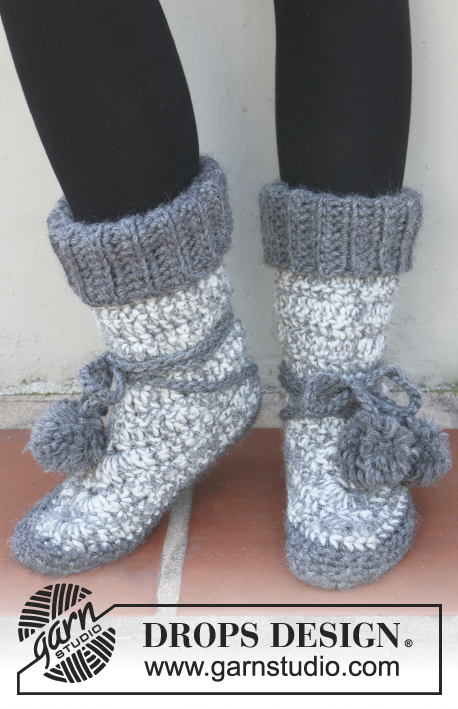
Pantofole DROPS all’uncinetto, in "Snow". Taglie: Dalla 35 alla 43.
DROPS Extra 0-888 |
|
|
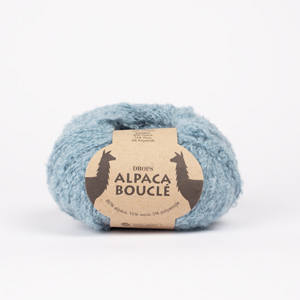
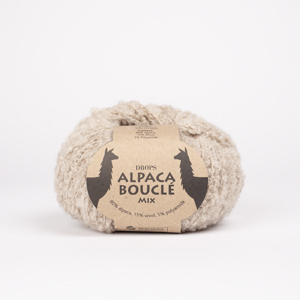
LAVORARE 2 M INSIEME: Lavorare la prima m ma non fare l’ultima gettata, lavorare la m successiva e, all’ultima gettata, passare il filo attraverso tutte e 3 le m sull’uncinetto. INFORMAZIONI PER IL LAVORO: Iniziare ogni riga a m.b con 1 cat. ---------------------------------------------- BORDO: Si lavora da lato a lato. Con 1 capo del filato Snow colore grigio scuro, avviare 13 cat morbide. Lavorare 1 m.b nella 2a cat dall’uncinetto, proseguire lavorando 1 m.b in ogni cat = 12 m.b. Leggere le INFORMAZIONI PER IL LAVORO - Proseguire avanti e indietro, lavorando 1 m.b nel filo posteriore delle m per 27-28-29 cm. Tagliare il filo. PANTOFOLA: Si lavora dall’alto verso il basso, avanti e indietro, con una cucitura sul dietro della gamba. Con 1 capo del filato Snow colore grigio chiaro e 1 capo del filato Alpaca Bouclé (= 2 capi lavorati insieme), riprendere 31-33-35 m.b a intervalli regolari lungo uno dei lati del bordo. Proseguire a lavorare come segue: * 2 cat, girare il lavoro, lavorare 1 m.a in ogni m della riga, 1 cat, girare il lavoro, lavorare 1 m.b in ogni m della riga *, ripetere da *-*. ALLO STESSO TEMPO, quando il lavoro misura in tutto 15 cm, diminuire 2 m nel corso della riga successiva, come segue: Lavorare le prime 2 m insieme - vedere le spiegazioni sopra - e al centro, sul davanti, lavorare 2 m insieme = 29-31-33 m. Proseguire come prima finché il lavoro non misura 26-28-31 cm. Lavorare ora il piede come segue – inserire un segno nella m centrale della riga: RIGA 1: Lavorare 1 m.b in ogni m finchè non rimane 1 m prima della m centrale, lavorare 2 m.b nella m successiva, 1 cat (= m centrale), saltare la m successiva, 2 m.b nella m successiva, 1 m.b in ognuna delle ultime m, girare il lavoro. RIGA 2: Lavorare 1 m.b in ognuna delle prime m fino alla cat, lavorare 7 m.a nella cat centrale (quindi la 4a m.a di queste 7 m.a è ora la m centrale) e 1 m.b in ognuna delle ultime m, girare il lavoro. RIGA 3: Lavorare 1 m.b in ognuna delle m successive finché non rimane 1 m prima della m centrale, lavorare 2 m.b nella m successiva, 1 cat (=m centrale), saltare la m successiva, lavorare 2 m.b nella m successiva, 1 m.b in ognuna delle ultime m, girare il lavoro. RIGA 4: Lavorare 1 m.b in ogni m fino alla m centrale, 7 m.a nella cat e 1 m.b in ognuna delle ultime m, girare il lavoro. Ripetere le righe 3 e 4 finché il lavoro non misura ca.23-26-28 cm, misurare la lunghezza del piede – misurare il lavoro piegato in due. Proseguire con 1 capo del filato Snow colore grigio scuro e da adesso in avanti, misurare il lavoro da questo punto. * Lavorare 1 riga di m.b, finire la riga con 1 cat e girare il lavoro *, ripetere da *-* finché il lavoro non misura ca.4-4½-5 cm. Lavorare ancora un’altra riga lavorando insieme le prime 2 e le ultime 2 m. Tagliare il filo. CONFEZIONE: Piegare la pantofola in due, cucire insieme sotto il piede e lungo il dietro della gamba. Cucire bordo contro bordo per evitare una cucitura troppo spessa. CORDINI CON POMPON Con il filato Snow colore grigio scuro avviare una fila di cat lunga ca.150 cm. Preparare un piccolo pompon da cucire ad ogni estremità – Suggerimento: prima di cucire il secondo pompon, far passare il cordino attraverso una m nella parte inferiore della gamba sul dietro, nel punto in cui si passa dal grigio chiaro al grigio scuro, in modo che il cordino sia fissato alla pantofola. Avvolgere intorno alla gamba. |
|
Avete terminato questo modello?Allora taggate le vostre foto con #dropspattern o inviatele alla #dropsfan gallery. Avete bisogno di aiuto con questo modello?Troverete 9 video tutorial, una sezione per i commenti/domande e molto altro guardando il modello su www.garnstudio.com © 1982-2025 DROPS Design A/S. Ci riserviamo tutti i diritti. Questo documento, compreso tutte le sue sotto-sezioni, è protetto dalle leggi sul copyright. Potete leggere quello che potete fare con i nostri modelli alla fine di ogni modello sul nostro sito. |








Lasciare un commento sul modello DROPS Extra 0-888
Noi saremmo felici di ricevere i tuoi commenti e opinioni su questo modello!
Se vuoi fare una domanda, fai per favore attenzione a selezionare la categoria corretta nella casella qui sotto per velocizzare il processo di risposta. I campi richiesti sono indicati da *.