
Categorie popolari
State cercando un filato?


Commenti / Domande (190)
![]() Claudine Van Belleghem ha scritto:
Claudine Van Belleghem ha scritto:
Twee vragen bij het haken van de mouwen (maat S). Je start met 67 losse waaruit dan 52stk gehaakt worden. Is dit de bovenkant van de mouw. Hoe kan die dan passen in de grotere opening in het rugpand (42stk + hoogte rugpand 22cm). Ook bij het verminderen van de mouw bij hoogte van 24cm een vraag. Moet je bij elke rij minderen? Dan kom je toch maar aan 32 stk aan 31cm? Voor de rand mouw moet je uiteindelijk aan 54v uitkomen. Hoe kan dit?
26.01.2014 - 12:09DROPS Design ha risposto:
Hoi Claudine. Je haakt de mouw van beneden naar boven. Je mindert in elke toer. De mouwkop moet schuin worden. Je bent begonnen met 52 stk aan de onderkant van de mouw en voor de rand haak je 1 v in elk stk en meerder je 2 v gelijkmatig = 60 v.
28.01.2014 - 16:34
![]() Nikki Baker ha scritto:
Nikki Baker ha scritto:
I love thus pattern. It is so feminine and beautiful. Well I'm finally ready to set in the sleeves but how do you determine where to set the sleeve? Is the top of the sleeve lined up in the middle of the 60ch? Or, say line the seam of the to an edge corner? Or where??? Help! Thanks in advance. Nikki
14.10.2013 - 04:45DROPS Design ha risposto:
Dear Mrs Baker, sleeves will be sewn half part to back piece and 2nd half to the border (the ch you cast on for armhole). Happy crocheting!
14.10.2013 - 09:20
![]() Satu Kaikkonen ha scritto:
Satu Kaikkonen ha scritto:
How and when do I add glitter thread or is it supposed to be knitted all the time with the actual thread? For me at least the amount needed of glitter thread (10g) sounds small for it to knitted along the actual thread. Hope You understand. Sorry about my english.
10.10.2013 - 15:28DROPS Design ha risposto:
Dear Mrs Kaikkonen, amount of Glitter has been updated to 20 g (2 spoons). Happy knnitting!
11.10.2013 - 09:19
![]() Satu Kaikkonen ha scritto:
Satu Kaikkonen ha scritto:
Miten ja missä vaiheessa tuota glitter lankaa lisätään vai kulkeeko se mukana koko ajan?
09.10.2013 - 17:32DROPS Design ha risposto:
Hei! Glitter-lanka kulkee kyllä koko ajan mukana.
10.10.2013 - 16:45
![]() Marisol ha scritto:
Marisol ha scritto:
Hola, ¿Se podría hacer este patrón en punto con dos agujas? Gracias!!
15.08.2013 - 09:35DROPS Design ha risposto:
Hola Marisol! Lo lamento pero este patrón es sólo para ganchillo.
17.08.2013 - 00:53
![]() Stefania ha scritto:
Stefania ha scritto:
Sto realizzando quest modello e trovo difficoltà al punto di avvio dello scalfo maniche. Le spiegazioni dicono di avviare 60( per la taglia cdi mio interesse) catenelle per lato e lavorare in tondo. In queste catenelle dovrei lavorarci dentro 46 m.a. MA come è possibile? Resta un avanzo di catenella e il lavoro resta largo. E' possibile che ci sia un errore? Mi potete aiutare? Grazie
24.07.2013 - 10:10DROPS Design ha risposto:
E' giusto così Stefania, anche se si poteva confondere nelle spiegazioni italiane. Ora l'abbiamo modificato. Non devi lavorare in ogni catenella, ma intorno agli archi di catenelle, quindi non è un problema che le m.a sono di meno. Buon lavoro
26.07.2013 - 18:14
![]() Carla ha scritto:
Carla ha scritto:
Thank you for the speedy reply. I'm new at crocheting & my first time making a complex pattern. Do I do the round pattern around the 60 ch as well? Thank you in advance for any help anyone would offer. :) Have a great day!
12.07.2013 - 05:58DROPS Design ha risposto:
Dear Carla, after the first row discribed in the last answer (with 60 ch for each armhole), you will then work in the round on 1st Rd, you'll skip 1 dc from top and bottom part of back piece /1 ch from each armholes and work ch1, 1 dc in next dc. Happy crocheting!
12.07.2013 - 10:26
![]() Carla ha scritto:
Carla ha scritto:
Hello! Question about the EDGING, do I attach the rounds to the 60 ch that was made? If not, what is the 60 ch supposed to be for? Attach the sleeve? Thank you in advance for any help! Have an awesome day!
09.07.2013 - 05:41DROPS Design ha risposto:
Dear Carla, in the edging, the 60 ch are for both armholes, so that you first work 1 row on the back piece, then crochet the ch for armhole, work 1 row on the other side of back piece (bottom edge), work a ch for 2nd armhole and join to the first st at the beg of round. Happy crocheting!
09.07.2013 - 11:10
![]() Alison Leveridge ha scritto:
Alison Leveridge ha scritto:
Sleeves were too big and bulky. Trying to redo them in my own way, but a bit disappointed as the rest of the pattern is lovely.
25.06.2013 - 00:09
![]() Ingrid ha scritto:
Ingrid ha scritto:
Hallo, gebruik ik voor het hele patroon het goud draad? heb ik dan genoeg aan 1 klosje van 10 gram?
18.06.2013 - 16:01DROPS Design ha risposto:
Ja, je gebruik Glitter samen met Cotton Viscose op het hele patroon. 1 klosje Glitter is ongeveer 700 meter, dus je hebt meer dan genoeg. Veel haakplezier.
19.06.2013 - 13:20
|
||||||||||
Country Rose#countryrosebolero |
||||||||||
 |
 |
|||||||||
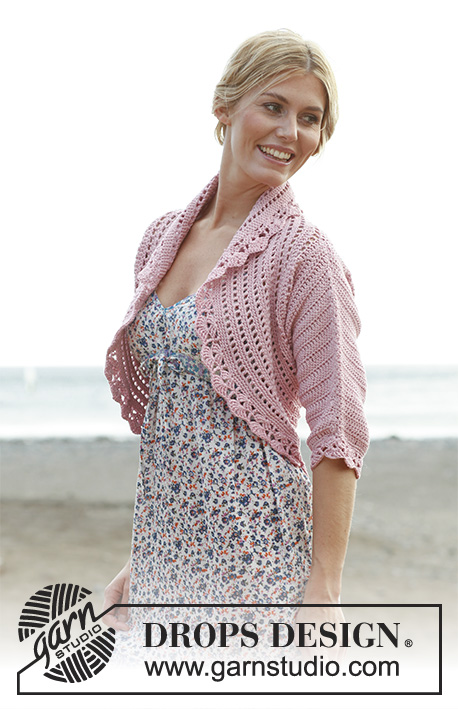
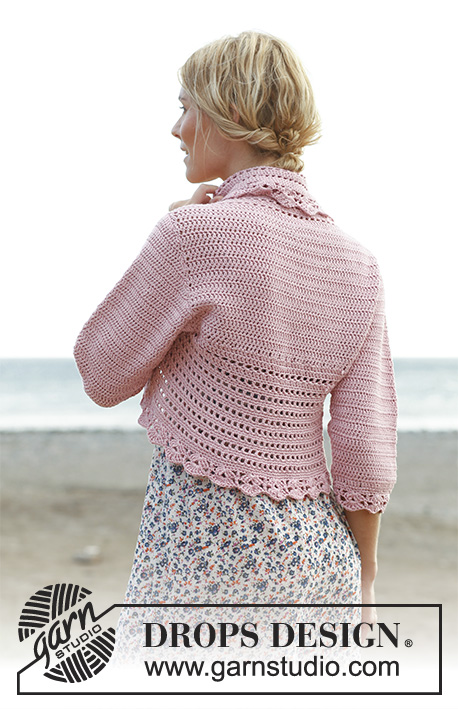
Giacca all’uncinetto DROPS in "Cotton Light" e "Glitter" Taglia: Dalla S alla XXXL.
DROPS 138-6 |
||||||||||
|
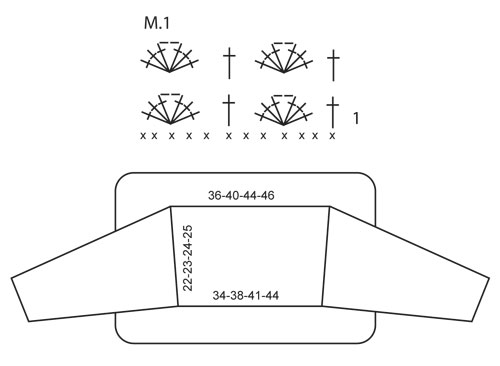
INFO UNCINETTO: Sostituire la 1° m.a. di ogni riga con 3 cat. Sostituire la 1° m.b. di ogni giro con 1 cat. Terminare ogni giro di m.b. con 1 m.bss. nella 1° cat. d’inizio giro. Sostituire la 1° m.a. di ogni giro con 3 cat. Terminare ogni giro di m.a. con 1 m.bss. nella 3° cat. di inizio giro. AUMENTI: Aumentare lavorando 2 m.a. nella 1° e nell’ultima m.a. della riga. DIMINUZIONI: Diminuire all’inizio della riga come segue: lavorare 1 m.bss. su tante m.a. quanto sono le m. da diminuire. Diminuire alla fine della riga come segue: quando rimangono da lavorare il numero di m.a da diminuire, girare il lavoro. -------------------------------------------------------- DIETRO: Avviare senza tendere troppo il filo una catena di 78-86-94-99 cat. con l’uncinetto nr. 4 con 1 filo di Cotton Light e 1 filo di Glitter (= 2 fili insieme). Lavorare 1 m.a. nella 4° cat. dall’uncinetto, * 1 m.a. in ognuna delle 3 cat. seguenti, saltare 1 cat. *, ripetere da * a * e terminare con 1 m.a. in ognuna delle ultime 2-2-2-3 cat = 58-64-70-74 m.a. Poi lavorare 1 m.a. in ogni m.a. - VEDERE INFO UNCINETTO. Quando il lavoro misura 7 cm, aumentare 1 m.a. su entrambi i lati - LEGGERE AUMENTI, ripetere l’aum. quando il lavoro misura 15 cm = 62-68-74-78 m.a. Lavorare finché il lavoro non misura 22-23-24-25 cm. BORDO GRANDE: Lavorare 1 m.a. in ogni m.a. sulla parte superiore del dietro, lavorare 56-58-60-64 cat, 1 m.a. in ogni m.a. lungo il basso del dietro, lavorare 56-58-60-64 cat e terminare con 1 m.bss. nella 1° m.a. del lato superiore del dietro. Lavorare 1 m.a. in ogni m.a. del dietro, negli archi di catene lavorare 42-44-46-48 m.a. = 204-220-236-248 m.a. Continuare a lavorare in tondo come di seguito: GIRO 1: 1 m.a. nella 1° m.a., * 1 cat., saltare 1 m.a, 1 m.a. nella m.a. seguente*, ripetere da * a * e terminare con 1 cat., saltare 1 m.a. e 1 m.bss. per chiudere il giro. GIRO 2: 1 m.b. in ogni m.a. e 1 m.b. in ogni cat. GIRO 3: 1 m.b. in ogni m.b. Ripetere questi 3 giri, ALLO STESSO TEMPO quando il bordo misura 5, 10 e 15 cm (assicurarsi di trovarsi in un giro di m.b), aum. 30-30-30-32 m.b. distribuite uniformemente nel giro - LEGGERE AUMENTI = 294-310-326-344 m.b. Quando il bordo misura 17-18-19-20 cm (assicurarsi che il giro successivo sia a m.b.), lavorare un giro a m.b. e ALLO STESSO TEMPO aum. di 0-2-4-4 m.b. distribuite uniformemente = 294-312-330-348 m.a. Poi lavorare seguendo il diagramma M.1 NOTA! Iniziare a lavorare sulla riga 1 sul diagramma. Lavorare il diagramma M.1 per 1 volta in altezza, tagliare e fissare il filo. MANICA: Avviare senza tendere il filo 67-72-72-77 cat. con l’uncinetto nr. 4 usando 1 filo di Cotton Light e un filo di Glitter (= 2 fili insieme). Lavorare 1 m.a. nella 4° cat. dall’uncinetto (= 2 m.a.), *saltare 1 cat., 1 m.a. nelle 4 cat. seguenti, *, ripetere da * a * e finire saltando 1 cat. e lavorando 1 m.a. in ognuna delle ultime 2 cat. = 52-56-56-60 m.a. Lavorare 1 m.a. in ogni m.a. avanti e indietro. ALLO STESSO TEMPO aum. 1 m.a. su entrambi i lati ogni riga per un totale di 13-14-16-17 volte, leggere AUMENTI = 78-84-88-94 m.a. Quando il lavoro misura 24-24-22-20 cm (la manica è più corta nelle taglie più grandi perché l’ampiezza della spalla è maggiore) dim. per lo scalfo ad ogni lato su tutte le righe - LEGGERE CONSIGLIO DIMINUZIONI: dim. 4 m.a. per 1 volta, poi 3-3-2-2 m.a. ad entrambi i lati finché il lavoro non misura 31-33-33-34 cm, ora dim. di 4 m.a. per 1 volta su entrambi i lati. Tagliare il filo e fissarlo. Cucire insieme la manica con piccoli punti. Lavorare intorno alla parte inferiore della manica come segue: lavorare 1 giro con 1 m.b. in ogni m.a., e allo stesso tempo aumentare 2-4-4-0 m.b. distribuite uniformemente = 54-60-60-60 m.b. Poi eseguire il diagramma M.1 per 1 volta in altezza. Tagliare il filo e fissarlo. CONFEZIONE: Cucire le maniche negli scalfi. |
||||||||||
Spiegazioni del diagramma |
||||||||||
|
||||||||||
 |
||||||||||
Avete terminato questo modello?Allora taggate le vostre foto con #dropspattern #countryrosebolero o inviatele alla #dropsfan gallery. Avete bisogno di aiuto con questo modello?Troverete 8 video tutorial, una sezione per i commenti/domande e molto altro guardando il modello su www.garnstudio.com © 1982-2026 DROPS Design A/S. Ci riserviamo tutti i diritti. Questo documento, compreso tutte le sue sotto-sezioni, è protetto dalle leggi sul copyright. Potete leggere quello che potete fare con i nostri modelli alla fine di ogni modello sul nostro sito. |
||||||||||


Con oltre 40 anni di esperienza nel design di modelli di maglia e uncinetto, DROPS Design offre la più estesa collezione di modelli gratuiti su internet - tradotti in 17 lingue. Ad oggi vi possiamo fornire 324 cataloghi e 12290 modelli - 9561 dei quali sono tradotti in Italiano.
Ci stiamo impegnando molto per darvi il meglio che vi possiamo offrire in termini di maglia e uncinetto, ispirazioni e consigli così come filati di grande qualità ad un prezzo incredibile! Volete utilizzare i nostri modelli per qualcosa d'altro oltre al vostro uso personale? Potete leggere tutto ciò che è consentito nel testo sul Copyright in basso su tutte le pagine dei nostri modelli. Buon lavoro!
Lasciare un commento sul modello DROPS 138-6
Noi saremmo felici di ricevere i tuoi commenti e opinioni su questo modello!
Se vuoi fare una domanda, fai per favore attenzione a selezionare la categoria corretta nella casella qui sotto per velocizzare il processo di risposta. I campi richiesti sono indicati da *.