
Categorie popolari
State cercando un filato?


Commenti / Domande (80)
![]() Kth Jolley ha scritto:
Kth Jolley ha scritto:
I have 2 questions. 1, how many yarns off the safran do's this garment take, 2 question can this garment be made in double knit wool or not. Thanks kath
16.07.2012 - 14:38DROPS Design ha risposto:
To make this it takes 4-5-5-6 skeins depending on size. We can't help with recommendations of substitute yarns outside our own range.
25.08.2012 - 00:40
![]() Lesley L ha scritto:
Lesley L ha scritto:
I'm just starting this and fallen at first hurdle :-) Back piece says "repeat from *-* until end of row = 74-82-94-106 sc. Continue with Pattern – see explanation above, until complete measurement" Does this mean I continue the repeat until I have done 106 sc (plus missed ch's) in the XL size? And do I then turn and start with first row of pattern i.e."Crochet 1 dc in each stitch, finish row with 1 ch to turn with"?
08.06.2012 - 22:11DROPS Design ha risposto:
Dear Lesley, when you have worked the first row as indicated, you will have a total of 106 sc. You then just have to follow the 2 rows of the pattern as indicated above. Start every dc row with 3 ch and every sc row with 1 ch. Happy crocheting !
06.12.2012 - 14:14
![]() Barbara ha scritto:
Barbara ha scritto:
I'm having a problem with the Right Front Piece. I'm ready to start bind off for the neckline. When I bind off 12 sts mid-front for neck, will I be starting from the center or on the side and will the 12 sts be on a DC row or a SC row?
05.03.2012 - 01:55DROPS Design ha risposto:
You bind off the 12 sts from the center. In smaller sizes you cont to bind off on every row and on larger sizes you bind of on every other row. There is a tip in beg of pattern telling how to bind off in beg of row, and at the end of a row.
06.03.2012 - 02:07
![]() Jamie ha scritto:
Jamie ha scritto:
After I've crocheted the first row, do I follow the second row of the pattern and continue from there or do I crochet the first row and then double crochet in each stitch? And I'm assuming I would then need to ch 3 at the end of the first row if I did.
21.02.2012 - 20:54DROPS Design ha risposto:
When you start pattern, you start with first row in pattern. First dc is replaced by ch 3.
29.02.2012 - 00:21DROPS Design ha scritto:
Barbara, yes you will :)
06.02.2012 - 19:10Barbara ha scritto:
When you dec on every third row 3 times, does this mean you'll be dec on a sc row as well as a dc row?
05.02.2012 - 21:29
![]() DROPS Design ha scritto:
DROPS Design ha scritto:
Lori, when you get there you work first the first shoulder only, then when that one is done, then you work the other shoulder on the other side and just do not work at all over the middle sts. To bind off for the neck you crochet until number of sts left equals number of sts to be bound off and then turn piece and work back.
17.01.2011 - 18:25
![]() Lori ha scritto:
Lori ha scritto:
I have a similar question to ones listed below. On the back piece it says to bind off when you get to 18 stiches on each side. I'm looking for a video on how to bind off in a middle of the row. Also in order to continue on you must have to work with a ball of yarn on each side to continue on for the shoulders? Am I correct/
17.01.2011 - 13:04
![]() Drops Design ha scritto:
Drops Design ha scritto:
Merci Elena, la dernière bride a été ajoutée.
01.05.2009 - 13:03
![]() Elena ha scritto:
Elena ha scritto:
Une erreur dans le descriptif du point eventail : entre les * la dernière bride est oubliée.
30.04.2009 - 23:29
|
|
Dainty Miss#daintymisstop |
|
|
|
|
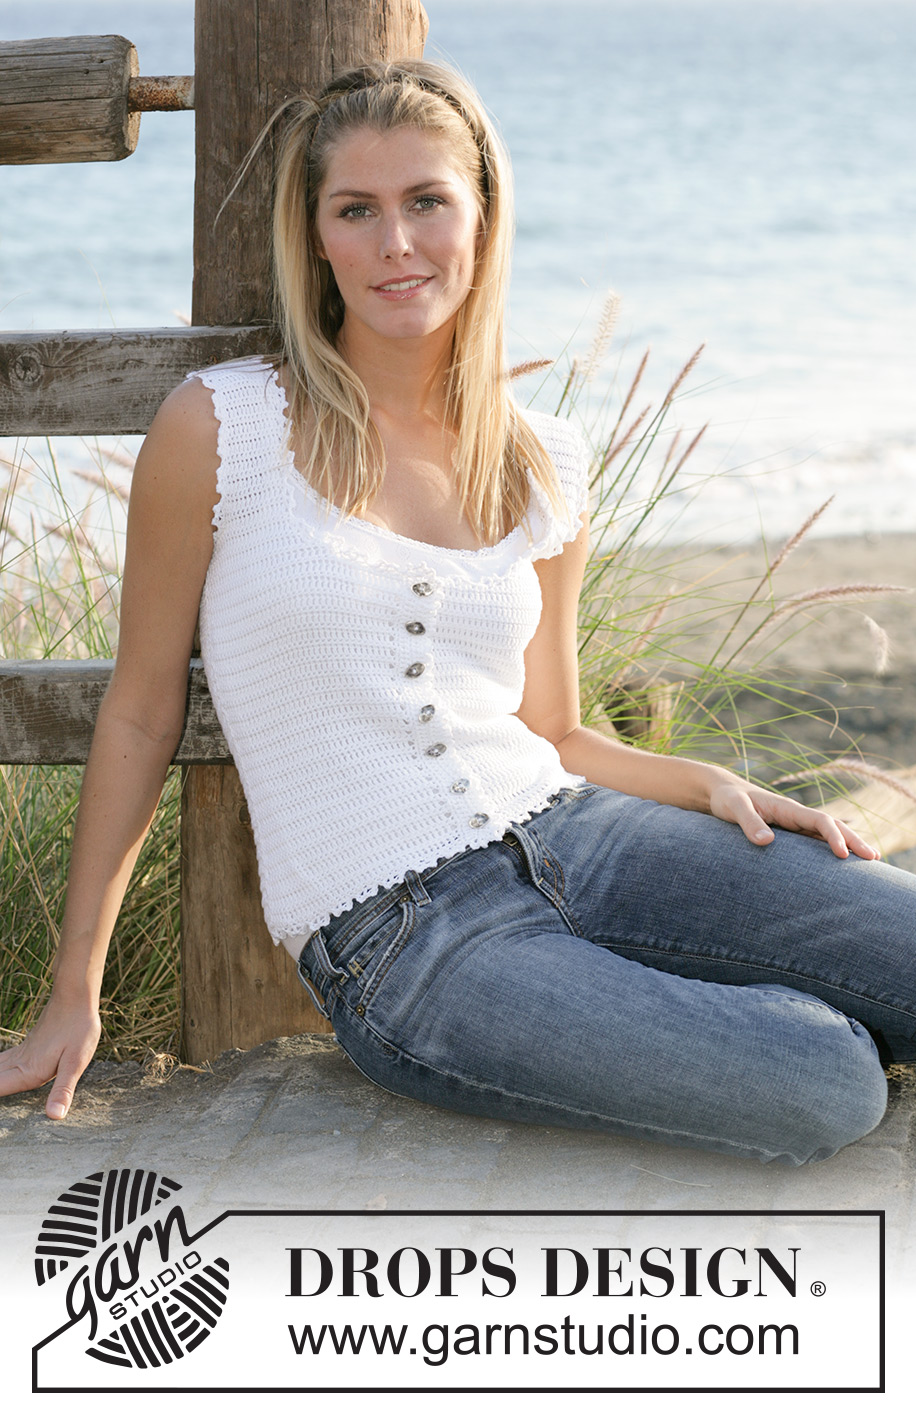
Top DROPS all’uncinetto, in "Safran". Taglie: dalla S alla XL.
DROPS 99-11 |
|
|
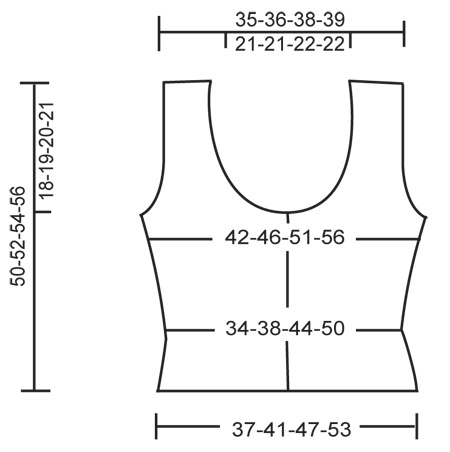
CAMPIONE: 20 m.a/m.b in larghezza x 13 righe in altezza seguendo il motivo con l’uncinetto n° 3,5 ed il filato Safran = 10 x 10 cm. MOTIVO: Riga 1 (= diritto del lavoro): 1 m.a in ogni m, finire la riga con 1 cat per girare il lavoro. Riga 2: 1 m.b in ogni m, finire la riga con 3 cat per girare il lavoro. Ripetere le righe 1 e 2. SUGGERIMENTO PER LE DIMINUZIONI (per lo scalfo e lo scollo): Diminuire all’inizio della riga, come segue: lavorare m.bss sul numero di m da diminuire. Diminuire alla fine del riga, come segue: non lavorare sul numero di m da diminuire alla fine della riga; girare il lavoro. MOTIVO A VENTAGLIO: Nella prima m lavorare: 1 m.a, 1 picot (= 3 cat, 1 m.b nella prima cat), 1 m.a, 1 picot e 1 m.a, * saltare 2 m, 1 m.bss nella m successiva, saltare 2 m (negli archi di cat dello scollo e dello scalfo, saltare 3 m per avere un bordo più regolare), nella m successiva, lavorare: 1 m.a, 1 picot, 1 m.a, 1 picot, 1 m.a *, ripetere da *-*. ------------------------------------------------------ DIETRO: Con l’uncinetto n° 3,5, avviare 93-103-118-133 cat (compresa 1 cat per girare il lavoro). Lavorare la prima riga come segue: 1 m.b nella 2a cat dall’uncinetto, 1 m.b nella cat successiva, * saltare 1 cat, 1 m.b in ognuna delle 4 cat successive *, ripetere da *-* fino alla fine della riga = 74-82-94-106 m.b. Proseguire seguendo il motivo – vedere le spiegazioni sopra, fino alle misure desiderate. Quando il lavoro misura 5-5-6-6 cm, diminuire saltando la seconda m dal bordo da ciascun lato ogni 3 righe 3 volte in tutto = 68-76-88-100 m. Quando il lavoro misura 15-16-17-18 cm, aumentare 1 m da ciascun lato lavorando 2 m nella seconda m dal bordo ogni 2 righe 8-8-7-6 volte in tutto = 84-92-102-112 m. Quando il lavoro misura 32-33-34-35 cm, diminuire per lo scalfo da ciascun lato ad ogni riga – vedere il SUGGERIMENTO PER LE DIMINUZIONI, come segue: 3 m 1-1-2-2 volte, 2 m 1-2-2-4 volte e 1 m 2-3-3-3 volte = 70-72-76-78 m. Quando il lavoro misura 47-49-51-53 cm, continuare lavorando sulle 18-19-20-21 m su uno dei lati, per la spalla. Continuare a diminuire per lo scollo, ad ogni riga, come segue: 2 m 1 volta e 1 m 2 volte = per la spalla rimangono 14-15-16-17 m. Tagliare il filo quando il lavoro misura 50-52-54-56 cm. Lavorare la seconda spalla in modo uguale. DAVANTI DESTRO: Con l’uncinetto n° 3,5, avviare 46-51-58-66 cat (compresa 1 cat per girare il lavoro). Riga 1: 1 m.b nella 2a cat dall’uncinetto, 1 m.b in ognuna delle 4-4-6-4 cat successive, * saltare 1 cat, 1 m.b in ognuna delle 4 cat successive *, ripetere da *-* fino alla fine della riga = 37-41-47-53 m.b. Lavorare ora il motivo come indicato per il dietro. Diminuire e aumentare sul lato come indicato per il dietro = 42-46-51-56 m. Quando il lavoro misura 30-31-32-33 cm, intrecciare per lo scollo (se desiderate uno scollo meno profondo, lavorare altri 3-3-4-4 cm prima di diminuire). Taglie S e M: intrecciare ad ogni riga. Taglie L e XL: intrecciare ogni 2 righe. Intrecciare le 12-12-13-13 m centrali per lo scollo, poi intrecciare per lo scollo 2 m 2 volte e 1 m 5 volte. ALLO STESSO TEMPO, quando il lavoro misura 32-33-34-35 cm, intrecciare per lo scalfo come indicato per il dietro. Terminate le diminuzioni per lo scalfo e per lo scollo, per la spalla rimangono 14-15-16-17 m. Tagliare il filo quando il lavoro misura 50-52-54-56 cm. DAVANTI SINISTRO: Lavorare come indicato per il davanti destro ma a specchio. CONFEZIONE: Cucire i lati nella m vivagno, con 1 m in ogni m. Cucire le spalle in modo uguale. BORDO DAVANTI SINISTRO: Lungo il davanti sinistro riprendere ca. 60-62-64-66 m.b– assicurarsi che il bordo rimanga piatto, né troppo stretto né ondulato. Lavorare ora 1 riga di m.a, 1 riga di m.b e 1 riga di m.a. Lavorare la riga successiva, come segue: Nella prima m.a lavorare: 1 m.b, 1 picot (= 3 cat, 1 m.b nella prima cat) e 1 m.b, * saltare 1 m, 1 m.b nella m successiva, saltare 1 m, nella m successiva lavorare: 1 m.b, 1 picot e 1 m.b *, ripetere da *-*. BORDO DAVANTI DESTRO: Lavorare come indicato per il bordo davanti sinistro, ma alla riga 3 (= m.b) lavorare 7 asole a intervalli regolari, come segue: 2 cat, saltare 2 m.a; alla riga successiva, lavorare 2 m.a nell’arco di cat – l’asola più in alto si deve trovare a 1 cm dal bordo superiore; l’asola più in basso a 1 cm dal bordo inferiore. MOTIVO A VENTAGLIO: Lavorare il motivo a ventaglio – vedere le spiegazioni sopra, intorno agli scalfi, lungo il bordo inferiore e intorno allo scollo. Attaccare i bottoni. |
|
 |
|
Avete terminato questo modello?Allora taggate le vostre foto con #dropspattern #daintymisstop o inviatele alla #dropsfan gallery. Avete bisogno di aiuto con questo modello?Troverete 5 video tutorial, una sezione per i commenti/domande e molto altro guardando il modello su www.garnstudio.com © 1982-2026 DROPS Design A/S. Ci riserviamo tutti i diritti. Questo documento, compreso tutte le sue sotto-sezioni, è protetto dalle leggi sul copyright. Potete leggere quello che potete fare con i nostri modelli alla fine di ogni modello sul nostro sito. |


Con oltre 40 anni di esperienza nel design di modelli di maglia e uncinetto, DROPS Design offre la più estesa collezione di modelli gratuiti su internet - tradotti in 17 lingue. Ad oggi vi possiamo fornire 324 cataloghi e 12290 modelli - 9561 dei quali sono tradotti in Italiano.
Ci stiamo impegnando molto per darvi il meglio che vi possiamo offrire in termini di maglia e uncinetto, ispirazioni e consigli così come filati di grande qualità ad un prezzo incredibile! Volete utilizzare i nostri modelli per qualcosa d'altro oltre al vostro uso personale? Potete leggere tutto ciò che è consentito nel testo sul Copyright in basso su tutte le pagine dei nostri modelli. Buon lavoro!
Lasciare un commento sul modello DROPS 99-11
Noi saremmo felici di ricevere i tuoi commenti e opinioni su questo modello!
Se vuoi fare una domanda, fai per favore attenzione a selezionare la categoria corretta nella casella qui sotto per velocizzare il processo di risposta. I campi richiesti sono indicati da *.