Commenti / Domande (23)
![]() Carol Maitland ha scritto:
Carol Maitland ha scritto:
Hi I am a bit confused.I knit the first 3 stitches putting a marker on the middle stitch which would be the second stitch.Then I do a yo then knit 1 then it asked for another yo then what.I keep redoing and redoing and end up always with 17 stitches instead of 18.Thks Carol.
04.01.2026 - 17:28DROPS Design ha risposto:
Hi Carol, You repeat from the first asterix to the second x 3: Knit 3 and insert the marker in the second stitch. 1 YO, knit 1, 1 YO, knit 3 and insert marker in 2nd stitch, 1 YO, knit 1, 1 YO, knit 3 and insert marker in 2nd stitch, 1 YO, knit 1, 1 YO. You have made 6 YOs and your original 12 stitches are now 18. Regards, Drops Team.
05.01.2026 - 06:53
![]() Judi ha scritto:
Judi ha scritto:
I have a question about the location of marking when the hat is half finished. For the first half, if I read correctly, for size XL I knit 10 cm over the increases, then an additional 9 cm with no increase or decreases, for a total of 33 cm from the cast on (23 cm from end of increases). However the instructions state to knit only 17 cm before starting to decrease. Is there a misprint in where to mark the midpoint? Also do you have a video on how to invisably fasten the end yarn on right side?
21.12.2025 - 13:59
![]() Bogi ha scritto:
Bogi ha scritto:
Eine schöne und gut verständliche Anleitung, dies war die allererste Mütze, die ich je gestrickt habe. Allerdings habe ich mich darüber geärgert, dass ich nur 2 Knäuel also 100g verbraucht habe. In der Anleitung sind als Verbrauch jedoch 3 Knäuel (150g) angegeben. Vielleicht korrigieren Sie diese Angabe 😊
01.12.2025 - 14:09
![]() Kath ha scritto:
Kath ha scritto:
Bonjour, j'aurais 2 questions de clarification: 1) A quel rang commence t-on à tricoter en rond? 2) Je ne comprends pas comment il est possible de terminer un rang avec un jeté plutôt qu'entre 2 mailles? Merci
02.11.2025 - 21:55DROPS Design ha risposto:
Bonjour Kath, le bonnet se tricote en rond dès le début; vous allez donc pouvoir terminer par 1 jeté vu que vous tricotez en rond. Si vous voulez tricoter ce bonnet en allers et retours, cette leçon pourra vous aider. Bon tricot!
03.11.2025 - 08:50
![]() Lisa Lebrija ha scritto:
Lisa Lebrija ha scritto:
For at udtagningerne skal lige dem på billedet, skal der tages ud på følgende måde efter der er slået 12 masker op. Strik 2 m ret, slå om, strik 2 m ret, slå om, Dette gøres 2 gange endnu. 2. omgang strikkes på følgende måde: 2 m ret, omslaget strikkes drejet ret til højre, 2 m ret, næste omslag strikkes ret til venstre. Så kommer det til at ligne udtagningerne på billedet af huen.
05.07.2025 - 17:45
![]() Lisa Lebrija ha scritto:
Lisa Lebrija ha scritto:
Jeg kan ikke få udtagningerne til at passe med udtagningerne på billedet. På billedet er der udtagninger på hver side af 2 masker. I opskriften er der kun 1 maske imellem hver udtagning. Så hvor er fejlen? Der står efter 2. omgang der nu skal tages ud på HVER pind. Vil det sige 2. omgang ikke skal strikkes før der er 18 masker ialt? Det bliver jo meget "hullet" med udtagninger på hver pind, uden en omgang ret uden udtagninger.
05.07.2025 - 11:14DROPS Design ha risposto:
Hei Lisa. Husk å lese UDTAGNINGSTIPS: Der tages ud på hver side af hver maske med mærke således: Strik til der er 1 maske tilbage før masken med mærke, slå om, strik 3 masker ret (mærket sidder i den midterste af disse masker), slå om (= 2 masker taget ud). Så det er 3 masker mellom hver kast. Strikk slik det er forklart på 1. og 2. pinne. Når du skal strikke 3. pinne (og videre), strikkes det glattstrikk og økninger (les udtagningstips), det økes på hver omgang totalt 6-7 ganger, før det skal økes på hver 2. omgang. mvh DROPS Design
07.07.2025 - 13:14
![]() Lalita ha scritto:
Lalita ha scritto:
Please let me ask about increasing and decreasing. After increasing 1 set, there will be 3 knitted stitches between the yarn over each side, but for decreasing, after knitting 2 together, knit 1 at the marker stitch, slip 1 knit 1 and pass the slipped knit over, the will be only 2 stitches between the decreased knit. Shouldn't we knit 2 (including the maker-stitch) before slipping 1 stitch?
08.04.2025 - 04:12DROPS Design ha risposto:
Dear Lalita, feel free to adjust where you will work the last (K2 tog) to get either K2 tog, K1 all the round or rather K1, K2 tog all the round, as you think it will look better, this round is the last one and this shouldn't be that visible. Happy knitting!
08.04.2025 - 09:47
![]() Tina ha scritto:
Tina ha scritto:
Hej Drops. Jeg vil gerne strikke denne her i 2 farver, hvor mange centimeter er der til midten?
13.02.2025 - 16:34DROPS Design ha risposto:
Hej Tina, Hele huen måler 26 eller 27 cm og så bukker du 6 cm op :)
18.02.2025 - 10:01
![]() Anna ha scritto:
Anna ha scritto:
In English (UK), the description suggests that you first knit the hat to a length of 26 cm, then knit another 17 cm until the decrease. (You can start decreasing when the piece measures 43 cm) In Hungarian (and some other languages) the description suggests that you knit 32 cm, then knit another 23 cm. (You can start decreasing when the piece measures 55 cm.) Which is correct? What is the recommended length for a size S/M beanie?
16.01.2025 - 12:45DROPS Design ha risposto:
Dear Anna, since the pattern was translated and uploaded its English version was reedited. Thank you for bringing to our attention, now the online Hungarian version is also updated. Happy Knitting!
17.01.2025 - 13:42
![]() Manon ha scritto:
Manon ha scritto:
Dans l'explication en français, il y a une erreur qui m'a fait douter un long moment "Augmenter ainsi 6-7-8 fois au total". 3 propositions pour 2 tailles ... Dans l'explication en anglais c'est "augmenter 6-7..." Le 8 est en trop en français. Maintenant que j'ai compris les explications je vais commencer le bonnet :)
16.01.2025 - 12:33DROPS Design ha risposto:
Bonjour Manon et merci pour votre retour, les explications ont été corrigées. Bon tricot!
16.01.2025 - 17:52
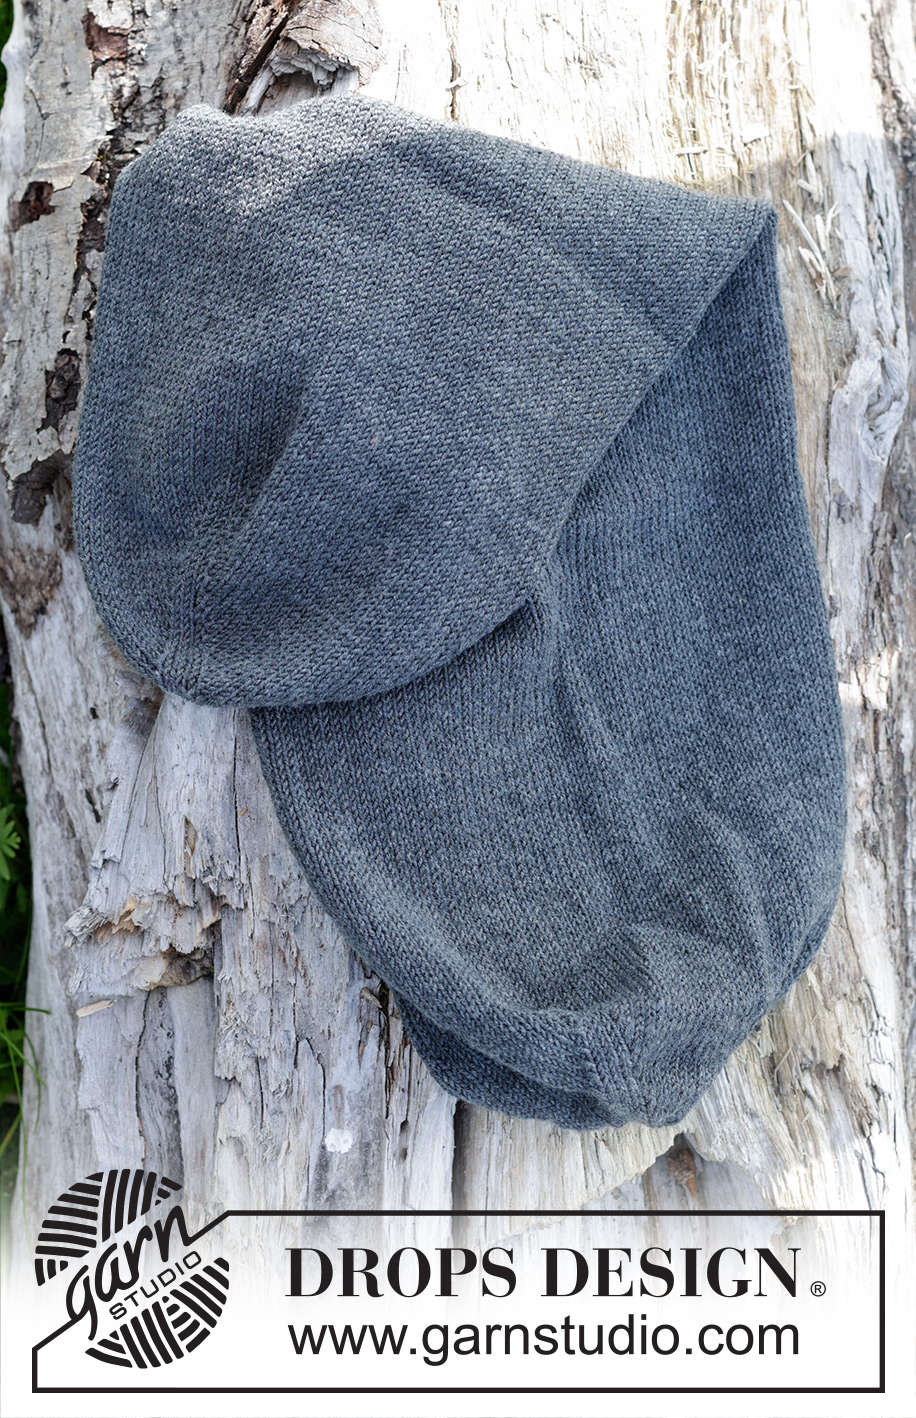
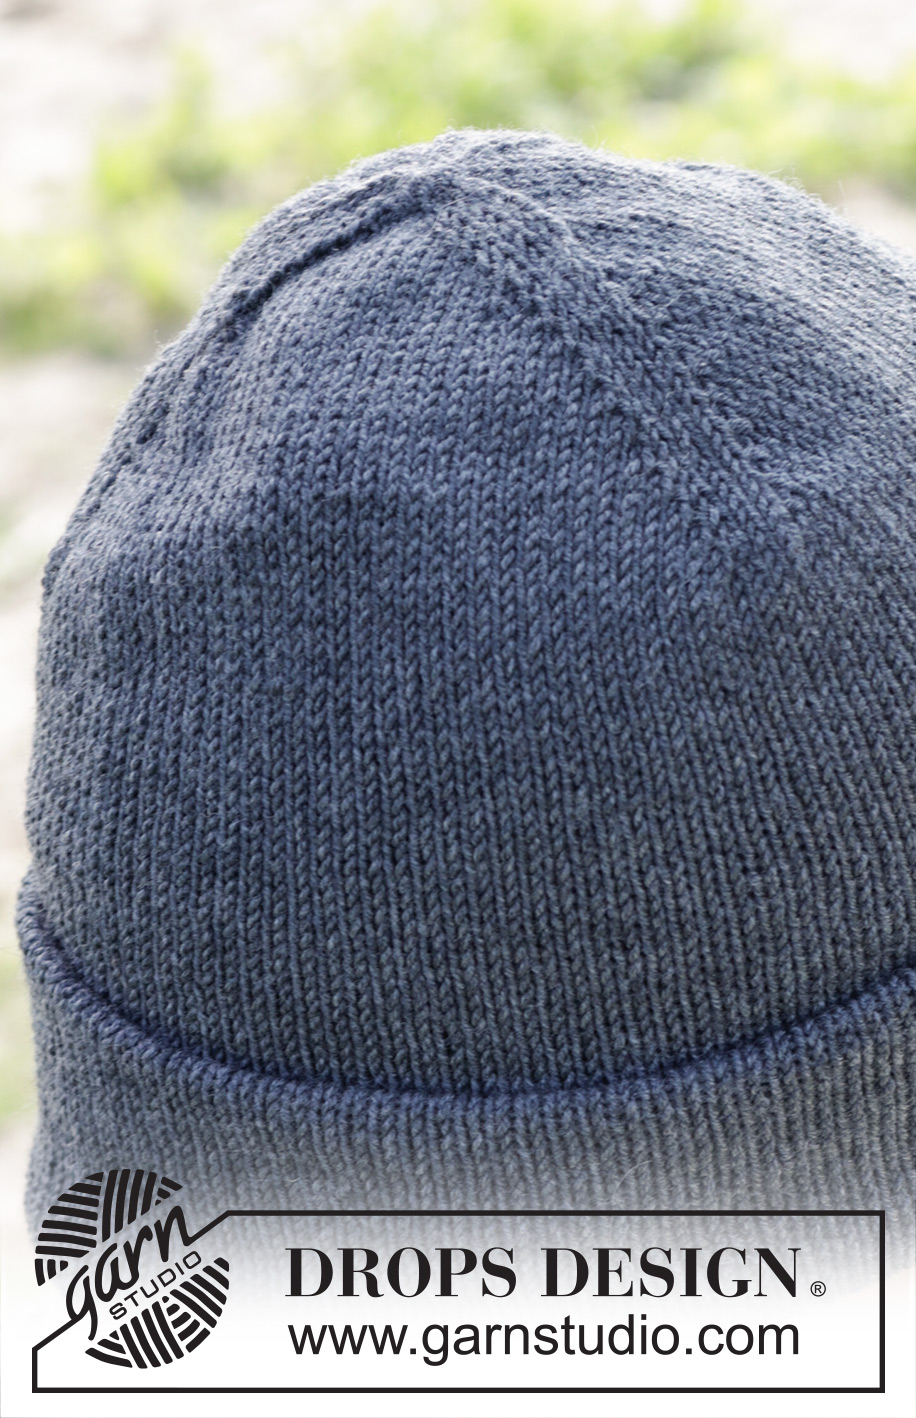
Blank Slate Hat#blankslatehat |
|
 |
 |
Cappello da uomo reversibile lavorato ai ferri in DROPS BabyMerino. Taglie: M – XL
DROPS 246-27 |
|
|
------------------------------------------------------- TECNICHE IMPIEGATE: ------------------------------------------------------- SUGGERIMENTO PER GLI AUMENTI (applicato alle maniche): Aumentare a ogni lato della maglia con il segnapunti come segue: lavorare fino a quando rimane 1 maglia prima della maglia con il segnapunti, 1 gettato, 3 maglie diritto (la maglia con il segnapunti è la maglia centrale), 1 gettato (= 2 aumenti). Sul giro successivo lavorare il gettato a diritto ritorto per evitare buchi. SUGGERIMENTO PER LE DIMINUZIONI: Diminuire a ogni lato di ogni maglia con il segnapunti come segue: Lavorare fino a quando rimangono 2 maglie prima della maglia con il segnapunti, 2 maglie insieme a diritto, 1 maglia diritto (maglia con il segnapunti), passare 1 maglia a diritto senza lavorarla, 1 maglia diritto, accavallare la maglia passata sopra quella appena lavorata (2 maglie diminuite). ------------------------------------------------------- INIZIO DEL LAVORO: ------------------------------------------------------- CAPPELLO – BREVE RIASSUNTO DEL LAVORO: Lavorare il cappello in tondo con i ferri a doppia punta, passando ai ferri circolari durante gli aumenti. Lavorare il cappello aumentando le maglie, lavorando verso il basso, poi diminuendo le maglie all’altra estremità. Il cappello assomiglierà ad un tubo, chiuso ad entrambe le estremità. Il tubo verrà ripiegato su se stesso per creare un tessuto doppio, a maglia rasata. CAPPELLO: Avviare 12 maglie con i ferri a doppia punta n° 3,5 mm e DROPS Baby Merino. GIRO 1: * 3 maglie diritto e inserire un segnapunti al centro di queste maglie, 1 gettato, 1 maglia diritto, 1 gettato *, lavorare *-* fino alla fine del giro = 3 segnapunti. GIRO 2: dirotto, lavorare i gettati a diritto ritorto = 18 maglie. Continuare a maglia rasata e aumentare 1 maglia a ogni lato di ogni maglia con il segnapunti – leggere il SUGGERIMENTO PER GLI AUMENTI (= 6 aumenti). Aumentare in questo modo su ogni giro per un totale di 6-7 volte, poi ogni 2 giri 11 volte. Alla fine di tutti gli aumenti, ci sono 120-126 maglie e il lavoro misura circa 9-10 cm dal bordo di avvio. FARE ATTENZIONE ALLA TENSIONE DEL LAVORO! Lasciare che i segnapunti seguano il lavoro – verranno usati durante le diminuzioni. NOTA! Ora è importante chiudere il buco in cima. Usare un ago e farlo passare attraverso le maglie, tirare e affrancare bene sul rovescio del lavoro. Continuare a maglia rasata in tondo fino a quando il lavoro misura 26-27 cm; metà cappello è finito. Inserire un segnapunti (usato per le misure). Continuare a maglia rasata in tondo fino a quando il lavoro misura 17-17 cm dal segnapunti. Ora diminuire 1 maglia a ogni lato di ogni maglia con il segnapunti – leggere il SUGGERIMENTO PER LE DIMINUZIONI (= 6 diminuzioni). Diminuire in questo modo ogni 2 giri per un totale di 11 volte, poi su ogni giro 6-7 volte. Alla fine di tutte le diminuzioni, rimangono 18 maglie. Lavorare il giro successivo come segue: * 2 maglie insieme a diritto, 1 maglia diritto *, lavorare *-* fino alla fine del giro = 12 maglie. Tagliare il filo. Far passare il filo attraverso le maglie rimaste e tirare. Affrancare il filo in modo che sia invisibile dal diritto del lavoro. Inserire le parti del cappello una dentro l’altra, dal segnapunti, in modo che siano un tessuto doppio, a maglia rasata sia all’interno che all’esterno; può essere utilizzato da entrambe le parti. Risvoltare i 6 cm più in basso verso il diritto del lavoro. |
|
Avete terminato questo modello?Allora taggate le vostre foto con #dropspattern #blankslatehat o inviatele alla #dropsfan gallery. Avete bisogno di aiuto con questo modello?Troverete 12 video tutorial, una sezione per i commenti/domande e molto altro guardando il modello su www.garnstudio.com © 1982-2026 DROPS Design A/S. Ci riserviamo tutti i diritti. Questo documento, compreso tutte le sue sotto-sezioni, è protetto dalle leggi sul copyright. Potete leggere quello che potete fare con i nostri modelli alla fine di ogni modello sul nostro sito. |
|


Lasciare un commento sul modello DROPS 246-27
Noi saremmo felici di ricevere i tuoi commenti e opinioni su questo modello!
Se vuoi fare una domanda, fai per favore attenzione a selezionare la categoria corretta nella casella qui sotto per velocizzare il processo di risposta. I campi richiesti sono indicati da *.