
Categorie popolari
State cercando un filato?


Commenti / Domande (34)
![]() Christelle R ha scritto:
Christelle R ha scritto:
Bonjour. Je crois que la question a déjà été posée mais je ne trouve pas de réponse. Je travaille la taille S. Au 1er rang du bas du top, j'obtiens bien 109m. Au 2eme rang A10 passe d'1 à 3m n'est ce pas ? (Sur le diagramme Rg1=14m/Rg2 et 3 =15m) Donc si je répète les rangs 2 et 3, je ne peux plus avoir 109m ? Où est l'erreur ? Merci pour votre réponse. Cdlt
28.04.2024 - 17:28DROPS Design ha risposto:
Bonjour Christelle, c'est exact, continuez simplement à crocheter les diagrammes comme indiqué, je transfère l'info à qui de droit. Bon crochet!
29.04.2024 - 09:52
![]() Ina Bremer ha scritto:
Ina Bremer ha scritto:
Problem gelöst! Mit der nötigen Ruhe klappt's dann auch mit der Häkelnanleitung : )
05.04.2024 - 22:14
![]() Ina Bremer ha scritto:
Ina Bremer ha scritto:
Hallo ihr Lieben, ich häkle die Größe XL und komme ganz zu Beginn nur auf 37 Stäbchen anstatt auf 40... Was übersehe ich, bzw. was mache ich verkehrt? Ganz liebe Grüße Ina
05.04.2024 - 18:42DROPS Design ha risposto:
Liebe Ina, auf der 1. Seite haben Sie (3 Lm + 1 Stb in die 4. Lm = 2 Stäbchen + 1 Stäbchen in je die nächsten 16 Lm = 18 Stäbchen + A.1 in die letzte Luftmasche = 2 Stäbchen = 20 Stäbchen auf der 1. Seite, dann auf die 2. Seite: A.1 = 2 Stäbchen (mit 1 Lm davor) + 1 Stäbchen in die nächsten 18 Lm = 20 Stäbchen = 40 Stäbchen insgesamt. Viel Spaß beim Häkeln!
08.04.2024 - 07:33
![]() Dawn ha scritto:
Dawn ha scritto:
What measurements are your sizes please for women XS -S -M -L -XL -XXL I’m not sure what size to make ? Thank you
22.03.2024 - 11:58DROPS Design ha risposto:
Dear Dawn, you will find the measurement chart for finished piece at the bottom of the written pattern, compare to a similar garment you have and like the shape to choose the best appropriate size. Read more here. Happy knitting!
22.03.2024 - 15:13
![]() Alcina Carvalho ha scritto:
Alcina Carvalho ha scritto:
Hello, Thanks for your answer. But you still didn't answer my question: at the end of Row 2 and Row 3, how many stitches do I have? Thanks.
23.06.2023 - 13:30DROPS Design ha risposto:
Dear Mrs Carvalho , you will have 149 sts after you have worked first row with A.8 and A.9 and then continue with A.9 only between A.10 and A.7 over all 149 sts. Happy crocheting!
23.06.2023 - 15:57
![]() Alcina Carvalho ha scritto:
Alcina Carvalho ha scritto:
Hello, I'm doing the part of the body (size L) of this pattern and I have doughts in how many stitches the row 2 and 3 have at the end. Is it supposed to finish with 168 stitches, as the beginning, or it has to finish with 149? Also, I think that at 2nd row, the A7 and A10 has to have only two stiches, and not three as indicated, otherwise we will increase 2 stitches for row. Could you please clarify? Thanks for your help!
22.06.2023 - 17:43DROPS Design ha risposto:
Dear Mrs Carvalho, when working diagram A.8 you will skip 1 stitch in each A.8 (4 sts over 5 chains), that's how you will decrease the number of stitches on first row to 149 sts.. Read 1st row from the right towards the left (starting with A.7 and finishing with A.10), then work row 2 starting with A.1, repeat A.9 and end with A.7 (don't work A.8 anymore). And repeat these 2 rows with A.7 over 4 sts on row 2 and3 sts on row 3; A.9 over 4 sts and A.10 over 3sts. Happy crocheting!
23.06.2023 - 07:32
![]() Alexandra ha scritto:
Alexandra ha scritto:
Row 3 , the treble cluster Rrow comes out with 135 stitches. It would be helpful if you could crochet the 1st 3 rows giving the correct amount of stitches after each row and do the same on the next 3 repeat rows stating amount of stitches after each row. This should have been written in the pattern.
05.06.2023 - 21:00DROPS Design ha risposto:
Dear Alexandra, which size are you working on? Remember that you don't work the same diagrams on 1st than on 2nd and 3rd row; on the first row you will crochet alternately A.8 and A.9 but on the 2nd and 3rd row you will then crochet only A.9 (A.8 was worked over 5 stitches and you skip 1 stitch so that A.8 ends with only 4 sts. Happy crocheting!
06.06.2023 - 09:04
![]() Alexandra ha scritto:
Alexandra ha scritto:
Sorry that should read 135 sts not 145. Still a lot more than 109!
05.06.2023 - 01:46
![]() Alexandra ha scritto:
Alexandra ha scritto:
I can't get the body to work. You are supposed to have 109 stitches throughout. Row 1 and 2 have 109 stitches but row 3 comes out with about 145 sts. . I think I am following the pattern exactly. I don't want to give up on it as I promised it fir my granddaughter.
05.06.2023 - 01:38DROPS Design ha risposto:
Dear Alexandra, when working row 3 you should just crochet 1 double crochet (UK-English) in each stitch, so if you get 109 sts on 2nd row, you should have 109 sts on 3rd row. Happy crocheting!
05.06.2023 - 10:25
![]() Anne Buckley ha scritto:
Anne Buckley ha scritto:
This is the way I got the BODY section pattern to work with the treble clusters lined up vertically every other row: First ROW 2 and 3 as written in pattern and diagram When you repeat ROW 2 (and subsequent repeats) , make first treble cluster in second stitch (DC) from beginning and final cluster in last but one. Otherwise, the clusters and holes do not line up! It would be useful to show some of the subsequent row 2/3 repeats in the diagram.
31.05.2023 - 09:34
|
|||||||||||||||||||||||||||||||
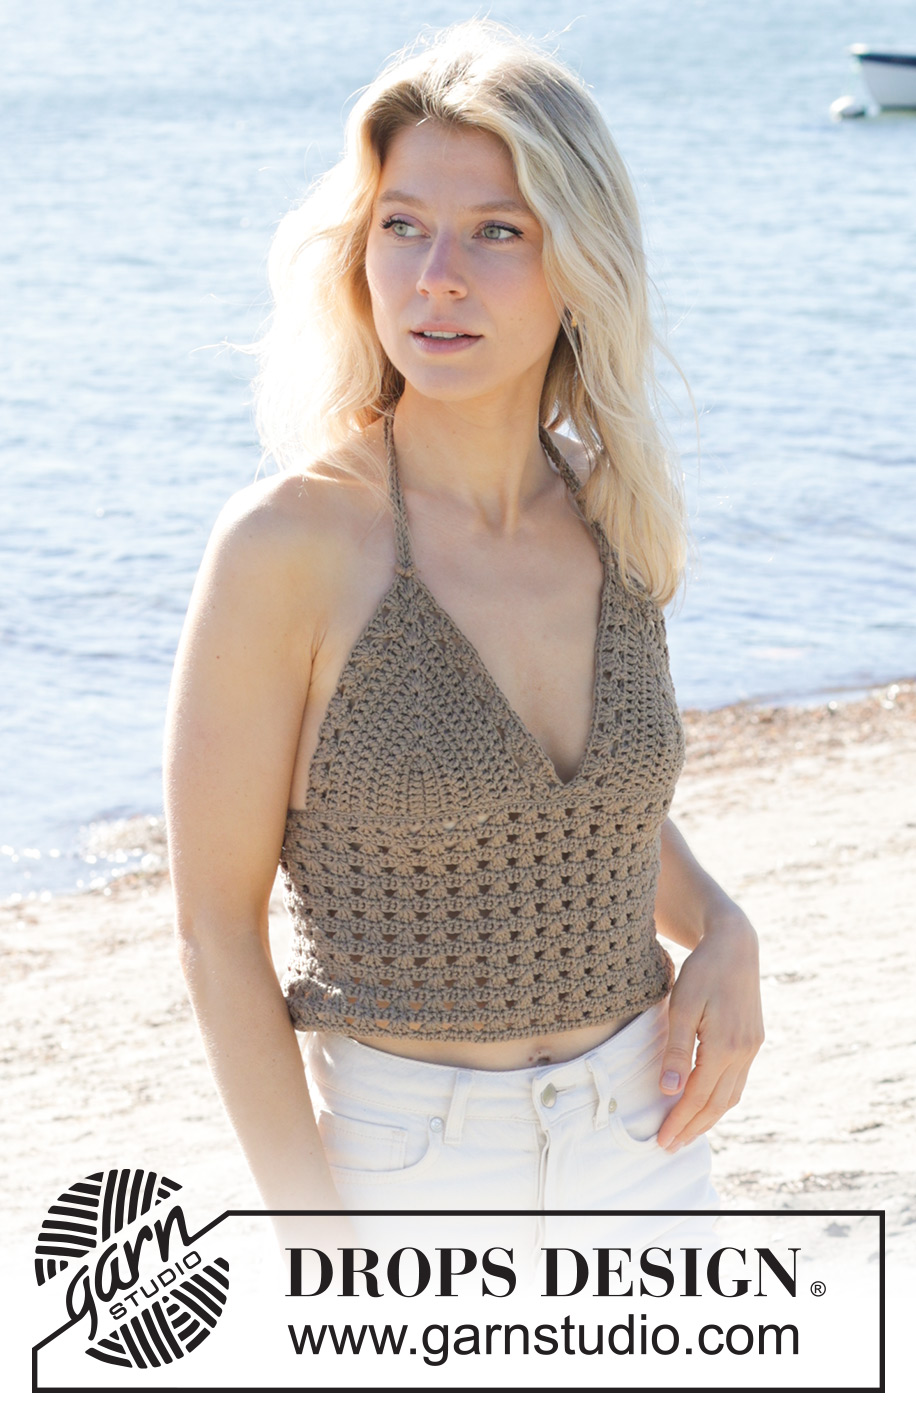
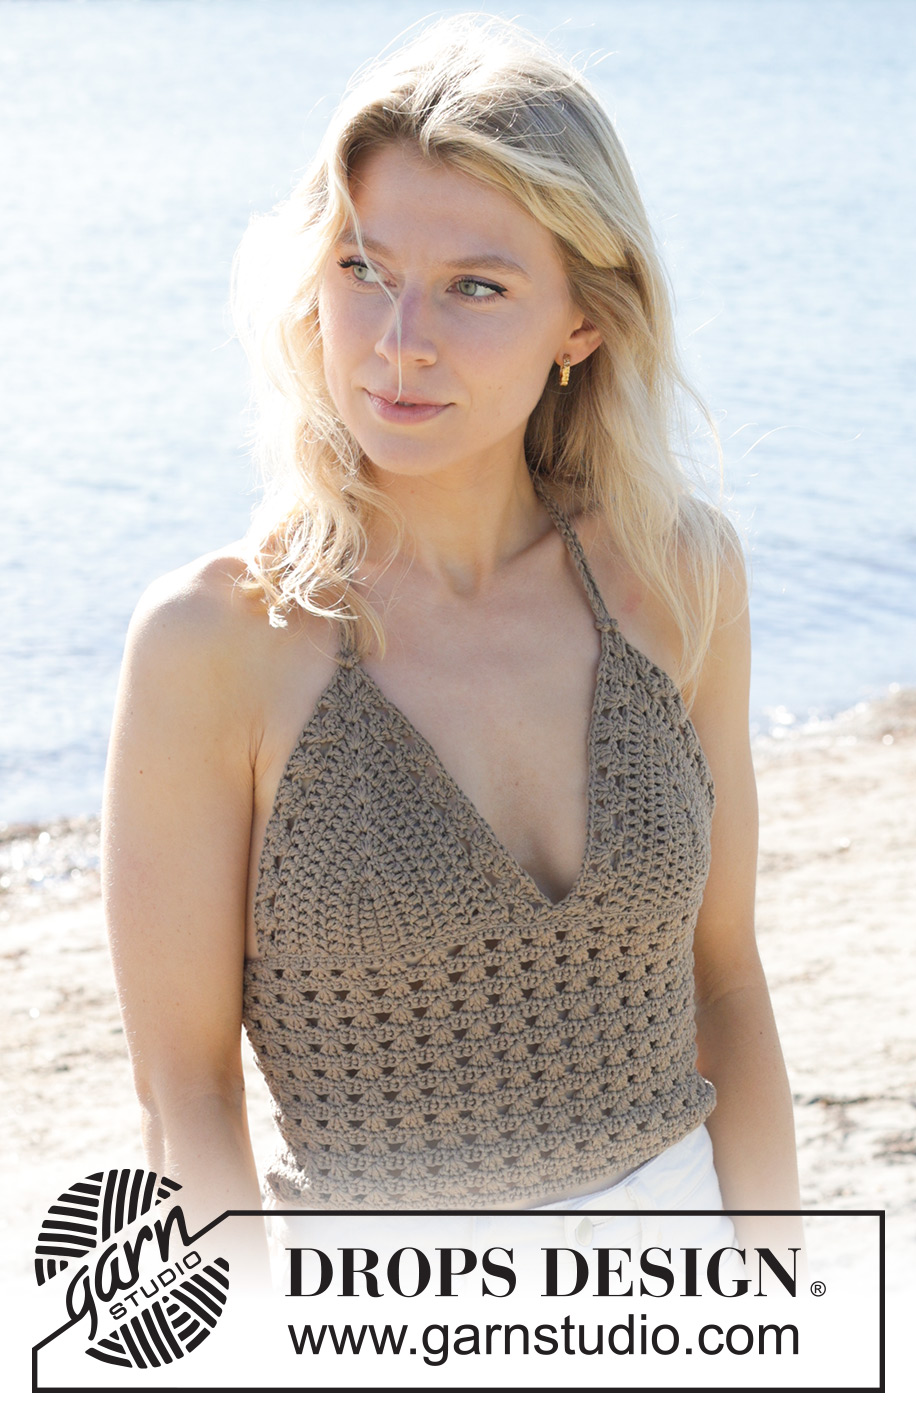
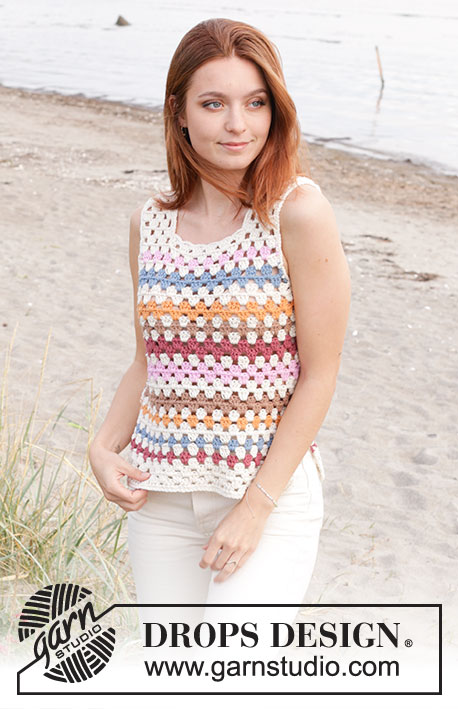
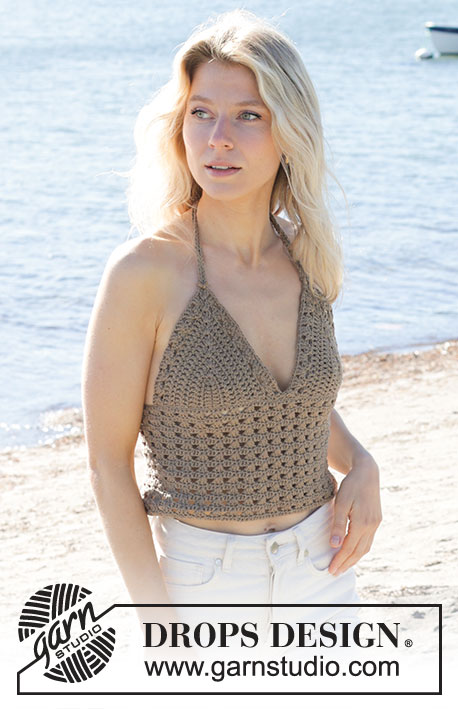
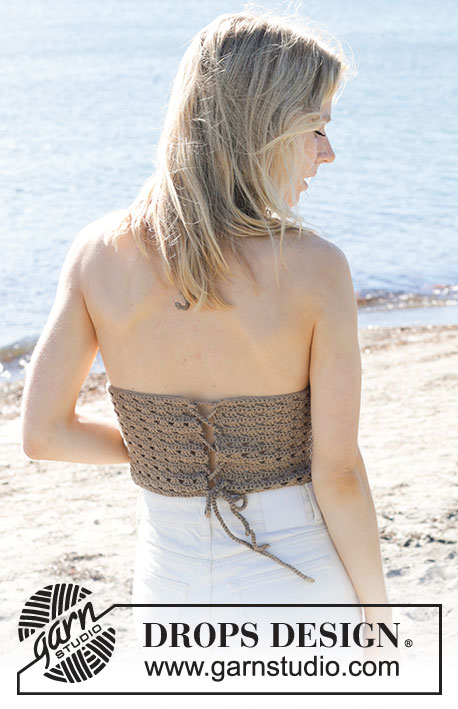
Charming Clover Top#charmingclovertop |
|||||||||||||||||||||||||||||||
 |
 |
||||||||||||||||||||||||||||||
Top lavorato all’uncinetto in DROPS Cotton Light. Lavorato con motivo traforato e spalline. Taglie: XS - XXL.
DROPS 239-28 |
|||||||||||||||||||||||||||||||
|
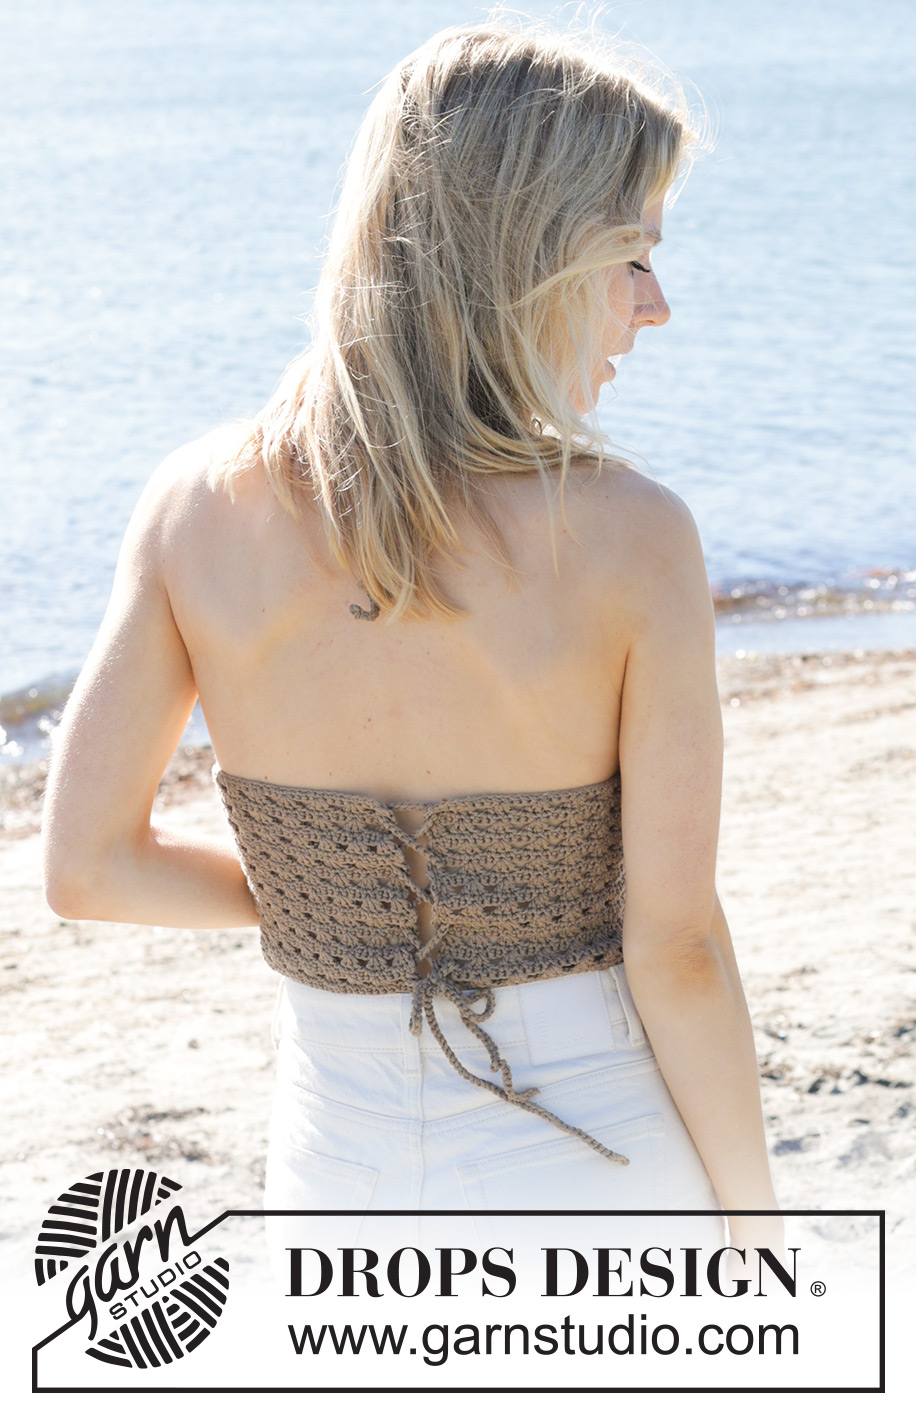
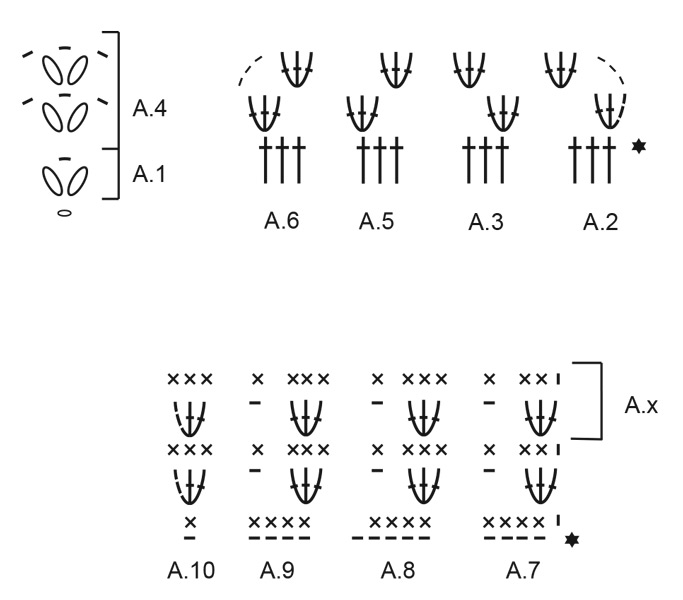
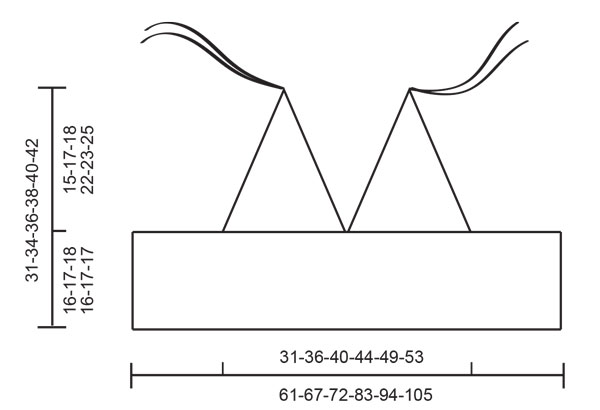
------------------------------------------------------- TECNICHE IMPIEGATE: ------------------------------------------------------- INFORMAZIONI PER IL LAVORO: CATENELLE: Se lavorate prevalentemente alla fine dell’uncinetto la catenella risulterà spesso troppo tirata. 1 catenella dev’essere lunga come la larghezza di 1 maglia bassa/alta. MAGLIE ALTE: All’inizio di ogni riga a maglie alte, lavorare 3 catenelle che sostituiscono la 1° maglia alta, cioè saltare la 1° maglia della riga precedente. MAGLIE BASSE: All’inizio di ogni riga a maglie basse, lavorare 1 catenella che sostituisce la 1° maglia bassa, cioè saltare la 1° maglia della riga precedente. MOTIVO: Vedere i diagrammi A.1 - A.10. SUGGERIMENTO PER IL LAVORO: Se preferite che il top vi copra di più sul davanti, potete lavorare le coppe con una piccola sovrapposizione al centro. Posizionare le coppe con la sovrapposizione e lavorare a maglie basse, aggiustando il n° di maglie in base a quanta sovrapposizione preferite. ------------------------------------------------------- INIZIO DEL LAVORO: ------------------------------------------------------- TOP – BREVE RIASSUNTO DEL LAVORO: Lavorare le coppe in modo separato, in piano, poi unirle. Lavorare il corpo in piano e cucire le coppe al corpo. Lavorare 1 spallina per ogni coppa e una spallina per allacciare il top al centro dietro. COPPE: Avviare 14-15-16-20-21-22 catenelle con l’uncinetto n° 3,5 mm e DROPS Cotton Light. Leggere le INFORMAZIONI PER IL LAVORO sopra. Lavorare 1 maglia alta nella 4° catenella dall’uncinetto, poi 1 maglia alta in ognuna delle 9-10-11-15-16-17 catenelle successive (1 catenella rimasta), lavorare il diagramma A.1 nell’ultima catenella (sopra della coppa). Girare e lavorare sotto la riga di catenelle, con 1 maglia alta nella parte inferiore di ognuna delle 11-12-13-17-18-19 maglie alte lavorate lungo l’altro lato della riga di catenelle (lavorare l’ultima maglia alta nella parte inferiore delle 3 catenelle che sostituiscono la 1° maglia alta). Ci sono 26-28-30-38-40-42 maglie alte e 1 catenella sulla riga. Girare. Lavorare in piano con 1 maglia alta in ogni maglia ma attorno alla catenella al centro di A.1 lavorare il diagramma A.1 (4 maglie alte aumentate sulla riga). FARE ATTENZIONE ALLA TENSIONE DEL LAVORO! Lavorare in questo modo fino a quando ci sono 5-6-7-8-9-10 righe di maglie alte. Ci sono 42-48-54-66-72-78 maglie alte e 1 catenella sulla riga. Lavorare seguendo i diagrammi A.2 - A.6 come segue: RIGA 1: Lavorare A.2 su 3 maglie, A.3 fino alla catenella centrale di A.1 (6-7-8-10-11-12 times), lavorare A.4 nella catenella, A.5 fino a quando rimangono 3 maglie (6-7-8-10-11-12 volte) (il motivo è simmetrico a entrambi i lati di A.4), lavorare A.6 su 3 maglie. Girare. RIGA 2: Lavorare A.6 su A.6, A.5 tra ogni gruppo di maglie alte fino alla 1° catenella di A.4 (5-6-7-9-10-11 volte), lavorare A.5 attorno alla 1° catenella di A.4, A.4 attorno alla catenella centrale di A.4, A.3 attorno all’ultima catenella di A.4, A.3 tra ogni gruppo di maglie alte (5-6-7-9-10-11 volte), A.2 su A.2. Finire la riga con 1 maglia bassissima nella 3° catenella dalla 1° riga = 52-58-64-76-82-85 maglie. Tagliare e affrancare il filo. Lavorare un’altra coppa nello stesso modo. CONFEZIONE DELLE COPPE: Leggere il SUGGERIMENTO PER IL LAVORO sopra. Usare l’uncinetto n° 3,5 mm e DROPS Cotton Light. Lavorare circa 29-32-36-39-43-47 maglie basse lungo la parte inferiore della 1° coppa, poi circa 29-32-36-39-43-47 maglie basse lungo la parte inferiore della 2° coppa. Tagliare e affrancare il filo. CORPO: Avviare 123-136-145-168-190-213 catenelle con l’uncinetto n° 3,5 mm e DROPS Cotton Light. Leggere le INFORMAZIONI PER IL LAVORO sopra. Girare. Iniziare nella 2° catenella dall’uncinetto e lavorare i diagrammi A.7 - A.10 come segue: RIGA 1 (rovescio del lavoro): lavorare A.7, poi in modo alternato A.8 e A.9 fino a quando rimangono 1-5-5-1-5-1 catenelle, lavorare A.9 0-1-1-0-1-0 volte e A.10. Ci sono 109-121-129-149-169-189 maglie basse. RIGA 2 (diritto del lavoro): lavorare A.10, A.9 fino a quando rimangono 4 maglie e finire con A.7 = 111-123-131-151-171-191 maglie. RIGA 3 (rovescio del lavoro): lavorare A.7, A.9 fino a quando rimangono 3 maglie e finire con A.10. Ripetere come mostrato in A.x fino a quando il lavoro misura 16-17-18-16-17-17 cm o fino alla lunghezza desiderata. Tagliare e affrancare il filo. CONFEZIONE: Mettere le coppe al centro del corpo, posizionarle lungo le catenelle dell’inizio del corpo e cucirle o attaccarle al corpo usando l’uncinetto. Cucire nel filo più esterno della maglia più esterna o lavorare a maglie bassissime in modo che la cucitura sia piatta e pulita. SPALLINE: Usare l’uncinetto n° 3,5 mm e 2 capi di DROPS Cotton Light. Lavorare a catenelle fino a una lunghezza di 110-115 cm o fino alla lunghezza desiderata. Lavorare 3 spalline, una per ogni coppa e una per chiudere il corpo sul dietro. Piegare una spallina al centro, inserire l’estremità dell’occhiello attraverso la cima di una coppa, far passare le estremità attraverso l’occhiello e tirare. Affrancare l’altra spallina nello stesso modo sull’altra coppa. Piegare il corpo, con I lati corti uniti. Far passare l’estremità dell’ultima spallina attraverso ogni lato in cima, poi dentro e fuori, attraverso i lati alternati, con le estremità che alla fine terminano sulla parte inferiore del corpo. Allacciare le estremità. |
|||||||||||||||||||||||||||||||
Spiegazioni del diagramma |
|||||||||||||||||||||||||||||||
|
|||||||||||||||||||||||||||||||
 |
|||||||||||||||||||||||||||||||
 |
|||||||||||||||||||||||||||||||
Avete terminato questo modello?Allora taggate le vostre foto con #dropspattern #charmingclovertop o inviatele alla #dropsfan gallery. Avete bisogno di aiuto con questo modello?Troverete 11 video tutorial, una sezione per i commenti/domande e molto altro guardando il modello su www.garnstudio.com © 1982-2026 DROPS Design A/S. Ci riserviamo tutti i diritti. Questo documento, compreso tutte le sue sotto-sezioni, è protetto dalle leggi sul copyright. Potete leggere quello che potete fare con i nostri modelli alla fine di ogni modello sul nostro sito. |
|||||||||||||||||||||||||||||||


Con oltre 40 anni di esperienza nel design di modelli di maglia e uncinetto, DROPS Design offre la più estesa collezione di modelli gratuiti su internet - tradotti in 17 lingue. Ad oggi vi possiamo fornire 324 cataloghi e 12290 modelli - 9561 dei quali sono tradotti in Italiano.
Ci stiamo impegnando molto per darvi il meglio che vi possiamo offrire in termini di maglia e uncinetto, ispirazioni e consigli così come filati di grande qualità ad un prezzo incredibile! Volete utilizzare i nostri modelli per qualcosa d'altro oltre al vostro uso personale? Potete leggere tutto ciò che è consentito nel testo sul Copyright in basso su tutte le pagine dei nostri modelli. Buon lavoro!
Lasciare un commento sul modello DROPS 239-28
Noi saremmo felici di ricevere i tuoi commenti e opinioni su questo modello!
Se vuoi fare una domanda, fai per favore attenzione a selezionare la categoria corretta nella casella qui sotto per velocizzare il processo di risposta. I campi richiesti sono indicati da *.