
Populaarsed kategooriad
Otsid lõnga?


Kommentaarid / Küsimused (16)
![]() Lene kirjutas:
Lene kirjutas:
Jeg har nu samlet til skulder og forstykke. I opskriften står der jeg skal strikke 14 cm nu fra mærket, men fra hvilket mærke, der er kun sat et mærke ved start af skulder som man allerede har strikket 14 cm til. Så hvor langt skal jeg strikke før jeg starter på bærestykket?
22.05.2026 - 09:35DROPS Design vastas:
Hej Lene, de 14 cm på forstykket er ca mål, det som er vigtigt er at sidste pind i A.2 er strikket når du klipper tråden (hvilket de burde være efter ca 14,5 cm i den største størrelse - ifølge strikkefastheden)
25.05.2026 - 11:16
![]() Brook kirjutas:
Brook kirjutas:
When you're working the rows beyond what is listed in the charts, will they end in the correct place when you're making a M or L? I noticed after you do the first 8 rows, it continues again at the first row with the arrow for the other sizes. Or do you just make sure you're in the 6-1-4-1 pattern until you hit 32 rows total and it'll be correct?
27.04.2026 - 22:34DROPS Design vastas:
Dear Brook, just work the new stitches into the pattern even if the pattern is not complete on each side after the 32 rows, when you work body in the round afterwards, pattern will fit in the round. Happy knitting!
28.04.2026 - 08:40
![]() John kirjutas:
John kirjutas:
I’m still a bit confused about working a3 for the back piece. If I’m understanding correctly you would work row 1 right to left, then 2 right to left, and then repeat the first 7 stitches of row 1? And then repeat for each subsequent set of rows but just moving up? Or do you always go back to the first 7 stitches of a2? Should you only then have two cables on the back piece? (When I do that I only have two)
25.04.2026 - 04:03DROPS Design vastas:
Dear John, from RS (read diagrams from the right towards the left) work A.1 then repeat A.2 and finish with A.3 - from WS start with A.3 (reading diagrams from the left towards the right), then work A.2 = K over K and P over P and finish with A.1. You can insert markers between markers so that you will be sure when A.1 and A.3 starts and stops. You should increase in A.1 and A.3 every row just as shown in diagram.If you work 2 repeats of A.2 on back piece you will get 2 cables to start with. There will be more cables afterwards (when there are enough stitches in the K6 sections to work a cable). Happy knitting!
27.04.2026 - 08:09
![]() Anna kirjutas:
Anna kirjutas:
Jag förstår inte hur ni tänker man ska följa diagrammen till bakstycket. Står att A.2 ska stickas över 31 maskor (A.2 x 2 + 7 första maskorna i A.2). Men A.2 måste väl öka i antal repetioner ju fler ökningar som görs? När sker detta? Ni har bara skrivit att varv 1 ska upprepas, det står inget om ökningar. Det är ett otydligt mönster. Jag ser nu var jag behöver göra om, men det är av egen erfarenhet, mönstret är inte till hjälp.
22.04.2026 - 17:24
![]() John kirjutas:
John kirjutas:
The videos also don’t seem to match this pattern? Are the back piece videos even applicable to this pattern?
19.04.2026 - 02:46DROPS Design vastas:
Hi John, this video shows the technique. To make the model 262-3, you have to watch the video first, and then make the back of your sweater following the instructions for this particular pattern. Happy knitting!
20.04.2026 - 09:52
![]() John kirjutas:
John kirjutas:
I’m finding this pattern confusing. For Row 2, the a.3 chart isn’t divisible by 31, so how are you supposed to work that? For the repeat instructions, are you only doing rows 1 and 2 or are you doing each whole chart to the end, and repeating 4 times total? How are you supposed to increase row 1 of each chart when you’ve got more stitches than what is listed? Unfortunately the pattern could be a little more clear on that.
19.04.2026 - 02:33DROPS Design vastas:
Dear John, when you have to work A.2 over 31 stitches, you repeat A.2 a total of 2 times in width then work the first 7 sts A.2 so that you get (12 sts x 2) + 7 = 31 sts. You then work diagrams as shown and at the same time increase as explained on row 1 and 2 (but you should not only work row 1 and 2 diagrams, work at the same time diagram one time in height, then repeat all rows in diagram until you are done with the increases). Can this help? Happy knitting!
20.04.2026 - 10:11
![]() Anke kirjutas:
Anke kirjutas:
Toch snap ik het nog niet helemaal. Als je aan de goede kant een meerdering naar links maakt en je draait het werk om naar de achterkant dan valt deze meerdering van daaruit gezien toch naar rechts? Moet ik dan aan de averechte kant dan boven de linker meerdering aan de goede kant dan geen meerdering naar rechts maken?
01.03.2026 - 15:46DROPS Design vastas:
Dag Anke
Als je de steek aan de ene kant rechtsom draait, zit hij aan de andere kant ook rechtsom, dus rechtsom blijft rechtsom als je het werk omkeert en linksom blijft linksom als je het werk aan de andere kant bekijkt.
04.03.2026 - 14:50
![]() Anke kirjutas:
Anke kirjutas:
Vraag over patroon DA-045 Walnut Dreams Vraag over A1 en A3: is het de bedoeling dat je de meerderingen aan de verkeerde kant andersom breit dan aan de voorkant? Dus wanneer aan de voorkant meerder naar links staat, moet ik dan aan de achterkant op die plek meerder naar rechts doen of ook meerder naar links.
01.03.2026 - 10:19DROPS Design vastas:
Dag Anke,
Goede vraag! Als de steek naar rechts moet draaien volg je de instructies zoals bovenaan beschreven om de steek naar rechts te laten draaien, dit geldt zowel voor de goed als de verkeerde kant. Dus als er aan de voorkant meerder naar links staat, dan meerder je aan de achterkant ook naar links volgens de instructie (als het goed is draait dan zowel aan de goede als de verkeerde kant de steek naar links).
01.03.2026 - 11:08
![]() Yolande kirjutas:
Yolande kirjutas:
Bonjour je voudrais faire ce pull en aiguilles 4,5 taille M mais je ne comprends pas vos explications. Pourriez-vous svp me faire un calcul pour me dire combien de mailles pour un dos, un devant et les manches. cordialement Yolande
26.01.2026 - 17:06DROPS Design vastas:
Bonjour Yolande, nous ne sommes malheureusement pas en mesure de pouvoir adapter chacun de nos modèles à chaque demande; vous pouvez vous inspirer d'un modèle analogue avec la tension souhaitée pour recalculer les indications pour votre taille. Merci pour votre compréhension. Bon tricot!
27.01.2026 - 08:52
![]() Elyne kirjutas:
Elyne kirjutas:
Bonjour, je tricote la taille xs. Je viens de finir les augmentations avant la séparation des manches et du corps. Quand je calcule le nombre d\'augmentation des 2 diagrams A4 et A5 je n\'arrive pas au nombre donné pour chaque partie : pour le dos et devant : 2+25+90+25+2=144 au total au lieu de 138 Pour les manches : 25+42+25=92 au lieu de 86. Est ce que vous pouvez m\'éclairer ?
19.12.2025 - 12:27DROPS Design vastas:
Bonjour Elyne, lorsque vous avez tricoté 36 tours vous n'avez augmenté que 21 mailles, soit: A.4 (22 m), A.2 (42 m), A.5(22 m) = 86 m pour les manches et 2 m jersey + A.4 (22 m) + A.2 (90 m) + A.5 (22 m) + 2 m jersey = 138 m pour le devant/le dos. Bon tricot!
22.12.2025 - 17:18
|
|||||||||||||||||||
Walnut Dreams Sweater#walnutdreamssweater |
|||||||||||||||||||
 |
 |
||||||||||||||||||
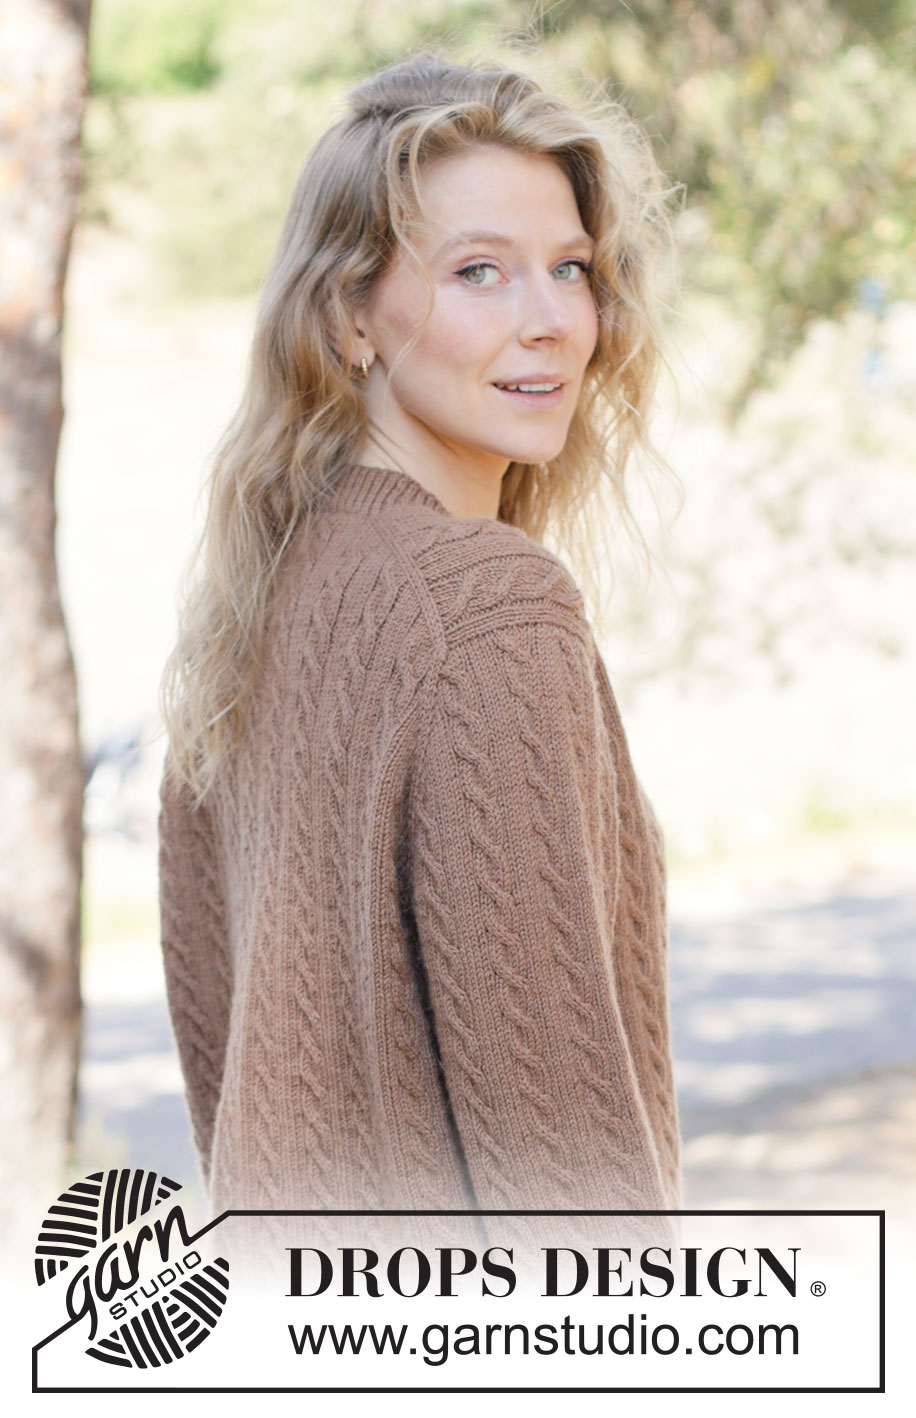
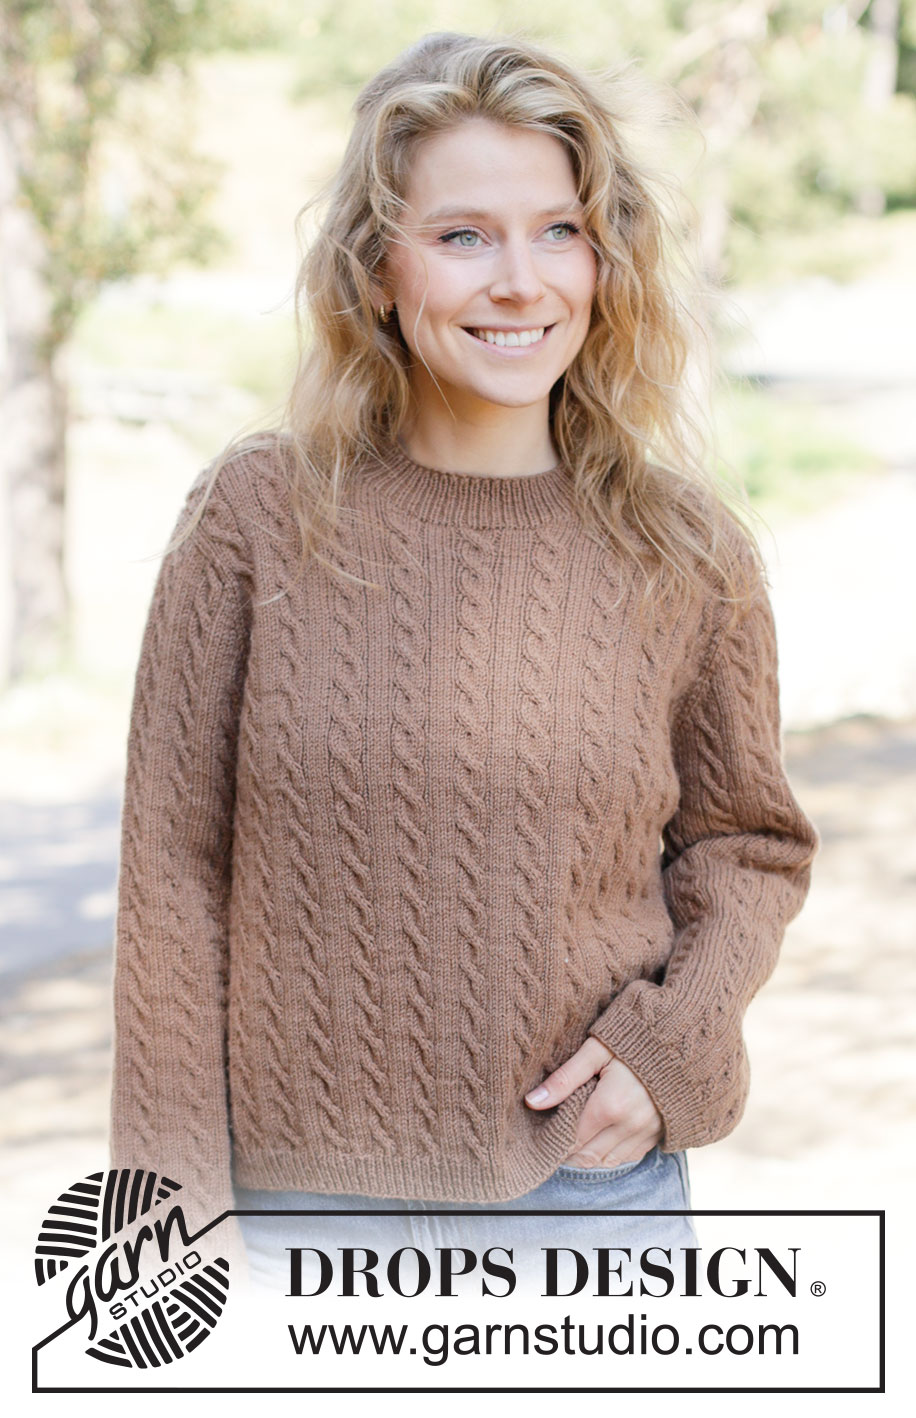
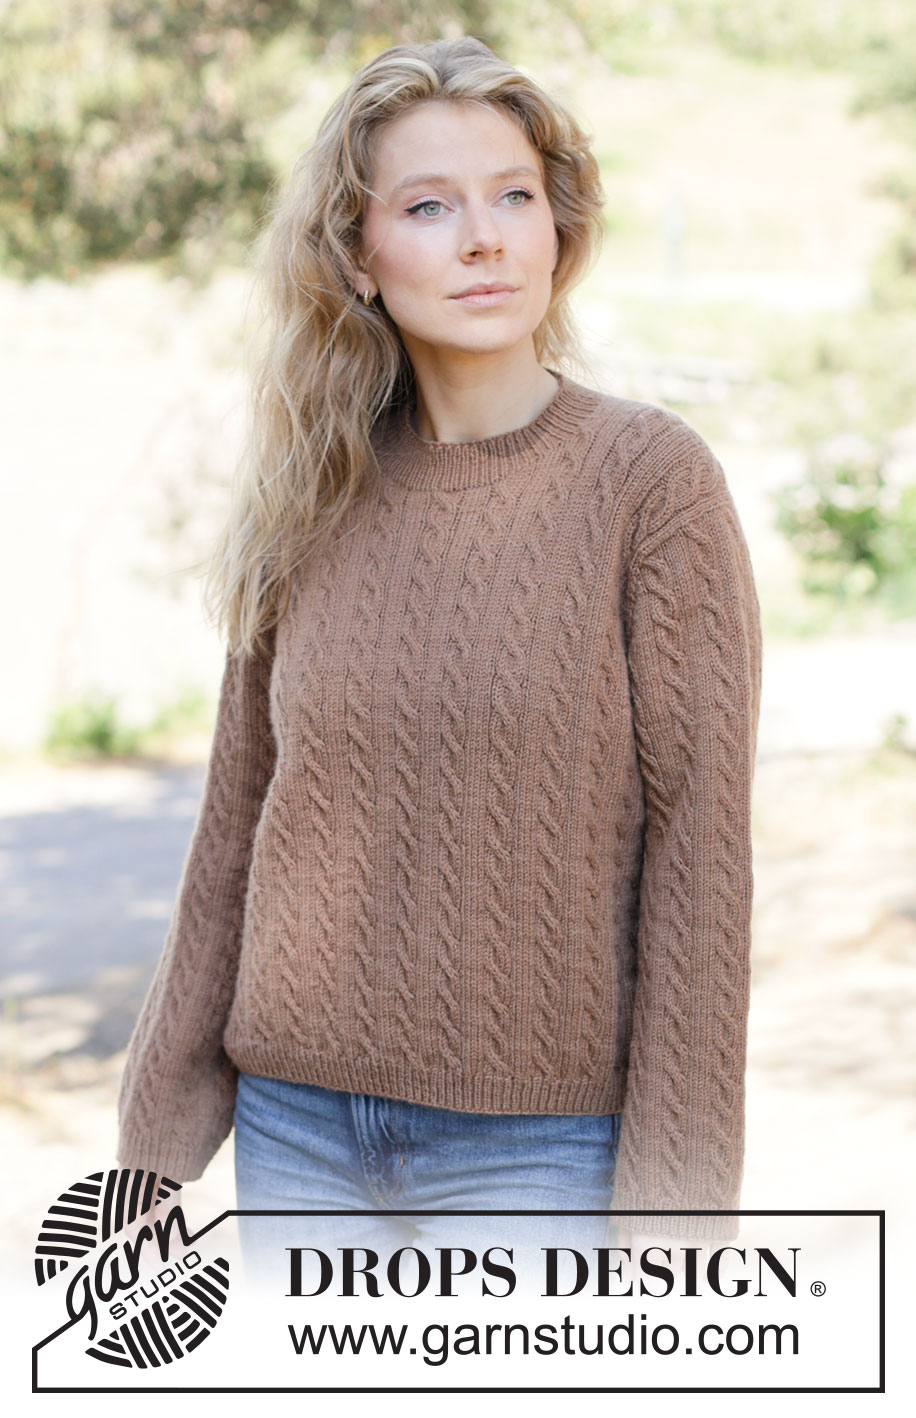
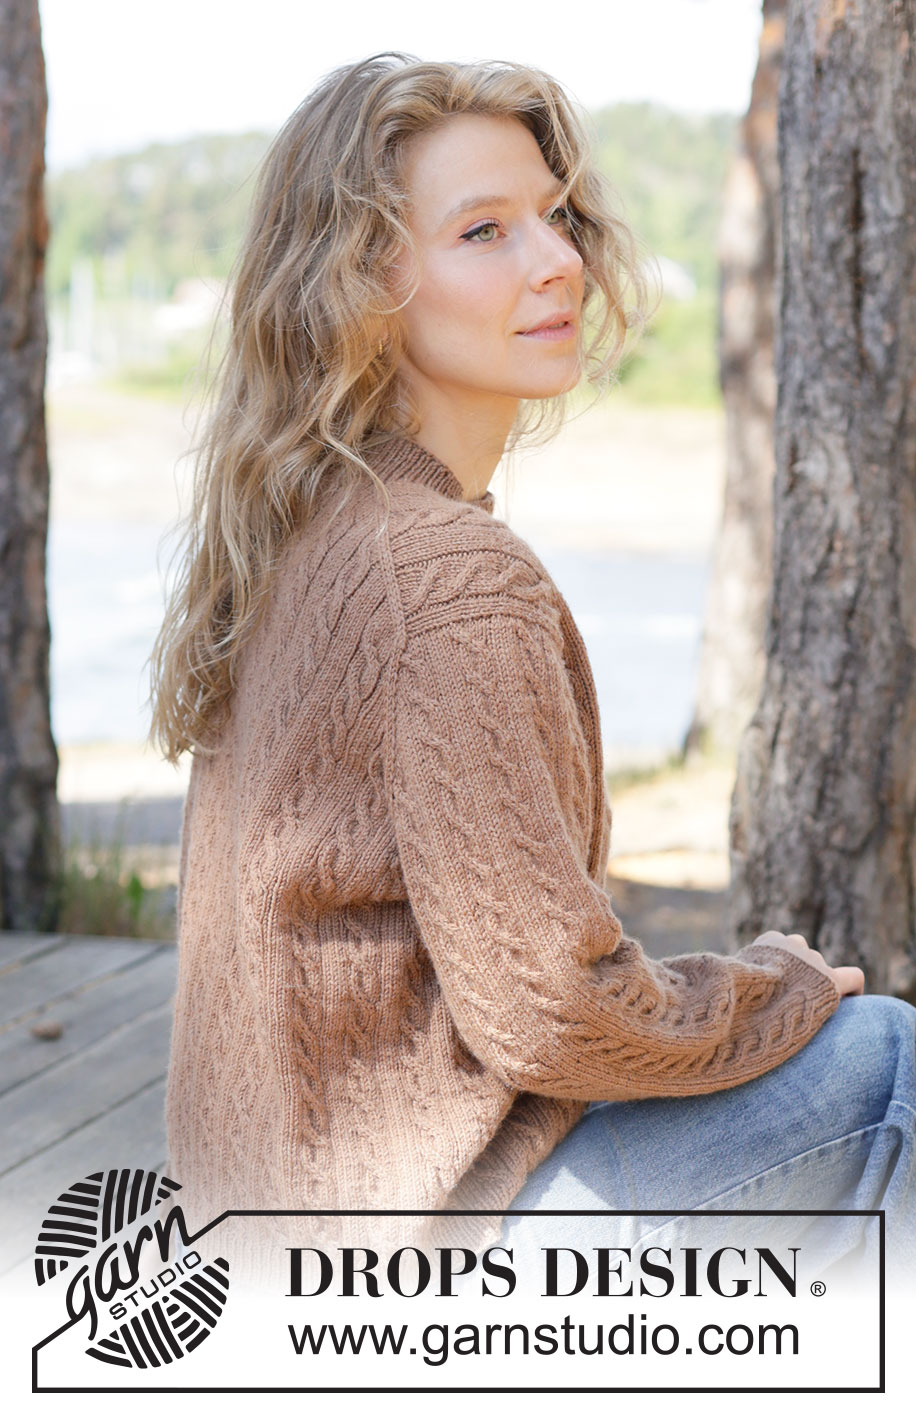
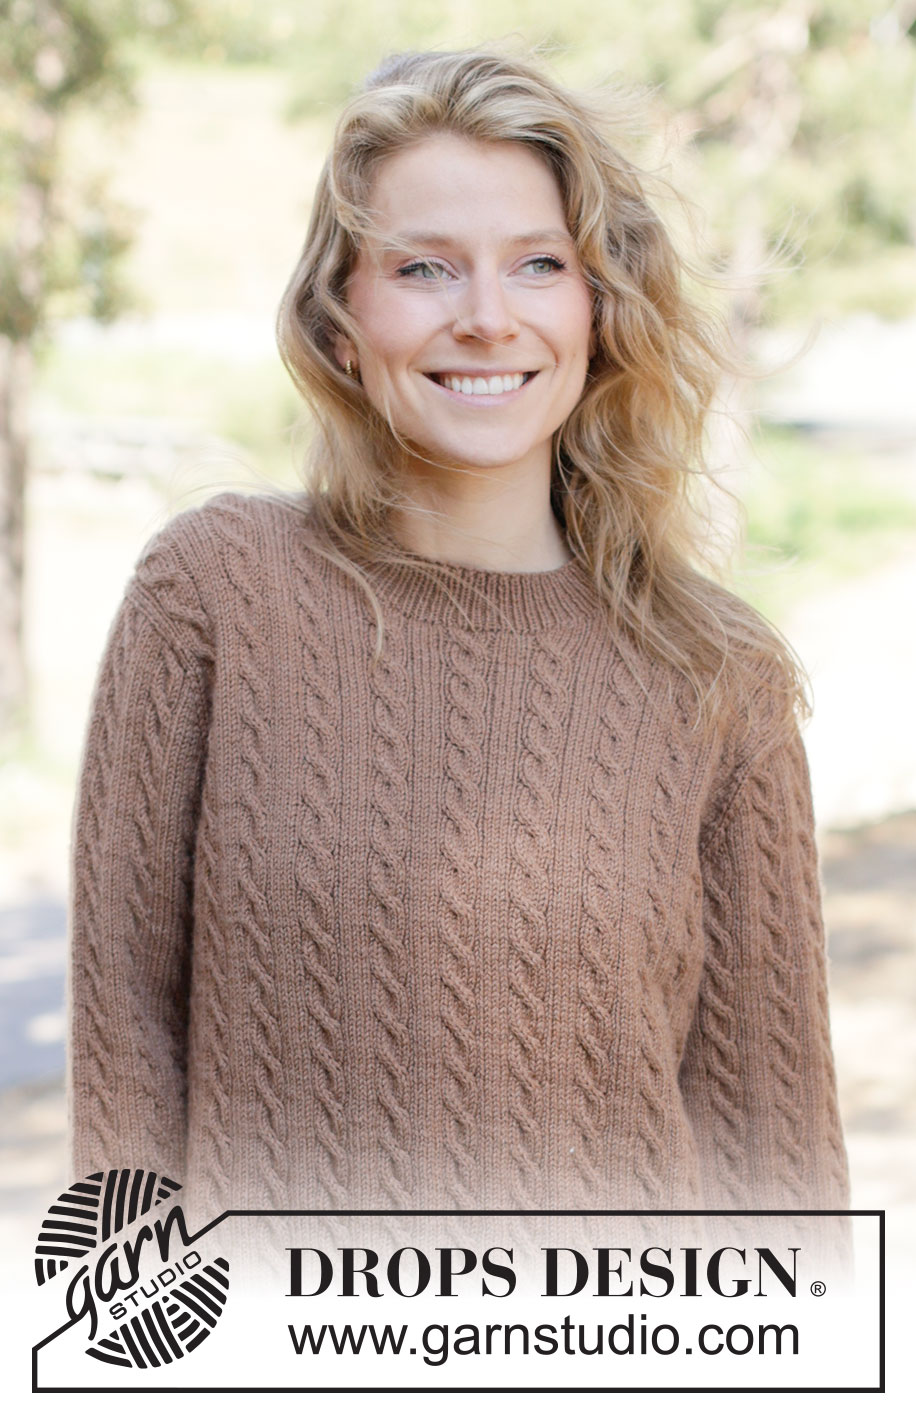
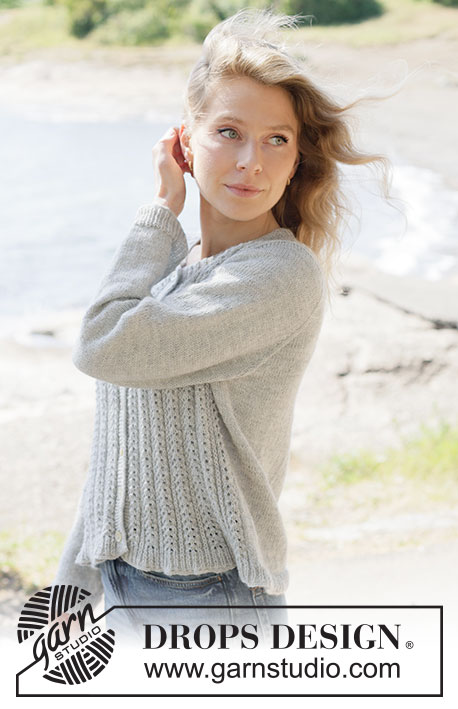
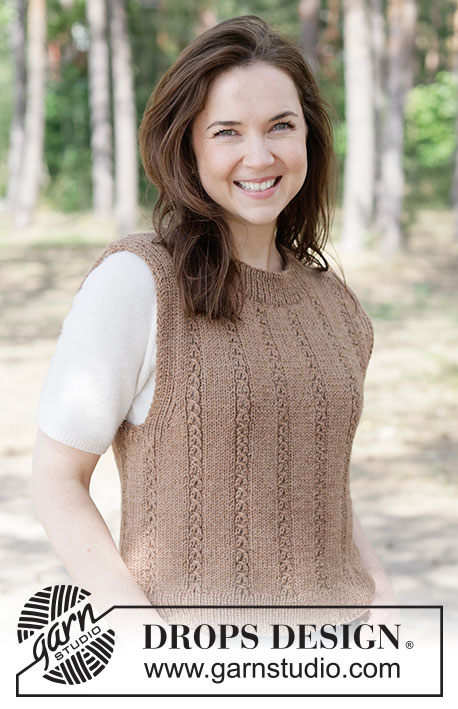
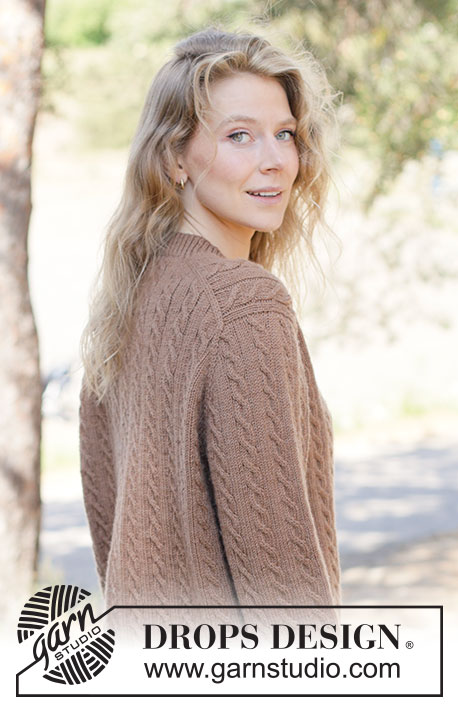
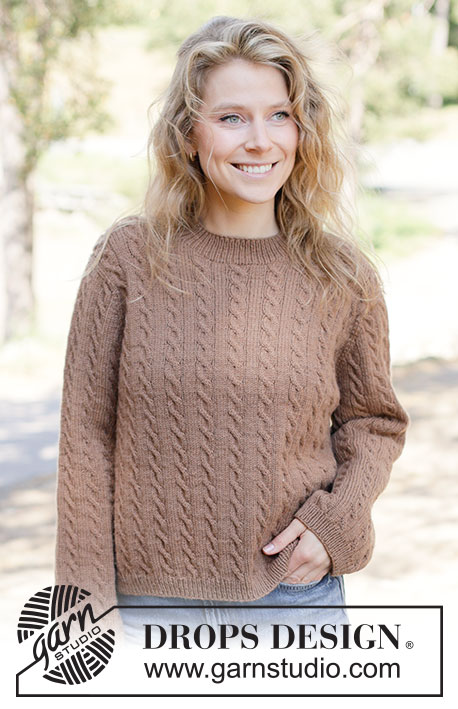
DROPS Daisy või DROPS Karisma lõngast ülevalt alla kootud Euroopa passega üheskootud varrukatega ja palmikutega džemper suurustele XS kuni XXXL
DROPS 262-3 |
|||||||||||||||||||
|
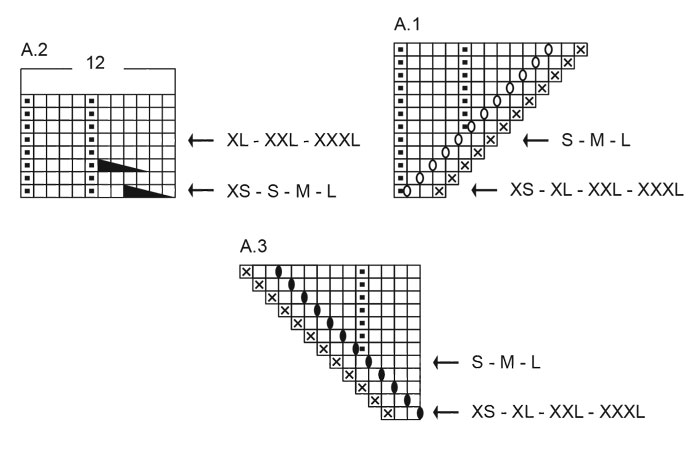
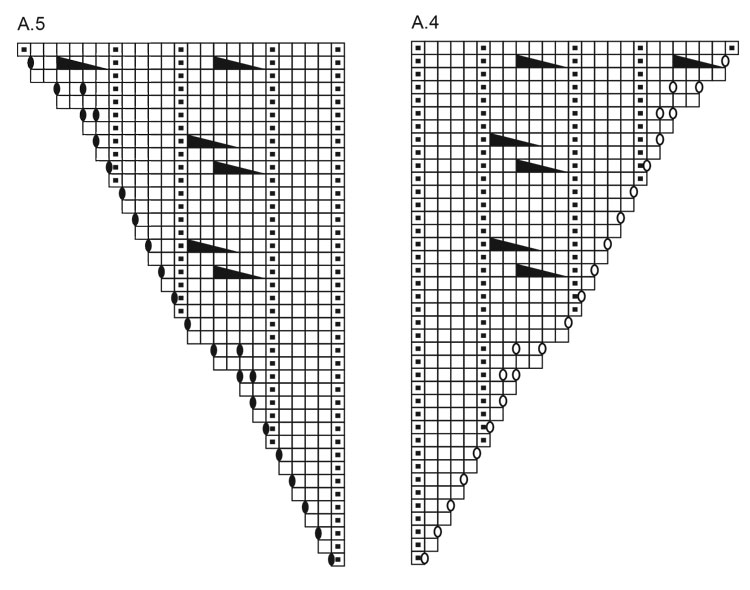
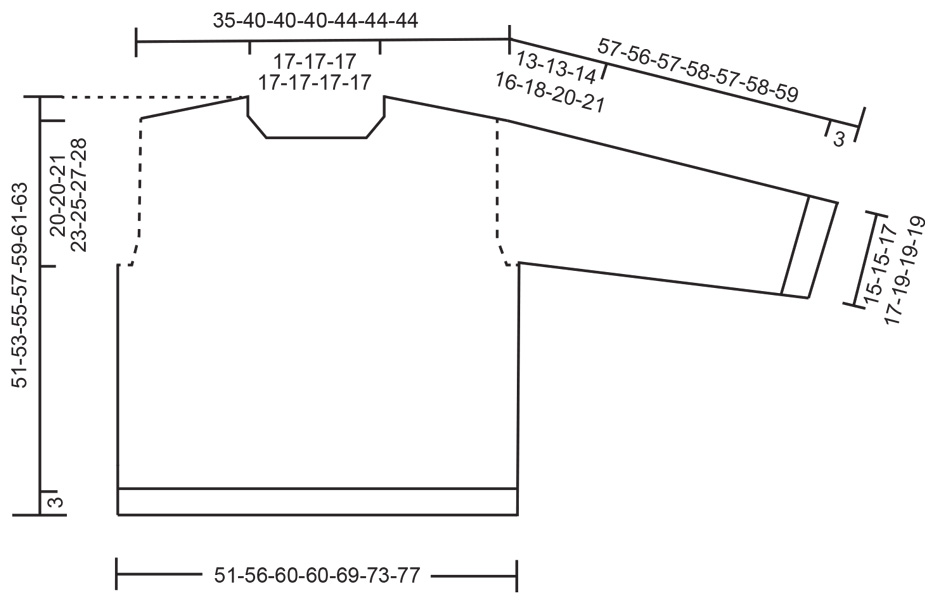
------------------------------------------------------- NÕUANDED: ------------------------------------------------------- MUSTER: Vaata skeeme A.1 kuni A.5. Alusta valitud suuruse noole juurest (skeemid A.1, A.2 ja A.3). Kui on liiga vähe silmuseid palmikukeeru tegemiseks, koo silmused parempidises koes. Muster on vaadatuna töö paremalt poolt ja näitab iga rida. KASVATAMISE NIPP 1: KASVATA 1 SILMUS VASAKULE - töö paremal pool: võta vasakule vardale lõng kahe silmuse vahelt suunaga eest taha ja koo parempidi läbi silmuse tagumise aasa. KASVATA 1 SILMUS PAREMALE - töö paremal pool: võta vasakule vardale lõng kahe silmuse vahelt suunaga tagant ette ja koo parempidi läbi silmuse eesmise aasa. KASVATAMISE NIPP 2: KASVATA 1 SILMUS VASAKULE - töö pahemal pool: võta vasakule vardale lõng kahe silmuse vahelt suunaga tagant ette ja koo pahempidi läbi silmuse eesmise aasa. KASVATA 1 SILMUS PAREMALE - töö pahemal pool: võta vasakule vardale lõng kahe silmuse vahelt suunaga eest taha ja koo pahempidi läbi silmuse tagumise aasa. VARRUKA NIPP: Käeaugust silmuseid korjates jäävad nurkadesse väikesed augud, kehaosa ja varruka üleminekule. Augu sulgemiseks võta vasakule vardale lõng kahe silmuse vahelt ja koo see keerdsilmusena kokku esimese silmusega kehaosa ja varruka vahel. KAHANDAMISE NIPP: Kahanda 1 silmus mõlemal pool silmusemärkijat järgmiselt: koo kuni jääb 3 silmust enne silmusemärkijat, koo 2 parempidi kokku, koo 2 parempidi (silmusemärkija on nende silmuste keskel), koo 2 ületõstmisega kokku (tõsta 1 silmus kudumata, koo 1 parempidi, tõsta kudumata silmus üle) = 2 silmust kahandatud. Kahandused hakkavad segama mustrit. Jälgi, et oleks 2 parempidi silmust varruka siseküljel (ringi esimene ja viimane silmus). ------------------------------------------------------- ALUSTA SIIT: ------------------------------------------------------- DŽEMPER – KOKKUVÕTE: Juhendis kasutatakse pikki ja lühikesi ringvardaid; alusta sobivate varrastega, et silmused ära mahuks. Pärast vaheta vajadusel vardaid. Kui valitud suurusel on antud number 0, siis jäta see osa vahele. Kootakse sammudena 1 kuni 5. 1. SELJAOSA: Silmused luuakse seljaosa kaelaaugu jaoks, kootakse seljaosa edasi-tagasi, kasvatades silmuseid mõlemal küljel, kuni õlgade silmused on saavutatud. Seljaosal on kergelt diagonaalsed õlad. 2. ESIOSA: Esiosa kootakse kahes osas (mõlemal pool kaela). Silmused korjatakse seljaosa ühelt õlalt, kootakse ülevalt alla ja luuakse silmused kaelaaugu jaoks. Sama korratakse teisel õlal. Siis luuakse silmuseid kaelaaugu jaoks esiosa keskel ning ühendatakse õlad. Esiosa kootakse edasi-tagasi alla. 3. PASSE: Esi- ja seljaosa tõstetakse samale ringvardale, kududes esiteks esiosa, korjatakse silmused ühe varruka jaoks esiosa küljelt, siis kootakse seljaosa ja korjatakse silmused teise varruka jaoks esiosa teiselt küljelt. Siis jätkatakse ringselt. 4. KASVATUSED KEHAOSAL ja VARRUKATEL: Passet tehes kasvatatakse silmuseid varrukate jaoks, siis hiljem kehaosa jaoks. 5. KEHAOSA JA VARRUKAD: Kui passe on tehtud, jagatakse töö kehaosaks ja varrukateks ning jätkatakse kehaosa ringselt alla. Varrukad kootakse ringselt ülevalt alla. Silmused korjatakse kaelakaarelt ja kootakse kaelus. SELJAOSA: Kootakse edasi-tagasi, ülevalt alla. Loo 38-37-37-37-38-38-38 silmust 4 mm ringvarrastele DROPS Daisy või DROPS Karisma lõngaga. Koo 1 rida pahempidi töö pahemal pool, SAMAL AJAL kasvata 12-9-9-9-12-12-12 silmust ühtlaste vahedega = 50-46-46-46-50-50-50 silmust. Nüüd kasvata iga rea alguses ühe 1 ääresilmuse ja 2 parempidises koes silmuse kõrval järgmiselt (koo uued silmused mustrisse skeemil). NB! Alusta 1. real noolest skeemil A.1 (= 4-8-8-8-4-4-4 silmust), koo skeemi A.2 (= 12 silmust), siis skeemi A.3 (= 3-7-7-7-3-3-3 silmust): 1. rida (töö parem pool): loe KASVATAMISE NIPPI 1, koo skeemi A.1, siis koo skeemi A.2 kokku 43-31-31-31-43-43-43 korda (st. koo skeemi A.2 3-2-2-2-3-3-3 korda, siis koo esimesed 7 silmust skeemil A.2), koo skeemi A.3 (2 silmust kasvatatud). 2. rida (töö pahemal pool): Loe ülevalt KASVATAMISE NIPPI 2. Koo skeemi A.3, siis koo parempidi silmused parempidi ja pahempidi silmused pahempidi järgmised 43-31-31-31-43-43-43 silmust, koo skeemi A.1 (2 silmust kasvatatud). Korda ridu 1 kuni 2 kokku 12-16-16-16-18-18-18 korda (24-32-32-32-36-36-36 rida tehtud ja 48-64-64-64-72-72-72 silmust kasvatatud – skeemi A.2 on kootud 3-4-4-4-4,5-4,5-4,5 korda vertikaalselt) = 98-110-110-110-122-122-122 silmust. Mustrit on nüüd alustatud seljaosal, tehes mõlemal küljel 2 silmust parempidises koes ja 1 ääresilmuse. Katkesta lõng. Tõsta silmused abilõngale. Esiosa muster ei ole veel paigas ning varrukatel kootakse mustrit seljaosast erinevalt. Kui osad ühendataks ja kootakse kehaosa ringselt, siis sobib muster kokku kõigil silmustel. Kampsun kootakse soonikkoes (4 parempidi, 1 pahempidi, 6 parempidi, 1 pahempidi vaadates töö paremal pool), tehes palmiku igal 6 silmusega parempidises koes osal. PAREM ÕLG: Korja silmused seljaosa paremalt õlalt järgmiselt: pane seljaosa enda ette töö paremal pool üles ja õlad ülespoole; parem õlg on paremal. Alusta töö paremal pool käeaugust seljaosa paremal õlal ja koo vardale 1 silmus õlal äärmisest silmusest, siis koo vardale 1 silmus igast reast õlal ääresilmuse kõrvalt kaela poole (24-32-32-32-36-36-36 silmust) = 25-33-33-33-37-37-37 õlasilmust. Paigalda 1 silmusemärkija kaela poole. MÕÕDA ESIOSA SIIT! 1. rida (töö pahemal pool): koo 2-0-0-0-2-2-2 pahempidi, 1-0-0-0-1-1-1 parempidi, 6-5-5-5-6-6-6 pahempidi, 1 parempidi, koo soonikut (4 pahempidi, 1 parempidi, 6 pahempidi, 1 parempidi), kuni jääb 3 silmust, koo 2 pahempidi, 1 pahempidi (= ääresilmus) – muster on nagu seljaosal. 2. rida (töö parem pool): koo parempidi 1 ääresilmus, 2 parempidi, 1 pahempidi, koo skeemi A.2 rea lõpuni. 3. rida (töö pahemal pool): koo parempidi silmused parempidi ja pahempidi silmused pahempidi. Korda 2. ja 3. rida, kuni töö kõrgus on 5-5-6-6-7-7-8 cm – tee viimane rida on töö pahemal pool. Märgi ära viimati tehtud rida skeemil A.2, kuna kaelaaugu kasvatused hakkavad samal real teisel küljel. Korda ridu 2 ja 3. SAMAL AJAL loo silmuseid kaelaaugu jaoks iga töö parempoolse rea lõpus järgmiselt: loo 1 silmus 4 korda, siis 2 silmust 4 korda (16 rida tehtud). Koo kasvatatud silmused skeemi A.2 mustrisse = 37-45-45-45-49-49-49 silmust. Kui kõik kasvatused on tehtud, koo viimane rida töö paremal pool ilma kasvatusteta. Töö pikkus on umbes 11-11-12-12-13-13-14 cm reamärkijast. Osa kaelaauku hoiab seljaosale. Kaelaauk esiosal = 9-10-11-11-12-12-13 cm. Kaelaauk seljaosal = 2-1-1-1-1-1-1 cm. Katkest lõng ja tõsta silmused abilõngale. Koo esiosa vasak õlg seljaosa vasaku õla külge nagu kirjeldatud allpool. VASAK ÕLG: Alusta töö paremal pool ja koo vardale töö paremal pool 1 silmus igast reast seljaosa vasakult õlalt ühe ääresilmuse kõrvalt (24-32-32-32-36-36-36 silmust), siis koo vardale 1 silmus äärmisest silmusest õlal = 25-33-33-33-37-37-37 silmust õlal. Paigalda 1 silmusemärkija kaela poole. MÕÕDA ESIOSA SIIT! 1. rida (töö pahemal pool): koo 1 pahempidi (= ääresilmus), 2 pahempidi, siis koo soonikut (1 parempidi, 6 pahempidi, 1 parempidi, 4 pahempidi) rea lõpuni (lõpus tee 2-5-5-5-2-2-2 pahempidi) – muster on nagu seljaosal. 2. rida (töö parem pool): koo skeemi A.2 kuni jääb 3 silmust (säti palmik 6 parempidises koes silmusele), koo 2 parempidi ja 1 ääresilmus parempidi. 3. rida (töö pahemal pool): koo parempidi silmused parempidi ja pahempidi silmused pahempidi. Korda 2. ja 3. rida, kuni töö pikkus on 5-5-6-6-7-7-8 cm, viimane rida töö pahemal pool – lõpeta sama reaga nagu paremal õlal enne kaelaaugu kasvatamisi. Korda ridu 2 ja 3. SAMAL AJAL loo silmuseid kaelaaugu jaoks iga töö pahempoolse rea lõpus järgmiselt: loo 1 silmus 4 korda, siis 2 silmust 4 korda (16 rida). Koo kasvatatud silmused mustrisse A.2, lugedes õlast väljapoole, et muster jätkuks nagu enne = 37-45-45-45-49-49-49 silmust. Kui kõik kasvatused on tehtud, koo viimane rida töö paremal pool - jälgi, et see oleks sama rida, kui on paremal õlal, kuna palmikukeerud peavad tulema samale reale tervel esiosal. Ära katkesta lõnga! Nüüd ühenda õlad esiosaks. ESIOSA: Koo töö pahemal pool parempidi silmused parempidi ja pahempidi silmused pahempidi vasakul õlal (37-45-45-45-49-49-49 silmust), loo 24-20-20-20-24-24-24 silmust, parempidi silmused parempidi ja pahempidi silmused pahempidi paremal õlal (37-45-45-45-49-49-49 silmust) = 98-110-110-110-122-122-122 silmust. Jätka mustriga järgmiselt (ära tee palmikukeerdu loodud silmustel esimesel real, aga jätka ülejäänud silmustel nagu enne): 1. rida (töö parem pool): koo 1 ääresilmus ripskoes, 2 parempidi, 1 pahempidi, koo skeemi A.2 kuni jääb 3 silmust (rea lõpus tee esimesed 7 silmust skeemil A.2), 2 parempidi, 1 ääresilmus. 2. rida (töö pahemal pool): koo parempidi silmused parempidi ja pahempidi silmused pahempidi. Jätka nii mustriga edasi-tagasi, kuni töö pikkus on 14 cm reamärkijast kaelusel – viimane rida on skeemi A.2 viimane rida. Katkesta lõng. Tõsta silmused abilõngale. Nüüd ühenda esi- ja seljaosa ning korja silmused varrukate jaoks. PASSE: Jätka töö paremal pool, koo parempidi kokku esimesed 2 silmust seljaosal (1 ääresilmus kahandatud), jätka skeemi A.2 kuni jääb 2 silmust seljaosale, koo 2 parempidi ületõstmisega kokku (tõsta 1 silmus kudumata, 1 parempidi, tõsta kudumata silmus üle äsja kootud silmuse (= 1 ääresilmus kahandatud), paigalda 1 silmusemärkija, koo vardale 42 silmust esiosa küljelt äärmise silmuse kõrvalt (= varrukasilmused), paigalda 1 silmusemärkija, koo parempidi kokku esimesed 2 silmust esiosal (= 1 ääresilmus kahandatud), jätka skeemi A.2 kuni jääb 2 silmust esiosale, koo 2 parempidi ületõstmisega kokku (tõsta 1 silmus kudumata, 1 parempidi, tõsta kudumata silmus üle äsja kootud silmuse (= 1 ääresilmus kahandatud), paigalda 1 silmusemärkija, koo vardale 42 silmust esiosa küljelt äärmise silmuse kõrvalt (= varrukasilmused), paigalda 1 silmusemärkija = 276-300-300-300-324-324-324 silmust. Ring algab vasaku varruka ja seljaosa ühinemise kohal. Ringselt kududes peavad olema palmikukeerud samal ringil varrukatel ja kehaosal. Esimesel ringil alustatakse mustrit varrukatel, samal ajal jätkatakse mustriga kehaosal. 1. ring: jätka mustriga seljaosal, tõsta silmusemärkija paremale vardale, kasvata 1 silmus vasakule, koo soonikut varrukal (6 parempidi, 1 pahempidi, 4 parempidi, 1 pahempidi), kuni jääb 6 silmust enne järgmist silmusemärkijat, koo parempidi 6 silmust, kasvata 1 silmus paremale (= 44 varrukasilmust), tõsta silmusemärkija paremale vardale, Jätka mustriga esiosal, tõsta silmusemärkija paremale vardale, kasvata 1 silmus vasakule, koo soonikut varrukal (6 parempidi, 1 pahempidi, 4 parempidi, 1 pahempidi), kuni jääb 6 silmust enne järgmist silmusemärkijat, koo 6 parempidi, kasvata 1 silmus paremale (= 44 varrukasilmust), tõsta silmusemärkija paremale vardale = 280-304-304-304-328-328-328 silmust. Nüüd kasvata kehaosal ja varrukatel nagu näidatud skeemil, kasvatades mõlemal pool 2 silmust parempidises koes ja koo mustrit ringselt järgmiselt: * koo 2 silmust parempidises koes, koo skeemi A.4, jätka skeemi A.2 järgmised 90-102-102-102-114-114-114 silmust, koo skeemi A.5, 2 silmust parempidises koes, tõsta silmusemärkija paremale vardale, koo skeemi A.4, jätka skeemi A.2 järgmised 42 silmust, koo skeemi A.5 (= varrukasilmused), tõsta silmusemärkija paremale vardale, * korda * kuni * veel 1 kord. Jätka mustriga ringselt 36-36-40-44-50-56-60 ringi – kui skeemid A.4 ja A.5 on tehtud vertikaalselt, on kasvatused tehtud suurustel XS, S ja M. Jätka mustriga ja kasvatustega skeemil 4 suuremal suurusel (168-168-192-208-232-264-288 silmust kasvatatud) = 448-472-496-512-560-592-616 silmust: 86-86-92-96-102-110-116 varrukasilmust ja 138-150-156-160-178-186-192 silmust esi- ja seljaosal. Varruka pikkus on umbes 13-13-14-16-18-20-21 cm. Kui kampsun panna õlgadest kokku, siis on umbes 20-20-21-23-25-27-28 cm õlast alla mööda käeauku. Kui töö on lühem, koo ilma kasvatusteta vajaliku pikkuseni. Nüüd jaga töö osadeks. JAGA KEHAOSA JA VARRUKAD JÄRGMISELT: koo esimesed 138-150-156-160-178-186-192 silmust nagu enne (= seljaosa), tõsta järgmised 86-86-92-96-102-110-116 silmust abilõngale varruka jaoks, loo 6-6-12-8-14-18-24 uut silmust (= külg varruka all), koo järgmised 138-150-156-160-178-186-192 silmust nagu enne (= esiosa), tõsta järgmised 86-86-92-96-102-110-116 silmust abilõngale varruka jaoks, loo 6-6-12-8-14-18-24 uut silmust (= külg varruka all). Jätka kehaosa ja varrukaid eraldi. KEHAOSA: = 288-312-336-336-384-408-432 silmust. Jätka ringselt mustriga A.2 veel 24-24-25-25-24-24-25 cm. Uued silmused külgedel lähevad mustrisse (= 24-26-28-28-32-34-36 mustrikordust). Võta 3 mm ringvardad. Koo soonikut 1 parempidi/1 pahempidi, samal ajal kahanda 30-28-32-32-34-38-42 silmust ühtlaste vahedega esimesel ringil = 258-284-304-304-350-370-390 silmust. Kui sooniku kõrgus on 3 cm, koo silmused maha soonikkoes. Kampsuni pikkus on umbes 51-53-55-57-59-61-63 cm õlast alla. VARRUKAD: Tõsta 86-86-92-96-102-110-116 silmust abilõngalt 4 mm ringvarrastele, lisaks koo vardale 1 silmus igast loodud 6-6-12-8-14-18-24 silmusest kaenlaaugus – loe ülevalt VARRUKA NIPPI = 92-92-104-104-116-128-140 silmust. Paigalda silmusemärkija 6-6-12-8-14-18-24 silmuse keskele varruka siseküljel – alusta ringi silmusemärkijast. Jätka ringselt mustriga nagu enne, koo uued silmused, mis ei mahu mustrisse varruka siseküljel, parempidises koes. Kui varruka pikkus on 3 cm jagamise kohast kaela all, kahanda varruka siseküljel – loe KAHANDAMISE NIPPI: kahanda 2 silmust iga 10-10-10-10-10-3-2 cm järel kokku 4-4-4-4-4-10-16 korda = 84-84-96-96-108-108-108 silmust. Jätka kudumist, kuni varruka pikkus on 41-40-40-39-36-35-35 cm osadeks jagamisest. Võta 3 mm vardad. Koo soonikut 1 parempidi/1 pahempidi, samal ajal kahanda 8-8-10-10-10-10-10 silmust ühtlaste vahedega esimesel ringil = 76-76-86-86-98-98-98 silmust. Kui sooniku kõrgus on 3 cm, koo silmused maha soonikkoes. Varruka pikkus on umbes 44-43-43-42-39-38-38 cm osadeks jagamisest. KAELUS: Võta 3 mm ringvardad. Alusta töö paremal pool ühelt õlalt ja koo vardale 108-108-112-112-114-114-116 silmust ümber kaelakaare 1 ääresilmuse kõrvalt - silmuste arv peab jaguma 2-ga. Koo ringselt soonikut 1 parempidi/1 pahempidi 4-4-4-4-4,5-4,5-4,5 cm. Siis koo silmused lõdvalt maha soonikkoes. |
|||||||||||||||||||
Skeemi seletused |
|||||||||||||||||||
|
|||||||||||||||||||
 |
|||||||||||||||||||
 |
|||||||||||||||||||
 |
|||||||||||||||||||
Kas oled teinud seda mustrit?Lisa oma piltidele viide #dropspattern #walnutdreamssweater või saada link projektile meie #dropsfan galeriisse. Vajad abi selle mustriga?Garnstudio.com kodulehel on 32 õppevideot, küsimuste/vastuste osa ja muudki. © 1982-2026 DROPS Design A/S. Kõik õigused kaitstud. See dokument, ning selle alajaotused on kaitsud autoriõigustega. Loe rohkem, mida meie mustritega võib teha, iga mustrilehe alt meie kodulehel. |
|||||||||||||||||||


Tegeledes üle 40 aasta kudumise ja heegeldamise disainidega, pakub DROPS Design ühte suurimat tasuta mustrite kollektsiooni internetis - tõlgituna 17 keelde. Tänaseks on meil 325 kataloogi ja 12298 mustrit - millest 9442 on tõlgitud Eesti keelde.
Me anname endast parima, et tuua teieni kõike mida kudumine ja heegeldamine võib pakkuda - inspiratsiooni, nõuandeid ning ka kvaliteetseid lõngu parima hinnaga! Soovid kasutada mustreid muukski, kui ainult oma tarbeks? Loe infot meie Copyright osas iga lehekülje all. Rõõmsat loomist!
Jäta kommentaar mustrile DROPS 262-3
Ootame kommentaare selle mustri kohta!
Kui soovid midagi küsida, siis kiiremaks vastuse saamiseks veendu, et valid õige kategooria alloleval formil. Vajaliku väljad *.