
Categorias populares
Procura um fio?


Comentários / Perguntas (23)
![]() Leeanne escreveu:
Leeanne escreveu:
Addtnl. info for my last comments: I was confused by the first sentence in the short rows instructions stating to do 6 rows over all stitches. I thought that was part of the directions and the piece started with 6 rows before starting the short row repeat cycle but that is incorrect. This sentence is just telling you that there are 6 rows included in the short row instruction cycle that are not, in fact, short rows – 6 full rows and 2 short rows (not in that order) are listed in the row cycle.
06.09.2025 - 15:15
![]() Leeanne escreveu:
Leeanne escreveu:
(Cont. from previous two comments) next row starts with R3 and finishes with L3 and last row starts with L4 and finishes with R4. Then you start the cycle again with the first short row. So yes, the short row cycle is short row, full row, short row, full row, full row, full row, full row, full row as the pattern states (1 SR followed by 1 full row followed by 1 SR followed by 5 full rows). There are no edges in which you are not doing a picot edge instruction which allows for an even 8 row cycle
06.09.2025 - 15:08
![]() Leeanne escreveu:
Leeanne escreveu:
(continued from my previous comment) work the L2 row to the first marker and turn to work back to the “beginning” of the left side row, ending with L3, turn and start a new row with L4, working all the way across, ending with R4, (all the remaining rows in the cycle go all the way across – no more short rows) next row begins with R1 and goes all the way across to the last 4 stitches, ending in L1, turn and start with L2 and go all the way across to finish with R2, (cont. in next comment)
06.09.2025 - 15:03
![]() Leeanne escreveu:
Leeanne escreveu:
For anyone that needs it, here is the cycle of rows, combining picot edge with short rows instructions (it helps to draw this out on paper): start with right side 1 (R1) and work a short row (to first marker only, not all the way across), turn and work back to the beginning and knit the last four with R2, turn to start next row beginning with R3 and knit all the way across, ending this row with L1, then start the second short row with L2, (continued in next comment)
06.09.2025 - 14:58
![]() Leeanne escreveu:
Leeanne escreveu:
I figured it out! It is definitely not too complicated but they could have written this pattern differently so it wouldn’t take weeks or trial and error to figure out how to work the short rows in with the picot edge. Maybe we were just making it too complicated. I don’t have enough room to write the pattern in this comment so I’ll start a new one. It is easier to draw your lines and mark each end with the picot line number but I’ll try to write it here in my next comment.
06.09.2025 - 14:55
![]() Leeanne escreveu:
Leeanne escreveu:
I think I get it! I will test it in the morning and comment again trying to explain it for others if I have it right. My last two comments are wrong for sure. It helps to draw the rows as a picture on paper and mark the ends with the line number.
06.09.2025 - 05:10
![]() Leeanne escreveu:
Leeanne escreveu:
Revising my last comment: I now have it written as: short row, R1 &L1 on the same row, short row, R2 & L2, short row, R3 & L3, short row, R4 & L4. But this adds up to 8 rows on the sides and only 4 rows in the middle, not 6. Also not sure why the short rows directions refers to the middle stitches as being 70 (for the second size) when it’s only 30 (if excluding 25 on each end) or 72 (if excluding only the outermost 4 on each end).
06.09.2025 - 04:26
![]() Leanne escreveu:
Leanne escreveu:
The directions for the short rows are difficult to figure out. I’ve been working at this for a few weeks with my MIL, have restarted my project 7 times and we still don’t have it right. So we are alternating between right and left rows 1, 2, etc. when doing full rows? We are not doing any picot edge instructions when doing short rows, correct? To incoorporate the short rows, does it go: left row 1, right row 1, short row, left row 2, right row 2, short row, etc. through all four edge rows?
06.09.2025 - 02:40
![]() Leeanne escreveu:
Leeanne escreveu:
In addition to my last comment, I’m also confused because it says for garter stitch to knit two rows. The main directions says start with the right Picot edge, then knit the directions for garter stitch for the rest of the row, except for the last four and then knit the directions for the left edge on the last four. How do you knit two rows for the garter stitch directions in between doing the right and left edges?
14.07.2025 - 19:22DROPS Design respondeu:
Dear Leeanne, the garter stitch structure is 2 knit rows. So whenever most of the stitches in the row are knitted, both from the right side and the wrong side, the resulting texture will be garter stitch. In the picot edges we are already using garter stitch, since all other stitches except for the 4 stitches on each side for the picot are knitted from the right side and the wrong side. So you just need to work as indicated; the edges will have the picot texture while the remaining stitches are knitted. Happy knitting!
19.07.2025 - 17:47
![]() Leeanne escreveu:
Leeanne escreveu:
A video of the actual pattern, please! This is so confusing. I’ve now learned how to do picot edges and short rows, but I can’t understand how to do both at the same time. How do you know which row of the picot edge you’re on if you’ve turned around and gone the other direction halfway through a row? And then when you start the next row do you count as if half the row is row 5 and half is row 6 or just continue with the next direction for that edge in sequence, ignoring row numbers?
14.07.2025 - 19:18DROPS Design respondeu:
Dear Leeanne, please remember to mark your comments as questions so that we can see them and answer sooner. When you are combining the short rows and the picot edges, count only the rows where you reach the edges; those rows where you turn before reaching the edges are not taken into account for the picot edges on that side. Happy knitting!
19.07.2025 - 17:48
|
|
Berry Kiss#berrykissvest |
|
 |
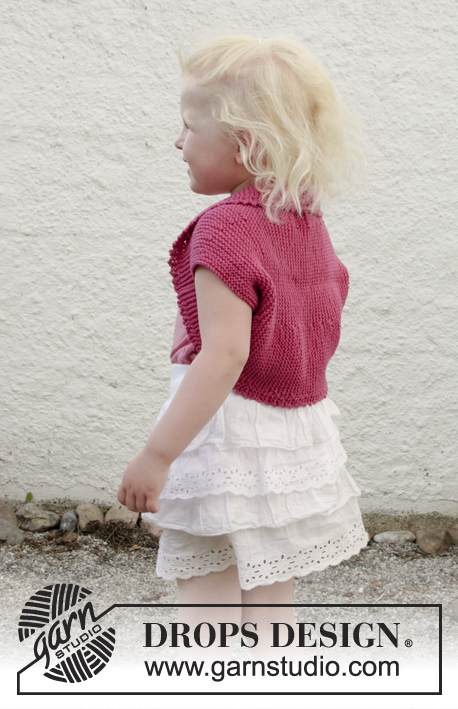 |
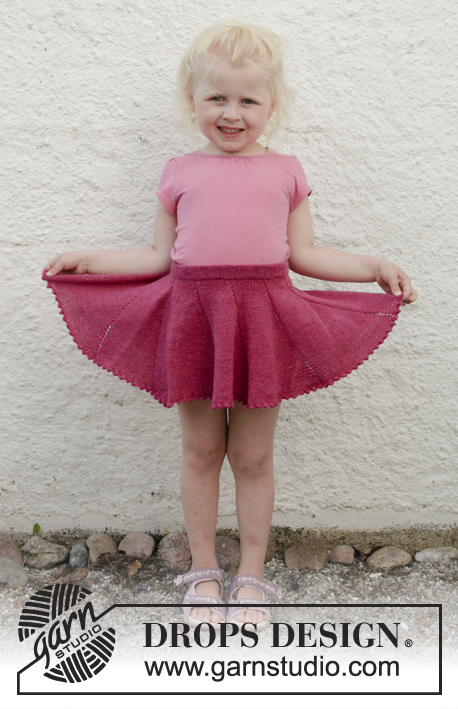
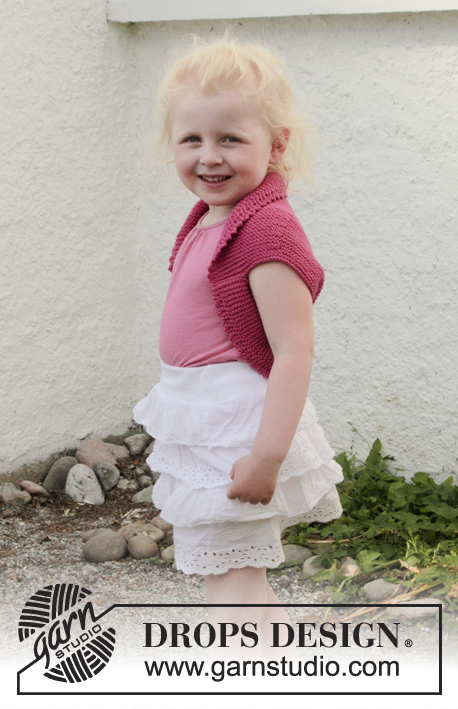
Bolero com carreiras encurtadas, orlas picot e ponto jarreteira em DROPS Cotton Merino. Dos 3 aos 12 anos.
DROPS Children 28-7 |
|
|
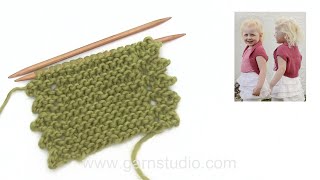
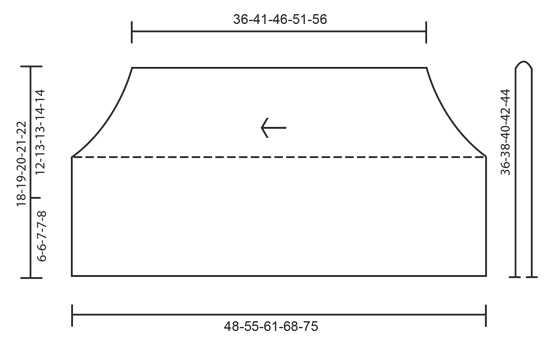
---------------------------------------------------------- PONTO JARRETEIRA (em idas e voltas): 1 barra jarreteira = Tricotar 2 carreiras meia. ORLA PICOT (em idas e voltas): LADO DIREITO: CARREIRA 1 (= pelo direito): Tricotar em meia. CARREIRA 2 (= pelo avesso): Tricotar em meia até restarem 4 malhas, tricotá-las da seguinte maneira: 2 malhas juntamente em meia, 1 laçada, tricotar 2 vezes em meia cada uma das 2 últimas malhas = 2 malhas a mais. CARREIRA 3 (= pelo direito): Deslizar a 1.ª malha em meia, 1 malha meia, passar a malha deslizada por cima da malha tricotada, 1 malha meia e passar a última malha da agulha direita por cima da primeira. Diminuímos 2 malhas – depois, tricotar as restantes malhas da carreira em meia. CARREIRA 4 (= pelo avesso): Tricotar em meia. Repetir as carreiras 1 a 4. LADO ESQUERDO: CARREIRA 1 (= pelo direito): Tricotar em meia até restarem 4 malhas, tricotá-las da seguinte maneira: 2 malhas juntamente em meia, 1 laçada, tricotar 2 vezes em meia cada uma das 2 últimas malhas = 2 malhas a mais. CARREIRA 2 (= pelo avesso): Deslizar a 1.ª malha em meia, 1 malha meia, passar a malha deslizada por cima da malha tricotada, 1 malha meia e passar a última malha por cima da 1.ª malha da agulha direita. Diminuímos 2 malhas – depois, tricotar as restantes malhas da carreira em meia. CARREIRA 3 (= pelo direito): Tricotar em meia. CARREIRA 4 (= pelo avesso): Tricotar em meia. Repetir as carreiras 1 a 4. CARREIRAS ENCURTADAS: Tricotar 6 carreiras em todas as malhas, *tricotar 24-25-26-27-28 malhas (até ao 1.º marcador), virar, puxar o fio e tricotar até ao fim da carreira. Tricotar 1 carreira em todas as malhas, virar, tricotar 24-25-26-27-28 malhas (até ao 1.º marcador), virar, puxar o fio e tricotar até ao fim da carreira. Tricotar 5 carreiras em todas as malhas*, repetir de * a *. Ou seja, tricotam-se 6 carreiras em ponto jarreteira (= 3 barras jarreteira) por cima das 66-70-72-80-86 malhas centrais e 8 carreiras em ponto jarreteira (4 barras jarreteira) por cima das malhas de cada lado da peça em cada série. -------------------------------------------------------- BOLERO: Tricota-se de um lado ao outro, em idas e voltas na agulha circular de uma cava à outra. Dobrar então o bolero e fazer a costura dos lados. Montar 76-80-84-88-92 malhas em Cotton Merino com a agulha circular 4 mm. Colocar 1 marcador a 24-25-26-27-28 malhas de cada lado da peça (= 28-30-32-34-36 malhas entre os marcadores). Tricotar da seguinte maneira – pelo direito: ORLA PICOT, LADO DIREITO, PONTO JARRETEIRA – ver acima -, por cima das 68-72-76-80-84 malhas seguintes, ORLA PICOT, LADO ESQUERDO por cima das 4 últimas malhas. MANTER A MESMA TENSÃO DA INDICADA PARA A AMOSTRA! Continuar em ponto jarreteira com a orla picot por cima das 4 malhas de cada lado da peça e, AO MESMO TEMPO, tricotar CARREIRAS ENCURTADAS – ver acima! Quando a peça medir cerca de 36-41-46-51-56 cm (medir ao nível mais curto) arrematar frouxamente. MONTAGEM: Dobrar o bolero ao meio – o esquema mostra a peça quando for dobrado. Costurar os 6-6-7-7-8 cm da bas, orla com orla, de cada lado da peça (= 12-13-13-14-14 cm para a cava). |
|
 |
|
Terminou este projecto?Então, identifique as suas fotos com as tags #dropspattern #berrykissvest ou mostre-as na galeria #dropsfan. Precisa de ajuda para este modelo?Encontrará 18 turotiais em vídeo, uma rubrica Comentários/Perguntas e muito mais ao visitar a página do modelo em www.garnstudio.com © 1982-2026 DROPS Design A/S. Todos os direitos reservados. Este documento, incluuindo as suas su-secções, tem copyrights. Saia mais o que pode fazer com os nossos modelos no fim de cada uma das páginas do nosso site. |
|


Com mais de 40 anos no design de modelos de tricô e de croché, a DROPS Design oferece uma das mais vastas colecções demodelos gratuitos na Internet - traduzidos em 17 línguas. Neste dia de hoje, temos 324 catálogos e 12284 modelos - dos quais 12265 estão traduzidos em português.
Trabalhamos com muito empenho para lhe proporcionar o melhor que o tricô e o croché têm para oferecer, para lhe fornecer inspiração e conselhos bem como fios da mais elevada qualidade a preços incríveis! Gostaria de usar os nossos modelos para outros fins que não uso pessoal? Pode ler o que lhe é permitido fazer no Copyright texto que se encontra na parte de baixo de todos os nossos modelos. Bom tricô! Bom croché!
Deixe um comentário acerca do modelo DROPS Children 28-7
Gostaríamos muito de saber o que tem a dizer-nos acerca deste modelo!
Se deixar uma pergunta acerca do modelo, certifique-se de que escolhe a categoria adequada no formulário abaixo para acelerar o processo relativo à resposta. Os campos obrigatórios estão assinalados com um *.