
Oblíbené kategorie
Hledáte přízi?


Komentáře / Otázky (65)
![]() Annick Mercier napsala:
Annick Mercier napsala:
Bonjour, je me demandais quel type de laine utiliser puisque la laine n'est pas disponible ici au Canada. Merci, Annick
02.09.2019 - 16:01Odpověď DROPS Design :
Bonjour Mme Mercier, je suis heureuse de vous informer que vous pouvez trouver notre laine au Canada - plus d'infos ici. Bon tricot!
02.09.2019 - 16:47
![]() Patricia Olivia Fuchs napsala:
Patricia Olivia Fuchs napsala:
Hallo, liebes Drops-Team. Wenn ich KEIN umgeknicktes Bündchen möchte, kann ich dann anstatt * 2 re., 3 li. * gleich mit Diagrammm M1 beginnen und der weiteren Anleitung folgen, oder muss ich dafür noch etwas anderes beachten?
24.06.2019 - 14:52Odpověď DROPS Design :
Liebe Frau Fuchs, also wahrscheinlich können Sie dann mit Zöpfen über die gewünschte Höhe stricken, dann setzt man eine Markierung und der Socken wird ab Markierer gemessen (nicht von der Anschlagskante). Viel Spaß beim stricken!
24.06.2019 - 17:00
![]() Mathilde napsala:
Mathilde napsala:
Bonjour, Je souhaiterais savoir ce que veux dire retourner le tricot ? Je ne comprends pas .... J'ai retourner mon ouvrage mais je tricote toujours dans le même sens ... Je vous remercie de bien vouloir l'éclairer Mathilde
14.01.2019 - 19:09Odpověď DROPS Design :
Bonjour Mathilde, après les côtes, retournez l'ouvrage sur l'envers = les premiers rangs de côtes seront retournés sur l'endroit à la fin et ont donc été tricotés sur l'envers. Au premier tour après avoir retourné votre ouvrage, vous allez tricoter la dernière maille du tour précédent pour terminer par la première maille, continuez ensuite toujours ainsi, c'est maintenant l'endroit de la chaussette. Bon tricot!
15.01.2019 - 09:02Nicola Stuart napsala:
Would love to knit these but would have to make them longer and bigger. How would I go about changing size?
11.11.2018 - 22:41Odpověď DROPS Design :
Dear Nicola, the pattern goes up to size 44. If you need even bigger by using a slightly bigger needle. Conversly, you can use the yarn Lima isntead of the Karisma =with bgger needles). If you only want it somewhat higher, you can continue knitting straight for a couple more cm-s, and6 or you can increase a stitch on both ides of this middle stitch. You can find the videos, related to this pattern at the left of the page, below the pictures. Also there are detailed explanation of the symbos of the pattern chart. If you need further help you can also ask for it in person in the store where you bought your DROPS yarn from. Happy Crafting!
12.11.2018 - 01:56
![]() Nicole napsala:
Nicole napsala:
Vielen Dank für diese tolle Anleitung. Die Strümpfe sehen im Original schöner aus wie auf Eurem Foto und war für mich als Anfänger leicht verständlich nach zu stricken. Inzwischen habe ich schon 3 Paar gestricht und es macht immer wieder Spaß.
08.08.2018 - 17:26
![]() Alexandra napsala:
Alexandra napsala:
When i get to this part in the M2 chart do I pearl the 6 after i pearl the first 18 or do i knit them I'm not sure how to determine if I am working on the right side or wrong side now? Knit following round like this: P the first 15-18-21 sts, chart M.2 (= 36 sts), P the last 15-18-21 sts. I hope you understand my question thank you , Alex
08.06.2016 - 21:34Odpověď DROPS Design :
Dear Alexandra, when working M.2 you are now working from RS and WS of M.1 is facing you (will be folded at the very end). M.2 is 36 sts in width, work rounds like this: P the first 15-18-21 sts from beg of round, then work the 36 sts in M.2 starting to read at the bottom corner on the right side towards the left and P the last 15-18-21 sts on round. Happy knitting!
09.06.2016 - 08:49
![]() Alexandra napsala:
Alexandra napsala:
I'm talking about the Drops long Sock pattern their is M,M2, M3 Diagram it's just a little harder to understand . Thanks, Alex
18.05.2016 - 16:05Odpověď DROPS Design :
Dear Alexandra, then follow the legend to diagram, and start reading diagram from the bottom corner on the right side towards the left every round. 1 square = 1 st x 1 round. Read more here. Happy knitting!
18.05.2016 - 17:11
![]() Alexandra napsala:
Alexandra napsala:
Okay What about the empty space at the bottom of the diagrams? What is that about? I'm sorry I'm new and to doING and reading diagrams. Thank you, Alexandra
18.05.2016 - 04:38Odpověď DROPS Design :
Dear Alexandra, an empty space can be added at the bottom of a diagram when there are less sts on some rows before you inc and get then more sts than on previous rows. Maybe you could ask your question on the pattern you are thinking about, it might help to make an accurate answer. Happy knitting!
18.05.2016 - 09:23
![]() Alexandra Dick napsala:
Alexandra Dick napsala:
I am wondering about the pattern for 103-10 are you to read the diagram from top to bottom or bottom to top? And is it read right to left or left to right? And what are the empty space at the bottom of diagram ment for? And are you to repeat pattern like the M1 it was p1,k4,p1,k4 do you continue doing that for a whole round? I tried finding a video to help but was unable to . Thank you
29.04.2016 - 05:27Odpověď DROPS Design :
Dear Mrs Dick, diagrams are read from bottom up starting on the corner on the right side, every round from the right towards the left (see here) 1st round in M1 will be workd; (K4, P1,K4, P1) repeat from (to) over all sts on round. Happy knitting!
29.04.2016 - 09:09
![]() Birgitt napsala:
Birgitt napsala:
Hallo, danke für die schnelle Antwort. Genau so habe ich die Anleitung auch verstanden, hatte schon bedenken, ich hätte es nicht kapiert. Meinem Mann ist das aber -zu langweilig- (OTon). Da ich für ihn die Maschenzahl ohnehin ändern muss, bekommt er auf der Rückseite M3 gestrickt (bis FerseI und in den linken Maschen zw. beiden Mustern kann ich super die Abnahmen für die Wade vornehmen. Gruß Birgitt
14.03.2016 - 19:03
|
||||||||||||||||||||||
Hilde & Winter |
||||||||||||||||||||||
|
|
||||||||||||||||||||||
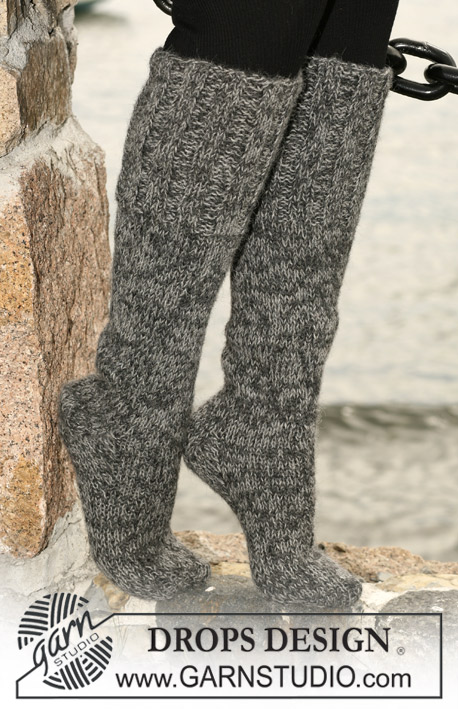
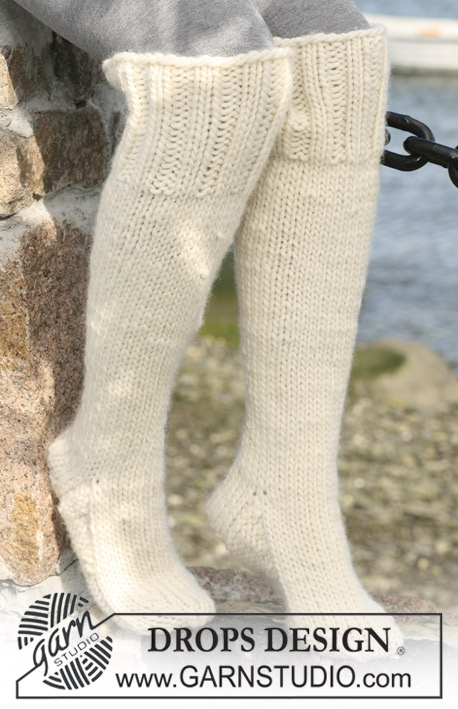
DROPS ponožky – podkolenky s copánkovým vzorem pletené z příze "Karisma".
DROPS 103-10 |
||||||||||||||||||||||
|
PRUŽNÝ VZOR 2/3: Pleteme střídavě 2 oka hladce, 3 obrace. VZOR: Viz schémata M.1, M.2 a M.3; zobrazena je vždy celá jedna sekvence vzoru nahlížena z lícové strany. TVAROVÁNÍ PATY: 1. řada (= lícová): pleteme hladce po posledních 7-8-9 ok na jehlici, 1 oko sejmeme hladce, 1 upleteme hladce a sejmuté přes ně přetáhneme. 2.ř. (= rubová): pleteme obrace po posledních 7-8-9 ok na jehlici, 1 oko sejmeme obrace, 1 upleteme obrace a sejmuté přes ně přetáhneme. 3.ř. (= lícová): pleteme hladce po posledních 6-7-8 ok na jehlici, 1 oko sejmeme hladce, 1 upleteme hladce a sejmuté přes ně přetáhneme. 4.ř. (= rubová): pleteme obrace po posledních 6-7-8 ok na jehlici, 1 oko sejmeme obrace, 1 upleteme obrace a sejmuté přes ně přetáhneme. 5.ř. (= lícová): pleteme hladce po posledních 5-6-7 ok na jehlici, 1 oko sejmeme hladce, 1 upleteme hladce a sejmuté přes ně přetáhneme. 6.ř. (= rubová): pleteme obrace po posledních 5-6-7 ok na jehlici, 1 oko sejmeme obrace, 1 upleteme obrace a sejmuté přes ně přetáhneme. Tímto způsobem pokračujeme v ujímání (vždy o 1 oko snížíme počet ok zbylých na jehlici) dokud nám na jehlici nezůstane 8-10-12 ok. ---------------------------------------------------------------------- PONOŽKA - PODKOLENKA: Pleteme v kruhových řadách na ponožkových jehlicích od středu zadní strany, lýtka. Na ponožkové jehlice č.3,5 nahodíme přízí Karisma 80-90-100 ok a pleteme pružným vzorem 2/3 – viz výše. Ve výši 2 cm pokračujeme vzorem M.1. Ve výši 20 cm práci otočíme – tj. dále pleteme z rubové strany (upletených 20 cm = lem, manžeta, kterou po dokončení ponožky založíme do líce). Upleteme 1 kruhovou řadu hladce a SOUČASNĚ ujmeme rovnoměrně 14-18-22 ok = 66-72-78 ok. Upleteme 1 kruhovou řadu obrace a umístíme do pleteniny značku – pleteninu budeme nadále měřit od tohoto místa. Následující kruhovou řadu pleteme takto: prvních 15-18-21 ok obrace, vzor M.2 (= 36 ok), posledních 15-18-21 ok obrace. Ve výši 5 cm ujmeme 1 oko na každé straně vzoru M.2 a toto ujímání opakujeme vždy po 2 cm výšky, celkem 11-12-13x (ujímáme spletením 2 ok obrace) = 44-48-52 ok. Ve výši 33-36-39 cm odložíme prostředních 24 ok (= nárt) na pomocnou jehlici. Nad zbylými 20-24-28 oky na jehlici (= pata) upleteme 5-5,5-6 cm výšky lícovým žerzejem. Poté tvarujeme patu – viz výše. Po dokončení tvarování nabereme po obou stranách paty 11-13-15 ok. Všechna oka rozdělíme rovnoměrně na ponožkové jehlice = 54-60-66 ok. Nad prostředními 24 oky na nártu pleteme vzor M.3, zbylá oka pleteme lícovým žerzejem. SOUČASNĚ ujímáme: PŘED vzorem M.3 splétáme 2 oka hladce, ZA vzorem M.3 splétáme 2 oka hladce za zadní nit; toto ujímání opakujeme v každé 2. kruhové řadě, celkem 6x = 42-48-54 ok. Pleteme do výše asi 18-20-22 cm od začátku tvarování paty (= chodidlo). Nyní pokračujeme lícovým žerzejem nad všemi oky – označíme si obě strany chodidla tak, abychom na horní straně (nártu) měli 22-24-26 ok, na dolní (chodidle) 20-24-28 ok. Poté tvarujeme špičku – ujímáme na každé straně každé značky: PŘED značkou splétáme 2 oka hladce, ZA značkou splétáme 2 oka hladce za zadní nit. Takto ujímáme v každé 2. kruhové řadě, celkem 3x = 30-36-42 ok; poté v každé kruhové řadě, celkem 6-7-9x = 6-8-6 ok. Přízi odstřihneme, protáhneme zbylými oky, stáhneme a zapošijeme. |
||||||||||||||||||||||
Vysvětlivky ke schématu |
||||||||||||||||||||||
|
||||||||||||||||||||||
 |
||||||||||||||||||||||
Dokončili jste tento model?Pak označte své fotky tagem #dropspattern nebo je pošlete do galerie #dropsfan. Potřebujete s tímto návodem poradit?Otevřete-li si návod na stránce garnstudio.com, najdete tam 15 výukových video-ukázek, Komentáře/Dotazy a další užitečné informace. © 1982-2026 DROPS Design A/S. Vyhrazujeme si veškerá práva. Tento dokument, včetně všech jeho dílčích částí, podléhá autorským právům. Podrobnější komentář k možnostem užití našich návodů najdete dole pod každým návodem na našich stránkách. |
||||||||||||||||||||||


V oblasti pletené a háčkované módy působí DROPS Design více než 40 let. Díky tomu vám můžeme nabídnout jednu z nejrozsáhlejších kolekcí modelů s bezplatnými návody dostupnými na internetu - navíc v 17 jazycích. K dnešnímu dni máme na 324 katalogů a 12290 návodů celkem - z nich je už 7605 dostupných v [češtině].
Přidejte komentář k návodu DROPS 103-10
Rádi bychom věděli, co si o tomto modelu myslíte!
Pokud se chcete na něco zeptat, dbejte prosím na to, abyste ve formuláři níže vybrali správnou kategorii - díky tomu se dříve dozvíte, co potřebujete vědět. Povinná pole jsou označena *.