
Populære kategorier
Ser du etter et garn?


Kommentarer / Spørsmål (91)
![]() Nora M skrev:
Nora M skrev:
Hei, jeg har allerede bynnt å strikket denne vesten og kommet meg på god vei. Men jeg angrer meg å ønsker å strikke en genser..? Er dette mulig eller burde jeg starte på nytt? Har dere noen tips om jeg kan få det til?
21.04.2026 - 08:30DROPS Design answered:
Hej Nora, de her strikkes med samme strikkefasthed (11 m på 10 cm) og nedenfra og op som vesten. Det vil sige at du kan vælge en af de her og fortsætte ifølge den nye opskrift på en genser: genser, nedenfra og op, 11masker=10 cm
21.04.2026 - 14:30
![]() Maria skrev:
Maria skrev:
Hej. Jeg vil gerne hvilken str pind der er brugt til at lave strikkeprøven. Er det 7 eller 8.
08.04.2026 - 16:51DROPS Design answered:
Hej Maria. Det är den större pinden, dvs den du bruker til glatstrik. Mvh DROPS Design
10.04.2026 - 09:21
![]() Melissa skrev:
Melissa skrev:
My first major project will be the Isla Slipover vest in medium using either DROPS AIR or DROPS ANDES. The problem I have is not knowing just how many balls of yarn I will need to complete the vest?
20.03.2026 - 02:59DROPS Design answered:
Hi Melissa, Drops Air is sold in 50 g balls and Drops Andes in 100 g balls. So you will need 6 balls of Air (and work with 2 strands) or 3 balls of Andes and work with a single strand). Regards, Drops Team.
20.03.2026 - 05:28
![]() Anna skrev:
Anna skrev:
Hi, I would like to use Merino Cotton yarn to make a more spring/summer-friendly version of the project. Would 2 strands of Merino Cotton be enough to substitute for 2 strands of DROPS Air? If so, should I use the same size needles as recommended for DROPS Air?
13.03.2026 - 11:50DROPS Design answered:
Dear Anna, Cotton Merino belongs to yarn group B while Air belongs to yarn group C, most of the time you can replace 1 strand yarn group E as Wish here with 2 strands yarn group C as Air here, but Cotton Merino might not be a good alternative even with 2 strands - see a swatch of 2 strands Cotton Merino worked together here. Happy knitting!
13.03.2026 - 15:33
![]() Mathilde skrev:
Mathilde skrev:
Bonjour Combien faut il de pelotes de laine de drops snow pour ce modèle de pull sans manche en taille M Merci par avance :)
04.03.2026 - 06:53DROPS Design answered:
Bonjour Mathilde, utilisez le convertisseur pour voir les quantités correspondantes en Snow. Bon tricot!
04.03.2026 - 08:08
![]() Rachael skrev:
Rachael skrev:
Hi, I’m attempting to pick up stitches around the armhole, but I’m unsure of the pick up rate, e.g. pick up 3, skip 1, pick up 3, skip 1… Pattern says to end up with approx 72 stitches. Could you advise please? Thanks!
21.02.2026 - 20:32DROPS Design answered:
Hi Rachael, Her is a link to our video for knitting up stitches around the neck (the same method as you use for knitting up aound the armholes): https://www.garnstudio.com/video.php?id=1787&lang=en Regards, Drops Team.
23.02.2026 - 07:16
![]() Rachael skrev:
Rachael skrev:
Hi, I’m a beginner knitter and am attempting the pattern, however it’s a little ambiguous. I’ve cast on and completed 6 row rib for the back. The next instruction is to work st st from the right side. Does that mean I should start row 7 with a Knit row, or a Purl row?
12.02.2026 - 22:57DROPS Design answered:
Hi Rachael, Stocking stitch is knitted from the right side and purled from the wrong side, so the 7th row is knitted. Regards, Drops Team.
13.02.2026 - 06:26
![]() Suzanne skrev:
Suzanne skrev:
Je ne comprends pas . Après avoir rabattu mes 22 mailles centrales. Rabattre ensuite 1 maille au début du rg suivant à partir de l’encolure = 8 mailles pour ma grandeur. Est- ce qu’ on rapetisse à chaque rang 1 maille Ce n’est pas clair pour moi svp
11.02.2026 - 22:38DROPS Design answered:
Bonjour Suzanne, lorsque vous avez rabattu les 22 mailles centrales, il vous reste 9 mailles pour chaque épaule. (40 mailles au total - 22 m pour l'encolure = 18m soit 9 m pour chaque épaule ). Vous terminez chaque épaule séparément, et, au 1er rang à partir de l'encolure (sur l'endroit pour l'épaule gauche/sur l'envers pour l'épaule droite) vous rabattez 1 maille pour l'encolure = il reste 8 mailles pour l'épaule. Bon tricot!
12.02.2026 - 17:51
![]() Katharina skrev:
Katharina skrev:
Soll man oberhalb der abgeketten Maschen für die Armausschnitte weiterhin am Rand kraus rechts stricken oder die erste Masche der Reihe übernehmen?
03.02.2026 - 14:30DROPS Design answered:
Liebe Katharina, Sie stricken die Randmaschen glatt rechts, also so wie die restlichen Maschen in der Hin-Reihe rechts und in der Rück-Reihe links. Aus dem glatt rechts gestrickten Rand lassen sich später die Maschen für die Armausschnittblenden gut auffassen. Viel Spaß beim Weiterstricken!
03.02.2026 - 19:23
![]() Anna skrev:
Anna skrev:
Hi, can I use two strands of yarn - drops Alaska and Drops Melody for this pattern ? I would like the vest to be really chunky but maybe it would be too much ?
02.02.2026 - 19:16DROPS Design answered:
Hi Anna, Drops Alaska belongs to yarn group C and 2 strands from any yarn from yarn group C will be the same thickness as 1 strand of Drops Wish (belongs to yarn group E). However, Melody belongs to yarn group D, so the 2 strands will then be slightly thicker and you will need to adjust needle sizes and/or stitch numbers to get the correct measurements for the vest. Regards, Drops Team.
03.02.2026 - 07:22
|
|
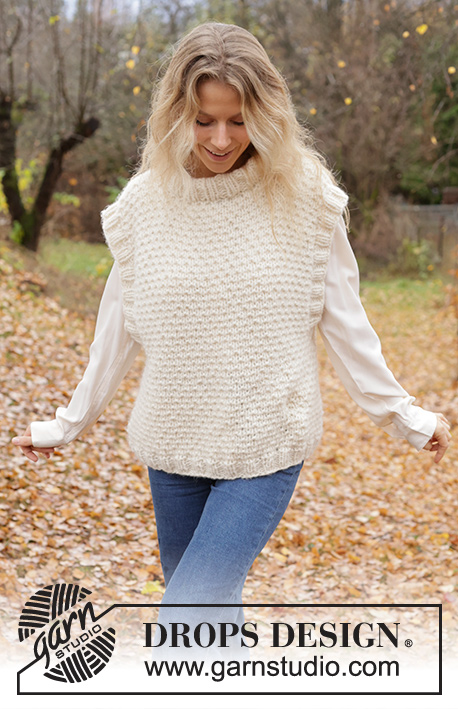
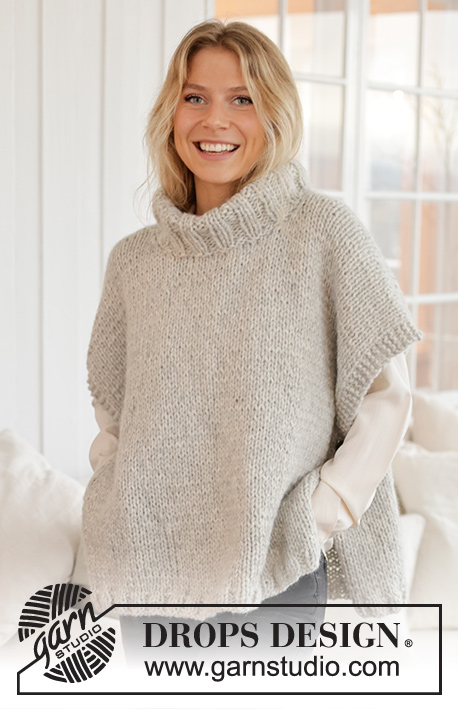
Isla Slipover#islaslipover |
|
 |
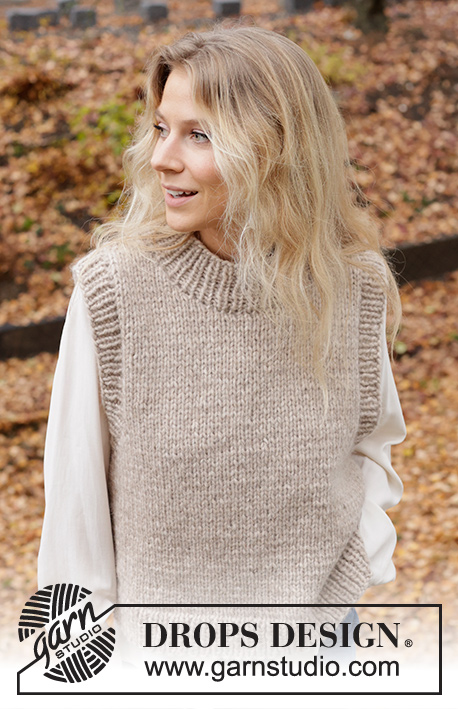 |
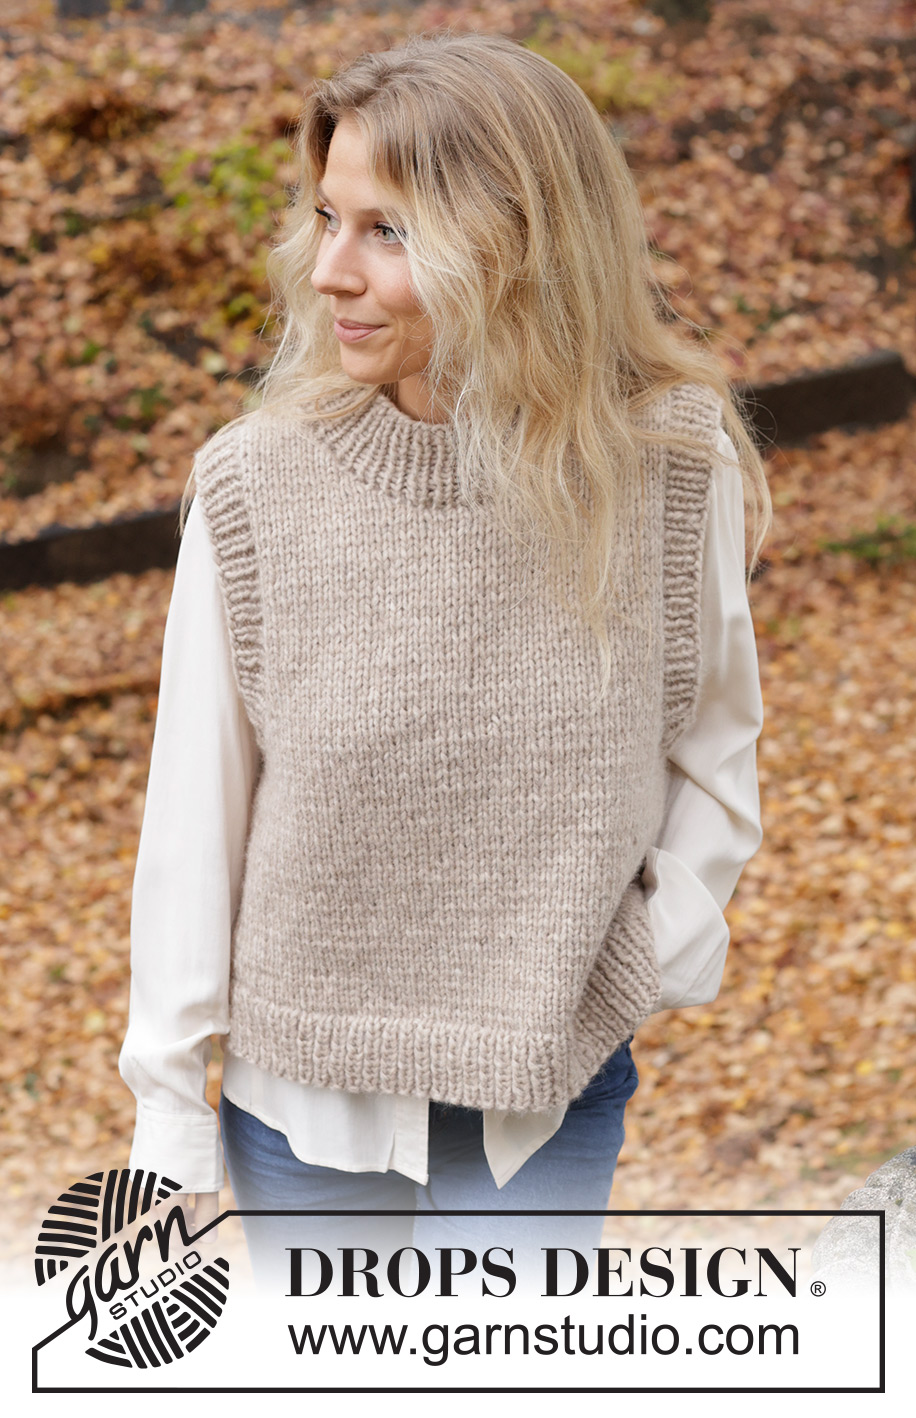
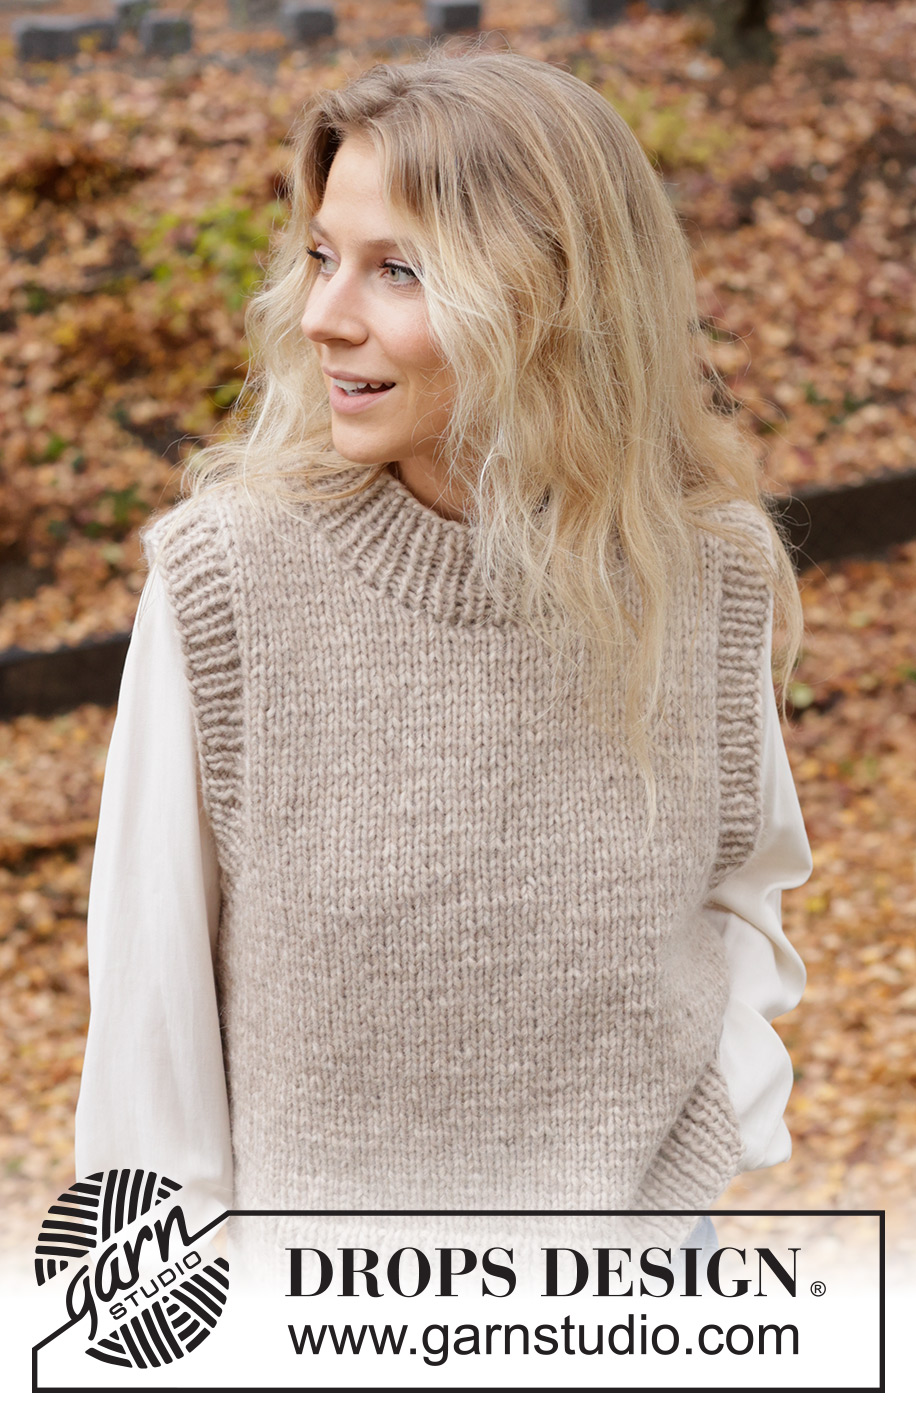
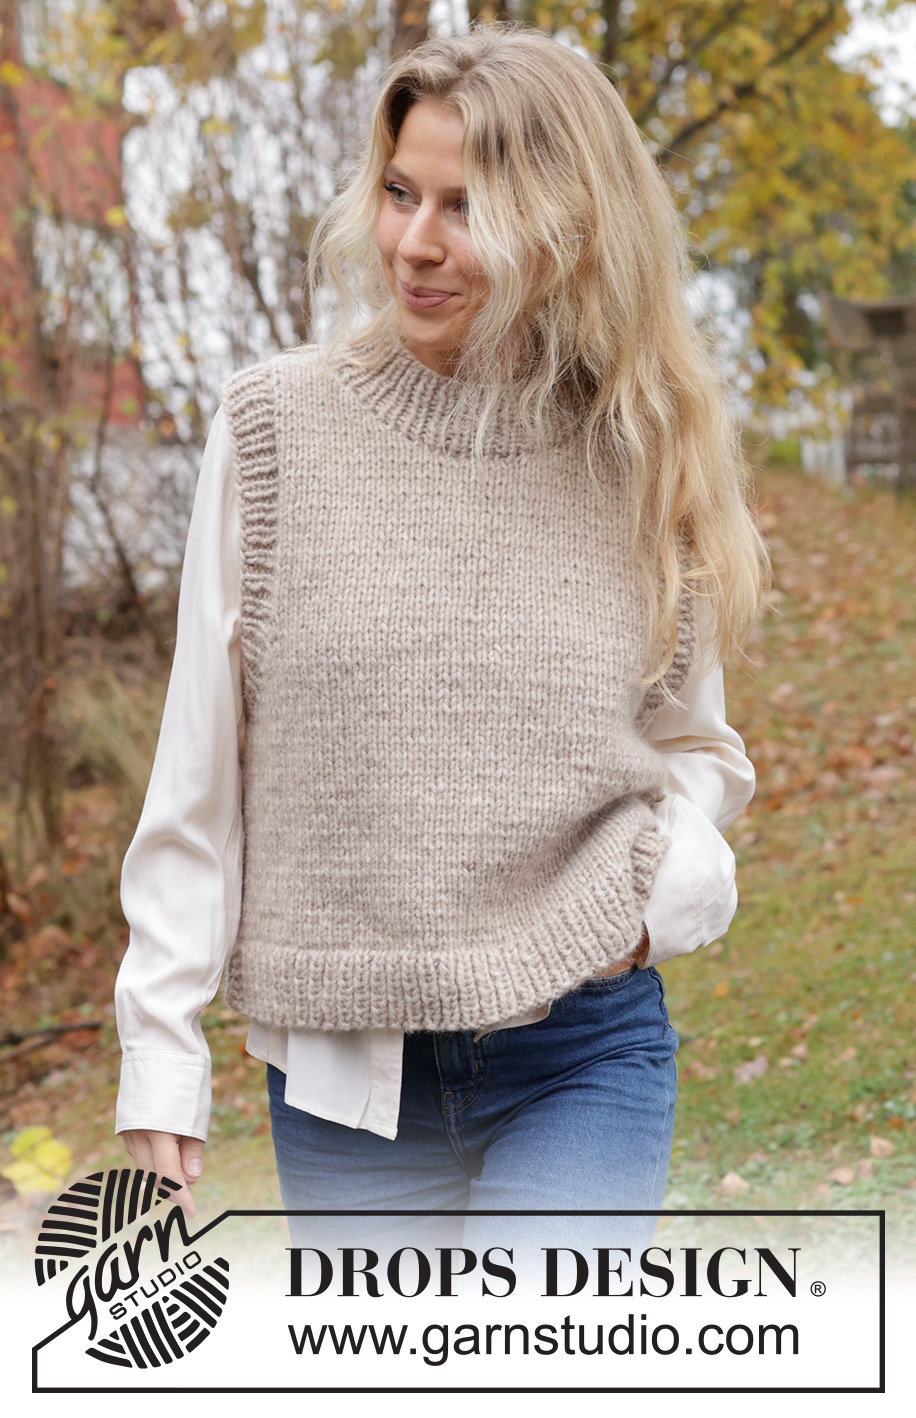
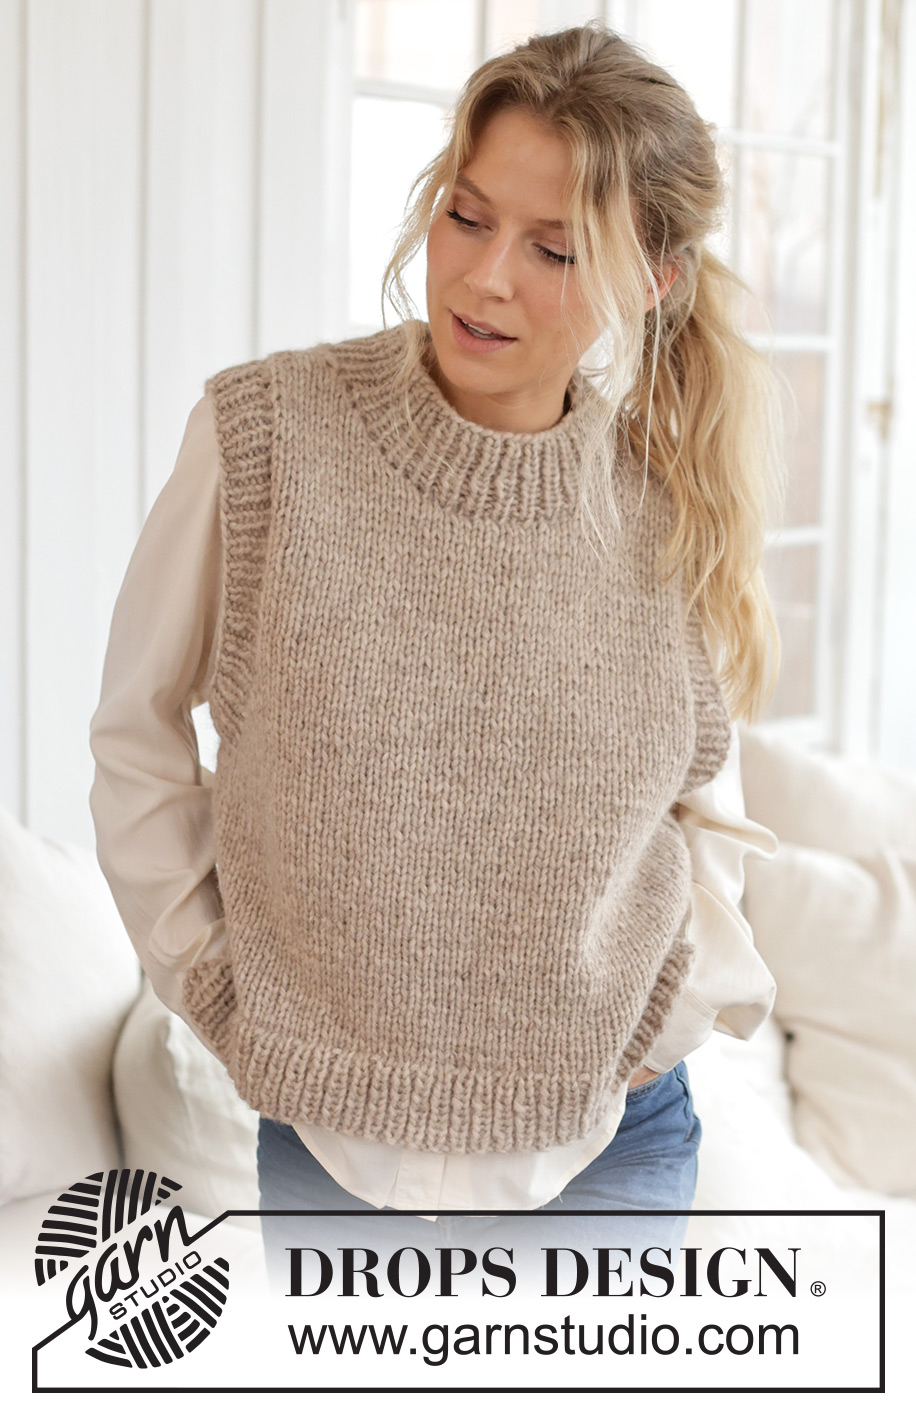
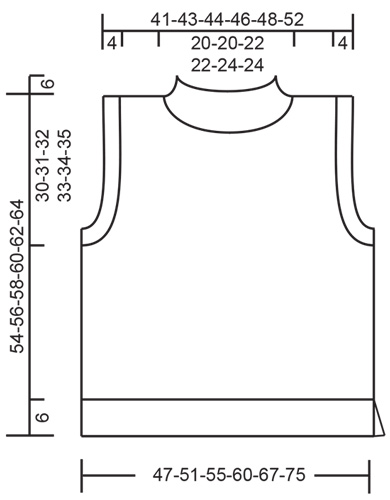
Strikket vest / slipover i DROPS Wish eller 2 tråder DROPS Air. Arbeidet strikkes i glattstrikk med kanter i vrangbord og splitt i siden. Størrelse S - XXXL.
DROPS 226-58 |
|
|
------------------------------------------------------- FORKLARING TIL OPPSKRIFTEN: ------------------------------------------------------- RILLE (strikkes frem og tilbake): Strikk rett på alle pinner. 1 rille i høyden = Strikk 2 pinner rett. ------------------------------------------------------- START ARBEIDET HER: ------------------------------------------------------- VEST – KORT OVERSIKT OVER ARBEIDET: Forstykket og bakstykket strikkes frem og tilbake på rundpinne hver for seg til ferdig mål. Det strikkes kanter i vrangbord rundt begge ermehullene og rundt halsen. BAKSTYKKE: Legg opp 69-73-77-85-93-103 masker på rundpinne 7 med 1 tråd DROPS Wish eller 2 tråde DROPS Air. Første pinne strikkes slik fra retten: Strikk 2 kantmasker i RILLE - les forklaring over, strikk vrangbord (1 vrang / 1 rett) til det gjenstår 3 masker, 1 vrang og 2 kantmasker i rille. Fortsett vrangborden slik til arbeidet måler 6 cm og neste pinne er fra retten. På neste strikkes det slik: Strikk 1 kantmaske i rille, strikk glattstrikk og fell 17-17-17-19-19-21 masker jevnt fordelt over de neste 67-71-75-83-91-101 maskene, og avslutt med 1 kantmaske i rille = 52-56-60-66-74-82 masker. Bytt til rundpinne 8 og strikk glattstrikk videre med 1 kantmaske i rille i hver side. HUSK PÅ STRIKKEFASTHETEN! Når arbeidet måler 24-25-26-27-28-29 cm, felles det av til ermehull på hver 2.pinne (på begynnelsen av hver pinne) i hver side slik: Fell av 3 masker 1-1-1-1-1-2 ganger, 2 masker 0-1-2-2-3-3 ganger og 1 maske 5-4-3-5-6-5 ganger = 36-38-40-42-44-48 masker. Strikk videre i glattstrikk. Når arbeidet måler 51-53-55-57-59-61 cm, felles de midterste 20-20-22-22-24-24 maskene av til hals og skuldrene strikkes ferdig hver for seg. Strikk glattstrikk og fell av 1 maske på neste pinne fra halsen = 7-8-8-9-9-11 masker. Strikk videre til arbeidet måler 54-56-58-60-62-64 cm, og fell løst av med rett fra retten. Strikk den andre skulderen på samme måte. FORSTYKKE: Legg opp og strikk som bakstykket til arbeidet måler 45-47-48-50-51-53 cm. Nå felles de midterste 8-8-8-10-10-10 maskene av til hals og hver skulder strikkes ferdig hver for seg. Strikk glattstrikk og fell av til hals på begynnelsen av hver pinne fra halsen slik: Fell av 2 masker 2 ganger og 1 maske 3-3-4-3-4-4 ganger = 7-8-8-9-9-11 masker. Strikk videre til arbeidet måler 54-56-58-60-62-64 cm, og fell løst av med rett fra retten. Strikk den andre skulderen på samme måte. MONTERING: Sy skuldersømmene. Sy sidesømmen i ytterste ledd av ytterste rille slik at det ikke blir en tykk søm, men la det gjenstå 6 cm nederst ved vrangborden (= splitt). ERMEHULLSKANT: Bruk rundpinne 7. Start i siden nederst i ermehullet og strikk opp fra retten innenfor 1 maske, ca 72-72-76-76-80-84 masker rundt ermehullet (maskeantallet skal være delelig med 2). Strikk vrangbord rundt (1 rett / 1 vrang) i 4 cm. Fell løst av med rett over rett og vrang over vrang. Strikk en kant rundt det andre ermehullet på samme måte. HALSKANT: Bruk liten rundpinne 7. Start midt på den ene skulderen og strikk opp fra retten innenfor 1 maske, ca 54-54-60-60-64-64 masker rundt halsen (maskeantallet skal være delelig med 2). Strikk vrangbord rundt (1 rett / 1 vrang) i 6 cm. Fell løst av med rett over rett og vrang over vrang. |
|
 |
|
Har du fullført dette mønsteret?Tagg bildene dine med #dropspattern #islaslipover eller send dem til #dropsfan-galleriet. Trenger du hjelp med denne oppskriften?Du finner 23 instruksjonsvideoer, kommentarer/spørsmål og mer i oppskriften på www.garnstudio.com © 1982-2026 DROPS Design A/S. Alle rettigheter er reservert. Dette dokumentet med sine underdokumenter har copyright. Les mer om hva du er tillatt å gjøre med våre oppskrifter nederst i alle våre oppskrifter på vår nettside. |
|


Med over 40 år i strikke- og heklebransjen, tilbyr DROPS Design en av de mest omfattende samlingene av gratis oppskrifter på internett - oversatt til 17 språk. Per i dag har vi 325 kataloger og 12291 oppskrifter på Norsk.
Vi jobber hardt for å tilby det beste innen strikking og hekling, inspirasjon og gode råd, men også kvalitetsgarn til fantastiske priser! Vil du bruke våre oppskrifter til annet enn personlig bruk? Du kan lese om hvilke regler som gjelder i teksten Copyright nederst på siden i alle våre oppskrifter. God fornøyelse!
Kommenter oppskrift DROPS 226-58
Vi vil gjerne høre din mening om denne modellen!
Hvis du ønsker å stille et spørsmål, husk å velge riktig kategori i menyen under - det vil sørge for at du får svar raskere. Obligatoriske felt er markert med *.