
Leder du efter et garn?


Hvordan tages ud på en usynlig måde

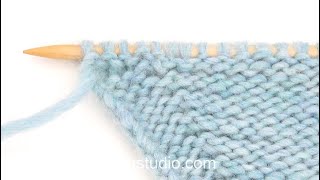
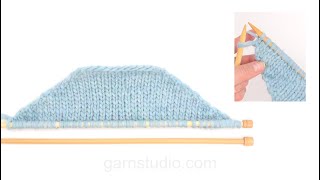
I højre side: Løft tråden forfra mellem to masker med venstre pind og strik 1 m i bagerste maskebue.
I venstre side: løft tråden bagfra mellem to masker med venstre pind og strik 1 m i forreste maske bue.
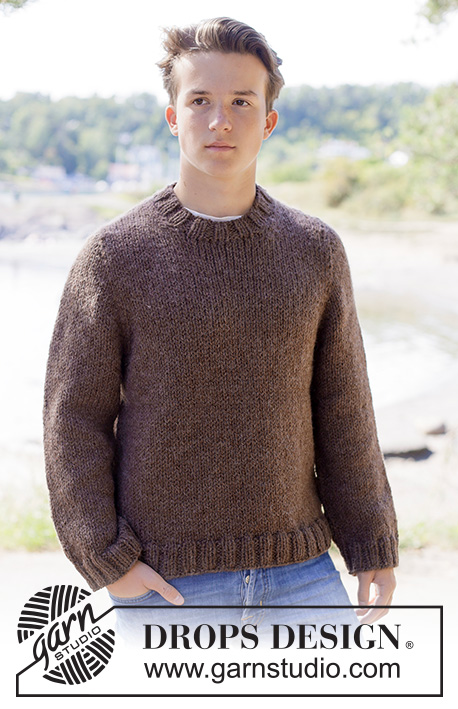
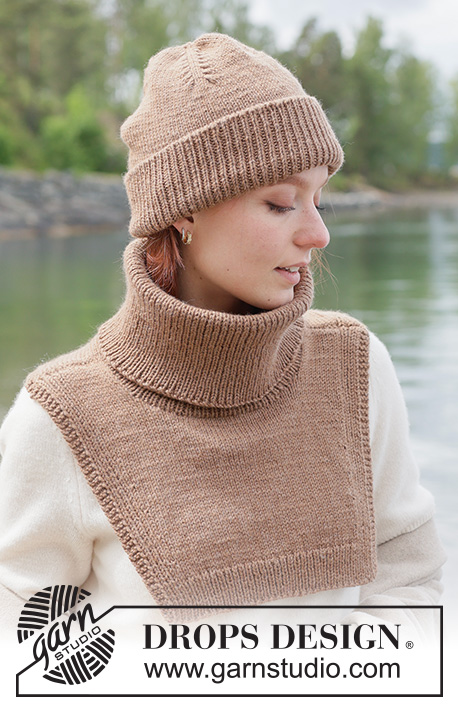
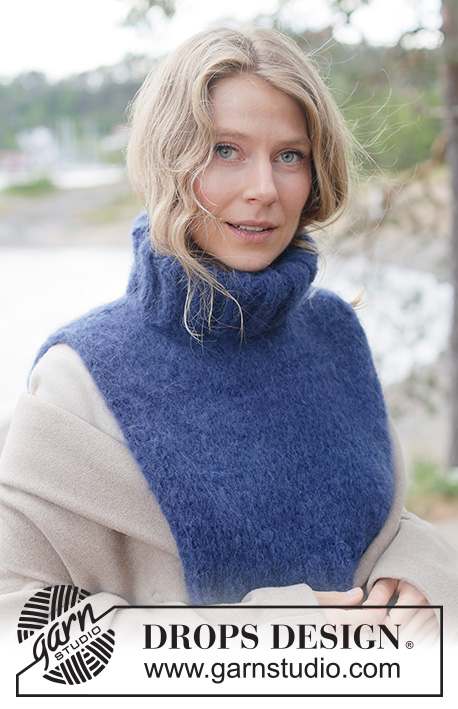
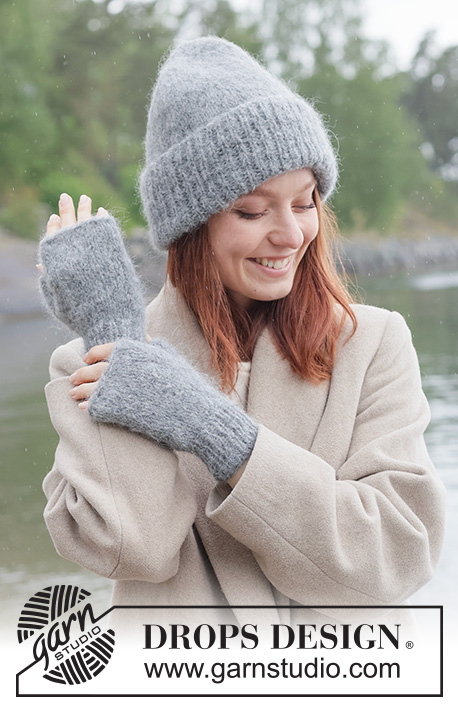
Opskrifter som bruger denne teknik
Video #9, findes i: Lær at strikke, Hvordan tages ud, Strikkede udtagninger - Basisteknik
Vores videoer har ikke lyd. Vi er en verdensomspændende virksomhed, og vores videoer bliver set af folk, der taler mange forskellige sprog, og mange forstår ikke engelsk. Da der ikke er et givet sprog for os at bruge, har vi i stedet skrevet instruktioner til videoen, og så er der ingen lyd til at forstyrre når man kigger.
Du kan justere hastigheden på denne video ved at klikke på ikonet, nederst til højre.
Skriv en kommentar eller et spørgsmål til denne video
Din mailadresse vil ikke synes. Obligatoriske felter er markeret med *.
Du synes måske også om...


Med over 40 år i strikke- og hæklebranchen tilbyder DROPS Design en af de mest omfattende kollektioner med gratis opskrifter på internettet - oversat til 17 sprog. Dags dato har vi 325 kataloger og 12298 opskrifter på Dansk.
Vi arbejder hårdt for at kunne tilbyde Dig det bedste man kan få af strik og hækling, inspiration og gode råd men også kvalitetsgarn til fantastiske priser! Vil du bruge vore opskrifter til andet end for privat brug? Du kan læse om hvilke regler som gælder under teksten Copyright nederst på siden i alle vore opskrifter. God fornøjelse!
Thanks for your reply. There is no pattern number - the full name is #minnacaston by Siv Kristin Olsen.
09.01.2024 - 16:31Hi! I am working on #minnacaston and having BIG problems. I am a very experienced knitter, but this is not working. It’s about Increase 1. You write and (and in the video) indicate that increase 1 is effectively making two new stitches. That does not add up correctly with the pattern stitch count. When I make the 1 2, it doesn’t either. Please help me. I really want to make and wear this sweater. Thank you Helen
08.01.2024 - 02:16DROPS Design :
Dear Mrs Worley, I'm not sure which pattern you are working on, can you please tell us the number so that we can check together? Thanks for your comprehension..
09.01.2024 - 08:19Estoy haciendo el cardigan Richard -Drops 85-13 y al hacer los aumentos del cuerpo, supongo serán uno a la derecha y otro a la izquierda. Además dice incorporar al Patrón y eso no lo entiendo, porque al agregar un punto el patrón cambia ya que es un punto al derecho y el siguiente al revés.Podrías ayudarme?
02.10.2023 - 17:21DROPS Design :
Hola Lourdes, aumentas 1 punto a cada lado del punto con marcapuntos (es decir, uno a la derecha y otro a la izquierda del mismo punto). En total hay 4 puntos aumentados en la fila. Estos puntos se trabajan después dentro del patrón. Puede quedar un ligero desajuste en el lateral, pero el dibujo general no debería variar demasiado.
08.10.2023 - 23:51Salve sto facendo il modello Drops Baby 20-10, non riesco a capire l' aumento ai lati delle 3 maglie centrale.
29.04.2023 - 14:02DROPS Design :
Buonasera Marie, è un aumento sollevato, deve sollevare il filo della maglia del giro precedente e lavorarlo a diritto. Buon lavoro!
07.05.2023 - 00:03Los aumentos para el canesú son 2 a cada lado de los 4 marcadores?. Gracias.
15.02.2023 - 08:37DROPS Design :
Hola Olga, este es un vídeo aplicable para varios patrones. ¿Podrías indicar el número del patrón que estás trabajando para que podamos ayudarte más?
16.02.2023 - 20:28I am just starting Warm Blush drops top down. The diagram pattern has a purl knit pattern every second row. The pattern is knit top down and on circular needles. I’m stumped at the second row of pearl knit as I have just added 8 stitches on the previous knit row. Where do I start the second row? At the increase d stitch at the first market or at the original stitch at the first marker?
08.12.2022 - 09:29DROPS Design :
Dear Jill, when increasing a diagram you will have to work the new stitches as a new repeat on each side, ie after raglan, at the beg of A.1 work the first stitch increased as the next stich previous repeat, ie as the 2nd st in A.1 and work the first stitch increased at the end of A.1 as the next stitch in A.1, so that you should always keep 1 stitch in garter stitch (alternately purled and knitted) and 1 stitch in stocking stitch - pattern always starts and ends with the same stitch between raglan stitches (the stitches with the markers) so that it will be symmetrical. Happy knitting!
08.12.2022 - 10:17Er det ikke omvent? I skriver: I højre side: Løft tråden forfra mellem to masker med venstre pind og strik 1 m i bagerste maskebue. I venstre side: løft tråden bagfra mellem to masker med venstre pind og strik 1 m i forreste maske bue. Hvis man skal laveg en udtagning til venstre side, skal man løft tråden forfra med ventre pind ot strik 1m forreste masek bue....
15.06.2021 - 15:13Scusate, una domanda forse sciocca. Cosa significa aumento lato destro, aumento lato sinistro? Vedo la differenza nell'esecuzione ma non capisco quando si dovrebbe usare uno piuttosto che l'altro per esempio. Grazie.
13.11.2020 - 08:32DROPS Design :
Buongiorno Cinzia, sono aumenti che inclinati a destra o sinistra. Si lavorano solitamente in corrispondenza dei segnapunti o degli scalfi , o comunque in corrispondenza di aumenti simmetrici, ma solitamente è indicato nel lavoro. Buon lavoro!
13.11.2020 - 15:58Quando dite ad esempio: "aumentare ogni due giri" intendete nel secondo giro l'aumento o nel terzo. Grazie mille
06.08.2019 - 07:13DROPS Design :
Buongiorno Silvia. Aumenta su un giro; lavora il giro successivo senza aumentare; al giro successivo aumenta. Buon lavoro,
06.08.2019 - 12:26Love your patterns but they are a bit daunting as I am a new knitter and they are not fully written out row by row! However, I am slowly learning the terminology. Regarding patterns that say “make 1 yarnover” when increasing, does this mean Make 1, then do a yarn over? Or just Make 1, i.e. increase by one stitch? Won’t doing a yarn over create a (unwanted) hole every time? Thank you
04.08.2019 - 22:43DROPS Design :
Dear KateC, when you have to increase with a yarn over, work as shown in this video - working yarn over K or P and in the front of back loop of yarn over as explained in the pattern. Happy knitting!
08.08.2019 - 11:51