
Popular categories
Looking for a yarn?


Comments / Questions (22)
![]() Judit wrote:
Judit wrote:
Nem értem a mintát. \ ehez a jelhez 2 szem tartozik, a leírásban pedig 7. Hogy kell ezt kötni? Már sajnálom, hogy elkezdtem.
16.11.2024 - 13:46DROPS Design answered:
Kedves Judit! Köszönjük, hogy felhívta a figyelmünket, a diagram jeleinek leírásában javítottuk a hibát.
14.01.2025 - 13:59
![]() Radhika wrote:
Radhika wrote:
What head circumference will the 2 sizes of this hat fit?
22.01.2023 - 18:27DROPS Design answered:
Dear Radhika, size S/M fits approx. 54/56 cm and size M/L approx. 56/58 cm head circumference. Happy knitting!
23.01.2023 - 10:08
![]() 112 wrote:
112 wrote:
Nem érhető el a kép
15.12.2022 - 15:37
![]() Bea wrote:
Bea wrote:
Sziasztok! A magyar mintaleírásnál az utóbbi javítás óta nem jelenik meg sajnos a diagram.
22.06.2022 - 10:51
![]() Oliveo wrote:
Oliveo wrote:
Hi Drops Design. Sorry, I mean I'm confused with how to work A.2b over A.2a at the same time. Thanksx
03.11.2021 - 13:09DROPS Design answered:
Dear Oliveo, after 18-19 cm stop working A.2a and work A.2b instead (over A.2a), this means you will decrease sts at the beg and end of each repeat as shown in diagram, while working A.2b stop working cable A.2b when there are not enough sts to work it. Happy knitting!
04.11.2021 - 07:07
![]() Oliveo wrote:
Oliveo wrote:
Hello! I'm confused with how to work A.2b over A.2a at the same time? Would appreciate some help with this. Thanks x
03.11.2021 - 02:09DROPS Design answered:
Hi Oliveo, A.1a is the fold-up and A.2 is the main pattern. So you work A.1a until the piece measures 3 cm. Then you work A.2 (repeated 5 times in width on the round). I hope this helps and happy knitting!
03.11.2021 - 07:00
![]() Chantal wrote:
Chantal wrote:
Bonjour, Pouvez vous m'expliquer où je peux trouver les corrections des diagrammes et des légendes des symboles de ce modèle. Merci beaucoup
09.04.2021 - 17:52DROPS Design answered:
Bonjour Chantal, Si vous avez imprimé les explications avant la date de la correction, il peut être sage de les imprimer à nouveau, sinon, les explications sont justes et ont déjà été corrigées. Bon tricot!
12.04.2021 - 07:11
![]() Vemis wrote:
Vemis wrote:
Hele driten går jo ikke opp? De står at man skal ende med 85 masker i slutten av A. 2, men det er fysisk umulig ettersom man skal lage den mengden med kast!
26.03.2021 - 20:56
![]() Line wrote:
Line wrote:
Jeg kan ikke få diagrammet A2b til at stemme, når jeg kommer til 9. række ved 3 maske hvor “omslag og løs maske skal over på højre pind” - det er ikke noget omslag og løs maske på foregående pind? Der er retmasker.
09.12.2020 - 19:31DROPS Design answered:
Hej Line, Der mangler en prik på pind nr 8 i A.2b som du siger. Tak for info det skal vi få rettet :)
15.12.2020 - 14:37
![]() Belinda Lantto wrote:
Belinda Lantto wrote:
Jag ser att alla frågar samma sak, men jag förstår inte svaren; hur byter man från A1a till A2? Man avslutar ju A1a i en ribb (avig rät) det finns ju inga omslag på det varvet.
23.11.2020 - 20:58DROPS Design answered:
Hei Belinda. Oppskriften er oversendt til design avd. slik at de kan ta en dobbeltsjekk evnt komme med en rettelse. mvh DROPS design
24.11.2020 - 11:25
|
||||||||||||||||||||||||||||
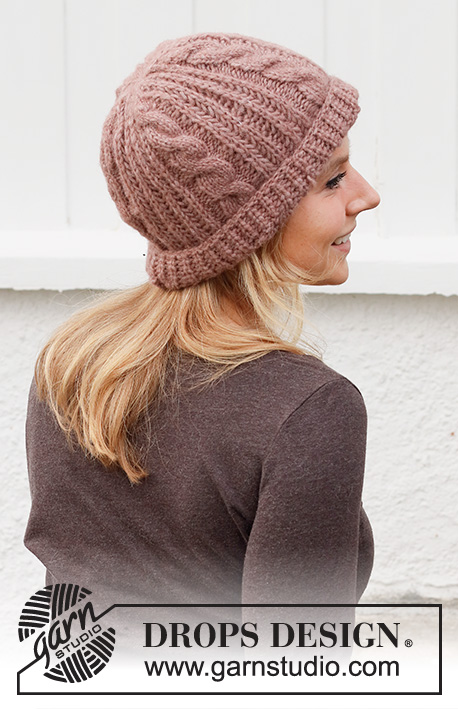
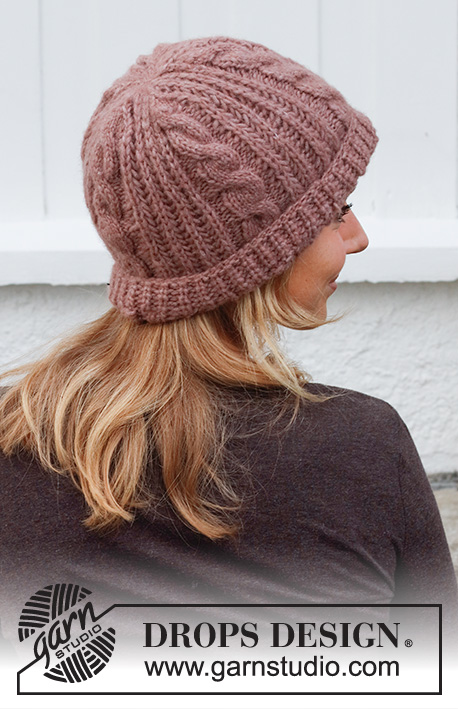
Rose Crush#rosecrushhat |
||||||||||||||||||||||||||||
 |
 |
|||||||||||||||||||||||||||
Knitted hat with cables and English rib in DROPS Air.
DROPS 214-17 |
||||||||||||||||||||||||||||
|
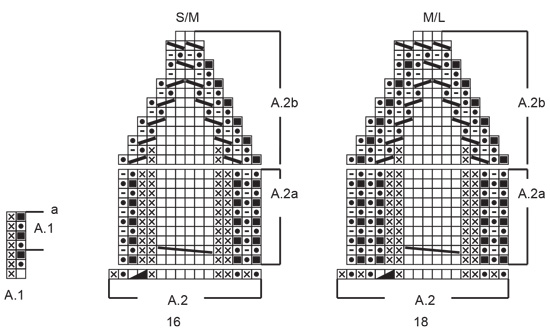
------------------------------------------------------- EXPLANATION FOR THE PATTERN: ------------------------------------------------------- PATTERN: See diagrams A.1 and A.2. See diagram for your size (applies to A.2). ------------------------------------------------------- START THE PIECE HERE: ------------------------------------------------------- HAT - SHORT OVERVIEW OF THE PIECE: Worked in the round on circular needle, bottom up. Switch to double pointed needles when needed. HAT: Cast on 80-90 stitches on circular needle size 4 mm with Air. Work A.1 (= 2 stitches) over all stitches, when the 3 first rounds in A.1 have been worked, repeat A.1a upwards. Continue with A.1a until piece measures 3 cm. Then work A.2 (= 16-18 stitches) 5 times in total in width. REMEMBER THE KNITTING TENSION! When first round of A.2 has been worked, there are 75-85 stitches on needle. Switch to circular needle size 5 mm and work A.2a. Repeat A.2a vertically until piece measures 18-19 cm. Work A.2b over A.2a - AT THE SAME TIME the cable from A.2a continues in A.2b until there is not enough stitches for a whole cable (due to decreases). When A.2b has been worked 1 time vertically, there are 10-15 stitches on needle. Work all stitches together 2 by 2. Cut the yarn and pull it through the remaining stitches, tighten together and fasten. Hat measures approx. 24-25 cm. |
||||||||||||||||||||||||||||
Diagram explanations |
||||||||||||||||||||||||||||
|
||||||||||||||||||||||||||||
|
||||||||||||||||||||||||||||
Have you finished this pattern?Tag your pictures with #dropspattern #rosecrushhat or submit them to the #dropsfan gallery. Do you need help with this pattern?You'll find 12 tutorial videos, a Comments/Questions area and more by visiting the pattern on garnstudio.com. © 1982-2025 DROPS Design A/S. We reserve all rights. This document, including all its sub-sections, has copyrights. Read more about what you can do with our patterns at the bottom of each pattern on our site. |
||||||||||||||||||||||||||||


With over 40 years in knitting and crochet design, DROPS Design offers one of the most extensive collections of free patterns on the internet - translated to 17 languages. As of today we count 314 catalogues and 11822 patterns translated into English (UK/cm).
We work hard to bring you the best knitting and crochet have to offer, inspiration and advice as well as great quality yarns at incredible prices! Would you like to use our patterns for other than personal use? You can read what you are allowed to do in the Copyright text at the bottom of all our patterns. Happy crafting!
Post a comment to pattern DROPS 214-17
We would love to hear what you have to say about this pattern!
If you want to leave a question, please make sure you select the correct category in the form below, to speed up the answering process. Required fields are marked *.