
Popular categories
Looking for a yarn?


Comments / Questions (14)
![]() Aga wrote:
Aga wrote:
Ile g włóczki typu C potrzeba?
14.11.2024 - 16:25DROPS Design answered:
Witaj Agnieszko, podobny efekt uzyskasz używając włóczki DROPS Air (1 nitka). Będziesz potrzebować 3 motki (150 g) tej włóczki. Pozdrawiamy!
15.11.2024 - 09:23
![]() Hanna wrote:
Hanna wrote:
Bardzo ładny komin i piękne kolory. Zrobiłam dwa według tego wzoru. Drugi zrobiłam na okrągło i uważam, że lepiej wygląda niż ten zszywany. W internecie znalazłam filmik jak połączyć włóczkę aby nie było uskoku przy zmianie koloru. Jestem zadowolona. Polecam ten wzór. Hanna
18.10.2024 - 13:44
![]() Stine wrote:
Stine wrote:
Kor mykje garn treng eg om den skal strikkast einsfarga?
15.01.2023 - 00:16DROPS Design answered:
Hei Stine. Det har vi dessverre ikke oversikten over. Men vil tippe 150+ gram Alpaca og 75 gram Kid-Silk. mvh DROPS Design
16.01.2023 - 12:49
![]() Esmée Tiemens wrote:
Esmée Tiemens wrote:
Hallo, hoeveel garen heb ik nodig als ik de halswarmer in één kleur wil maken?
05.01.2023 - 15:58DROPS Design answered:
Dag Esmée,
Om eerlijk te zijn weet ik dat niet precies. Als je 200 gram van elke kwaliteit neemt heb je in ieder geval genoeg en vaak kun je overgebleven bollen binnen een bepaalde termijn terugsturen naar de winkel waar je ze hebt gekocht. Vraag naar de voorwaarden bij je winkel.
06.01.2023 - 19:31
![]() Angelica wrote:
Angelica wrote:
Sería genial que pusieran las medidas al principio de la explicación, así uno puede hacerla en cualquier punto que quiera sin tener que mirar todo el patrón. Por ejemplo: las medidas son 50 centímetros de diámetro por 90 centímetros de largo, así es mucho más fácil.
03.06.2022 - 21:54
![]() Christine wrote:
Christine wrote:
Avez vous un courriel ? je voudrai tricoter ce modèle merci pour votre aide. Je ne peux pas additionner car les pelotes ne sont pas utilisées en entier bonne journée
09.11.2021 - 14:20
![]() Christine wrote:
Christine wrote:
Merci mais je n'ai pas de magasin Drops à Annapolis en NS. Auriez-vous un courriel ? Bonne journée
09.11.2021 - 13:10DROPS Design answered:
Bonjour Christine, Nous ne sommes malheureusement pas en mesure de pouvoir adapter chacun de nos modèles à chaque demande, contactez par mail le magasin DROPS qui livre dans votre pays, retrouvez la liste ici (sélectionnez votre pays si besoin). Merci pour votre compréhension.
09.11.2021 - 13:29
![]() Christine wrote:
Christine wrote:
Combien de laine pour cet ouvrage que je vais faire d'une seule couleur merci
08.11.2021 - 23:09DROPS Design answered:
Bonjour Christine, comme ce modèle a été tricoté avec des rayures, nous n'avons pas la quantité nécessaire pour une seule couleur. Merci pour votre compréhension. Vous pouvez additionner chaque couleur, il vous en faudra probablement un peu moins - votre magasin DROPS saura vous aider et vous conseiller, même par mail ou téléphone. Bon tricot!
09.11.2021 - 13:03
![]() Simona wrote:
Simona wrote:
Buongiorno, vorrei fare questo capo in un unico colore, il totale del peso dei filati è sempre g 200 alpaca e g 100 kit silk? Grazie in anticipo
05.01.2021 - 13:46DROPS Design answered:
Buongiorno Simona, potrebbe provare con un gomitolo in meno per qualità: in ogni caso si faccia consigliare dal suo rivenditore DROPS di fiducia. Buon lavoro!
05.01.2021 - 14:56
![]() Sheena Merrett wrote:
Sheena Merrett wrote:
Hi - I'm interested in knitting the Sunsets Glow Neck Warmer. The needles required are listed as circular - but then later on in the pattern it says the piece is worked back and forth top down and then under assembly you are told to sew sides together. I thought if it was on a circular needle, there would be no seam? Also, where it says 7-8 cms for a stripe - is it up to me how deep to make it? or does this mean something else. Many thanks for your help. Sheena
09.11.2020 - 14:06DROPS Design answered:
Dear Mrs Merett, piece is worked back and forth on circular needle with a seam at the end - you have to add up all stripes, ie the measuremnets give is for each stripe. Happy knitting!
09.11.2020 - 15:37
|
|
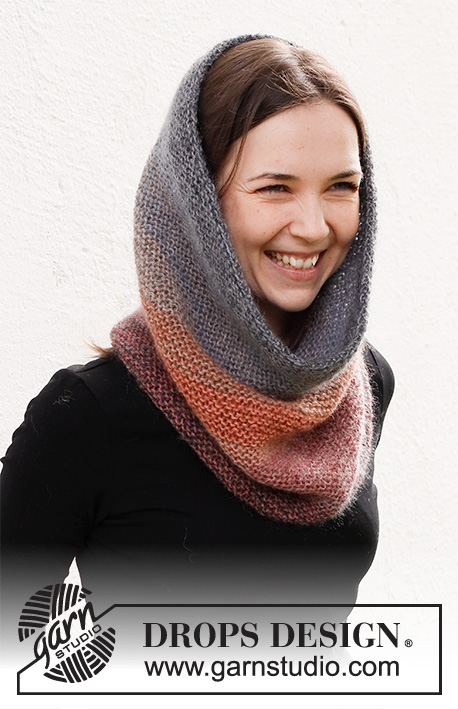
Sunsets Glow#sunsetsglowbalaclava |
|
 |
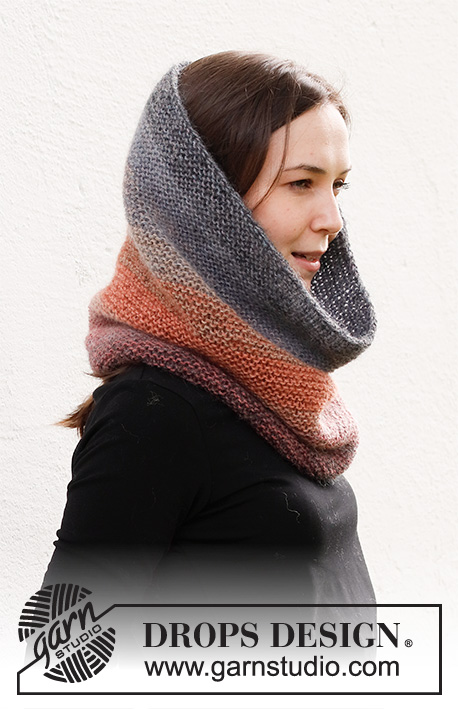 |
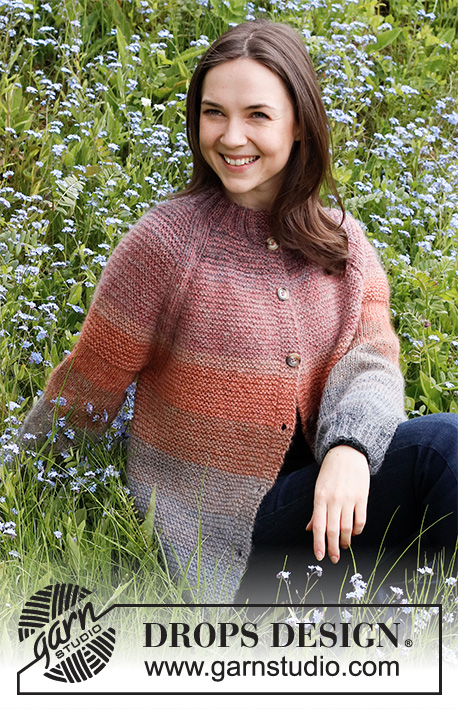
Knitted neck warmer in DROPS Alpaca and DROPS Kid-Silk. The piece is worked in garter stitch and stripes.
DROPS 214-13 |
|
|
------------------------------------------------------ EXPLANATIONS FOR THE PATTERN: ------------------------------------------------------- RIDGE/GARTER STITCH (worked back and forth): Knit all rows. 1 ridge in height = Knit 2 rows. STRIPES: 7-8 cm with 1 strand ash grey Kid-Silk and 1 strand old rose Alpaca. 2-2 cm with 1 strand grey Kid-Silk and 1 strand old rose Alpaca. 7-8 cm with 1 strand beige Kid-Silk and 1 strand old rose Alpaca. 2-2 cm with 1 strand beige Kid-Silk and 1 strand blush Alpaca. 4-5 cm with 1 strand rust Kid-Silk and 1 strand blush Alpaca. 4-5 cm with 1 strand rust Kid-Silk and 1 strand nougat Alpaca. 4-5 cm with 1 strand grey Kid-Silk and 1 strand nougat Alpaca. 4-5 cm with 1 strand beige Kid-Silk and 1 strand lavender mix Alpaca. 4-5 cm with 1 strand grey Kid-Silk and 1 strand lavender mix Alpaca. 4-5 cm with 1 strand ash grey Kid-Silk and 1 strand lavender mix Alpaca. CASTING-OFF TIP: To avoid the cast-off edge being tight you can cast off with a larger size needle. If the edge is still tight, make 1 yarn over after approx. each 4th stitch at the same time as casting off; the yarn overs are cast off as normal stitches. ------------------------------------------------------- START THE PIECE HERE: ------------------------------------------------------- NECK WARMER – SHORT OVERVIEW OF THE PIECE: The piece is worked back and forth on the needle, top down. The sides are then sewn together. NECK WARMER: Cast on a little loosely 108-118 stitches with circular needle size 5.5 mm and 2 strands ash grey Kid-Silk and 1 strand old rose Alpaca (= 3 strands). Remove one of the strands of Kid-Silk. The rest of the piece is worked with 1 strand of each quality; casting on with an extra strand avoids the cast-on edge being tight. Work GARTER STITCH and STRIPES back and forth – read descriptions above. REMEMBER THE KNITTING TENSION! When the stripes are finished the piece measures approx. 42-50 cm from the cast-on edge. Cast off with knit from the right side – read CASTING-OFF TIP! ASSEMBLY: Sew the sides together – sew in the outermost loop in the outermost stitch so the seam is flat. |
|
Have you finished this pattern?Tag your pictures with #dropspattern #sunsetsglowbalaclava or submit them to the #dropsfan gallery. Do you need help with this pattern?You'll find 10 tutorial videos, a Comments/Questions area and more by visiting the pattern on garnstudio.com. © 1982-2025 DROPS Design A/S. We reserve all rights. This document, including all its sub-sections, has copyrights. Read more about what you can do with our patterns at the bottom of each pattern on our site. |
|


With over 40 years in knitting and crochet design, DROPS Design offers one of the most extensive collections of free patterns on the internet - translated to 17 languages. As of today we count 314 catalogues and 11822 patterns translated into English (UK/cm).
We work hard to bring you the best knitting and crochet have to offer, inspiration and advice as well as great quality yarns at incredible prices! Would you like to use our patterns for other than personal use? You can read what you are allowed to do in the Copyright text at the bottom of all our patterns. Happy crafting!
Post a comment to pattern DROPS 214-13
We would love to hear what you have to say about this pattern!
If you want to leave a question, please make sure you select the correct category in the form below, to speed up the answering process. Required fields are marked *.