
Popular categories
Looking for a yarn?


|
||||||||||||||||||||||||||||||||||||||||
DROPS 76-10 |
||||||||||||||||||||||||||||||||||||||||
|
|
||||||||||||||||||||||||||||||||||||||||
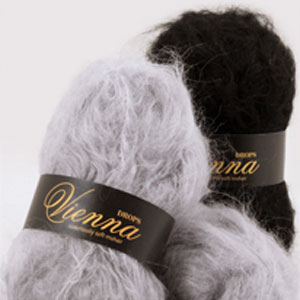
DROPS Sweater with textured pattern and large collar in Alaska, Vienna and Silke-Tweed.
DROPS 76-10 |
||||||||||||||||||||||||||||||||||||||||
|
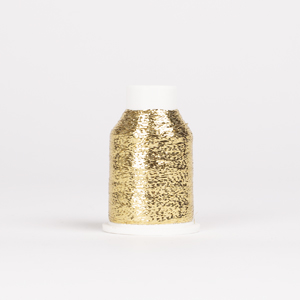
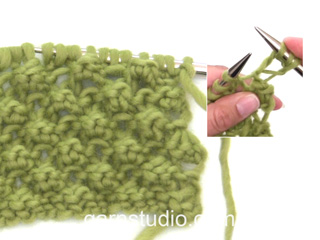
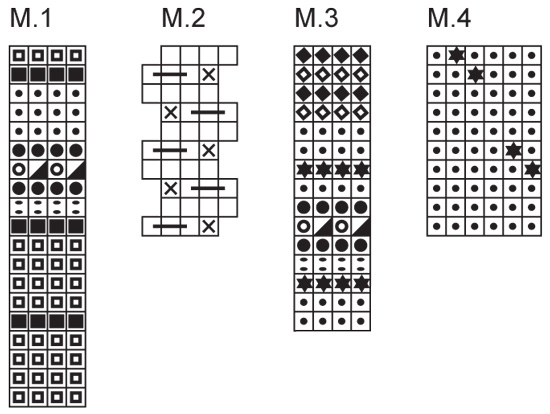
Gauge (pullover): 14 sts x 20 rows on larger needles in Pattern 1, 2 or 3 = 10 x 10 cm. 14 sts x 17 rows on larger needles with Alaska in stockinette st and Pattern 4 = 10 x 10 cm. Collar: 10 sts x 18 rows with Vienna in garter st = 10 x 10 cm. Pattern: See charts. 1 repeat on Body = Pattern 1+Pattern 2+Pattern 3. Front: Read the entire pattern before knitting: Cast on 60-64-72-80 sts on smaller needles with Vienna and knit 8 rows garter st (row 1 = right side). Then knit Pattern 1 keeping 1 edge st at each side not in Pattern. On the 9th row of Pattern 1 change to larger needles and increase 6 sts evenly distributed across the row = 66-70-78-86 sts. After Pattern 1 knit Pattern 2 with 1 strand Alaska + 1 strand Glitter (1st row = wrong side). Then knit Pattern 3 (1st row = wrong side). After Pattern 3 repeat Patterns 1, 2 and 3 in the same order to finished measurements. At the same time when the piece measures 35-36-37-38 cm bind off for armhole at each side every other row: 4-4-4-8 sts 1 time, then 1 st 3-5-7-7 times = 52-52-56-56 sts. Note: where armhole bind off takes place in Pattern 2, bind off on right side rows (P rows). Continue pattern as established over all sts. When the piece measures 48-50-51-53 cm bind off the center 10-10-12-12 sts for the neck. Then dec 1 st at each neck edge every other row 5 times = 16-16-17-17 sts remain on each shoulder. Note: where neck bind off takes place in Pattern 2 bind off on right side rows as for armhole. Bind off when the piece measures 54-56-58-60 cm. Back: Cast on and knit the same as the front. Bind off for armhole as on front and continue until the piece measures 52-54-56-58 cm. Now bind off the center 18-18-20-20 sts for the neck. On the next row dec 1 st at each neck edge = 16-16-17-17 sts remain on each shoulder. Bind off when the piece measures 54-56-58-60 cm. Sleeve: Cast on 34-34-38-38 sts on smaller needles with Vienna and knit 8 rows garter st (row 1 = right side). Read entire next section before knitting: Knit Pattern 1 keeping 1 edge st at each side not in pattern. On the 9th row of Pattern 1 change to larger needles and inc 4 sts evenly distributed on the row = 38-38-42-42 sts. After Pattern 1 knit Pattern 2 twice with 1 strand Alaska + 1 strand Glitter. Take away Glitter and knit 2 rows stockinette st with Alaska. Change to Vienna and knit 4 rows garter st. Then continue with Alaska and Pattern 4 to finished measurements. At the same time when the piece measures 15 cm inc 1 st at each side every 5-4.5-4-3.5 cm a total of 7-8-8-9 times = 52-54-58-60 sts. Knit the increased sts in pattern as you go along. When sleeve measures 49-49-47-45 cm bind off for sleeve cap at each side every other row: 3 sts 2 times, 2 sts 1-2-2-2 times and 1 st 1-2-2-4 times, then bind off 2 sts at each side until the piece measures 56-57-56-57 cm, then bind off 3 sts at each side 1 time. Bind off the remaining sts, the piece measures approx. 57-58-57-58 cm. Assembly: Sew right shoulder. Collar: Pick up approx. 34 to 40 sts around the neck on 9 mm needles (or size needed to obtain correct gauge) with Vienna and knit garter st back and forth on needles, increasing on the 1st row evenly distributed to 54 sts. When the collar measures 7 cm inc 10 sts evenly distributed = 64 sts. Repeat this inc when the collar measures 14 cm = 74 sts. Bind off with 2 strands Vienna when the collar measures approx. 30 cm. Sew left shoulder and up along the collar edge. Sew in sleeves using edge sts as a seam allowance. Sew sleeve and side seams using edge sts as a seam allowance. |
||||||||||||||||||||||||||||||||||||||||
Diagram explanations |
||||||||||||||||||||||||||||||||||||||||
|
||||||||||||||||||||||||||||||||||||||||
|
||||||||||||||||||||||||||||||||||||||||

|
||||||||||||||||||||||||||||||||||||||||
|
Have you made this or any other of our designs? Tag your pictures in social media with #dropsdesign so we can see them! Do you need help with this pattern?You'll find tutorial videos, a Comments/Questions area and more by visiting the pattern on garnstudio.com. © 1982-2024 DROPS Design A/S. We reserve all rights. This document, including all its sub-sections, has copyrights. Read more about what you can do with our patterns at the bottom of each pattern on our site. |
||||||||||||||||||||||||||||||||||||||||


With over 40 years in knitting and crochet design, DROPS Design offers one of the most extensive collections of free patterns on the internet - translated to 17 languages. As of today we count 304 catalogs and 11422 patterns - 11417 of which are translated into English (US/in).
We work hard to bring you the best knitting and crochet have to offer, inspiration and advice as well as great quality yarns at incredible prices! Would you like to use our patterns for other than personal use? You can read what you are allowed to do in the Copyright text at the bottom of all our patterns. Happy crafting!
Comments / Questions (3)
Cathy Atlija wrote:
Can you please tell me the pattern number for the cardigan on the left? Thank you.
31.12.2015 - 20:35DROPS Design answered:
Dear Mrs Atlija, please click here to get the pattern for the jacket. Happy knitting!
02.01.2016 - 16:06Hej,jeg vil strikke denne model til min datter,kan i hjælpe mig med hvilken garn jeg skal bruge i stedet for tweed?
05.05.2014 - 09:19DROPS Design answered:
I stedet for Silke-Tweed kan du bruge fex Alpaca eller andre garner fra garngruppe A som har samme tykkelse. God fornöjelse!
07.05.2014 - 10:18Is het mogelijk dat ik hier geen bruine maar paarse tinten moet gebruiken? Welke combinatie nrs. zijn dat dan? Met wat vervang ik de Silk-Tweed? Alpaca? Welke kleur ? Kan u nog andere kleurcombinaties geven aub?Vroeger bestelde ik bij Dolce Lana maar die stoppen helaas met de verdeling van Drops. Alvast bedankt, Marleen
28.02.2013 - 23:03DROPS Design answered:
Het model is gebreid van bruine tinten, ik denk dat het licht op de foto het model wat paars-achtig maakt. Maar je kan kijken op de kleurenoverzichten voor paarse kleuren Alaska en Vienna. Je kan o.a. Silke-Tweed vervangen door Alpaca. Klik op de link Kleurenkaart Silke-Tweed en zie hier alternatieven. Wij hebben ook andere winkels in België en een nieuwe Superstore in België. Zie het overzicht van verkooppunten. Zij helpen u ook graag met het kiezen en opsturen van uw garens. Veel plezier.
01.03.2013 - 09:45