
Catégories populaires
Vous cherchez un fil?


Commentaires / Questions (28)
![]() Georgia a écrit:
Georgia a écrit:
Coming back to this pattern now which is very difficult. The pattern does not tell you what needles to change to when reducing/shaping. I have discovered there are several different ways but none of them are outlined here on this website.
07.10.2022 - 17:01DROPS Design a répondu:
Dear Georgia, we only change to double-pointed needles when it's too difficult to work the stitches in a circular needle because you have too few stitches in the needle. From them, you can continue with the double pointed needles up till the end. So it may depend on each person; you can directly change to double-pointed needles as soon as you start decreasing/ shaping for the top of the hat. Happy knitting!
09.10.2022 - 19:18
![]() Georgia a écrit:
Georgia a écrit:
Should the 'knit 2 together' and decrease knit be also 'twist knit'? What about the slip knitting h when decreasing? Dies it mean normal knitting or trust knit? Whi h would actually be purlwise .
03.05.2022 - 08:18DROPS Design a répondu:
Dear Georgia, you can replace the K2 tog with slip 1 twisted, slip 1 twisted and K2 together, and the slip 1 as if to K., K1, psso, with slip 1 twisted, knit 1 and psso; Happy knitting!
03.05.2022 - 10:30
![]() Georgia a écrit:
Georgia a écrit:
Turning the work: when watching the suggested videos for this, the second video gies the best finish HOWEVER, because the video is using knit only it is important to make sure that your working yarn is in the right place. I have worked out that you need to follow the video instruction making sure that where the yarn is you need to do the opposite so that the yarn is in the right position (at the back) for when you have turned and are ready to do the first stitch will be a knit.
12.04.2022 - 12:30
![]() Georgia a écrit:
Georgia a écrit:
Another question: how do you 'turn the work'? I have watched the videos but both methods don't explain how to turn when doing ribbing.
11.04.2022 - 20:23DROPS Design a répondu:
Dear Georgia, when you fold the lower part of the hat, the wrong side will be facing outwards. So, to be sure that the rib looks the same both in the upper part on the right side and the lower part on the wrong side, you turn, so that you work on the wrong side and then knit where you would purl and purl where you would knit. Then, if you fold the lower part of the hat, the rib should look opposite to what you have worked and the same as in the upper part of the hat. Happy knitting!
11.04.2022 - 22:56
![]() Georgia a écrit:
Georgia a écrit:
Hello, I am a beginner and don't understand what this means: A.1 (= 26 stitches) over all stitches (= 5 times in width). When A.1 has been worked 1 time in height there are 10 stitches left.
08.04.2022 - 21:42DROPS Design a répondu:
Dear Georgia, you repeat A.1 (which consists of 26 stitches) in the round. So, to work it until the end of the round, you need to repeat it 5 times (work round 1 of A.1 once, then start again the round 1 of A.1 the 2nd time...). A.1 includes decreases. In the last round of A.1, you only work 2 stitches in each repeat (so, if you had 5 repeats, you will have 10 stitches left in total). Since you are working the last round of A.1, that's what's called working A.1 1 time in height (you have worked all of the rounds of A.1). Happy knitting!
09.04.2022 - 18:44
![]() Andreas a écrit:
Andreas a écrit:
Jag förstår inte hur jag ska vända arbetet?! När jag stickar baklänges blir det ett hål när jag kommer tillbaka till markören. Säg att jag stickar rät/ avig när jag vänder arbetet, kommer första maskan jag ska sticka i vara avig?
29.01.2022 - 11:14
![]() Laila a écrit:
Laila a écrit:
Etter å ha strikket oppbrettskanten, skal en ikke strikke videre med rett/vrang, og ikke vridd rett/vrang?
28.12.2021 - 08:34DROPS Design a répondu:
Hei Laila. Når oppbrettskanten er ferdig, vendes luen slik at luen strikkes rundt i motsatt retning av brettekanten. Og det skal strikkes videre med vrangbord (= 1 vridd rett / 1 vrang). mvh DROPS Design
04.01.2022 - 13:55
![]() Ulrike K a écrit:
Ulrike K a écrit:
Die Mütze ist zur Lieblingsmütze des Vaters geworden, der täglich Mütze trägt. Grund dafür ist sicher das Garn, es ist so leicht und hält so schön warm. Da werde ich bald noch eine stricken. Vielen Dank für die Anleitung.
28.12.2021 - 07:26
![]() Claude a écrit:
Claude a écrit:
Bonjour, que voulez vous dire par :Continuer maintenant le bonnet en tournant l'ouvrage sur l'endroit et tricoter en rond, dans le sens opposé, en côtes. Pourriez vous intégrer un tutoriel pour que l’on puisse visualiser
03.09.2021 - 23:15DROPS Design a répondu:
Bonjour Claude, la partie que vous avez tricoté au début doit se retrouver maintenant sur l'envers et vous continuez à tricoter sur l'endroit (qui était l'envers auparavant) pour que l'endroit du revers soit à l'endroit quand on le retourne (mais il sera sur l'envers jusqu'à la fin du bonnet). En espérant que ces explications complémentaires puissent vous aider; votre demande a été transmise à notre équipe; Bon tricot!
06.09.2021 - 07:17
![]() Alva a écrit:
Alva a écrit:
Hej! Läses A1 diagrammet från höger till vänster eller tvärtom?
28.05.2021 - 10:36DROPS Design a répondu:
Hej Alva, Ja du starter i nederste højre hjørne og strikker hver maske ifølge diagrammet, så starter du forfra igen omgangen rundt :)
28.05.2021 - 13:37
|
||||||||||||||||
Care for Nature#carefornaturehat |
||||||||||||||||
 |
 |
|||||||||||||||
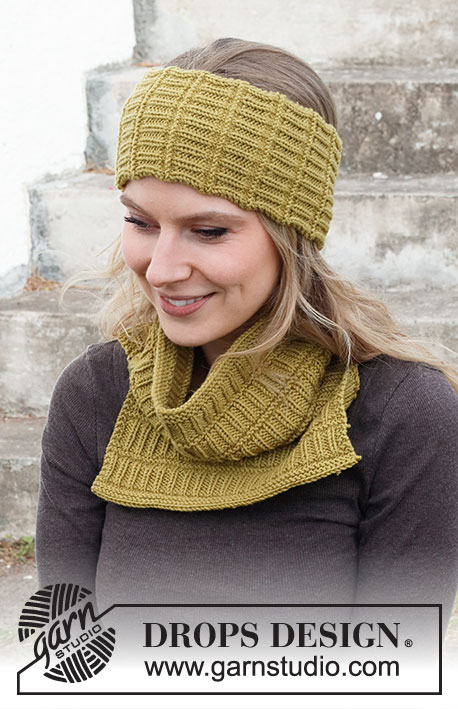
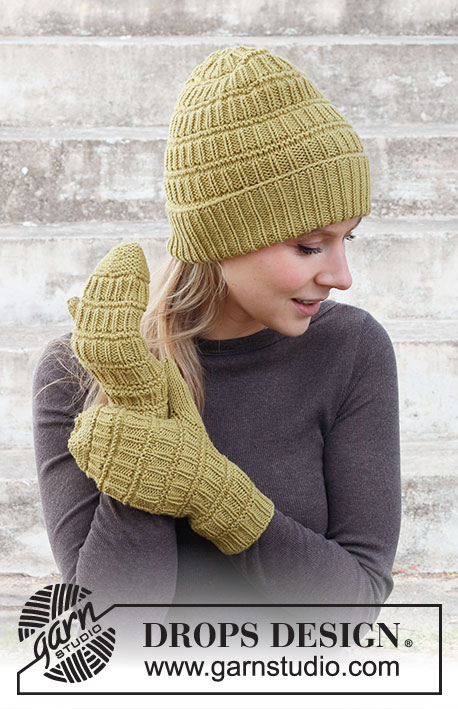
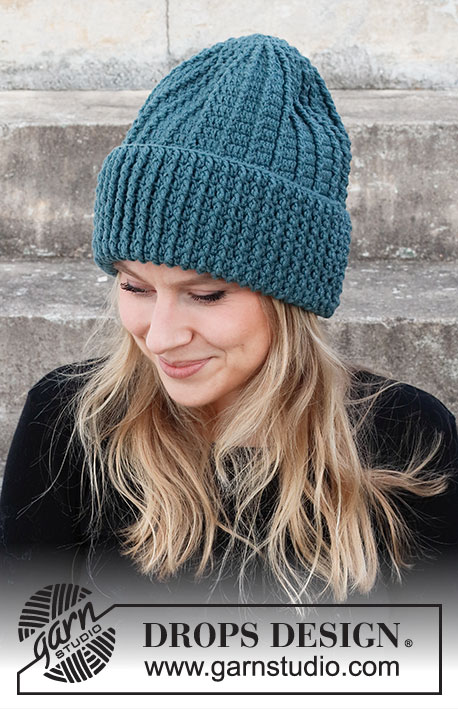
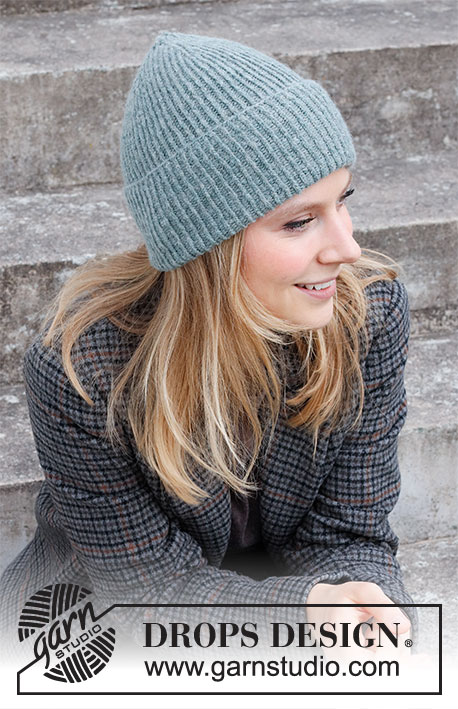
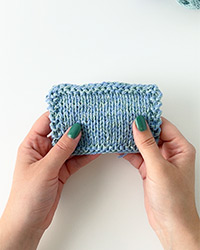
Bonnet tricoté / Bonnet Hipster tricoté en côtes, en DROPS Sky. Taille unique.
DROPS 214-33 |
||||||||||||||||
|
------------------------------------------------------- TECHNIQUES EMPLOYÉES: ------------------------------------------------------- POINT FANTAISIE: Voir diagramme A.1. ------------------------------------------------------- L'OUVRAGE COMMENCE ICI: ------------------------------------------------------- BONNET – PETIT APERÇU DE L'OUVRAGE: Se tricote de bas en haut, en rond sur aiguille circulaire, continuer avec les aiguilles doubles pointes quand nécessaire. Le revers se tricote sur l'envers, tourner ensuite l'ouvrage pour terminer le bonnet sur l'endroit. BONNET: Tricoter d'abord le revers, sur l'envers, ainsi: monter 130 mailles en Sky et tricoter 1 tour endroit. Tricoter ensuite en côtes (= 1 maille torse à l'endroit/1 maille envers) pendant 12 cm. Le revers est tricoté sur l'envers pour que les mailles torse à l'endroit soient sur l'endroit quand on le replie. Continuer maintenant le bonnet en tournant l'ouvrage sur l'endroit et tricoter en rond, dans le sens opposé, en côtes (= 1 maille torse à l'endroit, 1 maille envers). BIEN CONSERVER LA MÊME TENSION QUE POUR L'ÉCHANTILLON! Quand le bonnet mesure 27 cm (y compris les 12 cm de revers – il reste environ 8 cm avant la fin), tricoter A.1 (= 26 mailles) sur toutes les mailles (= 5 fois en largeur). Quand A.1 est terminé, il reste 10 mailles. Couper le fil, le passer dans les mailles restantes, serrer et sécuriser. Le bonnet mesure environ 35 cm depuis le rang de montage. Replier les 12 cm du bas. |
||||||||||||||||
Légende diagramme(s) |
||||||||||||||||
|
||||||||||||||||
 |
||||||||||||||||
Vous avez terminé ce modèle?Alors taguez vos photos avec #dropspattern #carefornaturehat ou bien présentez-les dans la galerie #dropsfan Vous avez besoin d'aide pour ce modèle ?Vous trouverez 13 tutoriels vidéo, une rubrique commentaires/questions et plus encore en vous rendant sur la page du modèle sur garnstudio.com © 1982-2026 DROPS Design A/S. Tous droits réservés. Ce document, y compris ces sous-sections, est protégé par les droits d'auteur (copyright). Apprenez-en davantage sur ce que vous pouvez faire avec nos modèles en bas de chacune des pages de notre site. |
||||||||||||||||

Avec plus de 40 ans dans la conception de modèles tricot et crochet, DROPS Design offre l'une des plus vastes collections de modèles gratuits sur internet - traduits dans 17 langues. À ce jour, on compte 324 catalogues et 12177 modèles en français.
Nous nous efforçons de vous apporter le meilleur de ce que le tricot et le crochet peuvent vous offrir, inspiration et conseils mais également des fils de haute qualité à des prix incroyables! Vous souhaiteriez utiliser nos modèles autrement que pour un usage personnel? Vous pouvez lire ce que vous êtes autorisés à faire dans le Copyright en bas de page de chacun de nos modèles. Bon tricot!
Poster un commentaire sur le modèle DROPS 214-33
Nous aimerions connaître votre avis sur ce modèle !
Si vous souhaitez poser une question, merci de bien vouloir vérifier que vous avez choisi la bonne catégorie dans le formulaire ci-dessous afin d'accélérer la réponse. Les champs obligatoires sont indiqués par une *.