
Catégories populaires
Vous cherchez un fil?



























Commentaires / Questions (121)
 Ava Goei-Vujovich a écrit:
Agree not a well worded pattern & diagram explanations. In section A, I K2tog (4 & 5th stitch together), then immediately following: do I do 2 times YO followed by a sl1, K1, psso?
07.03.2019 - 06:07DROPS Design a répondu:
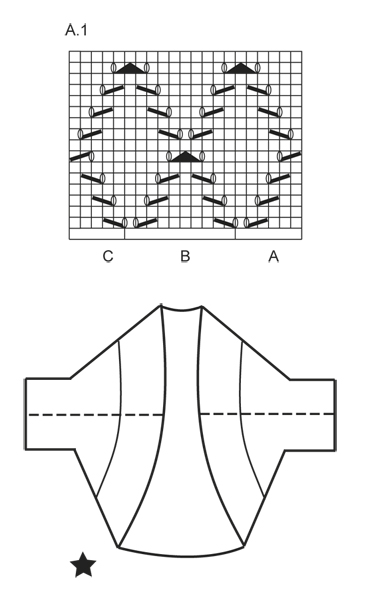
Dear Mrs Goei-Vujovich, on first row in A.1, work A.1A as follows: K3, K2 tog, YO - then work B: YO, slip 1 as if to K, K1, psso, K5, K2 tog, YO, K1 (repeat B), and work C: YO, slip 1 as if to K, K1, psso, K3. On row 15, work the last 2 sts in A tog with the next st in B, then work the last 2 sts in B with next st in next B / in C. Happy knitting!
07.03.2019 - 09:43
 Marcia Ebert a écrit:
I have started knitting this pattern and realize that there are directions for knitting the RS but not for wrong side. Is this done in stockinette stitch except for pattern stitches? Garter stitch is the border stitches but what do you do on the wrong side in the middle. It looks like every other row of the pattern stitch on the diagram is plain so is it purl on the wrong side. Is this correct?
21.01.2019 - 04:51DROPS Design a répondu:
Hi Marcia, All the rows in the diagram show the stitches from the right side, so between the lace pattern you work stocking stitch (knit from the right side and purl from the wrong side). Happy knitting!
21.01.2019 - 07:01
Marcia Ebert a écrit:
The pattern calls for knitting A then B then C That would be following the pattern right to left. Is this correct? It would be much easier to follow it left to right. I find this confusing. It is a pretty sweater.
15.01.2019 - 04:08DROPS Design a répondu:
Dear Mrs Ebert, diagrams are worked top down, from RS read from the right towards the left and from WS from the left towards the right. Work A, then repeat B and finish row with C. On row 15, work the last 2 sts in A/B together with the first st B/next B/C. Happy knitting!
15.01.2019 - 09:39Carla a écrit:
Drops 146-16. I’ve never read a pattern like this before and I’m very lost is there a tutorial showing what to do after doing the garter st for 7cm??
12.11.2018 - 00:51DROPS Design a répondu:
Dear Carla, you can find the videos, related to this pattern at the left of the page, below the pictures. Also there are detailed explanation of the symbos of the pattern chart. If you need further help you can also ask for it in person in the store where you bought your DROPS yarn from. Happy Crafting!
12.11.2018 - 01:50
 Kitty Neijssel a écrit:
Voor dit patroon zou voor maat XXXL 350 gram nodig zijn. Ik heb dus 7 bolletjes besteld. Al na 1 bolletje zag ik dat die hoeveelheid lang niet genoeg zou zijn. Na 4 bollen ben ik nog niet op de helft. Volgens mijn berekening heb ik nog 2 bollen nodig. Ik ben zeker geen beginnende breister ( ex-lerares Textiele Werkvormen en gedegen hobby-breister). Alles klopt volgens de stekenproef e.d. Ik ben een enthousiaste fan van Drops en tot nog toe heb ik nog nooit een probleem gehad met de patronen.
26.03.2018 - 13:20
 Anna a écrit:
Da quale lato va letto il diagramma A1? La linea tratteggiata è la manica?
20.11.2017 - 07:53DROPS Design a répondu:
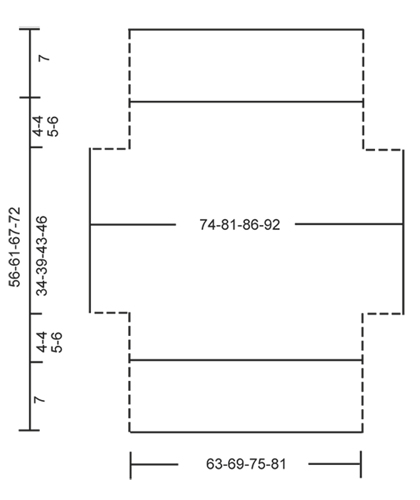
Buongiorno Anna. Il diagramma si legge dal basso verso l’alto e da destra verso sinistra (lavorando avanti e indietro, i ferri pari si leggono da sinistra verso destra). Nel grafico con le misure, le linee tratteggiate sono le parti che verranno cucite: dovrà cucire sotto le maniche e i lati del davanti e dietro. Buon lavoro!
20.11.2017 - 11:04
 Natasja a écrit:
Hi. Im about to cast on for the sleeves, and i dont understand the 10 st. Is it 10 st in each side or 5 st in each side, and how ?
07.08.2017 - 12:24DROPS Design a répondu:
Hi Natasja, You cast on 10 new stitches at the end of the next 2 rows, so 10 stitches at the end of the first row and then 10 new stitches at the end of the next row. So 20 stitches all in all. I hope this helps. Happy knitting!
07.08.2017 - 15:53
 Karine a écrit:
Bonjour, Je tricote la taille L J'ai un souci à la première ligne du diagramme A1. 3 m. pt mousse - A1a - A1b - terminer par A1c OK mais il me reste 6 mailles avant de terminer 3 m pt mousse de la fin ? Logiquement, répétition de 5 fois diagramme A1 sur la ligne c'est juste ? Je refais plusieurs fois, j'arrive toujours pareil, je ne comprends pas :(
03.04.2017 - 17:49DROPS Design a répondu:
Bonjour Karine, vérifiez bien que vous avez bien 6 m pour A.1A, 10 m pour chaque motif de A.1B et 5 m pour A.1C, ainsi, vous devriez bien avoir: 3 m point mousse, 6 m de A.1A, 11-12-13-14 fois A.1B (= 110-120-130-140 m en A1B), 5 m de A.1C et 3 m point mousse = 127-1237-147-157 m. Bon tricot!
04.04.2017 - 10:04
April a écrit:
Reading the pattern as we add the sleeves which pattern do we follow. It says to fit A.1 in before the increase. I'm confused as to which diagram we use for the sleeves.
18.07.2016 - 04:05DROPS Design a répondu:
Dear April, start with 3 sts in garter st, then work A.1A on the next 6 sts (= new sts cast on for sleeve), now work first A.1B over the next 10 sts (= last st cast on for sleeve + the next 3 sts previously worked in garter st + the next 6 sts previously worked in A.1A), then repeat A.1B and A.1C as before until end of row, cast on the 10 new sts and continue as before. Happy knitting!
18.07.2016 - 09:35
Arika a écrit:
There is no way size L needs just 300 g. I am at 24 cm and I'm starting my 4th skein. I did the gauge and it was correct so it is not an issue of my loose knitting style. Now I have to order one more skein just to finish the garment. This is extremely frustrating as I'm not even sure if the dye lots match. Not to mention extra shipping cost (I was not planning to buy any yarn anytime soon). PLEASE correct the yardage for other knitters!
15.06.2016 - 05:07
|
|||||||||||||||||||
Cassie#cassiebolero |
|||||||||||||||||||
 |
 |
||||||||||||||||||
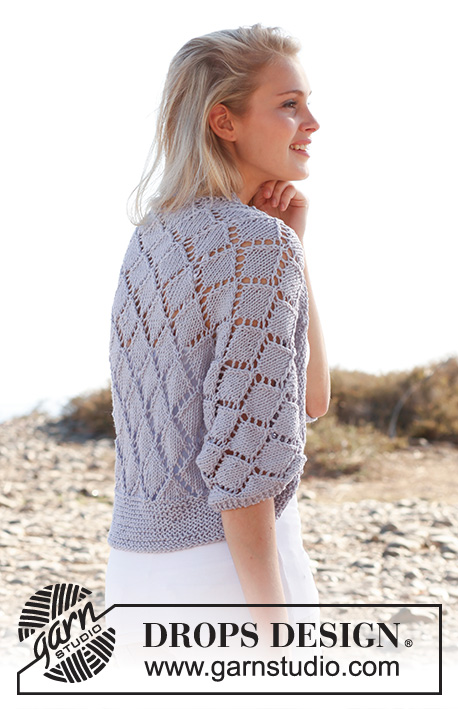
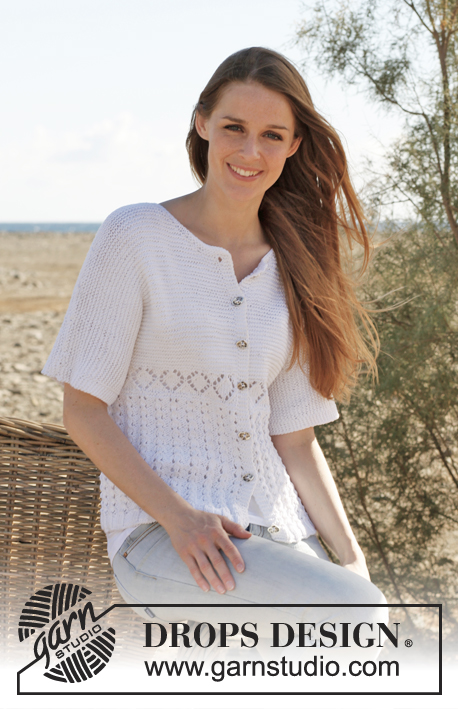
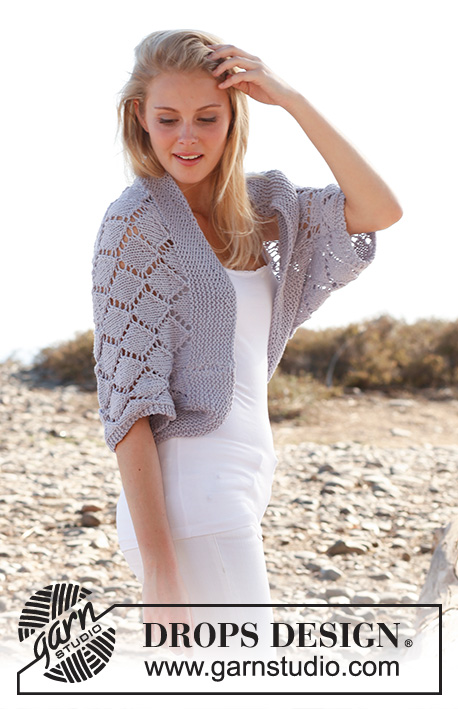
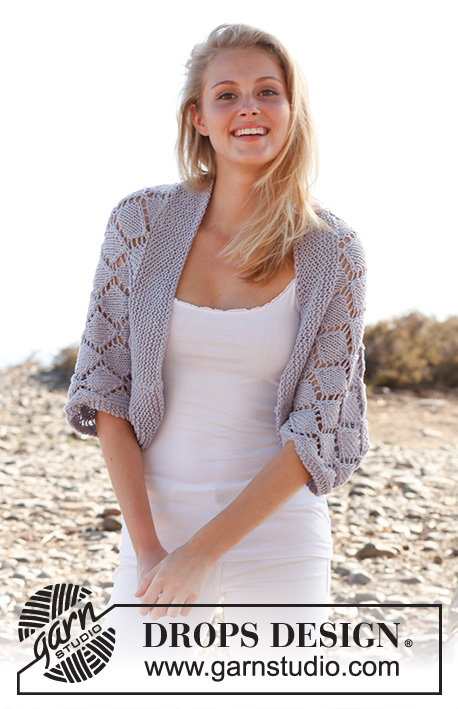
Boléro ajouré DROPS en ”Big Merino”. Du S au XXXL.
DROPS 146-16 |
|||||||||||||||||||
|
POINT MOUSSE (en allers et retours) : Tricoter tous les rangs à l'endroit. 1 "côte" mousse = 2 rangs end. POINT FANTAISIE : Voir diagramme A.1, Tous les rangs du point fantaisie sont représentés, vus sur l'endroit, dans le diagramme. --------------------------------------------------------- BOLÉRO: Se tricote en allers et retours sur aiguille circulaire pour avoir suffisamment de place pour y loger toutes les mailles. Monter 107-117-127-137 m avec l'aiguille circulaire 5 en Big Merino. Tricoter au point mousse jusqu'à ce que l'ouvrage mesure 7 cm. Tricoter ensuite ainsi sur l'endroit: 3 m au POINT MOUSSE - voir ci-dessus, A.1A (= 6 m), A.1 B au-dessus des 90-100-110-120 m suiv, terminer par A.1 C (= 5 m) et 3 m au POINT MOUSSE. Continuer A.1 avec 3 m au point mousse de chaque côté. NE PAS OUBLIER DE BIEN CONSERVER LA MÊME TENSION QUE POUR L'ÉCHANTILLON ! À 11-11-12-13 cm de hauteur totale, monter 10 m à la fin des 2 rangs suiv pour les manches = 127-137-147-157 m. Tricoter ainsi: 3 m au point mousse, A.1A (= 6 m), A.1 B au-dessus des 110-120-130-140 m suiv, terminer par A.1 C (= 5 m) et 3 m au POINT MOUSSE. NOTE! Continuer A.1 logiquement pour que le motif continue après les augmentations pour les manches. À 45-50-55-59 cm de hauteur totale, rabattre 10 m au début des 2 rangs suivants = 107-117-127-137 m. Tricoter ainsi: 3 m au point mousse, A.1A (= 6 m), A.1 B au-dessus des 90-100-110-120 m suiv, terminer par A.1 C (= 5 m) et 3 m au point mousse. À 49-54-60-65 cm de hauteur totale, tricoter au point mousse sur toutes les mailles. Rabattre à 56-61-67-72 cm de hauteur totale. ASSEMBLAGE : Faire la couture des côtés et sous les manches à 1 m lis du bord – voir ligne en pointillé dans le schéma. |
|||||||||||||||||||
Légende diagramme(s) |
|||||||||||||||||||
|
|||||||||||||||||||
 |
|||||||||||||||||||
 |
|||||||||||||||||||
Vous avez terminé ce modèle?Alors taguez vos photos avec #dropspattern #cassiebolero ou bien présentez-les dans la galerie #dropsfan Vous avez besoin d'aide pour ce modèle ?Vous trouverez 8 tutoriels vidéo, une rubrique commentaires/questions et plus encore en vous rendant sur la page du modèle sur garnstudio.com © 1982-2026 DROPS Design A/S. Tous droits réservés. Ce document, y compris ces sous-sections, est protégé par les droits d'auteur (copyright). Apprenez-en davantage sur ce que vous pouvez faire avec nos modèles en bas de chacune des pages de notre site. |
|||||||||||||||||||






Avec plus de 40 ans dans la conception de modèles tricot et crochet, DROPS Design offre l'une des plus vastes collections de modèles gratuits sur internet - traduits dans 17 langues. À ce jour, on compte 333 catalogues et 12525 modèles en français.
Nous nous efforçons de vous apporter le meilleur de ce que le tricot et le crochet peuvent vous offrir, inspiration et conseils mais également des fils de haute qualité à des prix incroyables! Vous souhaiteriez utiliser nos modèles autrement que pour un usage personnel? Vous pouvez lire ce que vous êtes autorisés à faire dans le Copyright en bas de page de chacun de nos modèles. Bon tricot!
Poster un commentaire sur le modèle DROPS 146-16
Nous aimerions connaître votre avis sur ce modèle !
Si vous souhaitez poser une question, merci de bien vouloir vérifier que vous avez choisi la bonne catégorie dans le formulaire ci-dessous afin d'accélérer la réponse. Les champs obligatoires sont indiqués par une *.