
Catégories populaires
Vous cherchez un fil?


Commentaires / Questions (91)
![]() Nora M a écrit:
Nora M a écrit:
Hei, jeg har allerede bynnt å strikket denne vesten og kommet meg på god vei. Men jeg angrer meg å ønsker å strikke en genser..? Er dette mulig eller burde jeg starte på nytt? Har dere noen tips om jeg kan få det til?
21.04.2026 - 08:30DROPS Design a répondu:
Hej Nora, de her strikkes med samme strikkefasthed (11 m på 10 cm) og nedenfra og op som vesten. Det vil sige at du kan vælge en af de her og fortsætte ifølge den nye opskrift på en genser: genser, nedenfra og op, 11masker=10 cm
21.04.2026 - 14:30
![]() Maria a écrit:
Maria a écrit:
Hej. Jeg vil gerne hvilken str pind der er brugt til at lave strikkeprøven. Er det 7 eller 8.
08.04.2026 - 16:51DROPS Design a répondu:
Hej Maria. Det är den större pinden, dvs den du bruker til glatstrik. Mvh DROPS Design
10.04.2026 - 09:21
![]() Melissa a écrit:
Melissa a écrit:
My first major project will be the Isla Slipover vest in medium using either DROPS AIR or DROPS ANDES. The problem I have is not knowing just how many balls of yarn I will need to complete the vest?
20.03.2026 - 02:59DROPS Design a répondu:
Hi Melissa, Drops Air is sold in 50 g balls and Drops Andes in 100 g balls. So you will need 6 balls of Air (and work with 2 strands) or 3 balls of Andes and work with a single strand). Regards, Drops Team.
20.03.2026 - 05:28
![]() Anna a écrit:
Anna a écrit:
Hi, I would like to use Merino Cotton yarn to make a more spring/summer-friendly version of the project. Would 2 strands of Merino Cotton be enough to substitute for 2 strands of DROPS Air? If so, should I use the same size needles as recommended for DROPS Air?
13.03.2026 - 11:50DROPS Design a répondu:
Dear Anna, Cotton Merino belongs to yarn group B while Air belongs to yarn group C, most of the time you can replace 1 strand yarn group E as Wish here with 2 strands yarn group C as Air here, but Cotton Merino might not be a good alternative even with 2 strands - see a swatch of 2 strands Cotton Merino worked together here. Happy knitting!
13.03.2026 - 15:33
![]() Mathilde a écrit:
Mathilde a écrit:
Bonjour Combien faut il de pelotes de laine de drops snow pour ce modèle de pull sans manche en taille M Merci par avance :)
04.03.2026 - 06:53DROPS Design a répondu:
Bonjour Mathilde, utilisez le convertisseur pour voir les quantités correspondantes en Snow. Bon tricot!
04.03.2026 - 08:08
![]() Rachael a écrit:
Rachael a écrit:
Hi, I’m attempting to pick up stitches around the armhole, but I’m unsure of the pick up rate, e.g. pick up 3, skip 1, pick up 3, skip 1… Pattern says to end up with approx 72 stitches. Could you advise please? Thanks!
21.02.2026 - 20:32DROPS Design a répondu:
Hi Rachael, Her is a link to our video for knitting up stitches around the neck (the same method as you use for knitting up aound the armholes): https://www.garnstudio.com/video.php?id=1787&lang=en Regards, Drops Team.
23.02.2026 - 07:16
![]() Rachael a écrit:
Rachael a écrit:
Hi, I’m a beginner knitter and am attempting the pattern, however it’s a little ambiguous. I’ve cast on and completed 6 row rib for the back. The next instruction is to work st st from the right side. Does that mean I should start row 7 with a Knit row, or a Purl row?
12.02.2026 - 22:57DROPS Design a répondu:
Hi Rachael, Stocking stitch is knitted from the right side and purled from the wrong side, so the 7th row is knitted. Regards, Drops Team.
13.02.2026 - 06:26
![]() Suzanne a écrit:
Suzanne a écrit:
Je ne comprends pas . Après avoir rabattu mes 22 mailles centrales. Rabattre ensuite 1 maille au début du rg suivant à partir de l’encolure = 8 mailles pour ma grandeur. Est- ce qu’ on rapetisse à chaque rang 1 maille Ce n’est pas clair pour moi svp
11.02.2026 - 22:38DROPS Design a répondu:
Bonjour Suzanne, lorsque vous avez rabattu les 22 mailles centrales, il vous reste 9 mailles pour chaque épaule. (40 mailles au total - 22 m pour l'encolure = 18m soit 9 m pour chaque épaule ). Vous terminez chaque épaule séparément, et, au 1er rang à partir de l'encolure (sur l'endroit pour l'épaule gauche/sur l'envers pour l'épaule droite) vous rabattez 1 maille pour l'encolure = il reste 8 mailles pour l'épaule. Bon tricot!
12.02.2026 - 17:51
![]() Katharina a écrit:
Katharina a écrit:
Soll man oberhalb der abgeketten Maschen für die Armausschnitte weiterhin am Rand kraus rechts stricken oder die erste Masche der Reihe übernehmen?
03.02.2026 - 14:30DROPS Design a répondu:
Liebe Katharina, Sie stricken die Randmaschen glatt rechts, also so wie die restlichen Maschen in der Hin-Reihe rechts und in der Rück-Reihe links. Aus dem glatt rechts gestrickten Rand lassen sich später die Maschen für die Armausschnittblenden gut auffassen. Viel Spaß beim Weiterstricken!
03.02.2026 - 19:23
![]() Anna a écrit:
Anna a écrit:
Hi, can I use two strands of yarn - drops Alaska and Drops Melody for this pattern ? I would like the vest to be really chunky but maybe it would be too much ?
02.02.2026 - 19:16DROPS Design a répondu:
Hi Anna, Drops Alaska belongs to yarn group C and 2 strands from any yarn from yarn group C will be the same thickness as 1 strand of Drops Wish (belongs to yarn group E). However, Melody belongs to yarn group D, so the 2 strands will then be slightly thicker and you will need to adjust needle sizes and/or stitch numbers to get the correct measurements for the vest. Regards, Drops Team.
03.02.2026 - 07:22
|
|
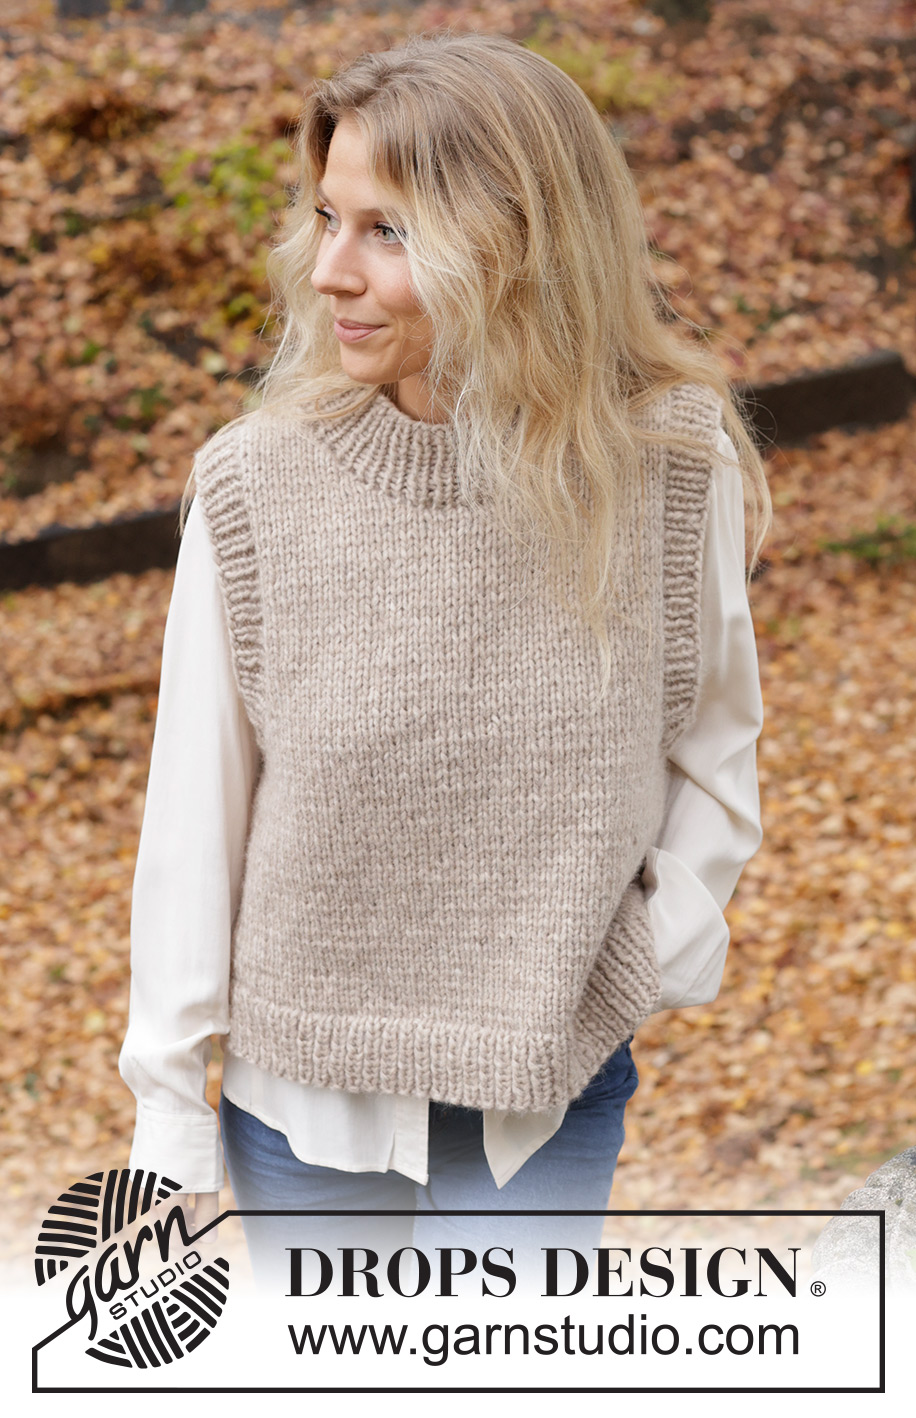
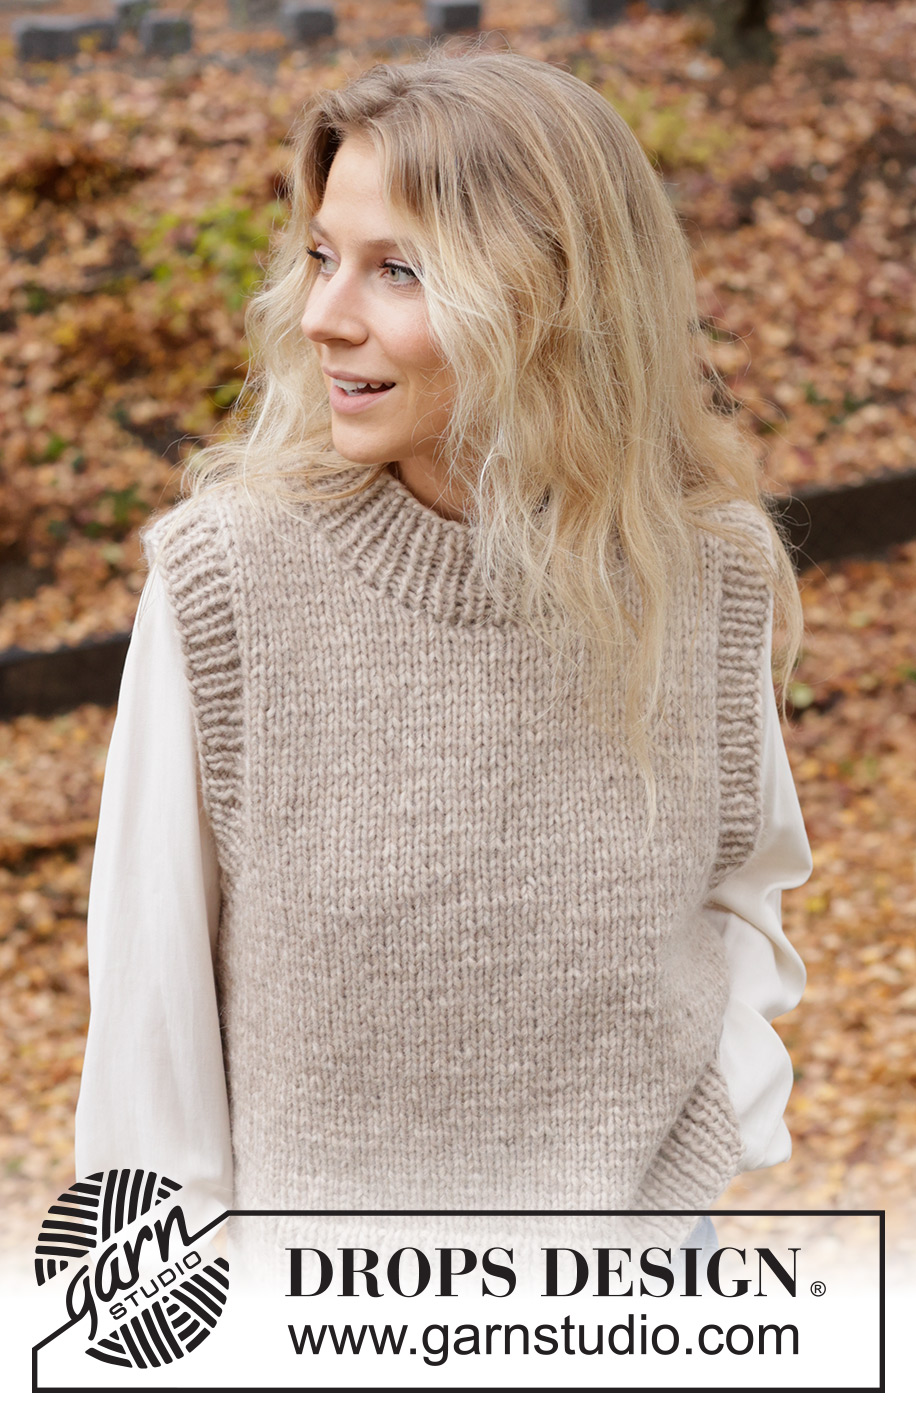
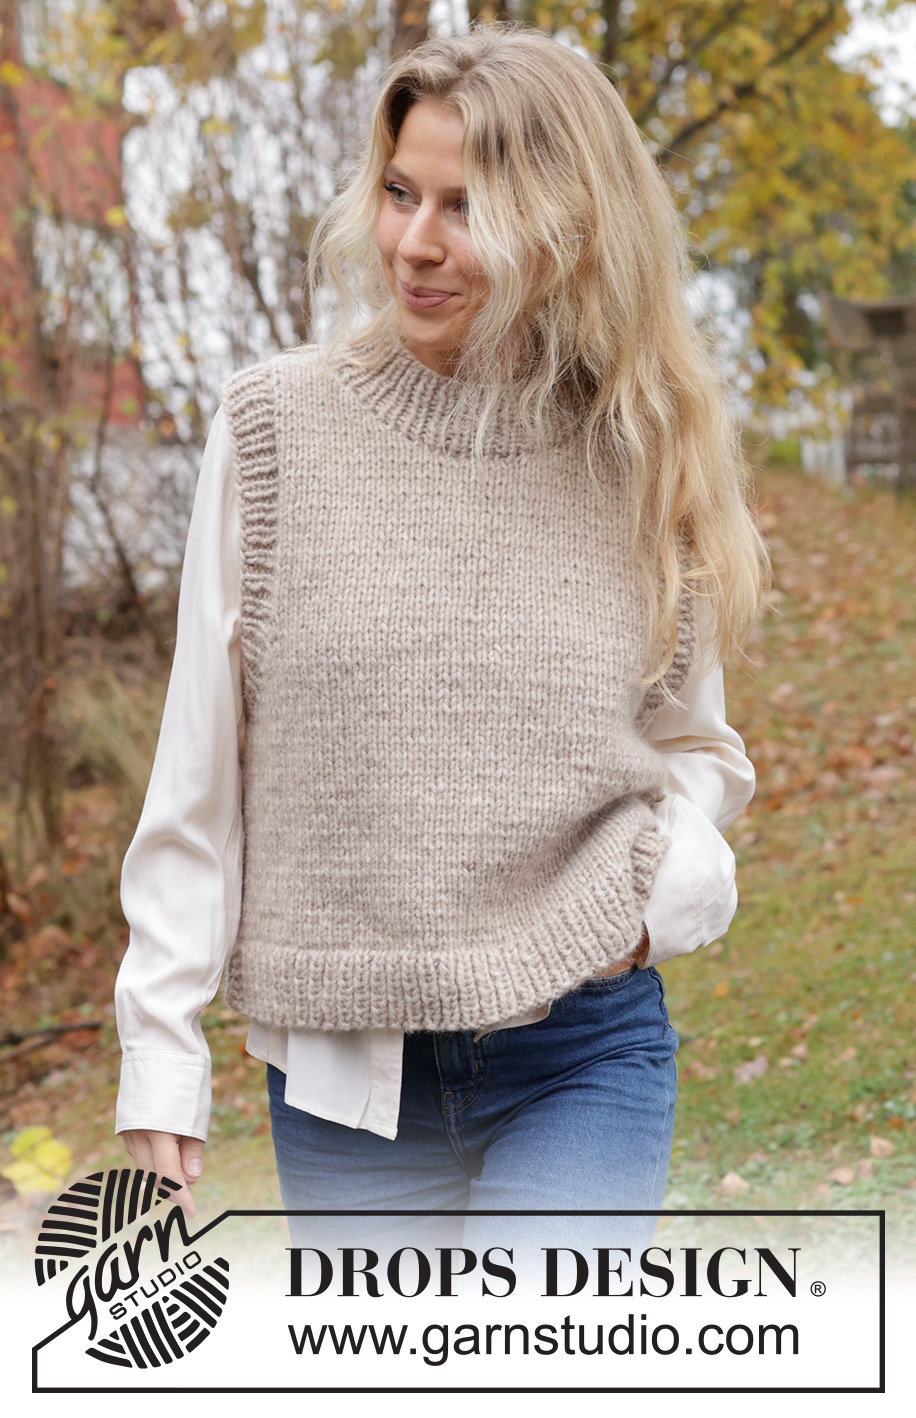
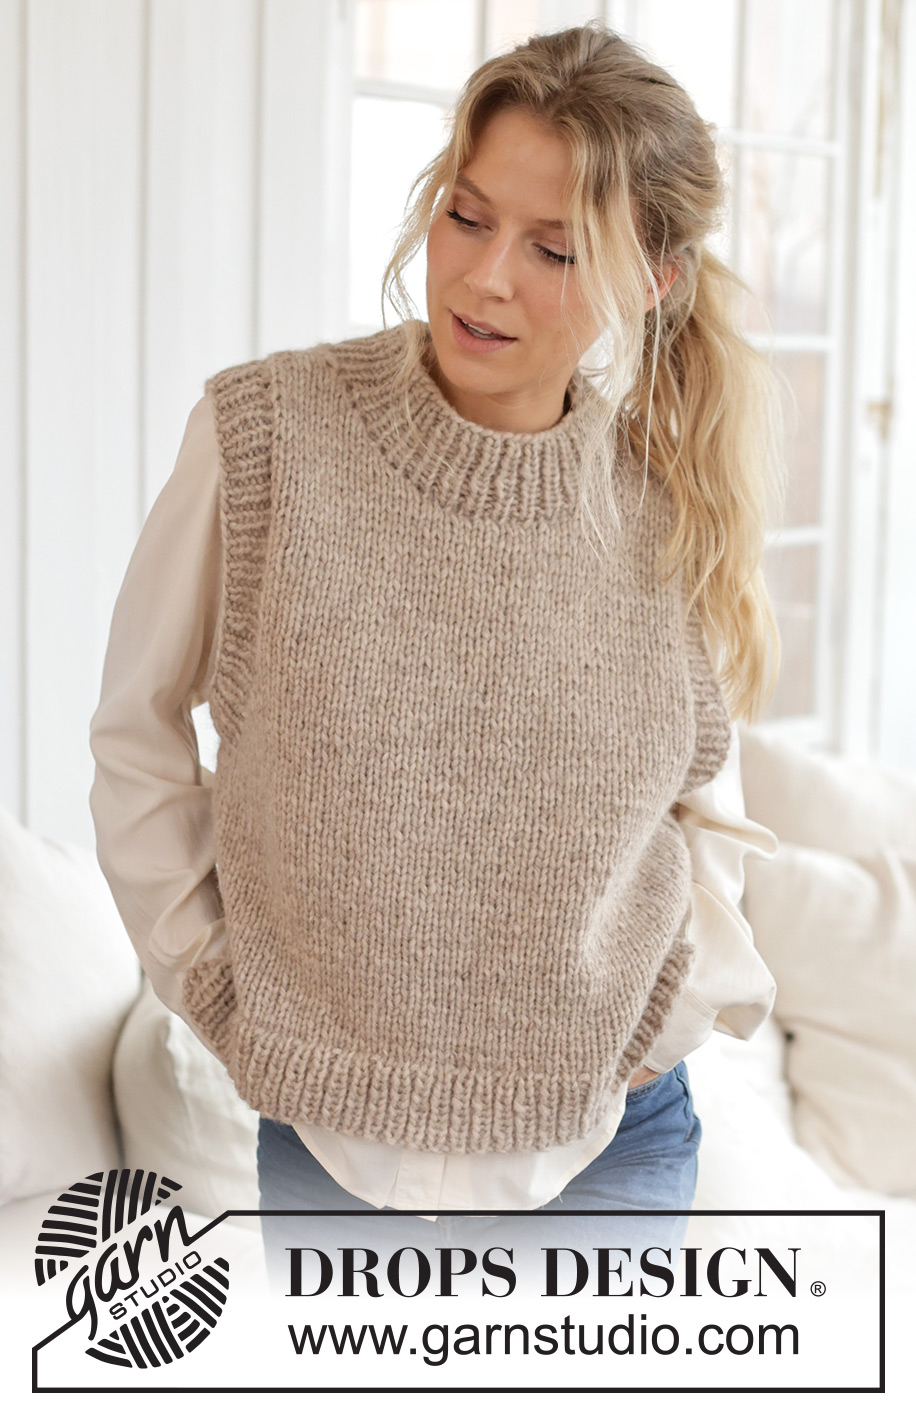
Isla Slipover#islaslipover |
|
 |
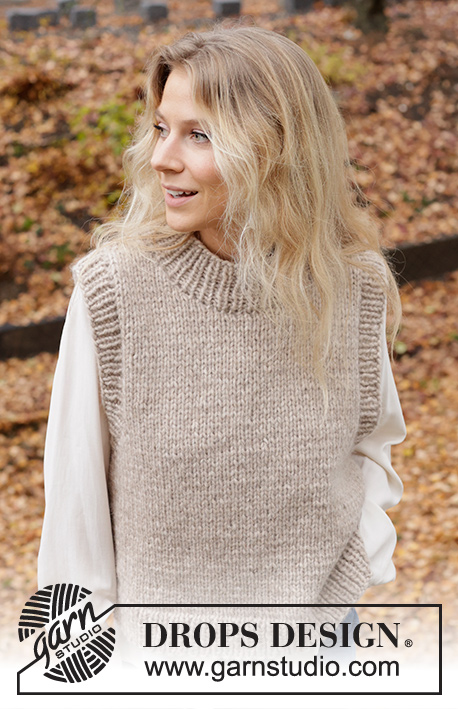 |
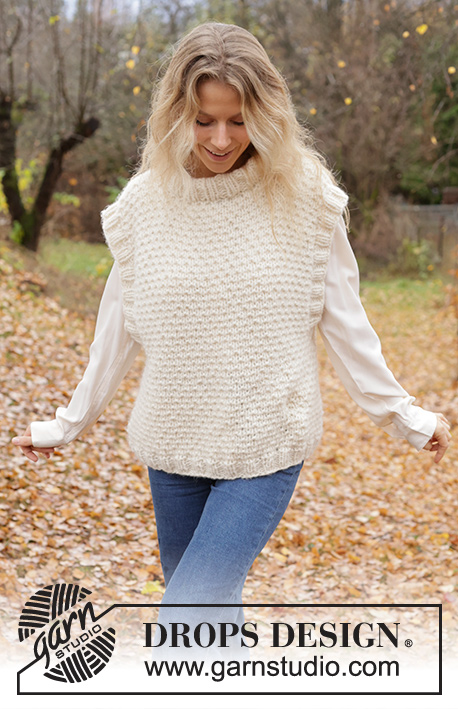
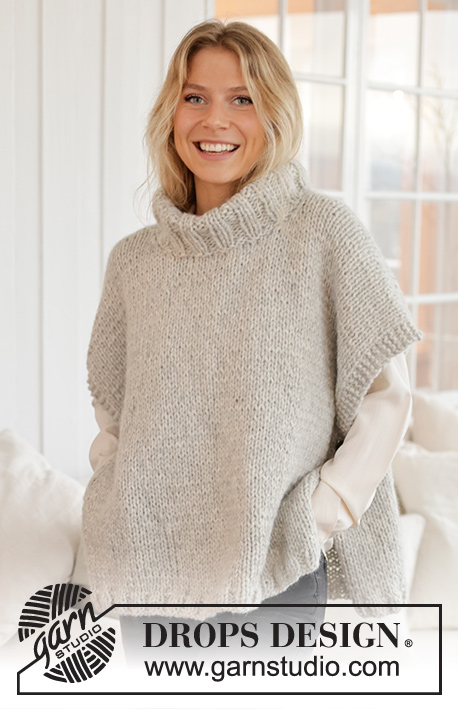
Pull sans manches tricoté avec 1 fil DROPS Wish ou 2 fils DROPS Air. Se tricote entièrement en jersey, avec bordures en côtes et fentes sur les côtés. Du S au XXXL.
DROPS 226-58 |
|
|
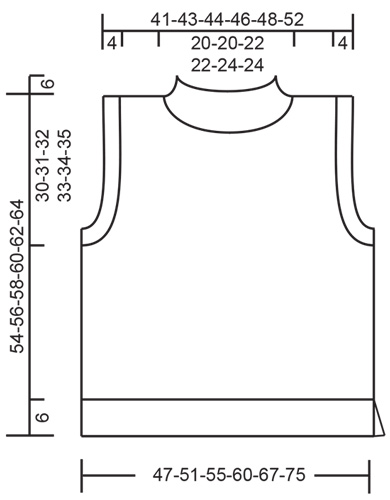
------------------------------------------------------- TECHNIQUES EMPLOYÉES: ------------------------------------------------------- POINT MOUSSE (en allers et retours): Tricoter tous les rangs à l'endroit. 1 côte mousse = tricoter 2 rangs endroit. ------------------------------------------------------- L'OUVRAGE COMMENCE ICI: ------------------------------------------------------- PULL SANS MANCHES – PETIT APERÇU DE L'OUVRAGE: Le devant et le dos se tricotent séparément, en allers et retours. La bordure des emmanchures et le col se tricotent en rond à la fin. DOS: Monter 69-73-77-85-93-103 mailles avec l'aiguille circulaire 7 avec 1 fil DROPS Wish ou 2 fils DROPS Air. Tricoter le 1er rang sur l'endroit ainsi: 2 mailles de bordure au POINT MOUSSE – voir ci-dessus, côtes (1 maille envers, 1 maille endroit) jusqu'à ce qu'il reste 3 mailles, 1 maille envers et 2 mailles de bordure au point mousse. Continuer en côtes ainsi pendant 6 cm Au rang suivant sur l'endroit, tricoter ainsi: 1 maille lisière au point mousse, 67-71-75-83-91-101 mailles jersey en diminuant 17-17-17-19-19-21 mailles à intervalles réguliers et terminer par 1 maille lisière au point mousse = 52-56-60-66-74-82 mailles. Changer pour l'aiguille circulaire 8 et continuer en jersey avec 1 maille lisière au point mousse de chaque côté. BIEN CONSERVER LA MÊME TENSION QUE POUR L'ÉCHANTILLON! Quand l'ouvrage mesure 24-25-26-27-28-29 cm, rabattre pour les emmanchures au début de chaque rang de chaque côté: 1-1-1-1-1-2 fois 3 mailles, 0-1-2-2-3-3 fois 2 mailles et 5-4-3-5-6-5 fois 1 maille = 36-38-40-42-44-48 mailles. Continuer en jersey jusqu'à ce que l'ouvrage mesure 51-53-55-57-59-61 cm. Rabattre les 20-20-22-22-24-24 mailles centrales pour l'encolure et terminer chaque épaule séparément. Rabattre ensuite 1 maille au début rang suivant à partir de l'encolure = 7-8-8-9-9-11 mailles. Continuer jusqu'à ce que l'ouvrage mesure 54-56-58-60-62-64 cm. Rabattre souplement à l'endroit sur l'endroit. Tricoter l'autre épaule de la même façon. DEVANT: Monter et tricoter comme pour le dos jusqu'à ce que l'ouvrage mesure 45-47-48-50-51-53 cm. Rabattre les 8-8-8-10-10-10 mailles centrales pour l'encolure et terminer chaque épaule séparément. Rabattre au début de chaque rang à partir de l'encolure: 2 fois 2 mailles et 3-3-4-3-4-4 fois 1 maille = 7-8-8-9-9-11 mailles. Continuer jusqu'à ce que l'ouvrage mesure 54-56-58-60-62-64 cm. Rabattre souplement à l'endroit sur l'endroit. Tricoter l'autre épaule de la même façon. ASSEMBLAGE: Coudre les épaules. Coudre les côtés dans le brin le plus à l'extérieur des mailles point mousse pour que la couture soit plate, en gardant 6 cm ouvert en bas pour les fentes côtés. BORDURE DES EMMANCHURES: Avec l'aiguille circulaire 7, en commençant en bas de l'emmanchure, relever sur l'endroit, à 1 maille du bord, environ 72-72-76-76-80-84 mailles autour de l'emmanchure (le nombre de mailles doit être divisible par 2). Tricoter en rond, en côtes (1 maille endroit, 1 maille envers) pendant 4 cm. Rabattre souplement les mailles comme elles se présentent. Tricoter la bordure de l'autre emmanchure de la même façon. COL: Avec la petite aiguille circulaire 7, en commençant à l'une des épaules, relever sur l'endroit, à 1 maille du bord, environ 54-54-60-60-64-64 mailles autour de l'encolure (le nombre de mailles doit être divisible par 2). Tricoter en rond, en côtes (1 maille endroit, 1 maille envers) pendant 6 cm. Rabattre souplement les mailles comme elles se présentent. |
|
 |
|
Vous avez terminé ce modèle?Alors taguez vos photos avec #dropspattern #islaslipover ou bien présentez-les dans la galerie #dropsfan Vous avez besoin d'aide pour ce modèle ?Vous trouverez 23 tutoriels vidéo, une rubrique commentaires/questions et plus encore en vous rendant sur la page du modèle sur garnstudio.com © 1982-2026 DROPS Design A/S. Tous droits réservés. Ce document, y compris ces sous-sections, est protégé par les droits d'auteur (copyright). Apprenez-en davantage sur ce que vous pouvez faire avec nos modèles en bas de chacune des pages de notre site. |
|


Avec plus de 40 ans dans la conception de modèles tricot et crochet, DROPS Design offre l'une des plus vastes collections de modèles gratuits sur internet - traduits dans 17 langues. À ce jour, on compte 324 catalogues et 12290 modèles en français.
Nous nous efforçons de vous apporter le meilleur de ce que le tricot et le crochet peuvent vous offrir, inspiration et conseils mais également des fils de haute qualité à des prix incroyables! Vous souhaiteriez utiliser nos modèles autrement que pour un usage personnel? Vous pouvez lire ce que vous êtes autorisés à faire dans le Copyright en bas de page de chacun de nos modèles. Bon tricot!
Poster un commentaire sur le modèle DROPS 226-58
Nous aimerions connaître votre avis sur ce modèle !
Si vous souhaitez poser une question, merci de bien vouloir vérifier que vous avez choisi la bonne catégorie dans le formulaire ci-dessous afin d'accélérer la réponse. Les champs obligatoires sont indiqués par une *.