
Categorie popolari
State cercando un filato?


Commenti / Domande (73)
Jayne ha scritto:
Is there a video on how to fold the garment to assemble?
24.01.2016 - 06:55DROPS Design ha risposto:
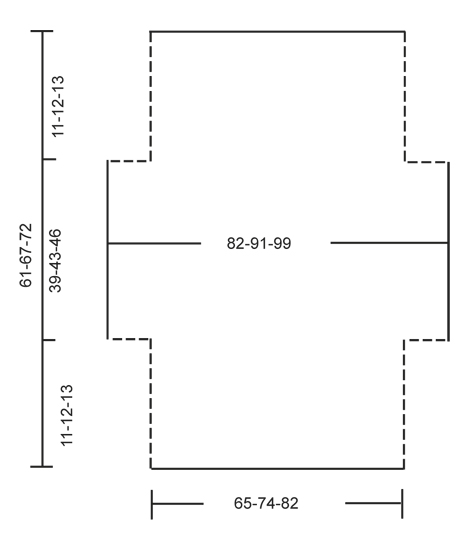
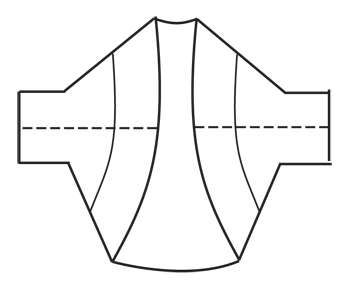
Dear Jayne, there is no video showing how to make the assembly, both charts are showing how to sew tog (fold along the measurement 82-91-99 in measurement chart) and sew tog the dotted lines from measurement chart to get the bottom chart, how to wear the piece. Happy crocheting!
25.01.2016 - 12:10
![]() Pia ha scritto:
Pia ha scritto:
Jeg har hæklet modellen, og synes den er mærkelig! Jeg trævlede Man laver ligesom både forstykke og bagstykke og så skal det hele sidde på ryggen..? det virkede ikke for mig. Jeg trævlede det ene "forstykke" op og lavede nogle Freestyle trekanter under ærmerne således at bagstykkets kant ikke bare hang og flagrede - på den måde blev den god. Men den oprindelige opskrift synes jeg ikke holder.
27.08.2015 - 13:49Nadia ha scritto:
Thanks for your quick answer!!! My problem is that I'm size 16 UK so what kind of crochet mm should I prefer?2mm or 5mm? I'm new in all this Thanks again
21.08.2015 - 14:03DROPS Design ha risposto:
Dear Nadia, compare the measurements in the chart to a similar garment you have (height, width... in cm). Shoulder piece is worked with a crochet hook size 5 mm or size to get 14 tr x 8.5 rows = 10 x 10 cm. Remember to check and keep the correct tension. Happy crocheting!
21.08.2015 - 15:10Nadia ha scritto:
Hi I'm new in crochet and want to ask how can we find our size for this pattern for example?? Thanks anyway....
19.08.2015 - 22:56DROPS Design ha risposto:
Dear Nadia, you will find at the bottom of the pattern a measurement chart with all measurements in cm taken flat from side to side (before folding it), compare theses to a similar garment you have and like the shape to find out the matching size. Happy crocheting!
20.08.2015 - 13:43
![]() Inge ha scritto:
Inge ha scritto:
Ach ja, zo logisch, het is ook alweer jaren geleden, dank!
19.08.2015 - 08:32
![]() SJH ha scritto:
SJH ha scritto:
Hej. Der hvor der skal tages ud, forstår jeg opskriften sådan at der på den ene side tages ud efter A2 række 5, mens der på den anden side tages ud efter A2 række 6. De 2 sider bliver dermed ikke ens - er det meningen?
15.08.2015 - 18:50DROPS Design ha risposto:
Hej, Jo det er sådan du skal tage ud, så bare fölg opskriften. God fornöjelse!
04.09.2015 - 09:25
![]() Inge ha scritto:
Inge ha scritto:
De eerste toer begint met: haak 1 stokje in elke van de volgende 4-1-3l. Dit begrijp ik niet. Betekent dit 8 stokjes achter elkaar haken?
15.08.2015 - 07:33DROPS Design ha risposto:
Hoi Inge. Nee, je haakt afhankelijk van welke maat je maakt: 1 stokje in elke van de volgend 4, 1 OF 3 l, dus voor de kleinste maat 1 stk in 4 l.
18.08.2015 - 17:06
![]() Genie ha scritto:
Genie ha scritto:
Hi, I'm quite new to crochet and I'm struggling to read the chart. Please could you explain what the dotted lines mean? For Example, A.1 starts with one. Also is the rest of the row trebles till the end or are there meant to be spaces between? Thanks Genie
01.08.2015 - 20:02DROPS Design ha risposto:
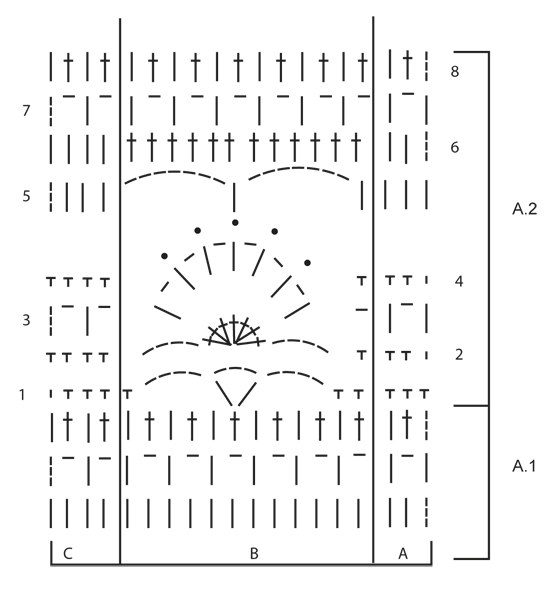
Dear Mrs Genie, the 3 dotted lines on the bottom corner on the right side of diagrams represent the first 3 ch to work to replace 1st tr. You will see all symbols and text to diagram above A.1/A.2, start to read from the bottom corner ont the right side towards th eleft from RS and from the left towards the right from WS. From RS: work 1 time A.1, repeat A.1B and finish with 1 time A.1C on the last 4 sts - from WS work 1 time A.1C, repeat A.1B and finish with A.1A on the last 3 sts. Happy crocheting!
03.08.2015 - 09:25Jacquie ha scritto:
The pattern states that at 11-12-13 centimetres, adjust so that you are working Row 6. At 11 centimetres I am on Row 1. As far as I can understand, it is impossible to work Row 6 into Row 1. Am I missing something? Thank you
06.06.2015 - 02:30DROPS Design ha risposto:
Dear Jacquie, you first work 1 row, then A.1 (= 3 rows), then A.2 to row 5 and inc at the end of row 5, work row 6 and inc at the end of row 6 (on the other side). Remember to check and keep the correct tension. Happy crocheting!
06.06.2015 - 15:20
![]() Montagne ha scritto:
Montagne ha scritto:
Merci pour les précisions....
12.05.2015 - 13:05
|
||||||||||||||||
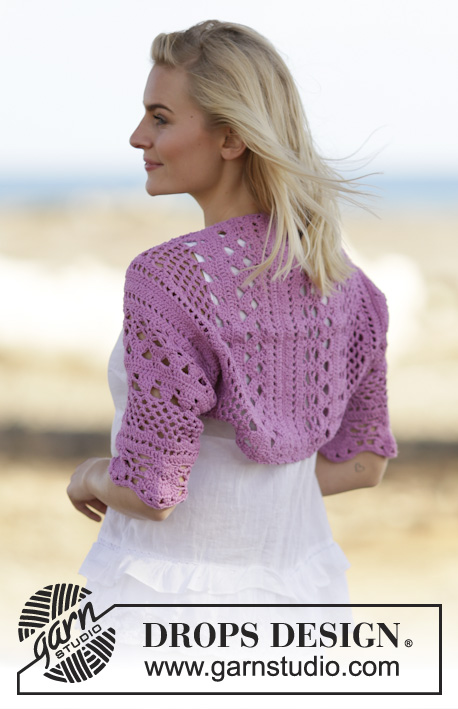
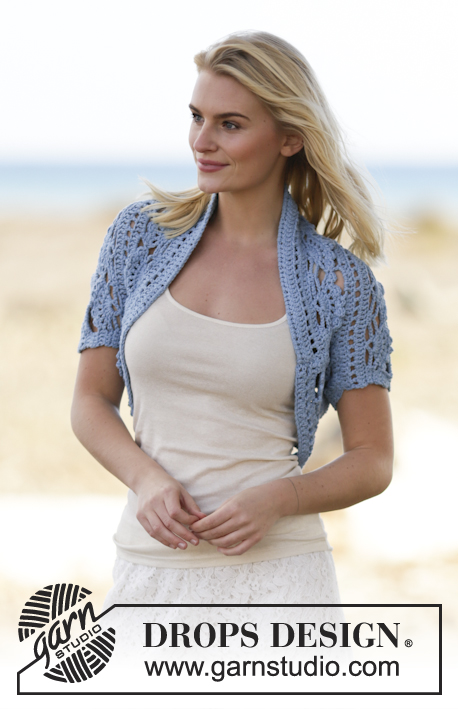
Blue Wonder#bluewondershoulderpiece |
||||||||||||||||
 |
 |
|||||||||||||||
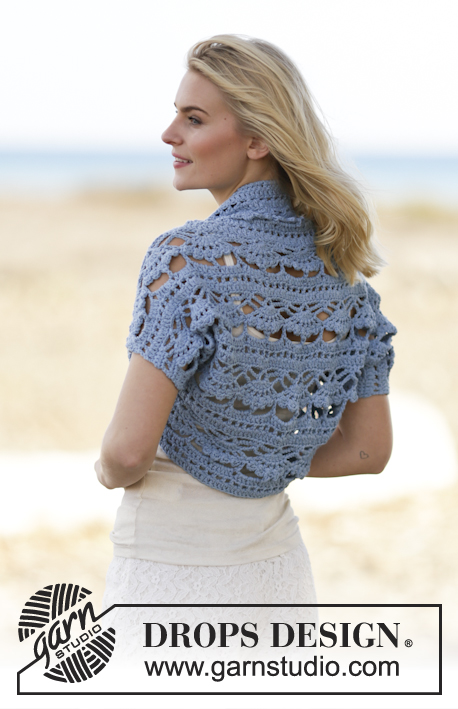
Coprispalle DROPS lavorato all’uncinetto in "Paris". Taglie S - XXXL.
DROPS 162-34 |
||||||||||||||||
|
MOTIVO: Vedere i diagrammi A.1 e A.2. --------------------------------------------------------- COPRISPALLE: Avviare 110-125-139 cat con l’uncinetto n° 5 mm con Paris. RIGA 1: Girare e lavorare 1 m.a nella 4° cat dall’uncinetto (= 2 m.a), lavorare 1 m.a in ognuna delle 4-1-3 cat successive, * saltare 1 cat, 1 m.a in ognuna delle 5 cat successive *, ripetere *-* = 91-103-115 m.a. RIGA 2: Poi lavorare secondo il diagramma A.1 come segue: A.1 A, A.1 B 7-8-9 volte in totale, finire con A.1 C. Quando A.1 è stato lavorato 1 volta in verticale, ripetere A.2 verso l’alto. ALLO STESSO TEMPO quando il lavoro misura circa 11-12-13 cm (aggiustarlo in modo che la riga successive sia la 6° riga di A.2), lavorare 14 cat alla fine della riga (= riga 5). Girare e lavorare 1 m.a nella 4° cat dall’uncinetto, poi lavorare 1 m.a in ognuna delle 10 nuove cat successive. Continuare con la 6° riga di A.2, alla fine della riga lavorare 15 nuove cat. Girare e lavorare 1 m.a nella 6° cat dall’uncinetto, * lavorare 1 cat, saltare 1 cat, 1 m.a nella cat successiva *, ripetere *-* sulle 9 nuove cat successive, finire con 1 cat. Lavorare il resto della riga secondo A.2. Sulla riga successiva lavorare come prima fino alle nuove m alla fine della riga, lavorare 1 m.a in ogni spazio di cat e 1 m.a in ogni m.a. Sono state aumentate 12 m.a a ogni lato = 115-127-139 m.a. Poi continuare sulla riga 8 come segue: A.2 A, A.2 B 9-10-11 volte in totale, finire con A.2 C. Quando il lavoro misura circa 50-55-59 cm (aggiustarlo in modo che la riga successive sia la 7° riga), non lavorare sulle 12 m.a a ogni lato = 91-103-115 m.a. Continuare a lavorare come segue: A.2 A, A.2 B 7-8-9 volte in totale, finire con A.2 C. Continuare fino a quando il lavoro misura circa 61-67-72 cm – aggiustarlo dopo un’intera ripetizione di A.2. Chiudere e affrancare. CONFEZIONE: Cucire i margini dei lati e sotto il braccio all’interno della m di vivagno. |
||||||||||||||||
Spiegazioni del diagramma |
||||||||||||||||
|
||||||||||||||||
 |
||||||||||||||||
 |
||||||||||||||||
 |
||||||||||||||||
Avete terminato questo modello?Allora taggate le vostre foto con #dropspattern #bluewondershoulderpiece o inviatele alla #dropsfan gallery. Avete bisogno di aiuto con questo modello?Troverete 7 video tutorial, una sezione per i commenti/domande e molto altro guardando il modello su www.garnstudio.com © 1982-2026 DROPS Design A/S. Ci riserviamo tutti i diritti. Questo documento, compreso tutte le sue sotto-sezioni, è protetto dalle leggi sul copyright. Potete leggere quello che potete fare con i nostri modelli alla fine di ogni modello sul nostro sito. |
||||||||||||||||


Con oltre 40 anni di esperienza nel design di modelli di maglia e uncinetto, DROPS Design offre la più estesa collezione di modelli gratuiti su internet - tradotti in 17 lingue. Ad oggi vi possiamo fornire 324 cataloghi e 12290 modelli - 9561 dei quali sono tradotti in Italiano.
Ci stiamo impegnando molto per darvi il meglio che vi possiamo offrire in termini di maglia e uncinetto, ispirazioni e consigli così come filati di grande qualità ad un prezzo incredibile! Volete utilizzare i nostri modelli per qualcosa d'altro oltre al vostro uso personale? Potete leggere tutto ciò che è consentito nel testo sul Copyright in basso su tutte le pagine dei nostri modelli. Buon lavoro!
Lasciare un commento sul modello DROPS 162-34
Noi saremmo felici di ricevere i tuoi commenti e opinioni su questo modello!
Se vuoi fare una domanda, fai per favore attenzione a selezionare la categoria corretta nella casella qui sotto per velocizzare il processo di risposta. I campi richiesti sono indicati da *.