
Categorie popolari
State cercando un filato?


Commenti / Domande (73)
![]() Kirsten ha scritto:
Kirsten ha scritto:
I'm a beginner, but love Drops. I often struggle to understand, even if the pattern is clear. My advice is to read other people's questions, watch the video and don't give up. I was confused about the picots until I saw in the video that each picot goes across 2 chain spaces, it starts in one ch sp and finishes in the next ch sp. Also the 14 ch in row 5 are increasing for the arms, as shown in the diagram. Hope this helps, Drops patterns always turn out lovely
26.04.2026 - 16:20
![]() Christina Melin ha scritto:
Christina Melin ha scritto:
Hej. Hur skall man veta vilken storlek som passar mig? Jag förstår inte hur jag skall mäta på mig.
16.02.2026 - 21:09DROPS Design ha risposto:
Hei Christina. Scroll deg helt nederst på oppskriften og se på målskissen med tall (cm mål). mvh DROPS Design
23.02.2026 - 10:29
![]() Jennie ha scritto:
Jennie ha scritto:
Jag måste ha förstått helt fel när man gör ökningarna i sidorna. Det hade vart enklare om jag kunde visa en bild, men de första maskorna man ökar i slutet av varv 6 får ju ett extra varv med stolpar jämfört med ökningarna i andra sidan och blir ju en helt centimeter längre/bredare beroende på hur man mäter. Trodde detta skulle kompenseras för när man slutar virka de extra maskorna men då slutar man ju virka alla samtidigt. Ska det se ut så?
04.07.2025 - 18:37DROPS Design ha risposto:
Hei Jennie. Det kan bli en liten "høyde" forskjell på radene, men den skal ikke være av noe stor betydning. Har du mulighet må du må gjerne ta et bilde eller ta med deg hele jakken til en butikk som selger DROPS garn. Da er det lettere for dem å se mer nøyaktig hva du mener. mvh DROPS Design
07.07.2025 - 11:30
![]() Caroline ha scritto:
Caroline ha scritto:
Je l’achète à qui arrive à me le faire 🤗
30.04.2024 - 01:47
![]() Gabriela ha scritto:
Gabriela ha scritto:
Ich verstehe nicht, wie die Seiten zusammengenäht werden müssen, ansonsten gefällt mir das Modell sehr gut
14.04.2024 - 16:37DROPS Design ha risposto:
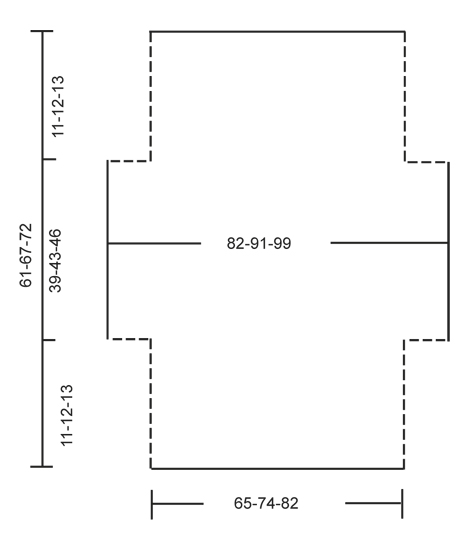
Liebe Gabriela, falten Sie die Arbeit in 2 in der Mitte (wo die 82-91-99 cm in der Maßskizze geschrieben sind), dann nähen Sie zusammen die ersten und die lezten 11-12-13 cm (links und rechts) zusammen, dann nähen Sie die neuen angeschlagenen Maschen mit den abgenommenen Maschen zusammen = es bleibt eine Öffnung an den mittleren 39-43-46 cm für die Arme. Viel Spaß beim Fertigstellen!
15.04.2024 - 08:18
![]() Lesley ha scritto:
Lesley ha scritto:
I can work the diagram until the picots in Row 5. The key says start the picot with a dc in a chain space, but there are 6 ch spaces and only 5 picots and the diagram makes it look like you start the picot in the treble st and not the ch space . I'm not sure where to put my picots!
13.09.2023 - 16:36DROPS Design ha risposto:
Dear Lesley, do you mean row called 4 in the diagram? You will start the diagram B with 1 dc in the chain, then crochet the dc in the next ch-space, work 3 ch, and worked 1 treble crochet in the 1st of this 3 chains, then crochet 1 dc in next ch-space to start next picot. that way, the picot will be over the treble crochets from previous row. Happy crocheting!
14.09.2023 - 09:40
![]() Nicole Rebiffé ha scritto:
Nicole Rebiffé ha scritto:
Bonjour, Dans le point Picot, il faut faire une bride ou une maille serrée?. Dans les explications ci-dessus, vous indiquez la bride, mais dans la vidéo , c'est une maille serrée.. Merci de votre réponse
20.08.2023 - 19:09DROPS Design ha risposto:
Bonjour Mme Rebiffé, selon le diagramme, c'est bien 1 bride dans la 1ère des 3 mailles en l'air qu'il faut faire, merci pour votre retour, j'ai transféré à notre équipe vidéo. Bonne continuation!
21.08.2023 - 09:12
![]() Mini Varkey ha scritto:
Mini Varkey ha scritto:
Am I supposed to reduce 12 stitches from row 6 on either side once I reach 55 cms.
01.08.2022 - 21:51DROPS Design ha risposto:
Hi Mini, Yes, you do not work the 12 stitches on each side. Happy crocheting!
02.08.2022 - 06:53
![]() Mini Mathew Varkey ha scritto:
Mini Mathew Varkey ha scritto:
How do you decrease after you reach 55 cm
01.08.2022 - 21:43DROPS Design ha risposto:
Dear Mr Varkey, cut the yarn at the end of the row when you reach 55 cm and turn piece, skip the first 12 sts at the beg of next row, join the yarn and work the next 103 sts (12 sts remain at the end of the row). Alternately you can also slip stitch over the first 12 sts if you want to avoid cutting the yarn. Happy crocheting!
02.08.2022 - 09:00
![]() Diana De Witt ha scritto:
Diana De Witt ha scritto:
In het patroon staat bij de picot 1 stk in de 1 e van de 3 l. Dit is waarschijnlijk verkeerd vanuit het engels naar het nederlands vertaald dit moet zijn 1 vaste in de 1 e van de 3 lossen. Uk = 1 dc en us 1 sc = een vaste in nl
17.06.2021 - 17:56
|
||||||||||||||||
Blue Wonder#bluewondershoulderpiece |
||||||||||||||||
 |
 |
|||||||||||||||
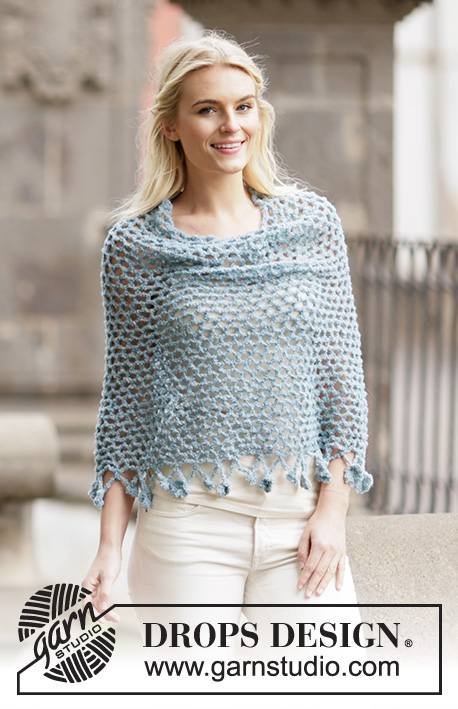
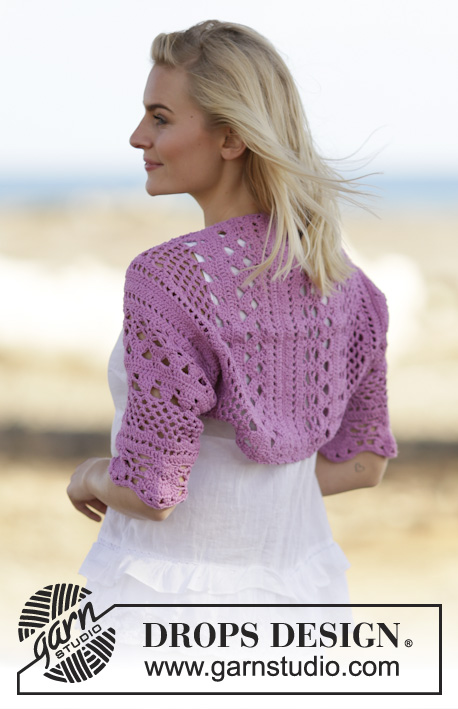
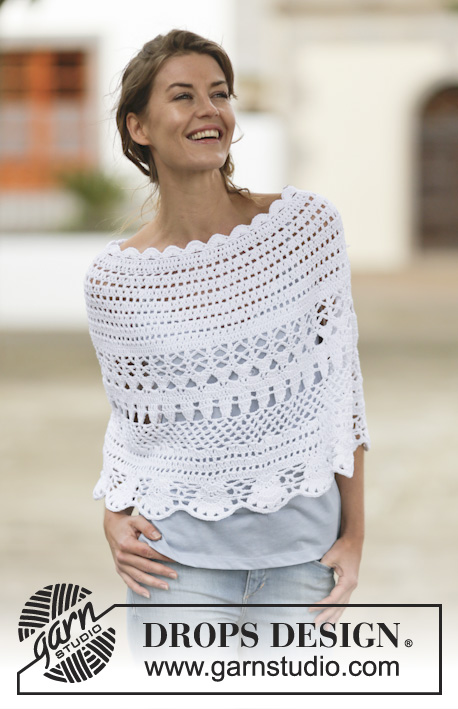
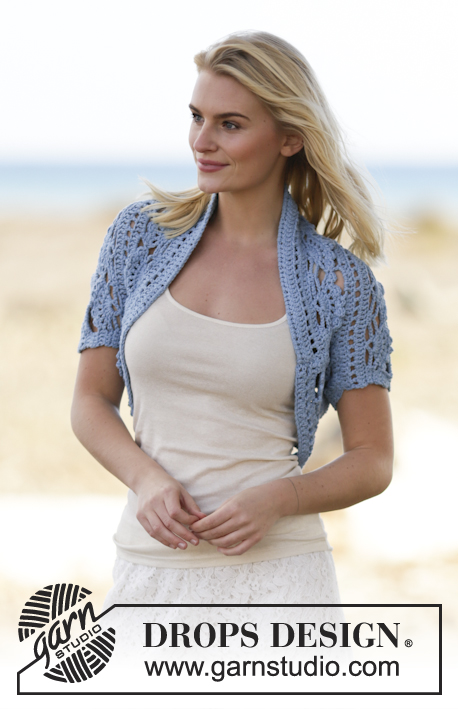
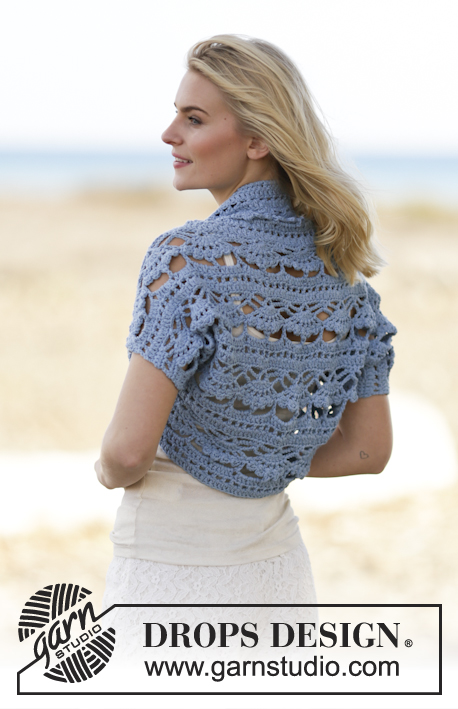
Coprispalle DROPS lavorato all’uncinetto in "Paris". Taglie S - XXXL.
DROPS 162-34 |
||||||||||||||||
|
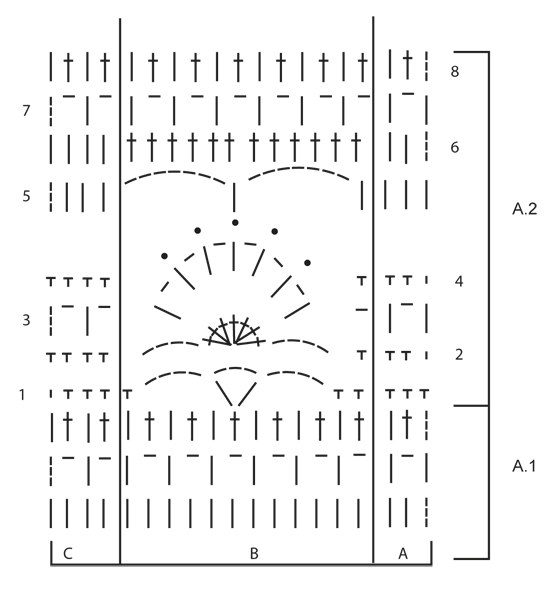
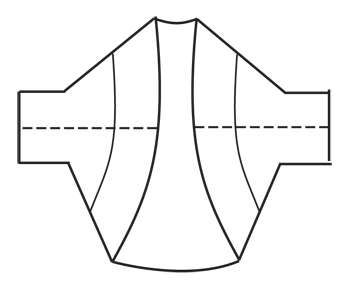
MOTIVO: Vedere i diagrammi A.1 e A.2. --------------------------------------------------------- COPRISPALLE: Avviare 110-125-139 cat con l’uncinetto n° 5 mm con Paris. RIGA 1: Girare e lavorare 1 m.a nella 4° cat dall’uncinetto (= 2 m.a), lavorare 1 m.a in ognuna delle 4-1-3 cat successive, * saltare 1 cat, 1 m.a in ognuna delle 5 cat successive *, ripetere *-* = 91-103-115 m.a. RIGA 2: Poi lavorare secondo il diagramma A.1 come segue: A.1 A, A.1 B 7-8-9 volte in totale, finire con A.1 C. Quando A.1 è stato lavorato 1 volta in verticale, ripetere A.2 verso l’alto. ALLO STESSO TEMPO quando il lavoro misura circa 11-12-13 cm (aggiustarlo in modo che la riga successive sia la 6° riga di A.2), lavorare 14 cat alla fine della riga (= riga 5). Girare e lavorare 1 m.a nella 4° cat dall’uncinetto, poi lavorare 1 m.a in ognuna delle 10 nuove cat successive. Continuare con la 6° riga di A.2, alla fine della riga lavorare 15 nuove cat. Girare e lavorare 1 m.a nella 6° cat dall’uncinetto, * lavorare 1 cat, saltare 1 cat, 1 m.a nella cat successiva *, ripetere *-* sulle 9 nuove cat successive, finire con 1 cat. Lavorare il resto della riga secondo A.2. Sulla riga successiva lavorare come prima fino alle nuove m alla fine della riga, lavorare 1 m.a in ogni spazio di cat e 1 m.a in ogni m.a. Sono state aumentate 12 m.a a ogni lato = 115-127-139 m.a. Poi continuare sulla riga 8 come segue: A.2 A, A.2 B 9-10-11 volte in totale, finire con A.2 C. Quando il lavoro misura circa 50-55-59 cm (aggiustarlo in modo che la riga successive sia la 7° riga), non lavorare sulle 12 m.a a ogni lato = 91-103-115 m.a. Continuare a lavorare come segue: A.2 A, A.2 B 7-8-9 volte in totale, finire con A.2 C. Continuare fino a quando il lavoro misura circa 61-67-72 cm – aggiustarlo dopo un’intera ripetizione di A.2. Chiudere e affrancare. CONFEZIONE: Cucire i margini dei lati e sotto il braccio all’interno della m di vivagno. |
||||||||||||||||
Spiegazioni del diagramma |
||||||||||||||||
|
||||||||||||||||
 |
||||||||||||||||
 |
||||||||||||||||
 |
||||||||||||||||
Avete terminato questo modello?Allora taggate le vostre foto con #dropspattern #bluewondershoulderpiece o inviatele alla #dropsfan gallery. Avete bisogno di aiuto con questo modello?Troverete 7 video tutorial, una sezione per i commenti/domande e molto altro guardando il modello su www.garnstudio.com © 1982-2026 DROPS Design A/S. Ci riserviamo tutti i diritti. Questo documento, compreso tutte le sue sotto-sezioni, è protetto dalle leggi sul copyright. Potete leggere quello che potete fare con i nostri modelli alla fine di ogni modello sul nostro sito. |
||||||||||||||||


Con oltre 40 anni di esperienza nel design di modelli di maglia e uncinetto, DROPS Design offre la più estesa collezione di modelli gratuiti su internet - tradotti in 17 lingue. Ad oggi vi possiamo fornire 324 cataloghi e 12290 modelli - 9561 dei quali sono tradotti in Italiano.
Ci stiamo impegnando molto per darvi il meglio che vi possiamo offrire in termini di maglia e uncinetto, ispirazioni e consigli così come filati di grande qualità ad un prezzo incredibile! Volete utilizzare i nostri modelli per qualcosa d'altro oltre al vostro uso personale? Potete leggere tutto ciò che è consentito nel testo sul Copyright in basso su tutte le pagine dei nostri modelli. Buon lavoro!
Lasciare un commento sul modello DROPS 162-34
Noi saremmo felici di ricevere i tuoi commenti e opinioni su questo modello!
Se vuoi fare una domanda, fai per favore attenzione a selezionare la categoria corretta nella casella qui sotto per velocizzare il processo di risposta. I campi richiesti sono indicati da *.