
Oblíbené kategorie
Hledáte přízi?


Komentáře / Otázky (46)
![]() Sarah LEBIGOT napsala:
Sarah LEBIGOT napsala:
Bonjour, Pour la seconde partie, il est indiqué de la faire en sens inverse et je ne comprend pas comment lire les diagrammes en sens inverse? Merci pour vos explications.
10.01.2017 - 00:11Odpověď DROPS Design :
Bonjour Mme Lebigot, la 2ème partie doit se faire en miroir, c'est-à-dire tricotez les diagrammes comme la 1ère partie, mais montez la maille de la fente de l'autre côté pour avoir 2 m point mousse en fin de rang sur l'endroit et plus en début de rang sur l'endroit. Bon tricot!
10.01.2017 - 09:47
![]() LeeAnn napsala:
LeeAnn napsala:
Ok this still did not help me please type out how to start the second piece where in the pattern chart is it started ????? Sorry to be such a pain but I have already ripped out second piece 3 times and am frustrated.
15.09.2016 - 16:43Odpověď DROPS Design :
Dear LeeAnn, work A.1,A.2, A.3 as on 1st piece, but after they have been worked 1 time in height, work A.4 and A.5 reversed, ie instead of working A.4, stocking st, A.5, work from RS on 2nd piece: A.5, stocking st and A.4. When piece measures 30 cm, cast on 1 st at the end of next row from RS (instead of from WS) an work this st in garter st. Hope this will help. Remember you can also get further individual assistance from the store where you bought your yarn. Happy knitting!
15.09.2016 - 17:25
![]() LeeAnn napsala:
LeeAnn napsala:
I am even more confused regarding so classy please read all my questions which basically the same except the last one being is the second piece starting with RS or WS. the answer I got was not answering my question but rather telling me how to do the second piece . there were 2 answers telling me how to do the second piece both different , so which one is correct lPease advise how to correctly do second piece and if I am starting the chart on the RS or the WS Thank you
15.09.2016 - 15:14Odpověď DROPS Design :
Dear LeeAnn, you are right, sorry for very first answer, at the beg of 2nd piece, work as first piece, but then work reversed all inc/moss sts so that both pieces will be mirrored. Read diagram from the bottom corner on the right side towards the left from RS and from the left towards the right from WS, ie as on 1st piece. Happy knitting!
15.09.2016 - 16:12
![]() LeeAnn napsala:
LeeAnn napsala:
I am making the So classy poncho, and I know the second piece is worked in reverse, does that also mean I will be starting the chart with the wrong side of the garment?
15.09.2016 - 03:19Odpověď DROPS Design :
Dear LeeAnn, on 2nd piece work diagrams A.1-A.3 as for 1st piece, but when you work A.4 and A.5, work A.5 over the first 10 sts, stocking st and finish with A.4. Then cast on 1 st at the end of row from RS (instead of at the end of row from WS). Then work A.1,A.2 and A.3 with 1 st in garter st at the beg of row and 2 sts in garter st at the end of row. Happy knitting!
15.09.2016 - 08:59
![]() LeeAnn napsala:
LeeAnn napsala:
I am confused for the second piece of the poncho, the pattern says Cast on and work the same way but reversed. So where am I starting and what is meant by reversed? Thank You.
01.09.2016 - 04:38Odpověď DROPS Design :
Dear LeeAnn, when working reversed you will work 2nd piece as follows from RS: 1 edge st, A.3, repeat A.2, A.1 and 1 edge st - then when casting on 1 st when piece measures 30, cast on at the end of a row from RS (instead of from WS). Happy knitting!
01.09.2016 - 10:01
![]() Yuliya napsala:
Yuliya napsala:
Thank you so much for the wonderful pattern!! The yarn was so light with heavenly texture. When ordering yarn from you for size in S-M to be on the safe side I ordered 50 gr more than you recommended. But actually used only 250gr for the whole Poncho, 50gr less was suggested. Yay!!!! It's so-so soft and Weat - such a lovely natural color. Love it!
20.06.2016 - 05:29
![]() Claudia napsala:
Claudia napsala:
I am a bit confused about beginning this pattern, is row 1 and 2 knitted to make the edge or does it start with the A1 and A2 combination. Also A1 =5 stitch and A2 is 8 therefore if cast on 107 I cannot have 12 times A1 and A2 in the width since (5+8) x 12 =156. Is that correct?
30.05.2016 - 03:02Odpověď DROPS Design :
Dear Claudia, you work on 1st round diagrams A.1, A.2 and A.3 with 1 edge st in garter st, ie in size M: 1 edge st, A.1 1 time in width (= 5 sts), repeat A.2 a total of 12 times in width (= 12 x 8 sts), A.3 1 time in width (= 4 sts) and 1 edge st in garter st = 107 sts. Happy knitting!
30.05.2016 - 10:32
![]() Tonje napsala:
Tonje napsala:
Da forstår jeg ikke når A2 og A3 skal strikkes?
14.03.2016 - 15:20Odpověď DROPS Design :
Hej Tonje, jo du strikker A1 en gang i bredden, A2 11-12-13-14 ganger i bredden og sidst A3 en gang i bredden. Spørg gerne hos din lokale DROPS forhandler hvis du har købt garnet der. God fornøjelse!
15.03.2016 - 15:52
![]() Tora napsala:
Tora napsala:
1+5+(11x8)+4+1=99.
14.03.2016 - 13:14
![]() Tonje napsala:
Tonje napsala:
Jeg får ikke mønsteret til å stemme med forklaring. A1 og A2 er til sammen 13 masker. Det står at dette skal strikkes 11 ganger i bredden, men det går altså ikke opp når man i utgangspunktet har 99 masker. Hva er det jeg gjør feil her eller ikke forstår?
14.03.2016 - 12:24Odpověď DROPS Design :
Hej. Det är kun A.2 som du stickar 11 gånger på bredden (A.1 stickas 1 gång). Lycka till!
14.03.2016 - 13:44
|
||||||||||||||||||||||
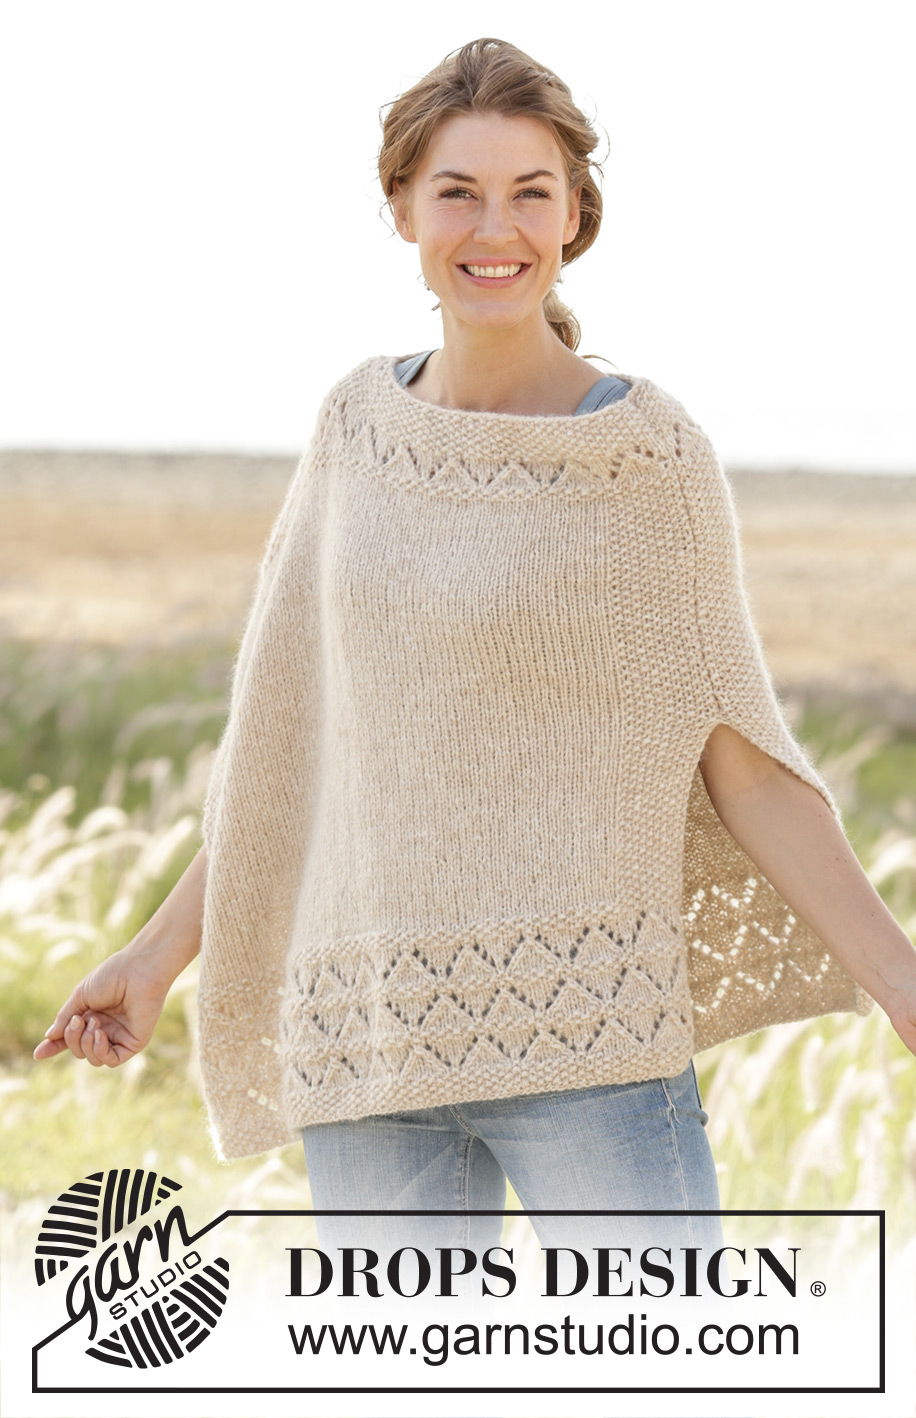
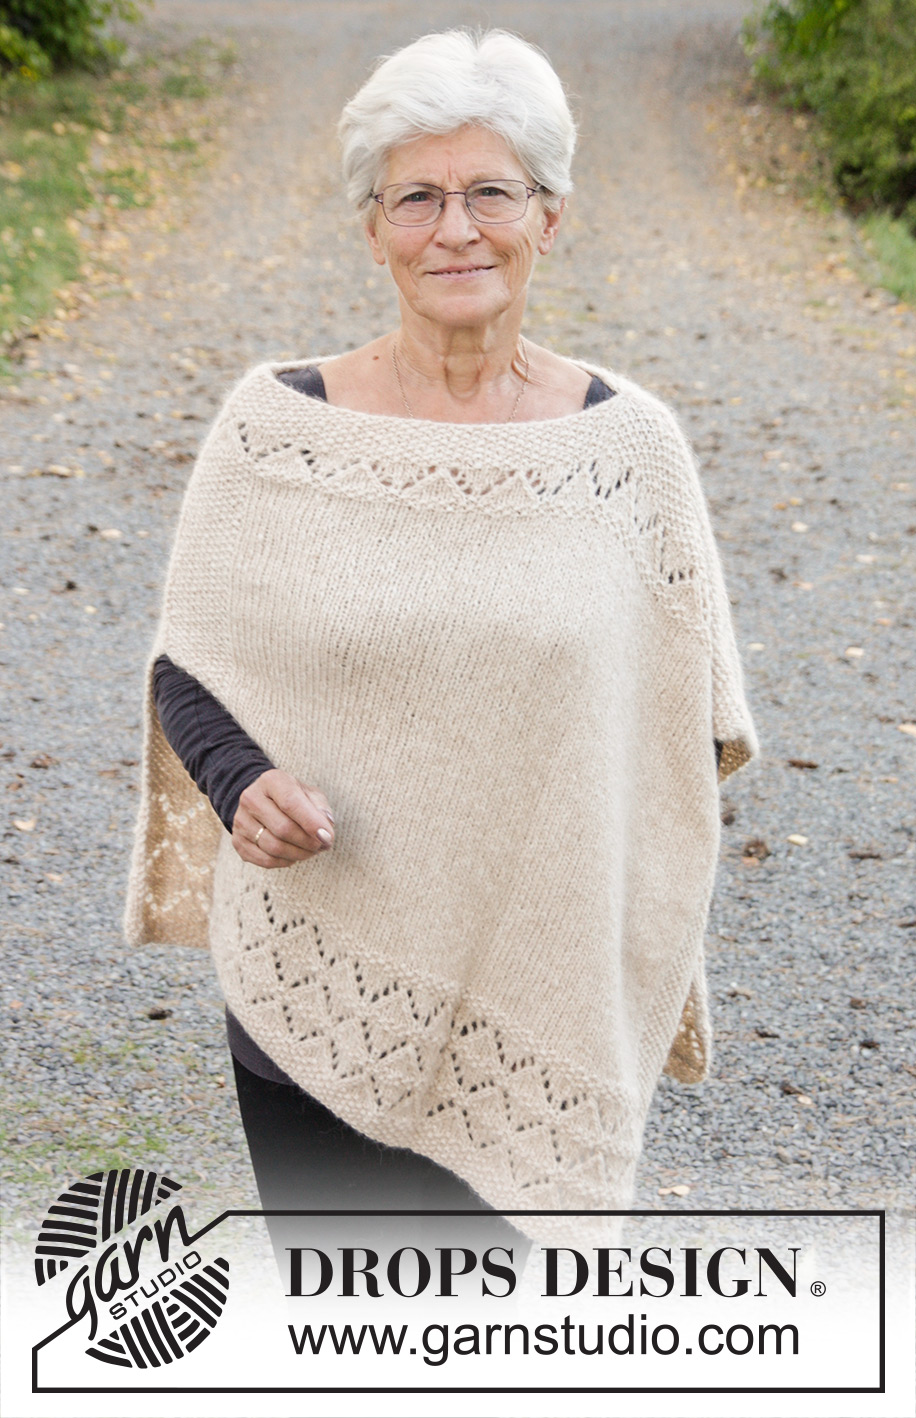
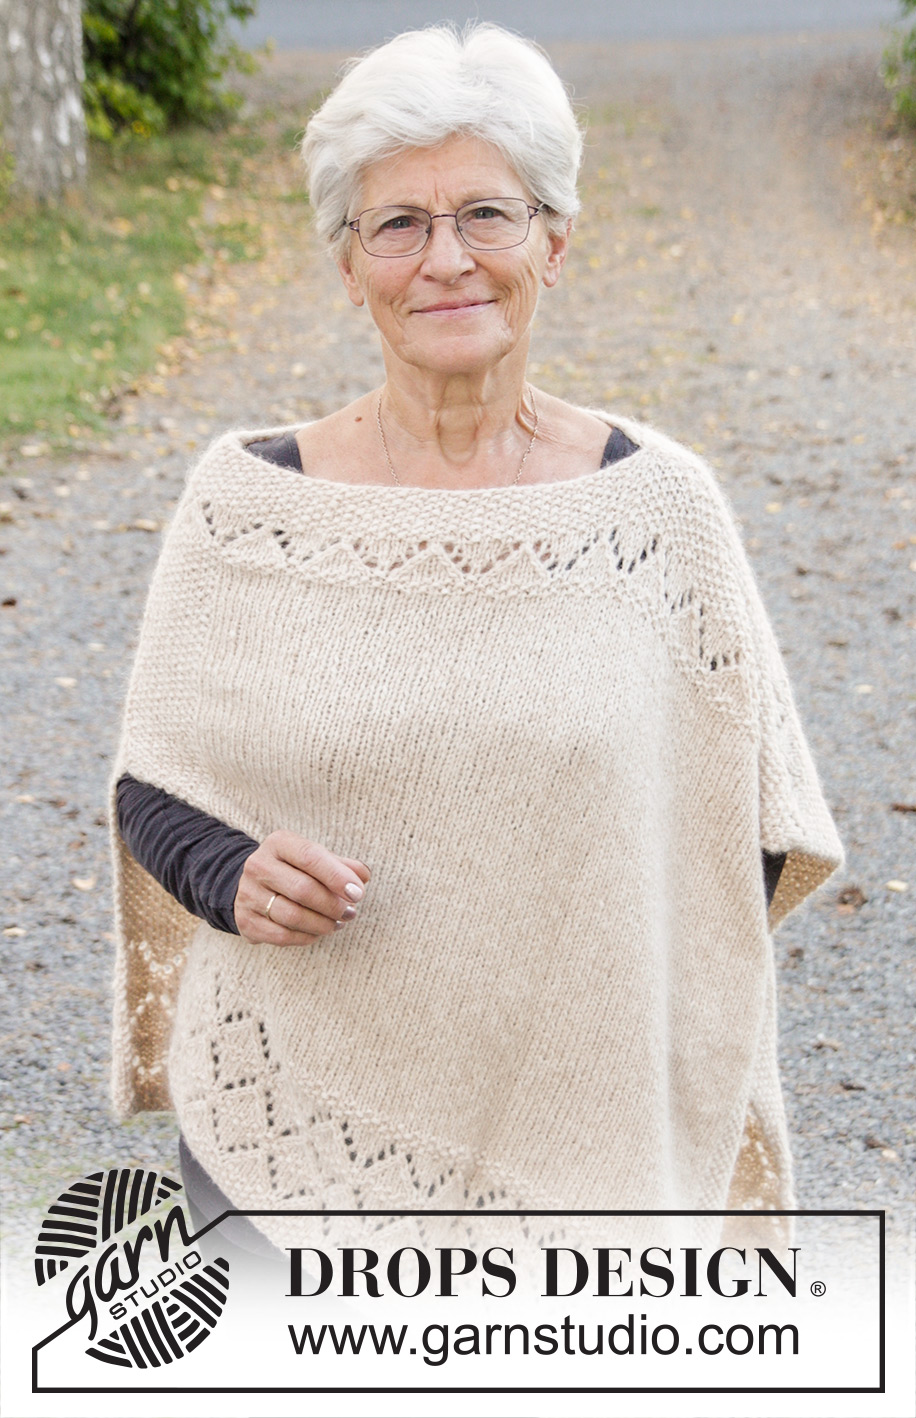
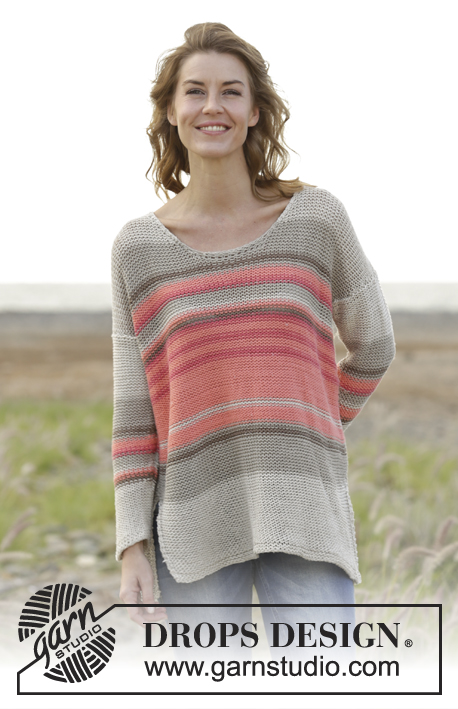
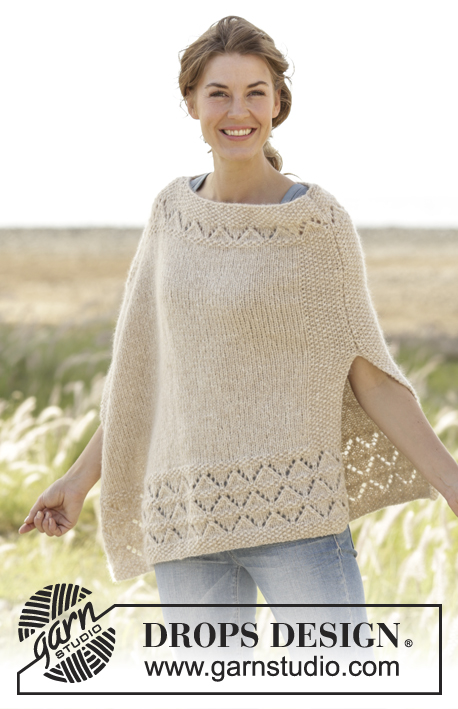
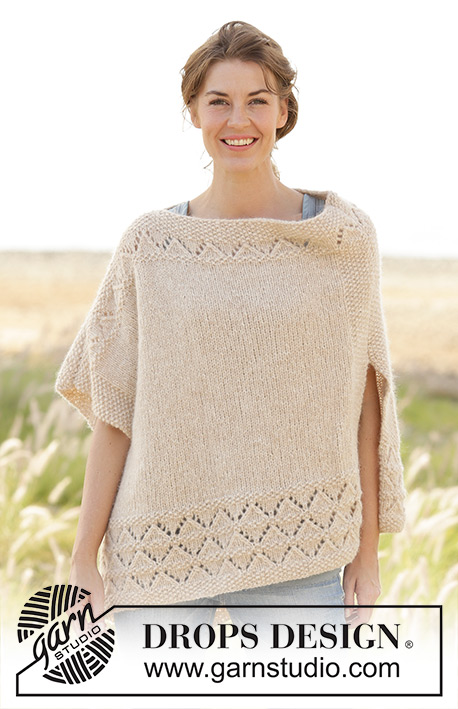
So Classy!#soclassyponcho |
||||||||||||||||||||||
 |
 |
|||||||||||||||||||||
DROPS pončo s perličkovým a ažurovým vzorem pletené z příze ”Air”. Velikost: S - XXXL.
DROPS 170-28 |
||||||||||||||||||||||
|
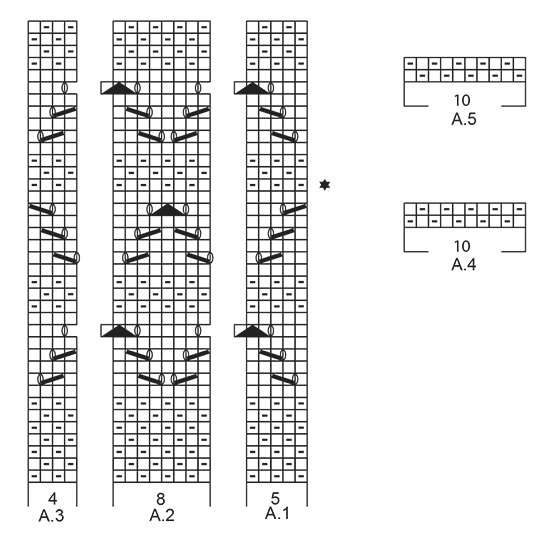
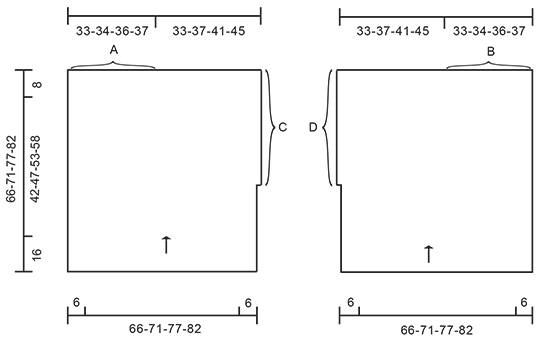
VROUBKOVÝ VZOR: Pleteme stále hladce, lícové i rubové řady. 1 vroubek = 2 řady hladce. VZOR: Viz schémata A.1 až A.5; zobrazeny jsou všechny řady vzoru nahlížené z lícové strany. ---------------------------------------------------------- PONČO: Pleteme v řadách na kruhové jehlici ve 2 dílech, které nakonec sešijeme. Na kruhovou jehlici č.6 nahodíme přízí Air 99-107-115-123 ok (včetně 1 krajového oka na každé straně) a pleteme takto: 1 krajové oko vroubkovým vzorem – viz výše, vzor A.1 (= 5 ok), vzor A.2 (= 8 ok) – sekvenci vzoru opakujeme 11-12-13-14x, vzor A.3 (= 4 oka), 1 krajové oko vroubkovým vzorem. POZN.: krajová oka pleteme vroubkovým vzorem po celou dobu, až do ukončení práce; vizuálně zapadnou do perličkového vzoru a vytvoří nám úhledný okraj. Po dokončení 1 celé sekvence vzoru A.1 až A.3 (na výšku) pokračujeme v tomto rozvržení vzorů – začínáme lícovou řadou: vzor A.4 (POZN.: 1. oko ve schématu = krajové oko), 79-87-95-103 ok lícovým žerzejem, posledních 10 ok v řadě pleteme vzorem A.5 (POZN.: poslední oko ve schématu = krajové oko). Takto pokračujeme až do celkové výše 30 cm. Na konci následující rubové řady nahodíme 1 nové oko (= konec rozparku) = 100-108-116-124 ok. Nové oko pleteme vroubkovým vzorem; tj. na začátku lícové řady máme nyní 2 krajová oka pletená vroubkovým vzorem. Ve výši 58-63-69-74 cm pleteme následující rozvržení vzorů – začínáme řadou, která je ve schématu označena hvězdičkou: 2 krajová oka vroubkovým vzorem, vzor A.1, vzor A.2 – sekvenci vzoru opakujeme 11-12-13-14x, vzor A.3, 1 krajové oko vroubkovým vzorem. Po dokončení celé sekvence vzoru (na výšku) opakujeme poslední 2 řady ze schématu. Ve výši 66-71-77-82 cm všechna oka dle vzoru uzavřeme. Druhý díl pleteme stejně, jen zrcadlově převrácený. DOKONČENÍ: Viz nákres. Body A a B sešijeme (nejlépe pletacím stehem). Pak sešijeme body C a D – šev vedeme vnější částí krajových ok. Na jedné straně máme rozparek dlouhý asi 30 cm, na druhé straně je rozparek po celé délce. Práci ukončíme. |
||||||||||||||||||||||
Vysvětlivky ke schématu |
||||||||||||||||||||||
|
||||||||||||||||||||||
 |
||||||||||||||||||||||
 |
||||||||||||||||||||||
Dokončili jste tento model?Pak označte své fotky tagem #dropspattern #soclassyponcho nebo je pošlete do galerie #dropsfan. Potřebujete s tímto návodem poradit?Otevřete-li si návod na stránce garnstudio.com, najdete tam 18 výukových video-ukázek, Komentáře/Dotazy a další užitečné informace. © 1982-2026 DROPS Design A/S. Vyhrazujeme si veškerá práva. Tento dokument, včetně všech jeho dílčích částí, podléhá autorským právům. Podrobnější komentář k možnostem užití našich návodů najdete dole pod každým návodem na našich stránkách. |
||||||||||||||||||||||


V oblasti pletené a háčkované módy působí DROPS Design více než 40 let. Díky tomu vám můžeme nabídnout jednu z nejrozsáhlejších kolekcí modelů s bezplatnými návody dostupnými na internetu - navíc v 17 jazycích. K dnešnímu dni máme na 324 katalogů a 12290 návodů celkem - z nich je už 7605 dostupných v [češtině].
We work hard to bring you the best knitting and crochet have to offer, inspiration and advice as well as great quality yarns at incredible prices! Would you like to use our patterns for other than personal use? You can read what you are allowed to do in the Copyright text at the bottom of all our patterns. Happy crafting!
Přidejte komentář k návodu DROPS 170-28
Rádi bychom věděli, co si o tomto modelu myslíte!
Pokud se chcete na něco zeptat, dbejte prosím na to, abyste ve formuláři níže vybrali správnou kategorii - díky tomu se dříve dozvíte, co potřebujete vědět. Povinná pole jsou označena *.