
Populaarsed kategooriad
Otsid lõnga?


Kommentaarid / Küsimused (59)
![]() Camilla kirjutas:
Camilla kirjutas:
Jeg er ved at lave pandebåndet. I diagrammet står der man skal strikke ret over ret og vrang over vrang. Når jeg har slået de 12 masker op er 1. pind på vrang-siden, den næste pind på ret-siden. Dvs. snoninger bliver lavet fra vrang siden? Hvorfor skal jeg så strikke ret på hjælpepinden og de resterende masker?
02.11.2014 - 23:31DROPS Design vastas:
Hej Camilla. 1. pind er retsiden. Snoningerne laves paa retsiden.
06.11.2014 - 13:42
![]() Carla kirjutas:
Carla kirjutas:
Il modello è bellissimo, ma devo mettere il doppio dei punti. Come costruire lo schema? Devo farlo speculare? Grazie per la risposta
07.09.2014 - 10:29DROPS Design vastas:
Deve mettere il doppio dei punti perché utilizza un filato più sottile? Nel caso in cui dovesse fare così potrebbe lavorare la treccia più larga (con più maglie ogni fascia della treccia) per esempio. Se deve fare la fascia deve fare prima un campione per capire quanto rende con il filato che utilizzerà.
11.09.2014 - 16:31
![]() Klára S kirjutas:
Klára S kirjutas:
Dobrý den, v českém návodu neodpovídá popis vzorku originálu. Hezký den Klára S
01.02.2014 - 20:23DROPS Design vastas:
Dobrý den, děkuji za upozornění - opraveno!
08.02.2014 - 01:06
![]() Isabel kirjutas:
Isabel kirjutas:
Hallo, Maakt het nog uit wat voor maat kabelnaald ik gebruik voor de hoofdband? Bedankt
26.10.2013 - 14:06DROPS Design vastas:
Hoi Isabel. De kabelnld moet niet te dun zijn. Heb je niet een hele dikke kabelnld, dan kan je eventueel een sokkenbreinld gebruiken.
28.10.2013 - 19:13
![]() Jan kirjutas:
Jan kirjutas:
Got it - thank you - sorry to be so dense :)
30.01.2013 - 00:43
![]() Jan kirjutas:
Jan kirjutas:
Yes, I have checked your video which is great for a cable stitch in the middle of a row, not as the first stitch in the row. The difference is that the skein side of the wrapping yarn is on the cable needle not the right hand needle so i am not sure if that yarn should go behind the cable needle or infront of the cable needle prior to knitting the next/6th stitch.
29.01.2013 - 18:49DROPS Design vastas:
In front, because stitches you have to knit next are in front of slipped sts.
29.01.2013 - 21:49
![]() Jan kirjutas:
Jan kirjutas:
Another source of my confustion -the wrap over yarn is on the cable needle since it is the first 5 stiches being slipped, when a cable is worked in the middle of a piece, the wrap over yarn is on the right hand knitting needle. Thank you again.
29.01.2013 - 13:41DROPS Design vastas:
Have you checked out our Video tutorials for cable knitting?
29.01.2013 - 14:58
![]() Jan kirjutas:
Jan kirjutas:
Thank you for your response and clarification. One more question - does the wrapping yarn for the 11th row go behind the cable needle and slipped stiches or in front? Thank you
29.01.2013 - 13:35DROPS Design vastas:
The yarn should not run over stitches in front and should not be visible. When you slip first 5 sts to cable needle behind piece, keep yarn front to knit next st from left needle.
29.01.2013 - 14:48
![]() Jan kirjutas:
Jan kirjutas:
I am making the neckwarmer and have a question regarding the 11th row. If I read the pattern correctly, this row starts with the 5 stitches slipped off to the cable needle. I find this awkward since the first stitch has the wrapping yarn (for lack of a better term). Am I reading the pattern correctly? I hope I am explaining myself properly.
28.01.2013 - 23:43DROPS Design vastas:
Dear Jan, you are correct, on row 11 the first 5 sts are slipped on cable needle behind piece for the cable. Happy knitting!
29.01.2013 - 09:02
![]() Isabel Hicks kirjutas:
Isabel Hicks kirjutas:
Would be grateful for some help! Am doing this lovely headband but- cast on 12 stitches K1 then cabled 4 back knitted 4 . Three stitches left - please tell me how do I get the braiding as no stitches left to do the other half of the chart - where am I going wrong?.. Many thanks
20.01.2013 - 00:32DROPS Design vastas:
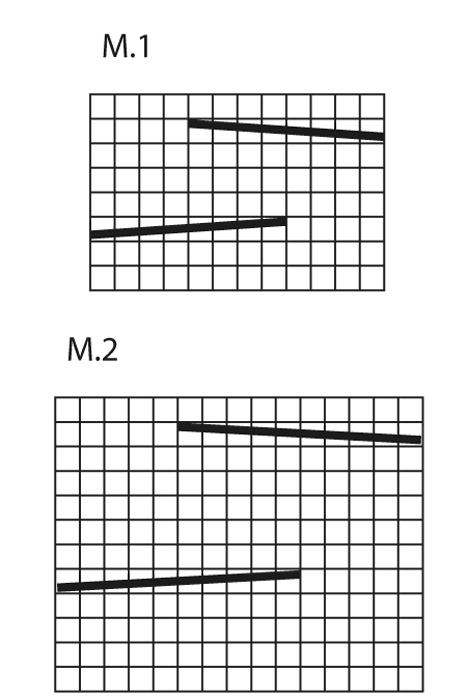
Dear Mrs Hicks, diagram is read from bottom right towards the left (RS) and left towards right side (WS), and M1 =12 sts, row 3 is : K4, cable on the next 8 sts. R7 : cable on the first 8 sts, K4. Happy knitting!
21.01.2013 - 18:21
|
||||||||||||||||
Braidy#braidyset |
||||||||||||||||
 |
 |
|||||||||||||||
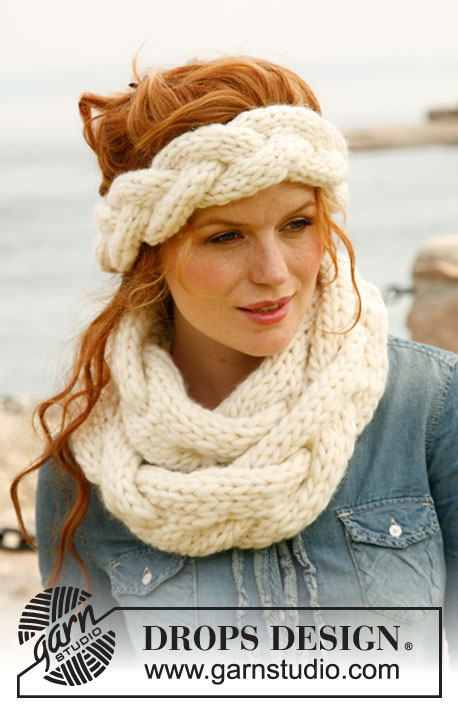
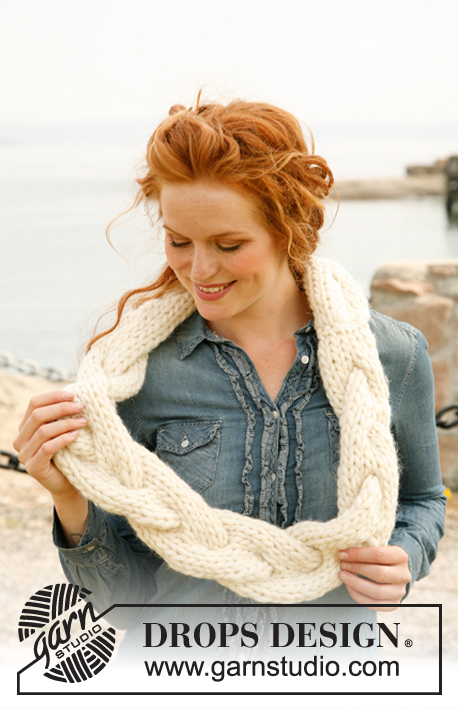
Kootud DROPSi palmikuga peapael ja sall lõngast ”Polaris”.
DROPS 134-7 |
||||||||||||||||
|
MUSTER Vaata skeemi M.1 peapaela jaoks ja skeemi M.2 sallile. Skeem on näidatud töö paremalt poolt (PP). LÕNGAVAHETUSE NIPP Uut palli alustades haruta lõngaots kaheks vähemalt 15 cm ulatuses - lõika 1 pool ära. Tee sama teise toki otsaga. Pane lõnga otsad üksteise peale nii, et need on nüüd normaaljämedusega ja jätka tööd. Nii jääb jätkamine märkamatuks. ------------------------- PEAPAEL Kootakse edasi-tagasi pikk riba ja hiljem õmmeldakse otsast kokku. Loo üles 12 mm varrastele 12 silmust. Koo skeemi M.1 järgi, kuni töö pikkus on u. 50 cm - lõpeta pärast tervet mustrikordust. Enne mahakudumist koo 1 rida parempidises koes. Õmble algusrida mahakudumise rea külge, läbi välimiste silmuste aasasid, et vältida paksu õmblust. ________________________________________________________ KAELUSSALL Kootakse edasi-tagasi pikk riba ja hiljem õmmeldakse kokku. Loo üles 15 mm varrastele 15 silmust. Koo skeemi M.2 järgi, kuni töö pikkus on u. 120 cm - lõpeta pärast tervet mustrikordust. Enne mahakudumist koo 4 rida parempidises koes. Õmble algusrida mahakudumise rea külge, läbi välimiste silmuste aasasid, et vältida paksu õmblust. Kandmiseks keera sall 8 kujuliseks. |
||||||||||||||||
Skeemi seletused |
||||||||||||||||
|
||||||||||||||||
 |
||||||||||||||||
Kas oled teinud seda mustrit?Lisa oma piltidele viide #dropspattern #braidyset või saada link projektile meie #dropsfan galeriisse. Vajad abi selle mustriga?Garnstudio.com kodulehel on 5 õppevideot, küsimuste/vastuste osa ja muudki. © 1982-2026 DROPS Design A/S. Kõik õigused kaitstud. See dokument, ning selle alajaotused on kaitsud autoriõigustega. Loe rohkem, mida meie mustritega võib teha, iga mustrilehe alt meie kodulehel. |
||||||||||||||||


Tegeledes üle 40 aasta kudumise ja heegeldamise disainidega, pakub DROPS Design ühte suurimat tasuta mustrite kollektsiooni internetis - tõlgituna 17 keelde. Tänaseks on meil 324 kataloogi ja 12290 mustrit - millest 9431 on tõlgitud Eesti keelde.
Me anname endast parima, et tuua teieni kõike mida kudumine ja heegeldamine võib pakkuda - inspiratsiooni, nõuandeid ning ka kvaliteetseid lõngu parima hinnaga! Soovid kasutada mustreid muukski, kui ainult oma tarbeks? Loe infot meie Copyright osas iga lehekülje all. Rõõmsat loomist!
Jäta kommentaar mustrile DROPS 134-7
Ootame kommentaare selle mustri kohta!
Kui soovid midagi küsida, siis kiiremaks vastuse saamiseks veendu, et valid õige kategooria alloleval formil. Vajaliku väljad *.