
Populaarsed kategooriad
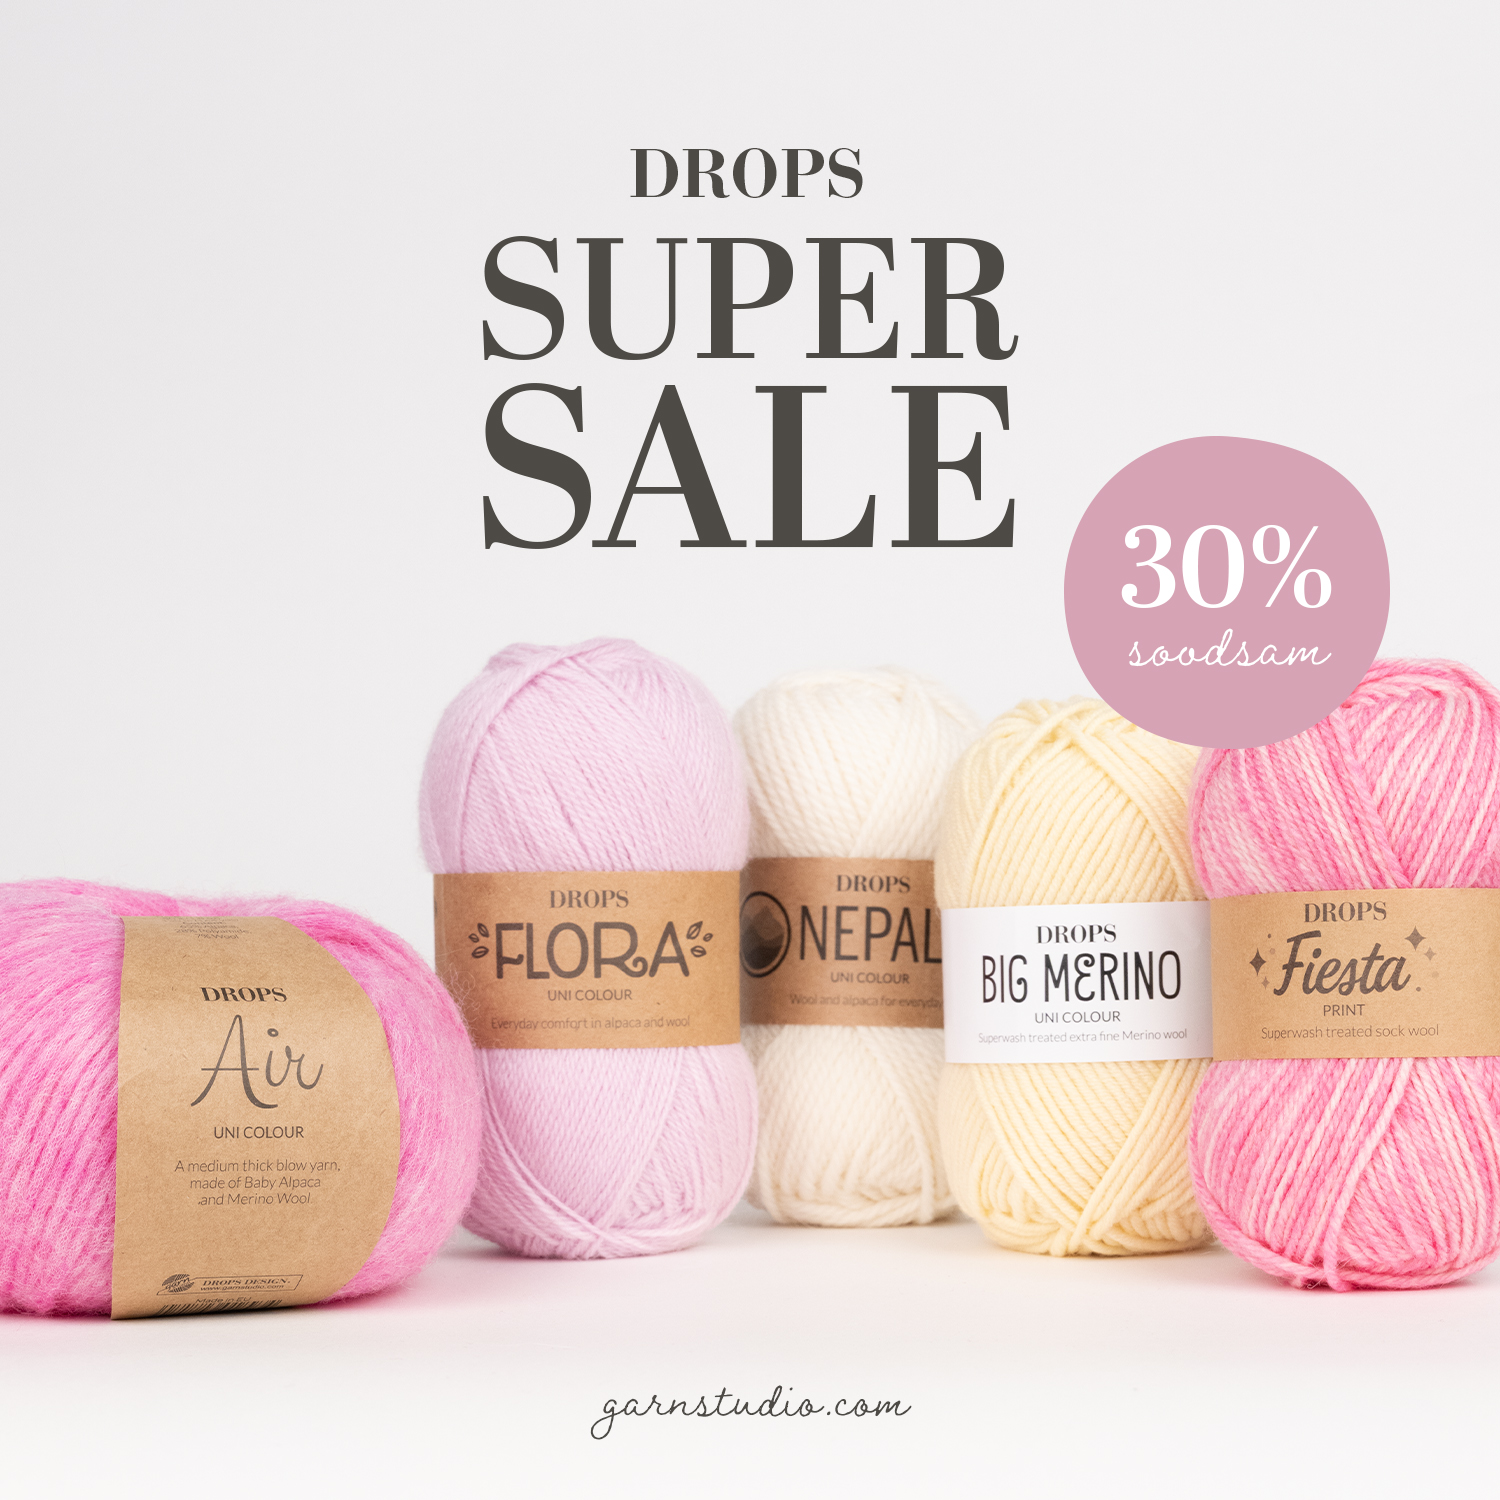
Otsid lõnga?


Kommentaarid / Küsimused (36)
![]() Eva-Lena kirjutas:
Eva-Lena kirjutas:
Gäller bröstkupan, jag får fram sammanlagt 26 stolpar trots det står ska vara 28 stolpar. stl s - ena 10 stolpar plus 1 stolpe i 4 e luftmaska och 2 st o 1 lm 2 st andra sida 11 stolpar ....?? repade och gjorde om men blir samma resultat.något jag missat ???
10.06.2024 - 21:20DROPS Design vastas:
Hei Eva-Lena. I str. S starter du med 15 luftmasker, hekle 1 stav i den 4. luftmasken fra nålen (du har nå 2 staver på 1. rad. De 3 siste luftmaskene av de 15 og 1 stav i 4. luftmasken fra nålen). Deretter hekles det 1 stav i hver av de 10 neste luftmasken = 2 staver + 10 staver. I siste luftmaske hekles det 2 staver + 1 luftmaske +2 staver). 2+10+2+2=16 staver. Så hekles det 1 stav på undersiden av de 12 stavene (i de sammen luftmaskene) = 2+10+2+2+12 = 28 staver. Den siste staven hekles i undersiden av de 3 luftmaskene (av de 15 start luftmaskene) som erstatter 1.stav. mvh DROPS Design
17.06.2024 - 11:04
![]() Hannah kirjutas:
Hannah kirjutas:
När jag gör bröstkuporna, står det att det ska bli 4 stolpar ökning varje varv, men när jag gör 1 A1 på varje varv i toppen så får jag bara två stolpar ökning. Vad har jag missat?
16.05.2024 - 10:42DROPS Design vastas:
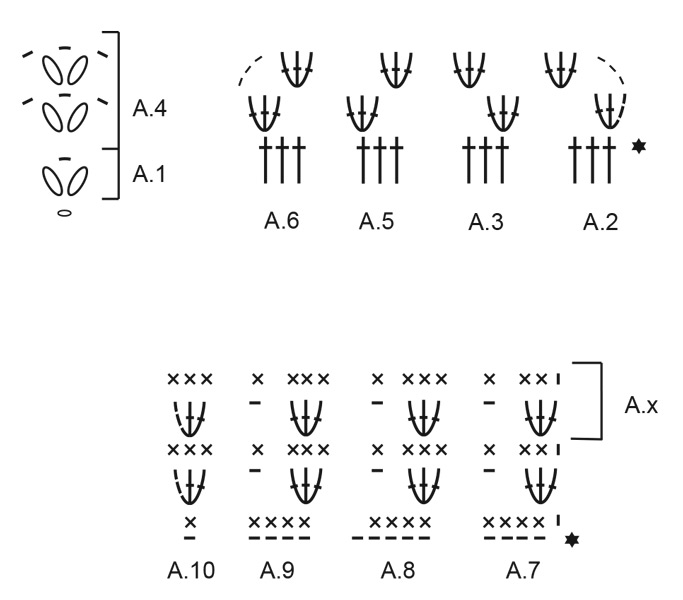
Hei Hannah. Se på diagram A.1, der er det 2 ovale sirkler. I diagramforklaringen leser man at 1 oval sirkel = 2 staver. Når du skal hekle A.1 i den siste masken hekler du 1 oval sirkel (= 2 staver) + 1 luftmaske + 1 oval sirkel (= 2 staver) = det er økt 4 staver. mvh DROPS Design
21.05.2024 - 13:25
![]() Christelle R kirjutas:
Christelle R kirjutas:
Bonjour. Je crois que la question a déjà été posée mais je ne trouve pas de réponse. Je travaille la taille S. Au 1er rang du bas du top, j'obtiens bien 109m. Au 2eme rang A10 passe d'1 à 3m n'est ce pas ? (Sur le diagramme Rg1=14m/Rg2 et 3 =15m) Donc si je répète les rangs 2 et 3, je ne peux plus avoir 109m ? Où est l'erreur ? Merci pour votre réponse. Cdlt
28.04.2024 - 17:28DROPS Design vastas:
Bonjour Christelle, c'est exact, continuez simplement à crocheter les diagrammes comme indiqué, je transfère l'info à qui de droit. Bon crochet!
29.04.2024 - 09:52
![]() Ina Bremer kirjutas:
Ina Bremer kirjutas:
Problem gelöst! Mit der nötigen Ruhe klappt's dann auch mit der Häkelnanleitung : )
05.04.2024 - 22:14
![]() Ina Bremer kirjutas:
Ina Bremer kirjutas:
Hallo ihr Lieben, ich häkle die Größe XL und komme ganz zu Beginn nur auf 37 Stäbchen anstatt auf 40... Was übersehe ich, bzw. was mache ich verkehrt? Ganz liebe Grüße Ina
05.04.2024 - 18:42DROPS Design vastas:
Liebe Ina, auf der 1. Seite haben Sie (3 Lm + 1 Stb in die 4. Lm = 2 Stäbchen + 1 Stäbchen in je die nächsten 16 Lm = 18 Stäbchen + A.1 in die letzte Luftmasche = 2 Stäbchen = 20 Stäbchen auf der 1. Seite, dann auf die 2. Seite: A.1 = 2 Stäbchen (mit 1 Lm davor) + 1 Stäbchen in die nächsten 18 Lm = 20 Stäbchen = 40 Stäbchen insgesamt. Viel Spaß beim Häkeln!
08.04.2024 - 07:33
![]() Dawn kirjutas:
Dawn kirjutas:
What measurements are your sizes please for women XS -S -M -L -XL -XXL I’m not sure what size to make ? Thank you
22.03.2024 - 11:58DROPS Design vastas:
Dear Dawn, you will find the measurement chart for finished piece at the bottom of the written pattern, compare to a similar garment you have and like the shape to choose the best appropriate size. Read more here. Happy knitting!
22.03.2024 - 15:13
![]() Alcina Carvalho kirjutas:
Alcina Carvalho kirjutas:
Hello, Thanks for your answer. But you still didn't answer my question: at the end of Row 2 and Row 3, how many stitches do I have? Thanks.
23.06.2023 - 13:30DROPS Design vastas:
Dear Mrs Carvalho , you will have 149 sts after you have worked first row with A.8 and A.9 and then continue with A.9 only between A.10 and A.7 over all 149 sts. Happy crocheting!
23.06.2023 - 15:57
![]() Alcina Carvalho kirjutas:
Alcina Carvalho kirjutas:
Hello, I'm doing the part of the body (size L) of this pattern and I have doughts in how many stitches the row 2 and 3 have at the end. Is it supposed to finish with 168 stitches, as the beginning, or it has to finish with 149? Also, I think that at 2nd row, the A7 and A10 has to have only two stiches, and not three as indicated, otherwise we will increase 2 stitches for row. Could you please clarify? Thanks for your help!
22.06.2023 - 17:43DROPS Design vastas:
Dear Mrs Carvalho, when working diagram A.8 you will skip 1 stitch in each A.8 (4 sts over 5 chains), that's how you will decrease the number of stitches on first row to 149 sts.. Read 1st row from the right towards the left (starting with A.7 and finishing with A.10), then work row 2 starting with A.1, repeat A.9 and end with A.7 (don't work A.8 anymore). And repeat these 2 rows with A.7 over 4 sts on row 2 and3 sts on row 3; A.9 over 4 sts and A.10 over 3sts. Happy crocheting!
23.06.2023 - 07:32
![]() Alexandra kirjutas:
Alexandra kirjutas:
Row 3 , the treble cluster Rrow comes out with 135 stitches. It would be helpful if you could crochet the 1st 3 rows giving the correct amount of stitches after each row and do the same on the next 3 repeat rows stating amount of stitches after each row. This should have been written in the pattern.
05.06.2023 - 21:00DROPS Design vastas:
Dear Alexandra, which size are you working on? Remember that you don't work the same diagrams on 1st than on 2nd and 3rd row; on the first row you will crochet alternately A.8 and A.9 but on the 2nd and 3rd row you will then crochet only A.9 (A.8 was worked over 5 stitches and you skip 1 stitch so that A.8 ends with only 4 sts. Happy crocheting!
06.06.2023 - 09:04
![]() Alexandra kirjutas:
Alexandra kirjutas:
Sorry that should read 135 sts not 145. Still a lot more than 109!
05.06.2023 - 01:46
|
|||||||||||||||||||||||||||||||
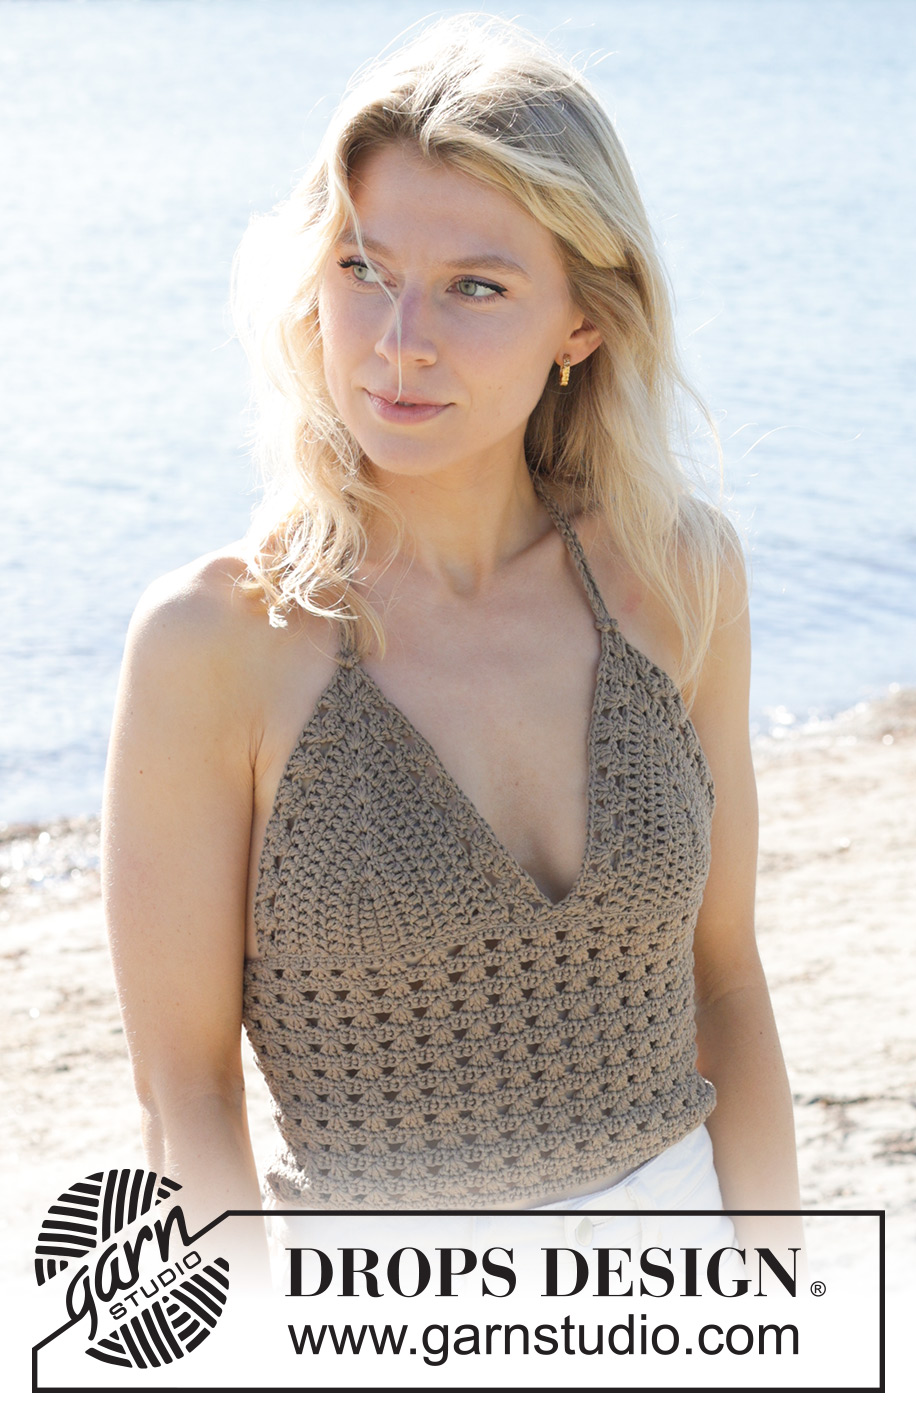
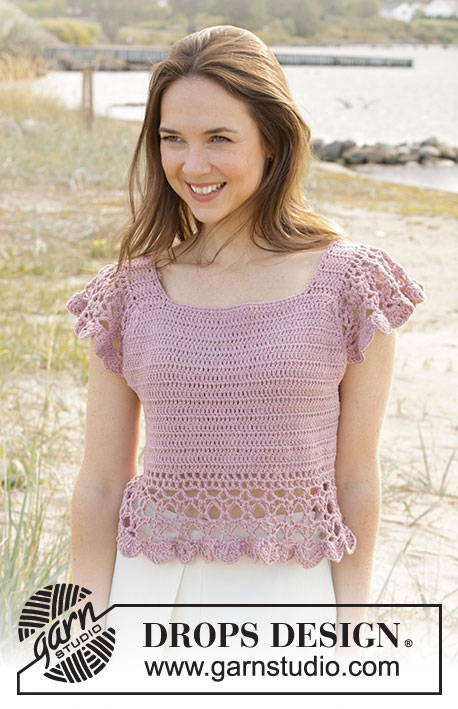
Charming Clover Top#charmingclovertop |
|||||||||||||||||||||||||||||||
 |
 |
||||||||||||||||||||||||||||||
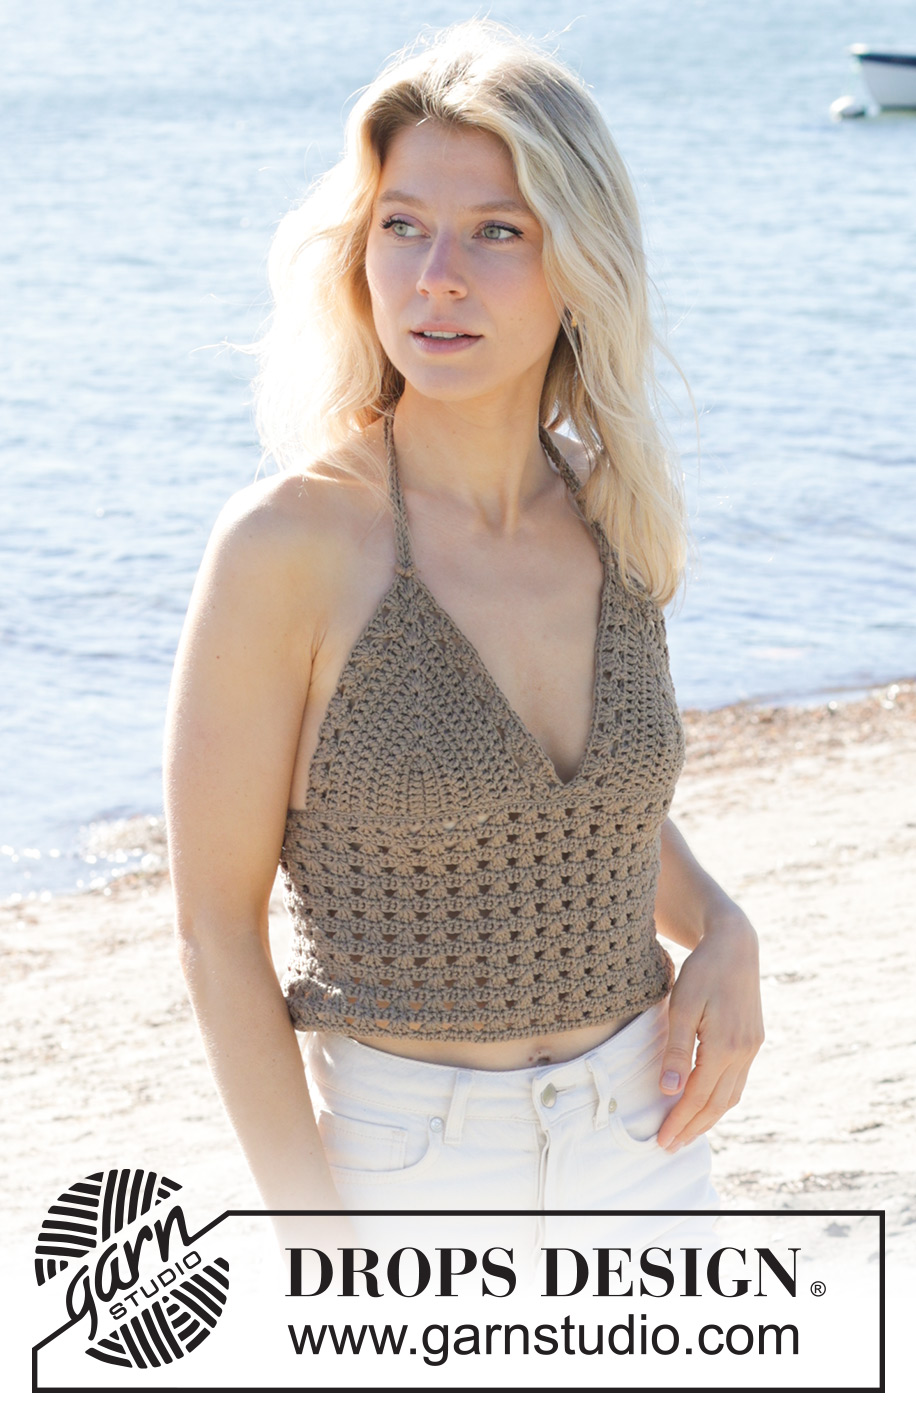
DROPS Cotton Light lõngast heegeldatud pitsmustriga õlapaeltega topp suurustele XS kuni XXL
DROPS 239-28 |
|||||||||||||||||||||||||||||||
|
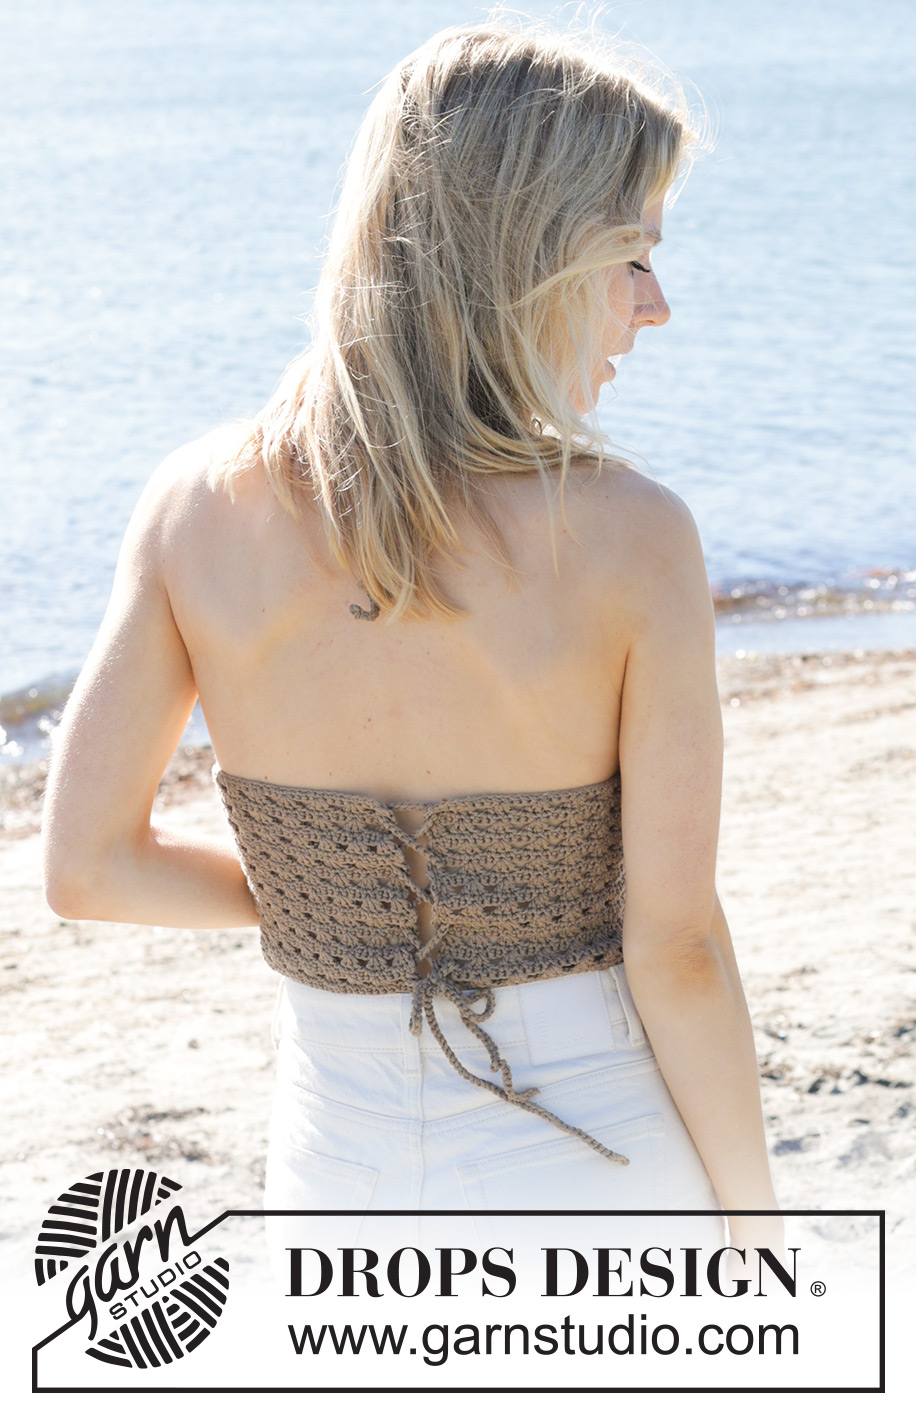
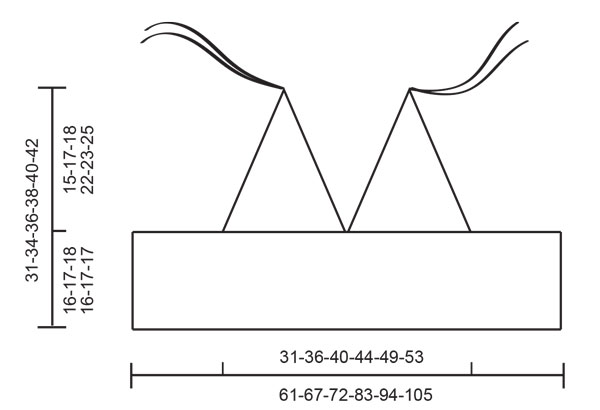
------------------------------------------------------- NÕUANDED: ------------------------------------------------------- HEEGELDAMISE INFO: AHELSILMUS: Tihti võivad ahelsilmused tulla liiga lühikesed; 1 ahelsilmus peaks olema sama pikk, kui on 1 kinnissilmus/ ühekordne sammas lai. ÜHEKORDNE SAMMAS: Asenda rea esimene ühekordne sammas 3 ahelsilmusega, st. jäta vahele eelmise rea esimene silmus. KINNISSILMUS: Asenda rea esimene kinnissilmus 1 ahelsilmusega, st. jäta vahele eelmise rea esimene silmus. MUSTER: Vaata skeeme A.1 kuni A.10. HEEGELDAMISE NIPP: Kui soovid kinnisemat toppi, võib heegeldatada rinnaosad suuremat, et need kattuks natuke teineteisega. Paiguta rinnaosad siis natuke ees keskel teineteise peale. ------------------------------------------------------- ALUSTA SIIT: ------------------------------------------------------- TOPP – KOKKUVÕTE: Algul heegelda rinnaosad eraldi edasi-tagasi, siis ühenda kokku. Kehaosa heegeldatakse edasi-tagasi ja siis õmmeldakse või heegeldatakse rinnaosad külge. Siis tee 1 õlapael mõlemale õlale ja seo need kaela taga kokku. RINNAOSA: Heegelda 14-15-16-20-21-22 ahelsilmust 3,5 mm heegelnõelaga ja Cotton Light lõngaga. Loe HEEGELDAMISE INFOT! Tee 1 ühekordne sammas neljandasse ahelsilmusesse heegelnõelast, siis tee 1 ühekordne sammas igasse järgmisesse 9-10-11-15-16-17 ahelsilmusesse (jääb 1 ahelsilmus), heegelda skeemi A.1 sellesse viimasesse ahelsilmusesse (rinnaosa tipp). Pööra tööd, heegelda ahelsilmuste keti teisele poole, tehes 1 ühekordse samba iga 11-12-13-17-18-19 samba alumisele küljele (tee viimane sammas 3 ahelsilmuse alla). Real on 26-28-30-38-40-42 ühekordset sammast ja 1 ahelsilmus. Pööra. Heegelda edasi-tagasi ja tee 1 ühekordne sammas igasse silmusesse, aga heegelda ümber ahelsilmuse skeemi A.1 keskel skeemi A.1 (4 ühekordset sammast kasvatatud real). JÄLGI HEEGELDAMISE TUGEVUST! Heegelda nii kuni on tehtud 5-6-7-8-9-10 rida sambaid. Real on 42-48-54-66-72-78 ühekordset sammast ja 1 ahelsilmus. Siis heegelda skeeme A.2 kuni A.6 järgmiselt: 1. RIDA: tee skeemi A.2 3 silmusesse, skeemi A.3 kuni keskmise ahelsilmuseni skeemil A.1 (6-7-8-10-11-12 korda), skeemi A.4 ahelsilmusesse, skeemi A.5 kuni jääb 3 silmust (6-7-8-10-11-12 korda) (et muster oleks sümmeetriline mõlemal pool skeemi A.4), tee skeemi A.6 3 silmusesse. Pööra. 2. RIDA: tee skeemi A.6 skeemi A.6 kohale, skeemi A.5 iga sammaste grupi vahele kuni esimese ahelsilmuseni skeemil A.4 (5-6-7-9-10-11 korda), tee skeemi A.5 ümber esimese ahelsilmuse skeemil A.4, tee skeemi A.4 ümber keskmise ahelsilmuse skeemil A.4, skeemi A.3 ümber viimase ahelsilmuse skeemil A.4, skeemi A.3 iga sammaste grupi vahel (5-6-7-9-10-11 korda), skeemi A.2 skeemi A.2 kohale, lõpus tee 1 aassilmus kolmandasse ahelsilmusesse esimesel real = 52-58-64-76-82-85 silmust. Katkesta ja kinnita lõng. Koo teine rinnakorv samamoodi. RINNAOSADE ÜHENDAMINE: Loe ülevalt HEEGELDAMISE NIPPI. Tee 3,5 mm heegelnõelaga ja Cotton Light lõngaga umbes 29-32-36-39-43-47 kinnissilmust mööda esimese rinnaosa alumist rida, siis umbes 29-32-36-39-43-47 kinnissilmust mööda teise rinnaosa alumist rida. Katkesta ja kinnita lõng. KEHAOSA: Heegelda 123-136-145-168-190-213 ahelsilmust 3,5 mm heegelnõelaga ja Cotton Light lõngaga. Loe HEEGELDAMISE INFOT! Pööra. Alusta teise ahelsilmusesse heegelnõelast ja tee skeeme A.7 kuni A.10 järgmiselt: 1. RIDA (töö pahemal pool): heegelda skeemi A.7, siis kordamööda skeemi A.8 ja A.9 kuni jääb 1-5-5-1-5-1 ahelsilmust, tee skeemi A.9 0-1-1-0-1-0 korda, skeemi A.10 = 109-121-129-149-169-189 kinnissilmust. 2. RIDA (töö parem pool): tee skeemi A.10, skeemi A.9 kuni jääb 4 silmust, tee skeemi A.7 = 111-123-131-151-171-191 silmust. 3. RIDA (töö pahemal pool): tee skeemi A.7, skeemi A.3 kuni jääb 3 silmust, tee skeemi A.10. Korda skeeemi A.x, kuni töö pikkus on 16-17-18-16-17-17 cm, või soovitud pikkusega. Katkesta ja kinnita lõng. VIIMISTLUS: Paiguta rinnaosad kehaosa keskele, alguse reale ja õmble või heegelda külge läbi ääresilmuste, et õmblus jääks lame. ÕLAPAELAD: Tee 3,5 mm heegelnõelaga ja 2 Cotton Light lõngaga ahelsilmustest ketti pikkusega 110-115 cm või soovitud pikkusega. Tee 3 paela, 1 mõlemale rinnaosale ja 1 seljale. Murra 1 pael pooleks, pista aas läbi ühe rinnaosa tipu ja tõmba otsad läbi. Kinnita teine pael samamoodi teisele rinnaosale. Paiguta kehaosa lühemad küljed vastastikku, pista pael läbi mõlema külje ülemise nurga, siis risti kordamööda läbi mõlema külje, kuni otsad tulevad alumises nurgas välja. Tee seos. |
|||||||||||||||||||||||||||||||
Skeemi seletused |
|||||||||||||||||||||||||||||||
|
|||||||||||||||||||||||||||||||
 |
|||||||||||||||||||||||||||||||
 |
|||||||||||||||||||||||||||||||
Kas oled teinud seda mustrit?Lisa oma piltidele viide #dropspattern #charmingclovertop või saada link projektile meie #dropsfan galeriisse. Vajad abi selle mustriga?Garnstudio.com kodulehel on 11 õppevideot, küsimuste/vastuste osa ja muudki. © 1982-2026 DROPS Design A/S. Kõik õigused kaitstud. See dokument, ning selle alajaotused on kaitsud autoriõigustega. Loe rohkem, mida meie mustritega võib teha, iga mustrilehe alt meie kodulehel. |
|||||||||||||||||||||||||||||||


Tegeledes üle 40 aasta kudumise ja heegeldamise disainidega, pakub DROPS Design ühte suurimat tasuta mustrite kollektsiooni internetis - tõlgituna 17 keelde. Tänaseks on meil 325 kataloogi ja 12298 mustrit - millest 9442 on tõlgitud Eesti keelde.
Me anname endast parima, et tuua teieni kõike mida kudumine ja heegeldamine võib pakkuda - inspiratsiooni, nõuandeid ning ka kvaliteetseid lõngu parima hinnaga! Soovid kasutada mustreid muukski, kui ainult oma tarbeks? Loe infot meie Copyright osas iga lehekülje all. Rõõmsat loomist!
Jäta kommentaar mustrile DROPS 239-28
Ootame kommentaare selle mustri kohta!
Kui soovid midagi küsida, siis kiiremaks vastuse saamiseks veendu, et valid õige kategooria alloleval formil. Vajaliku väljad *.