
Categorias populares
Procura um fio?


Comentários / Perguntas (60)
![]() Anneke Van Smirren escreveu:
Anneke Van Smirren escreveu:
Ik kom niet helemaal uit her vastmaken van de kraag. Gaan de vierkanten van achter recht aan de voorpanden of schuin. Het kan allenei en ik weet niet wat het juiste is. Alvast bedankt voor de reactie.
14.10.2025 - 12:26DROPS Design respondeu:
Dag Anneke,
Je haakt alle vierkanten met de zijkanten tegen elkaar, ook bij de kraag.
20.10.2025 - 21:38
![]() Lotje escreveu:
Lotje escreveu:
Hoe kan ik de mouw 'erin' zetten. Ik weet met welke steek, maar de mouw heeft minder steken dan het mouwsgat, dus ik kom niet uit
07.08.2025 - 09:39DROPS Design respondeu:
Dag Lotje,
In dat geval kun je, verdeeld over de mouw, vaker in eenzelfde steek of lossenlus haken.
09.08.2025 - 18:13
![]() Stefanie escreveu:
Stefanie escreveu:
Hallo! Auf dem Foto der Jacke ist oben am Ärmel noch ein Viereck zu sehen und in der Anleitung, wie der Ärmel zu häkeln ist, ist nicht beschrieben, dass oben noch Vierecke reinzuhäkeln sind. Nur dass die Arbeit oben geteilt werden soll . Könnten Sie das bitte genauer beschreiben? Vielen Dank!
22.07.2025 - 14:54DROPS Design respondeu:
Liebe Stefanie, es sind keine Vierecke bei den Ärmeln, die Vierecke de man im Foto sieht sind die von den Schultern/Kragen = die 2 Vierecke oben bei jedem Schulter beim Vordeteil. Viel Spaß beim Häkeln!
24.07.2025 - 16:24
![]() Sylvia escreveu:
Sylvia escreveu:
Von der Anleitung sieht es für mich so aus, als ob die gesamte Jacke aus zusammengehäkelten Vierecken (52) besteht. Aber auf dem Photo sieht es so aus, also ob viel weniger Vierecke da sind und viel mehr Luftmaschenbögen zwischen den Vierecken. Könnten Sie das bitte erklären? Danke.
03.04.2025 - 02:43DROPS Design respondeu:
Liebe Sylvia, so stimmen alle Foto mit Anleitung zusammen - wenn die Quadraten zusammengehäkelt sind, sieht es dann aus, wie es dann "mehr" Luftmaschenbogen gebe. Viel Spaß beim Häkeln!
03.04.2025 - 09:58
![]() Sylvia escreveu:
Sylvia escreveu:
Von der Anleitung sieht es für mich so aus, als ob die gesamte Jacke aus zusammengehäkelten Vierecken (52) besteht. Aber auf dem Photo sieht es so aus, also ob viel weniger Vierecke da sind und viel mehr Luftmaschenbögen zwischen den Vierecken. Könnten Sie das bitte erklären? Danke.
03.04.2025 - 02:42
![]() Ann Daeninck escreveu:
Ann Daeninck escreveu:
Hoeveel garen heb ik nodig om enkel de vest te maken?
23.05.2024 - 22:53DROPS Design respondeu:
Dag Ann,
Je hebt 800 gram nodig van DROPS Muskat, dus 16 bollen.
26.05.2024 - 15:33
![]() Pernilla escreveu:
Pernilla escreveu:
Hej Jag får inte till monteringen och på vilket sätt jag ska virka ihop de två bakre rutorna i mitten med de två främre rutorna för att få en krage.
08.04.2024 - 21:10DROPS Design respondeu:
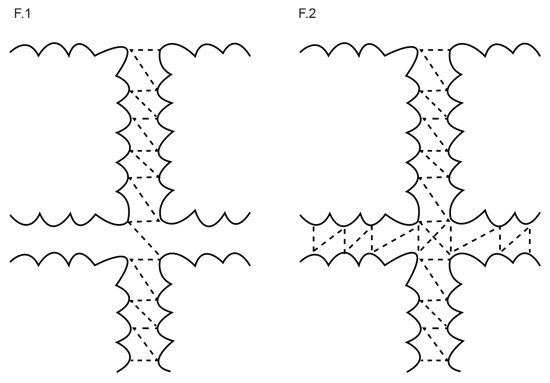
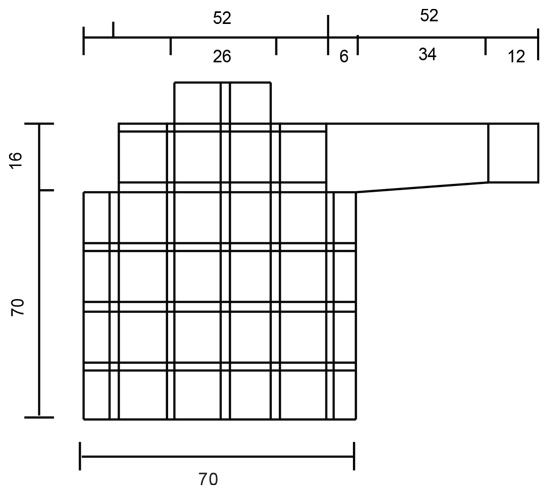
Hej Pernilla, har du set skitsen nederst i opskriften, her ser du hvordan ruderne skal lægges ud og sys sammen :)
09.04.2024 - 11:38
![]() Leslie escreveu:
Leslie escreveu:
So just to clarify. When I start back and forth on the sleeve- the chain 8 at the end of the row I turn and do a 1 sc in that chain stitch bow making that bow only 4 chain stitches? So at each end when you turn the chain stitch bows are long half the Length?
24.02.2022 - 22:45DROPS Design respondeu:
Dear Leslie, turn with 8 chains and crochet 1 sc in the first ch-space = you have half a ch-space, continue with the 8-ch-spaces and to the last ch-space of the row = you will have 12 ch-spaces + the first one as half a ch-space; turn with 8 ch, crochet 1 sc in the first ch-space, and crochet as before = you will have 12 ch-spaces + the first one as half a ch-space. Continue like this. Happy crocheting!
25.02.2022 - 09:13
![]() Leslie escreveu:
Leslie escreveu:
Confused about sleeve instructions- I have worked in the round up to sleeve measuring 18-1/8 th The instructions now say “ When the work measures 46 cm [18-1/8"], divide the work so that 1 square at the bottom of the sleeve is at the center of the hand and crochet back and forth. Finish when the sleeve measures 52 cm [20.5"].“. Confused about divide the work? Would I not just continue until 20.5” then when I set the sleeve in make sure the squares are on top and bottom center?
21.02.2022 - 18:44DROPS Design respondeu:
Dear Leslie, lay the sleeve flat placing one square on top of wrist edge, mark the opposite side, the rows should now start from here, that way, when the sleeve is crocheted to the armhole, you have a square on top of hand. And continue now from here back and forth (without decreasing, just working ch-spaces as before). Happy crocheting!
22.02.2022 - 09:26
![]() Leslie escreveu:
Leslie escreveu:
Confused about joining squares. Using fig 1 and legend ( using 5 chain stitches, 3 chain stitches and 1 double crochet). Are all the joins 5 chain stitches? Hard to see on diagram bold lines indicating 3 chain stitches, or a dot indicating 1 double crochet?
10.02.2022 - 22:18DROPS Design respondeu:
Dear Leslie, this video shows how to crochet squares together (this applies to a blanket, but you will work the same way for the squares here). Happy crocheting!
11.02.2022 - 09:20
|
|||||||||||||
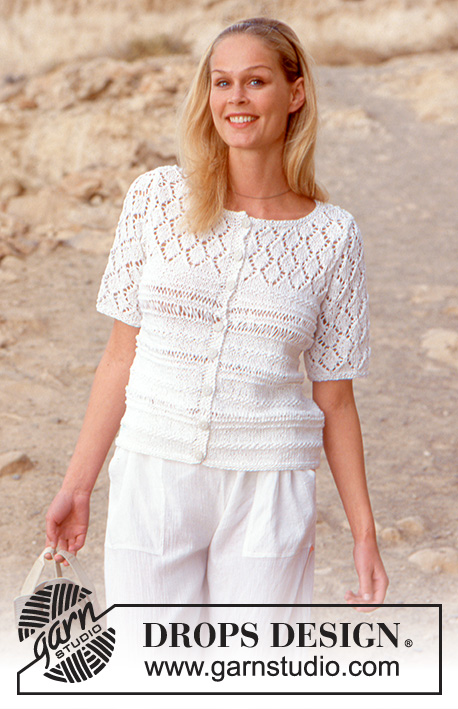
Garden Wedding Cardigan#gardenweddingcardigan |
|||||||||||||
|
|
|||||||||||||
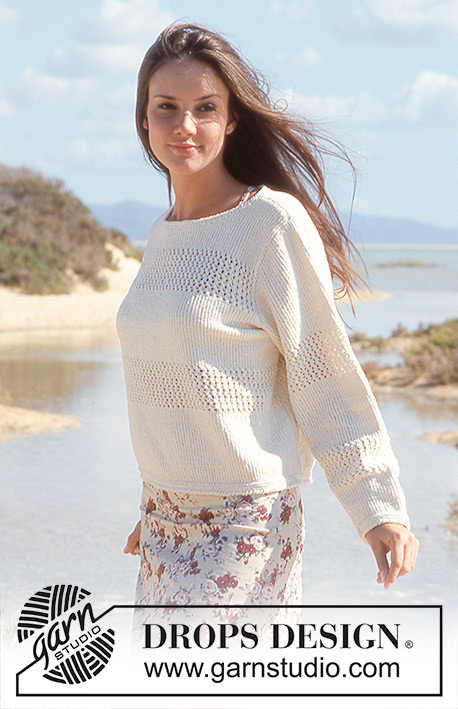
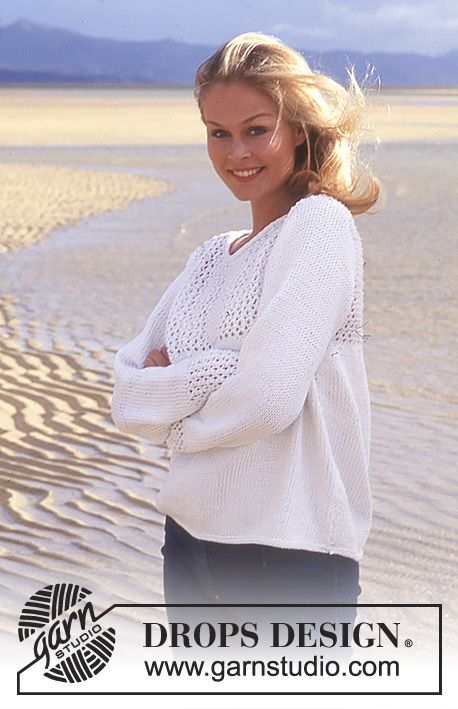
Pulôver DROPS em croché em Muskat
DROPS 65-9 |
|||||||||||||
|
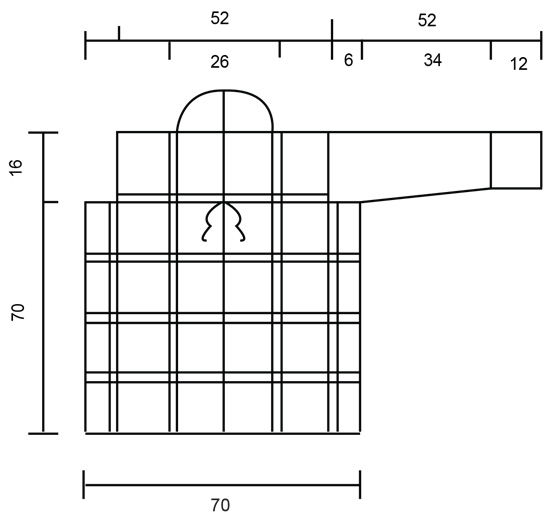
---------------------------------------------------------- NOTA: Existem termos diferentes de tricô e croché em português de Portugal e do Brasil. Malha = Ponto Canelado = Barra Ponto Jarreteira = Cordões de Tricô Ponto Liga = Ponto Tricô Croché: mpa – meio ponto alto pa – ponto alto pad – ponto alto duplo pat – ponto alto triplo pb – ponto baixo pbx – ponto baixíssimo pc – ponto corrente ---------------------------------------------------------- Amostra: 1 quadrado = cerca de 12 x 12 cm Ponto usado: ver diagramas abaixo. Quadrado Montar uma corrente de 8 pc e unir em redondo com 1 pbx C 1: *1 pa (substituir o 1.º pa por 3 pc), 2 pc * repetir de * a * 8 vezes, unir com 1 pbx no 1.º pa C 2: *4 pa (substituir o 1.º pa por 3 pc) no aro, 2 pc * repetir de * a * 8 vezes, unir com 1 pbx no 1.º pa C 3: *4 pad crochetados juntamente nos 4 pa da carreira precedente (substituir o 1.º pad por 4 pc) – Fazer o 1.º pad mas não fazer a última laçada (= 2 argolas estão na agulha de croché), fazer os 3 pad seguintes da mesma maneira, depois, 1 laçada e passar a agulha de croché por todas as argolas)- 6 pc, 1 pa no aro de 2 pc, 6 pc * repetir de * a *8 vezes, unir com 1 pbx no 1.º grupo de pad. C 4: Fazer pbx até meio do 1.º aro, 1 pc, 1 pb no 1.º aro, *5 pc, 1 pb no aro seguinte, 5 pc, 1 pb no aro seguinte, 10 pc, 1 pb no aro seguinte (= canto), 5 pc, 1 pb no aro seguinte * repetir de * a * 3 vezes, depois, 5 pc, 1 pb no aro seguinte, 5 pc, 1 pb no aro seguinte, 10 pc, 1 pb no aro seguinte (= canto), 5 pc, unir com 1 pbx no 1.º pb. C 5: Fazer pbx até meio do aro, 1 pc, 1 pb no aro, *5 pc, 1 pb no aro seguinte, 5 pc, 1 pb no aro seguinte, 8 pc, 1 pb no mesmo aro, a cerca de 1 cm (= canto), 5 pc, 1 pb no aro seguinte, 5 pc, 1 pb no aro seguinte * repetir de * a * 3 vezes, 5 pc, 1 pb no aro seguinte, 5 pc, 1 pb no aro seguinte, 8 pc, 1 pb no mesmo aro 1 cm mais adiante (= canto), 5 pc, 1 pb no aro seguinte, 5 pc, unir com 1 pbx no 1.º pb Explicações CASACO Costas e frente: Fazer 50 quadrados. Unir então os motivos em bandas verticais (ver fig. 1). As bandas verticais formam-se da seguinte maneira: 1.ª banda (meio frente) = 5 quadrados 2.ª banda = 5 quadrados 3.ª banda (lado) = 4 quadrados 4.ª banda = 5 quadrados 5.ª banda = 6 quadrados (o meio da parte de trás fica entre a 5.ª e a 6.ª banda) 6.ª banda = 6 quadrados 7.ª banda = 5 quadrados 8.ª banda (= lado) = 4 quadrados 9.ª banda = 5 quadrados 10.ª banda (meio da frente) = 5 quadrados Unir então as bandas entre elas - ver fig. 2. Unir os ombros seguindo também o esquema fig.2 e unir então os 2 quadrados do meio da parte de trás às 2 primeiras bandas do meio da frente para formar a gola. Mangas Fazer 2 quadrados. Unir em redondo como indicado na fig. 1. Continuar as mangas da seguinte maneira: C 1: 1 pb no 1.º aro, *5 pc, 1 pb no aro seguinte * repetir de * a * a toda a volta da manga = 13 aros, unir com 1 pbx no 1.º pb C 2: pbx até meio do 1.º aro, 1 pb no aro, *5 pc, 1 pb no aro seguinte * repetir de * a *. Repetir a carreira 2 até a manga medir 20 cm de altura total. Aumentar então 1 pc para cada aro (= 6 pc para cada aro). Continuar desta maneira até a manga medir 28 cm de altura total. Aumentar então 1 pc para cada aro (= 7 pc para cada aro). A 38 cm de altura total, aumentar 1 pc para cada aro (= 8 pc para cada aro). A 46 cm de altura total, dividir a peça fazendo de maneira a ter 1 quadrado na parte de baixo da manga e continuar em idas e voltas. A 52 cm de altura total, arrematar. Montagem: Unir as mangas à parte de trás e à frente seguindo a fig. 1. Crochetar a seguinte orla a toda a volta do casaco: C 1: *1 pb, 1 pc * repetir de * a* C 2: *1 pb no pc da carreira precedente, 1 pc * repetir de * a * Crochetar cerca de 18 pb ao longo de um quadrado. Montagem: Repetir estas 2 carreiras à volta do decote e ao longo das orlas das frentes. Crochetar 2 correntes com cerca de 50 cm de comprimento e 2 fios. Costurar 1 cordão de cada lado das frentes, na parte de cima do 4.º quadrado a partir da parte de baixo. |
|||||||||||||
Explicações do diagrama |
|||||||||||||
|
|||||||||||||
 |
|||||||||||||
 |
|||||||||||||
 |
|||||||||||||
Terminou este projecto?Então, identifique as suas fotos com as tags #dropspattern #gardenweddingcardigan ou mostre-as na galeria #dropsfan. Precisa de ajuda para este modelo?Encontrará 8 turotiais em vídeo, uma rubrica Comentários/Perguntas e muito mais ao visitar a página do modelo em www.garnstudio.com © 1982-2026 DROPS Design A/S. Todos os direitos reservados. Este documento, incluuindo as suas su-secções, tem copyrights. Saia mais o que pode fazer com os nossos modelos no fim de cada uma das páginas do nosso site. |
|||||||||||||


Com mais de 40 anos no design de modelos de tricô e de croché, a DROPS Design oferece uma das mais vastas colecções demodelos gratuitos na Internet - traduzidos em 17 línguas. Neste dia de hoje, temos 324 catálogos e 12290 modelos - dos quais 12271 estão traduzidos em português.
Trabalhamos com muito empenho para lhe proporcionar o melhor que o tricô e o croché têm para oferecer, para lhe fornecer inspiração e conselhos bem como fios da mais elevada qualidade a preços incríveis! Gostaria de usar os nossos modelos para outros fins que não uso pessoal? Pode ler o que lhe é permitido fazer no Copyright texto que se encontra na parte de baixo de todos os nossos modelos. Bom tricô! Bom croché!
Deixe um comentário acerca do modelo DROPS 65-9
Gostaríamos muito de saber o que tem a dizer-nos acerca deste modelo!
Se deixar uma pergunta acerca do modelo, certifique-se de que escolhe a categoria adequada no formulário abaixo para acelerar o processo relativo à resposta. Os campos obrigatórios estão assinalados com um *.