
Categorias populares
Procura um fio?


Comentários / Perguntas (123)
Dalia escreveu:
When piece measures 50 cm where exactly do I insert my marker to mark for the beg of the arm hole ? and when do I start to leave stitches to shape my arm hole ? thanks!
12.07.2015 - 15:14DROPS Design respondeu:
Dear Dalia, you just insert 1 marker on each side (in the edge st) for armholes, there are no dec for armhole, continue as before, the markers will be used when sewing sleeves (ie sew sleeves between markers on body). Happy crocheting!
27.07.2015 - 10:09
![]() Peggy Foister escreveu:
Peggy Foister escreveu:
I am having difficulty with the increase on the sleeve. If I increase (1dc and 1ch) at each end X 9 increases I get more than 65 stitches total for size large. Help, What am I doing wrong?
12.05.2015 - 17:44DROPS Design respondeu:
Dear Mrs Foister, in size L you have 47 sts and inc 2 sts a total of 9 times, ie 47 + ( 2x9) = 65 sts. Happy crocheting!
13.05.2015 - 10:37
![]() Cinzia escreveu:
Cinzia escreveu:
Buongiorno purtroppo non capisco cosa si intende nella spiegazione del dietro: a cm 68 non lavorare piu le 27_29.....45m.a. Sembra che devo lavorare una maglia si ed una no e comunque mi sembra che tra scollo e spalle il conteggio non torna! Aiutooo!
05.03.2015 - 07:26DROPS Design respondeu:
Buongiorno Cinzia. Per la taglia S, quando il dietro misura 68 cm, non deve più lavorare le 27 m centrali. Sono le m dello scollo. Lavorerà solo sulle m della spalla: quindi deve lavorare 1 m.a in ognuna delle prime e delle ultime 29 m della riga. Buon lavoro!
05.03.2015 - 11:05
![]() Cinzia escreveu:
Cinzia escreveu:
Grazie come sempre per la celerità e precisione delle vostre risposte Buon lavoro Cinzia
01.03.2015 - 12:36
![]() Cinzia escreveu:
Cinzia escreveu:
Buongiorno,per realizzare questo modello ho scelto il cottone Muskat.Le indicazioni dicono di usare l'uncinetto n°4 che dovrebbe dare un campione di 17m x 10 righe =cm 10x cm 10. per ottenere questo campione ho fatto verie prove ed ottengo la misura descritta solo con l'uncinetto n° 3 Possibile? Grazie per l'aiuto Cinzia
28.02.2015 - 14:22DROPS Design respondeu:
Buongiorno Cinzia. Sì, è possibile che la tensione corretta si ottenga con un numero di uncinetto anche molto diverso da quello indicato. Si ricordi, nel corso del lavoro, di controllare spesso che le misure siano corrette, prendendo come riferimento un capo analogo della misura giusta. Buon lavoro!
28.02.2015 - 22:59
![]() Neucarol escreveu:
Neucarol escreveu:
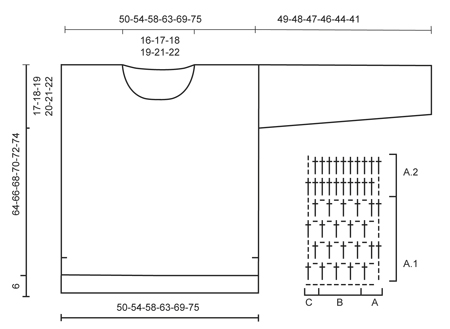
Where are the descriptions for the stitch groups named: A.1, A.2, A.1 B, and A.1.C. Thank you.
09.01.2015 - 16:31DROPS Design respondeu:
Dear Mrs Neucarol, you will find text to symbol above measurement chart - start row 1 from RS from the right towards the left and work WS rows from the left towards the right. Happy crocheting!
10.01.2015 - 17:23
![]() Cathy Richmond escreveu:
Cathy Richmond escreveu:
When I get to A.2 in the pattern the garment flares out is this normal or am I doing something wrong....I've started over with a light cotton and it is still doing this.
05.09.2014 - 02:40DROPS Design respondeu:
Dear Mrs Richmond, take care that you get the same tension in width in both patterns A.1 and A.2 (same number of sts in A.1 (including ch) = same number of st in A.2). You may try to crochet both patterns with a different hook. For any further individual asistance, you are welcome to contact your Store. Happy crocheting!
05.09.2014 - 09:32
![]() Cathy Richmond escreveu:
Cathy Richmond escreveu:
When I get to the A2 pattern the garment flares out because of the dc in every stitch is this normal or am I doing something wrong...changed to a lighter weight yarn......
05.09.2014 - 02:24
![]() Cathy Richmond escreveu:
Cathy Richmond escreveu:
I need to know what the numbers at the bottom of the chart are, if they are the number of dc I can't get the right amount for the XL and when we need to dc in every stitch at the top it is wider than the bottom and it ripples. Could really use some help on this,,,,thank you
28.08.2014 - 01:14DROPS Design respondeu:
Dear Mrs Richmond, the numbers at the bottom of measurement chart refer to measurements, ie for size XL, sweater is 63 cm in width. You should have same width in both diagrams, check that 1 ch in A.1 is as width as 1 dc so that you get the same width in A.1 and in A.2. Happy crocheting!
28.08.2014 - 14:20
![]() Cathy Richmond escreveu:
Cathy Richmond escreveu:
I need to know what the numbers at the bottom of the chart are, if they are the number of dc I can't get the right amount for the XL and when we need to dc in every stitch at the top it is wider than the bottom and it ripples. Could really use some help on this,,,,thank you
27.08.2014 - 22:11
|
|||||||
Donna#donnasweater |
|||||||
 |
 |
||||||
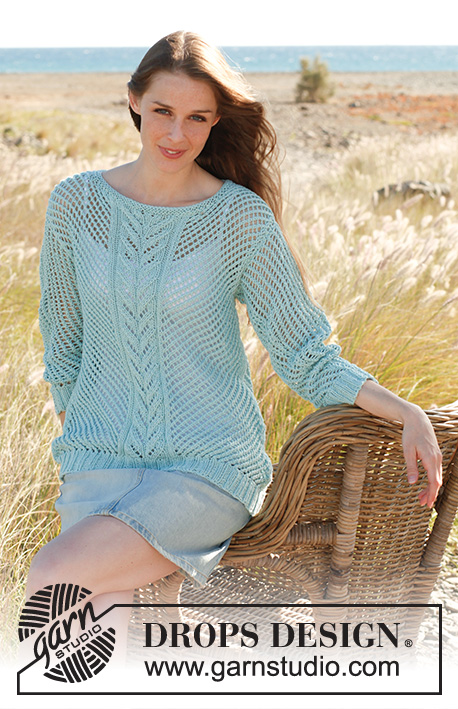
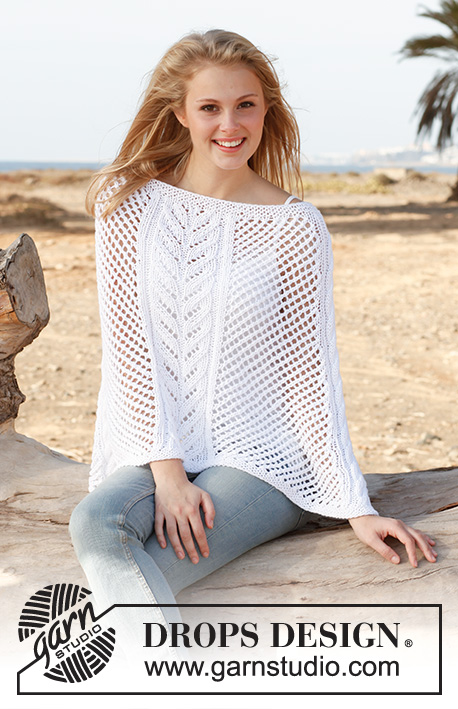
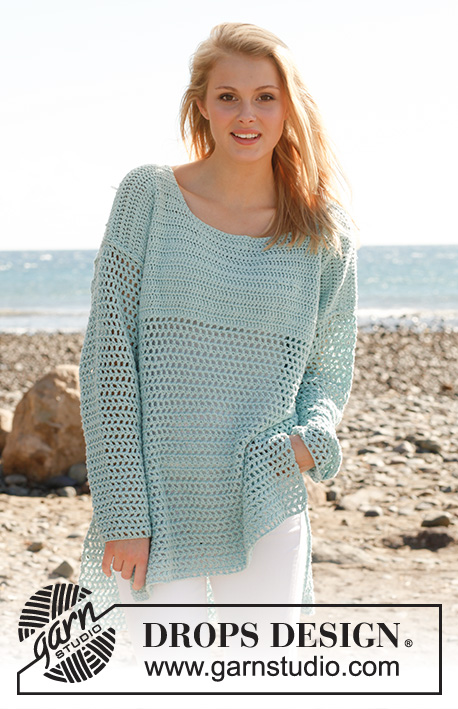
Pulôver DROPS em croché, em ”Cotton Light”. Do S ao XXXL.
DROPS 145-19 |
|||||||
|
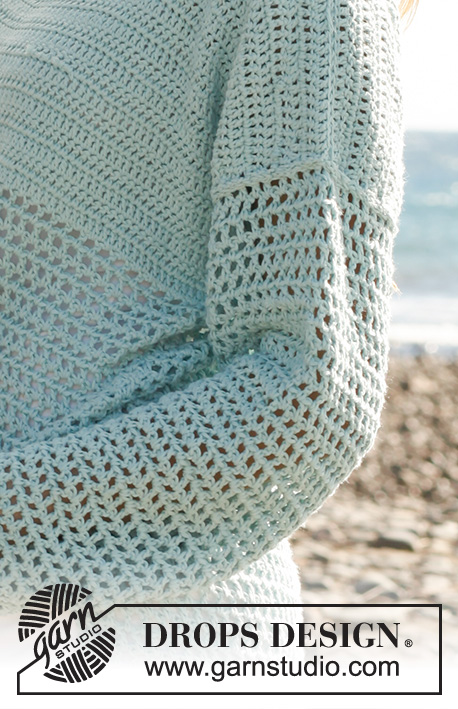
---------------------------------------------------------- NOTA: Existem termos diferentes de tricô e croché em português de Portugal e do Brasil. TRICÔ : Malha = Ponto Canelado = Barra Ponto Jarreteira = Cordões de Tricô Ponto Liga = Ponto Tricô CROCHÉ : mpa – meio ponto alto pa – ponto alto pad – ponto alto duplo pat – ponto alto triplo pb – ponto baixo pbx – ponto baixíssimo pc – ponto corrente ---------------------------------------------------------- PONTO FANTASIA : Ver diagramas A.1 e A.2. DIMINUIÇÕES: Virar quando restar 1 pa = 1 pa diminuído. AUMENTOS: Para aumentar, crochetar 1 pa + 1 pc a mais no 1.º/último pa de cada lado da peça. Crochetar os aumentos progressivamente no ponto fantasia A.1. ---------------------------------------------------------- COSTAS : Crocheta-se em idas e voltas. As costas medem 6 cm a mais em altura do que a frente. Montar FROUXAMENTE uma corrente de 88-94-102-110-120-130 pc (é importante que esta corrente seja frouxa para evitar um rebordo apertado) com a agulha de croché 4 mm e o fio Cotton Light. Virar e crochetar 1 pa no 6.º pc a partir da agulha de croché (A.1 A está agora feito – ver diagrama). Crochetar A.1 B acima dos 80-86-94-102-112-122 pc seguintes, e terminar com A.1 C nos 2 últimos pc. Continuar então com A.1. A 47-48-49-50-51-52 cm de altura total, crochetar da seguinte maneira : A.2 A, repetir A.2 B até restarem 2 pa/pc, terminar com A.2 C = 85-91-99-107-117-127 pa. Continuar no ponto fantasia A.2 até ao fim. A 53-54-55-56-57-58 cm de altura total, colocar 1 marcador de cada lado da peça (referência para o princípio das cavas). A 68-70-72-74-76-78 cm de altura total, deixar de crochetar acima dos 27-29-31-33-35-37 pa centrais = restam 29-31-34-37-41-45 pa para cada ombro. Terminar então cada ombro separadamente e continuar no ponto fantasia A.2, cortar e entretecer o fio a 70-72-74-76-78-80 cm de altura total. FRENTE : Começar e crochetar como para as costas até a peça medir 41-42-43-44-45-46 cm de altura total - NOTA: as costas medem 6 cm a mais do que a frente, e, por isso, as medidas serem diferentes. Continuar então da seguinte maneira: A.2 A, repetir A.2 B até restarem 2 pa/pc, terminar com A.2 C = 85-91-99-107-117-127 pa. Continuar no ponto fantasia A.2 até ao fim. A 47-48-49-50-51-52 cm de altura total, colocar 1 marcador de cada lado da peça (referências para o princípio das cavas). A 56-58-60-62-64-66 cm de altura total, deixar de crochetar acima dos 23-25-27-29-31-33 pa centrais e terminar então cada ombro separadamente e, ao mesmo tempo, diminuir no lado do decote 2 vezes 1 pa em todas as carreiras – ver DIMINUIÇÕES = restam 29-31-34-37-41-45 pa para cada ombro. Continuar no ponto fantasia A.2, cortar e entretecer o fio a 64-66-68-70-72-74 cm de altura total. MANGAS : Crochetam-se em idas e voltas. Montar FROUXAMENTE uma corrente de 48-48-50-52-54-56 pc (é importante que a corrente seja frouxa para evitar que o rebordo fique demasiado apertado) com a agulha de croché 4 mm e o fio Cotton Light. Virar e crochetar 1 pa no 6.º pc a partir da agulha de croché (A.1 A está agora feito), crochetar A.1 B acima dos 40-40-42-44-46-48 pc seguintes, e terminar com A.1 C nos 2 últimos pc = 45-45-47-49-51-53 pa/pc. Continuar no ponto fantasia A.1. A 8 cm de altura total, aumentar 1 m/p de cada lado da peça – ver AUMENTOS ! Repetir estes aumentos mais 5-7-8-9-9-10 vezes (6-8-9-10-10-11 aumentos ao todo) a cada 7-5-4½-3½-3½-3 cm = 57-61-65-69-71-75 pa/pc. Cortar e entretecer o fio a 49-48-47-46-44-41 cm de altura total (mais curto nos tamanhos maiores porque os ombros são mais largos). MONTAGEM : Fazer a costura dos ombros. Costurar as mangas – a partir do ombro até aos marcadores da frente e das costas. Fazer a costura sob as mangas e a dos lados, parar a 26 cm da parte de baixo das costas e a 20 cm da parte de baixo da frente = fendas laterais. |
|||||||
Explicações do diagrama |
|||||||
|
|||||||
 |
|||||||
Terminou este projecto?Então, identifique as suas fotos com as tags #dropspattern #donnasweater ou mostre-as na galeria #dropsfan. Precisa de ajuda para este modelo?Encontrará 5 turotiais em vídeo, uma rubrica Comentários/Perguntas e muito mais ao visitar a página do modelo em www.garnstudio.com © 1982-2026 DROPS Design A/S. Todos os direitos reservados. Este documento, incluuindo as suas su-secções, tem copyrights. Saia mais o que pode fazer com os nossos modelos no fim de cada uma das páginas do nosso site. |
|||||||


Com mais de 40 anos no design de modelos de tricô e de croché, a DROPS Design oferece uma das mais vastas colecções demodelos gratuitos na Internet - traduzidos em 17 línguas. Neste dia de hoje, temos 324 catálogos e 12290 modelos - dos quais 12271 estão traduzidos em português.
Trabalhamos com muito empenho para lhe proporcionar o melhor que o tricô e o croché têm para oferecer, para lhe fornecer inspiração e conselhos bem como fios da mais elevada qualidade a preços incríveis! Gostaria de usar os nossos modelos para outros fins que não uso pessoal? Pode ler o que lhe é permitido fazer no Copyright texto que se encontra na parte de baixo de todos os nossos modelos. Bom tricô! Bom croché!
Deixe um comentário acerca do modelo DROPS 145-19
Gostaríamos muito de saber o que tem a dizer-nos acerca deste modelo!
Se deixar uma pergunta acerca do modelo, certifique-se de que escolhe a categoria adequada no formulário abaixo para acelerar o processo relativo à resposta. Os campos obrigatórios estão assinalados com um *.