
Categorias populares
Procura um fio?


Comentários / Perguntas (39)
![]() Wendy escreveu:
Wendy escreveu:
Is there a complete video somewhere for this fish Tale sweater knitting pattern
17.11.2025 - 22:09
![]() Yvonne escreveu:
Yvonne escreveu:
” när arb mäter 21,5-24,5-28,5 (31,5-34,5-37,5) cm stickas axel så här: Sätt 4 m mitt under ärmen på en tråd. Sätt sedan 8 m i varje sida på tråden på vartannat v 2 ggr. Sedan sätts alla m tillbaka på st och sticka M.1. Maska av efter M.1. Arb mäter ca 26-30-34 (37-40-43) cm.” Jag har stickat ärmen runt på strumpstickor/kort rundsticka. Är det meningen att slutet av ärmen enl ovan stickas fram och tillbaka och inte runt?
11.09.2025 - 19:26DROPS Design respondeu:
Ja, ärmkullen ska stickas fram och tillbaka. Du kan sticka fram och tillbaka på rundstickan.
23.09.2025 - 19:33
![]() Lone Essom escreveu:
Lone Essom escreveu:
Jeg forstår ikke jeres beskrivelse af mønster. Hvad mener I med mønster 1, 8 cm af mønster 2??? hvilket skal man starte med og hvor mange cm?
06.05.2025 - 12:39DROPS Design respondeu:
Hei Lona. Usikker på hvor du ser 1,8 cm. I oppskriften står det at du skal strikke 6-7-7,5 (7,5-8-8,5) cm av mønster M.2. På Ryg- og forstykke i f.eks str. 3/4 år skal du etter vrangborden bytte til rundpinne 5 og strikke glattstrikk til arbeidet måler 17 cm, så skal det strikkes Mønster ryg- og forstk. Mønster ryg- og forstk er forklart øverst i oppskriften = Strikk M.1 (6 omganger), så skal du strikke etter M.2 i 6 cm, strikk M.1 (6 omganger), M.2 i 6 cm, så enda en gang: M.1 (6 omganger), M.2 i 6 cm og avslutt Ryg- og forstykke med M. 1 før det felles av. mvh DROPS Design
12.05.2025 - 09:23
![]() Lulu Kamp escreveu:
Lulu Kamp escreveu:
Kan denne opskrift ikke fås til voksne mænd ?
18.04.2025 - 15:14
![]() Cécile escreveu:
Cécile escreveu:
Je ne comprends pas comment procéder pour le haut de la manche. ..comment utiliser le porte-maille? (2mailles de chaque côté, tricoter aller-retour, puis 8 mailles)
10.05.2024 - 15:36DROPS Design respondeu:
Bonjour Cécile, quand vous avez mis en attente 4 mailles sous la manche (= 2 mailles de chaque côté du milieu sous la manche), continuez en allers et retours et mettez en attente les 8 premières mailles au début des 4 rangs suivants (= 2 x 8 mailles + 1 x 2 mailles en attente de chaque côté). Bon tricot!
10.05.2024 - 16:38
![]() Ida escreveu:
Ida escreveu:
I am having trouble with these instructions….shape the sleeve cap as follows: put 2 sts on each side of the marker on a holder. Knit the sleeve cap back and forth on the needle placing sts at each edge on a holder every other row as follows: 8 sts 2 times. Then put all sts back on needle and knit Pattern 1.
03.04.2024 - 20:42DROPS Design respondeu:
Dear Ida, When you knit the upper part of the sleeve, you knit back and forth, and while doing that, at the beginning of each row, you put the number of stitches described on a stitch-holder (after you knitted them). Then you put all the stitches back to the circular needle, and continue with the pattern. I hope this helps. Happy Knitting!
03.04.2024 - 23:20
![]() Linda Mccoy escreveu:
Linda Mccoy escreveu:
When sewing in the Sleeve s is it done from wrong side or right side?
16.01.2023 - 21:37DROPS Design respondeu:
Dear Mrs Mccoy, sleeves are generally sewn from right side - see this video. Happy assembly!
17.01.2023 - 10:12
![]() Linda Mccoy escreveu:
Linda Mccoy escreveu:
Hello and Happy New year. This has got to be the worst pattern to follow. I have been reading patterns 50 yrs. I have never had a pattern that has stumped me like this one. I realise that this has been translated from another language. However maybe someone should rewrite it so people can understand what the pattern is saying. Thank you
04.01.2023 - 19:59
![]() Lisa Hertel escreveu:
Lisa Hertel escreveu:
Does this cap take place under the arm? i cannot figure this out. I have knitted this portion of the pattern 3 times. the graphic does not show a cap for shoulder it looks straight across. again may i ask what is the purpose of this?
19.12.2022 - 15:43DROPS Design respondeu:
Dear Mrs Hertel, this portion is the sleeve cap, is you will work short rows (leaving first 2 sts 1 time then 8 sts 2 times unworked on each side of mid under sleeve, ie the first 2+8+8 sts from mid under sleeve and the last 2-8-8 sts towards mid under sleeve (the middle 36 sts under sleeve the sleeve are on a thread, 16 sts on each side of mid under sleeve) - chart is just standard and just don't show this sleeve cap. Hope it can help. Happy knitting!
19.12.2022 - 15:59
![]() Lisa Hertel escreveu:
Lisa Hertel escreveu:
I followed the directions given to Mrs. Frew. The pattern was askew and the work was done under the arm. If it is a cap, shouldn't it be on the top near the shoulder? I am very confused
18.12.2022 - 19:16DROPS Design respondeu:
Dear Mrs Hertel, please let us know if the previous answer could help you or if you need more information.
19.12.2022 - 09:40
|
|||||||
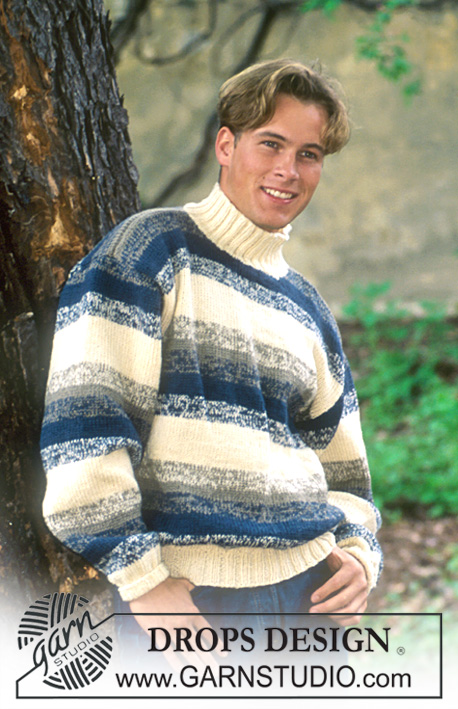
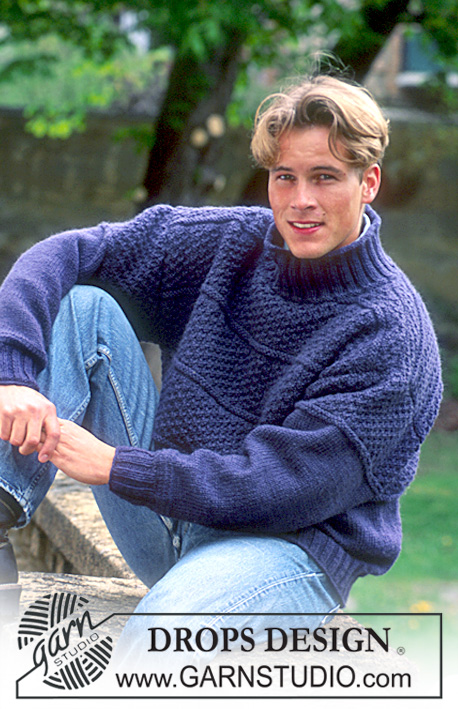
Fish Tales |
|||||||
|
|
|||||||
Pulôver em Alaska
DROPS Children 7-5 |
|||||||
|
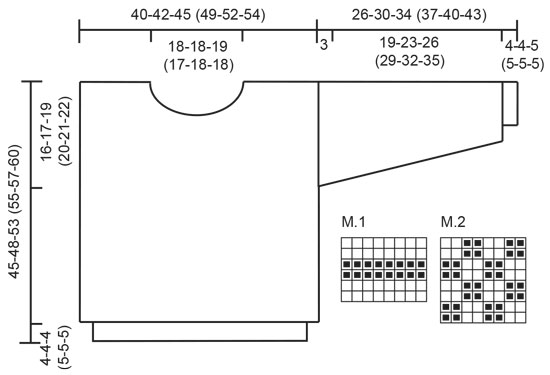
---------------------------------------------------------- NOTA: Existem termos diferentes de tricô e croché em português de Portugal e do Brasil. Malha = Ponto Canelado = Barra Ponto Jarreteira = Cordões de Tricô Ponto Liga = Ponto Tricô Croché: mpa – meio ponto alto pa – ponto alto pad – ponto alto duplo pat – ponto alto triplo pb – ponto baixo pbx – ponto baixíssimo pc – ponto corrente ---------------------------------------------------------- Amostra: 17 ms/pts e 22 carreiras nas agulhas 5 mm em ponto meia = 10 x 10 cm Ponto fantasia: Ver diagramas. O diagrama mostra uma repetição do ponto fantasia. O ponto fantasia é mostrado pelo direito da peça. Ponto fantasia 1: * 2 carreiras ponto meia, 2 carreiras ponto liga/tricô, 2 carreiras ponto meia * Ponto fantasia 2: Carreira 1: * 2 ms/pts meia, 2 ms/pts liga/tricô.* Repetir de * a * Carreira 2: * 2 ms/pts liga/tricô, 2 ms/pts meia.* Carreira 3: * 2 ms/pts liga/tricô, 2 ms/pts meia.* Carreira 4: * 2 ms/pts meia., 2 ms/pts liga/tricô * Repetir estes 4 carreiras. Canelado/barra: *2 ms/pts meia, 2 ms/pts liga/tricô*. Repetir de * a *. Corpo: Montar 136-144-152 (168-176-184) ms/pts com a agulha circular 3,5 mm e a cor azul. Unir, certificando-se de que não torce as ms/pts na primeira carreira. Colocar um marcador na junção, tricotar 2 carreiras em ponto meia e, depois, tricotar em canelado/barra até a peça medir 4-4-4 (5-5-5) cm. Mudar para a agulha circular 5 mm e tricotar em ponto meia. A 17-17-20.5 (22.5-23-24.5) cm de altura total, tricotar os diagramas da seguinte maneira: Diagrama 1 uma vez (6 carreiras). Tricotar 6-7-7.5 (7.5-8-8.5) cm no diagrama 2. Tricotar o diagrama 1 uma vez (6 carreiras). Tricotar 6-7-7.5 (7.5-8-8.5) cm no diagrama 2. Tricotar o diagrama 1 uma vez (6 carreiras). Tricotar 6-7-7.5 (7.5-8-8.5) cm no diagrama 2. Tricotar o diagrama 1 uma vez (6 carreiras). Ao mesmo tempo, a 29-31-34 (35-36-38) cm de altura, dividir a peça para a frente e as costas e tricotar cada parte separadamente. Frente: 68-72-76 (84-88-92) ms/pts. Continuar a tricotar os diagramas como antes.A 41-44-49 (50-52-54) cm de altura, arrematar as 24-24-26 (22-24-24) ms/pts centrais para o decote. Arrematar de cada lado do decote a cada 2 carreiras: 2 ms/pts 1 vez, 1 m/p 1 vez. Arrematar depois de ter completado do diagrama. A peça mede cerca de 45-48-53 (55-57-60) cm de altura. Costas: 68-72-76 (84-88-92) ms/pts. Continuar a tricotar os diagramas como se fez para a frente. A 43-46-51 (53-55-58) cm de altura, arrematar as 26-26-28 (24-26-26) ms/pts centrais para o decote. Arrematar 2 ms/pts de cada lado do decote na carreira seguinte. Arrematar depois de ter tricotado o diagrama. A peça mede cerca de 45-48-53 (55-57-60) cm de altura. Mangas: Montar 30-32-32 (34-34-36) ms/pts com a cor azul nas agulhas de pontas duplas 3,5 mm. Unir, certificando-se em não torcer as ms/pts na primeira carreira. Colocar um marcador na junção e tricotar 2 carreiras em ponto meia e, depois, em canelado/barra até a peça medir 4-4-5 (5-5-5) cm. Mudar para as agulhas de pontas duplas 5 mm e tricotar em ponto meia, distribuindo 4-6-8 (6-8-6) aumentos na primeira carreira = 34-38-40 (40-42-42) ms/pts. Ao mesmo tempo, depois do canelado/barra, aumentar 1 m/p de cada lado da peça 10-10-12 (14-15-16) vezes: Tamanhos 3/4 anos: alternadamente a cada 3 e 4 carreiras. Tamanhos 5/6 + 7/8 + 9/10 + 11/12 + 13/14 anos: alternadamente a cada 4 e 5 carreiras = 54-58-64 (68-72-74) ms/pts. A 15-18-21.5 (24.5-27-29.5) cm de altura, tricotar o diagrama 1 uma vez e depois de 6-7-7.5 (7.5-8-8.5) cm no diagrama 2. A 21.5-24.5-28.5 (31.5-34.5-37.5) cm de altura, formar a parte de cima da manga da seguinte maneira: colocar 2 ms/pts de cada lado do marcador num alfinete de ms/pts. Tricotar a parte de cima da manga em idas e voltas na agulha colocando as ms/pts de cada lado da peçano alfinete de porte-ms/pts a cada 2 carreiras da seguinte maneira: 8 ms/pts 2 vezes. Então, retomar todas as ms/pts do alfinete de ms/pts para a agulha e tricotar o diagrama 1. Arrematar depois do diagrama 1. A peça mede cerca de 26-30-34 (37-40-43) cm de altura. Montagem: Fazer as costuras do ombro. Levantar cerca de 72-84 ms/pts com a cor azul à volta do decote com a agulha circular 3,5 mm, tricotar 2 carreiras liga/tricô e, depois,tricotar 4-4-5 (5-6-6) cm em canelado/barra e, depois, 2 carreiras em ponto meia. Arrematar. Costurar as mangas. |
|||||||
Explicações do diagrama |
|||||||
|
|||||||
 |
|||||||
Terminou este projecto?Então, identifique as suas fotos com as tags #dropspattern ou mostre-as na galeria #dropsfan. Precisa de ajuda para este modelo?Encontrará 19 turotiais em vídeo, uma rubrica Comentários/Perguntas e muito mais ao visitar a página do modelo em www.garnstudio.com © 1982-2026 DROPS Design A/S. Todos os direitos reservados. Este documento, incluuindo as suas su-secções, tem copyrights. Saia mais o que pode fazer com os nossos modelos no fim de cada uma das páginas do nosso site. |
|||||||


Com mais de 40 anos no design de modelos de tricô e de croché, a DROPS Design oferece uma das mais vastas colecções demodelos gratuitos na Internet - traduzidos em 17 línguas. Neste dia de hoje, temos 324 catálogos e 12290 modelos - dos quais 12271 estão traduzidos em português.
Trabalhamos com muito empenho para lhe proporcionar o melhor que o tricô e o croché têm para oferecer, para lhe fornecer inspiração e conselhos bem como fios da mais elevada qualidade a preços incríveis! Gostaria de usar os nossos modelos para outros fins que não uso pessoal? Pode ler o que lhe é permitido fazer no Copyright texto que se encontra na parte de baixo de todos os nossos modelos. Bom tricô! Bom croché!
Deixe um comentário acerca do modelo DROPS Children 7-5
Gostaríamos muito de saber o que tem a dizer-nos acerca deste modelo!
Se deixar uma pergunta acerca do modelo, certifique-se de que escolhe a categoria adequada no formulário abaixo para acelerar o processo relativo à resposta. Os campos obrigatórios estão assinalados com um *.