
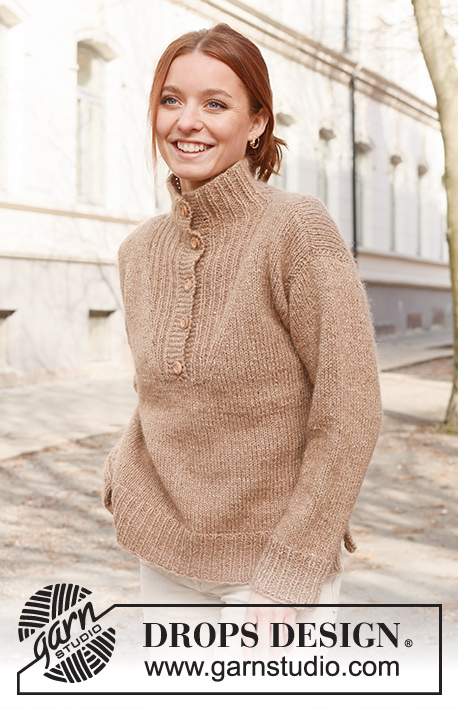
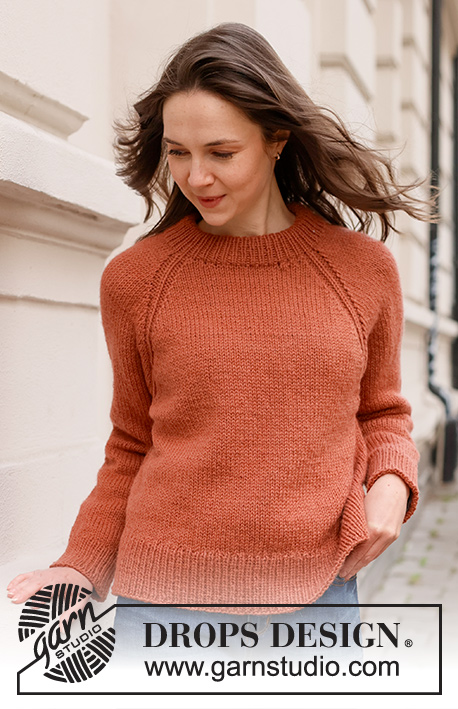
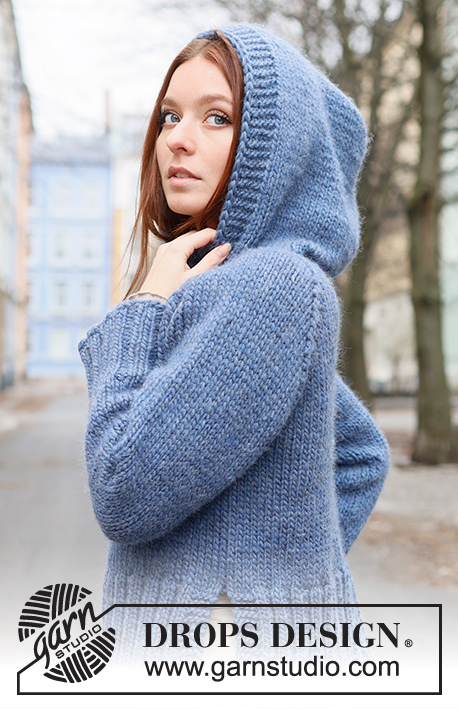
Categorias populares
Procura um fio?


Comentários / Perguntas (189)
![]() Hanneke Spaans escreveu:
Hanneke Spaans escreveu:
Goedendag , voor de mouwen staat naalden zonder knop maar kan ik ook de rondbreinaalden nr 8 en nr 9 gebruiken Groetjes Hanneke
10.08.2024 - 11:38DROPS Design respondeu:
Dag Hanneke,
Jazeker, in plaats daarvan kun je ook een rondbreinaald gebruiken.
12.08.2024 - 16:35
![]() Petra Fröhler escreveu:
Petra Fröhler escreveu:
Hallo, Ich stricke den Rain Chain Pullover und habe eine Frage zum Ärmel. Ab wo werden die 12 cm fürs zunehmen gerechnet. Erst ab dem Muster A1 oder schon nach dem Bündchen? Bitte erklären Sie mir folgendes genauer: „Dann glatt rechts weiterstricken - GLEICHZEITIG bei einer Länge von 12 cm je 1 Masche beidseitig….“ Vielen Dank schon im Voraus Schöne Grüße Petra
09.08.2024 - 15:24DROPS Design respondeu:
Liebe Petra, messen Sie diese 12 cm ab der Anschlagskante, dh mit dem Bündchen. Viel Spaß beim Stricken!
12.08.2024 - 07:40
![]() Wilma Sleyster escreveu:
Wilma Sleyster escreveu:
Deze opmerking was bedoeld voor patroon 237-8
04.08.2024 - 21:17
![]() Wilma Sleyster escreveu:
Wilma Sleyster escreveu:
Fantastisch patroon. Hele mooie combinatie van garens. Een plezier om te breien !!
04.08.2024 - 21:08
![]() Hanneke Spaans escreveu:
Hanneke Spaans escreveu:
Ik begrijp de zin niet Brei A.2 ( en het patroon begint en eindigt met 1 rechte steek in Patentsteek aan de binnenkant van 1 kantsteek in ribbelsteek, aan de goede kant gezien). Ga verder met A.2 in de hoogte.
14.07.2024 - 20:37DROPS Design respondeu:
Dag Hanneke,
Naast de kantsteek heb je 1 rechte steek. Die rechte steek maakt onderdeel uit van de patentsteek. De kantsteken brei je in ribbelsteken.
16.07.2024 - 18:20
![]() Heather escreveu:
Heather escreveu:
Totally confused with your A1 diagram . Do you mean knit from Right to left of diagram or from the right side of the jumper ??
04.07.2024 - 01:24DROPS Design respondeu:
Dear Heather, first row in A.1 is worked bottom up starting from RS = knit 1 row from RS, knit 1 row from WS, knit 1 row from RS, knit 1 row from WS (2 ridges), knit 1 row from RS and purl 1 row from WS = you have worked the 6 rows A.1 (= 2 ridges + 2 rows stocking stitch). Hapy knitting!
04.07.2024 - 09:15
![]() Mitch escreveu:
Mitch escreveu:
Totally confused with the A1 diagram . Do you mean knit from R side of the diagram to left or from the right side of the jumper ??
04.07.2024 - 01:20
![]() Louchart escreveu:
Louchart escreveu:
Il me semble qu'il y a une erreur dans les côtes 1/1 en bas du pull.D’après le dessin, il faut des côtes de 18cm pour le dos et 10cm pour le devant.Or il est écrit 10cm pour le dos. Il doit y avoir 1 erreur dans les explications. Mais merci pour tous ces modèles. Cordialement Mme Louchart
24.06.2024 - 19:21DROPS Design respondeu:
Bonjour Mme Louchart, le schéma est juste, les côtes mesurent 10 cm pour le devant et le dos mais le dos est 8 cm plus long que le devant, vous faites la couture des côtés à partir des emmanchures jusqu'aux côtes du devant soit 10 cm de côtes devant + les 8 cm du bas du dos. Bon tricot!
25.06.2024 - 09:22
![]() Karen Laila escreveu:
Karen Laila escreveu:
Drops 236-9. Model wi-054. Str. M Hvor mange g i alt med Drops wish E Hvor mange g i alt med Drops Air C Forstår ikke 1 tråd eller 2 tråde Om det er ca. 10 nøgler eller 20 nøgler Vh karen
27.05.2024 - 16:37DROPS Design respondeu:
Hej Karen, uanset om du strikker i DROPS Wish eller DROPS Air skal du bruge 10 nøgler i str M. Men hvis du strikker i DROPS Air, strikker du med 2 tråde samtidigt for at få den rigtige tykkelse :)
28.05.2024 - 10:25
![]() Claudia escreveu:
Claudia escreveu:
Hallo Können Sie mir noch mal A1 Diagramm erklären.
09.05.2024 - 22:50DROPS Design respondeu:
Liebe Claudia, bei A.1 stricken Sie die 1. Reihe (Hinreihe) rechts, die 2. Reihe (Rückreihe) rechts, die 3. Reihe rechts, die 4. Reihe rechts, die 5. Reihe rechts un die 6. Reihe links. Viel Spaß beim Stricken!
10.05.2024 - 08:58
|
||||||||||||||||
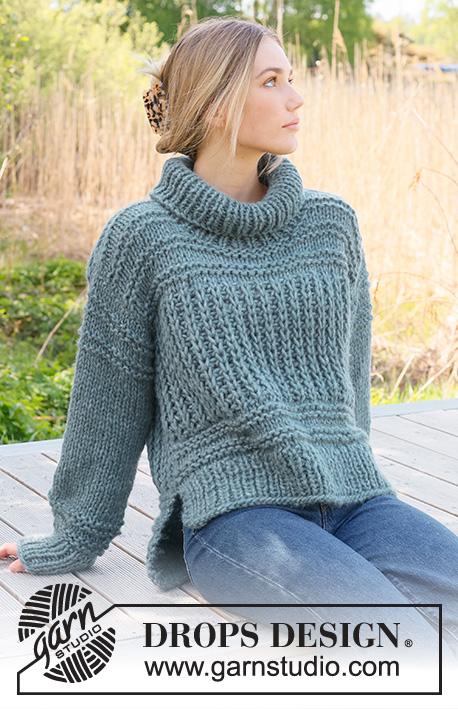
Rain Chain#rainchainsweater |
||||||||||||||||
 |
 |
|||||||||||||||
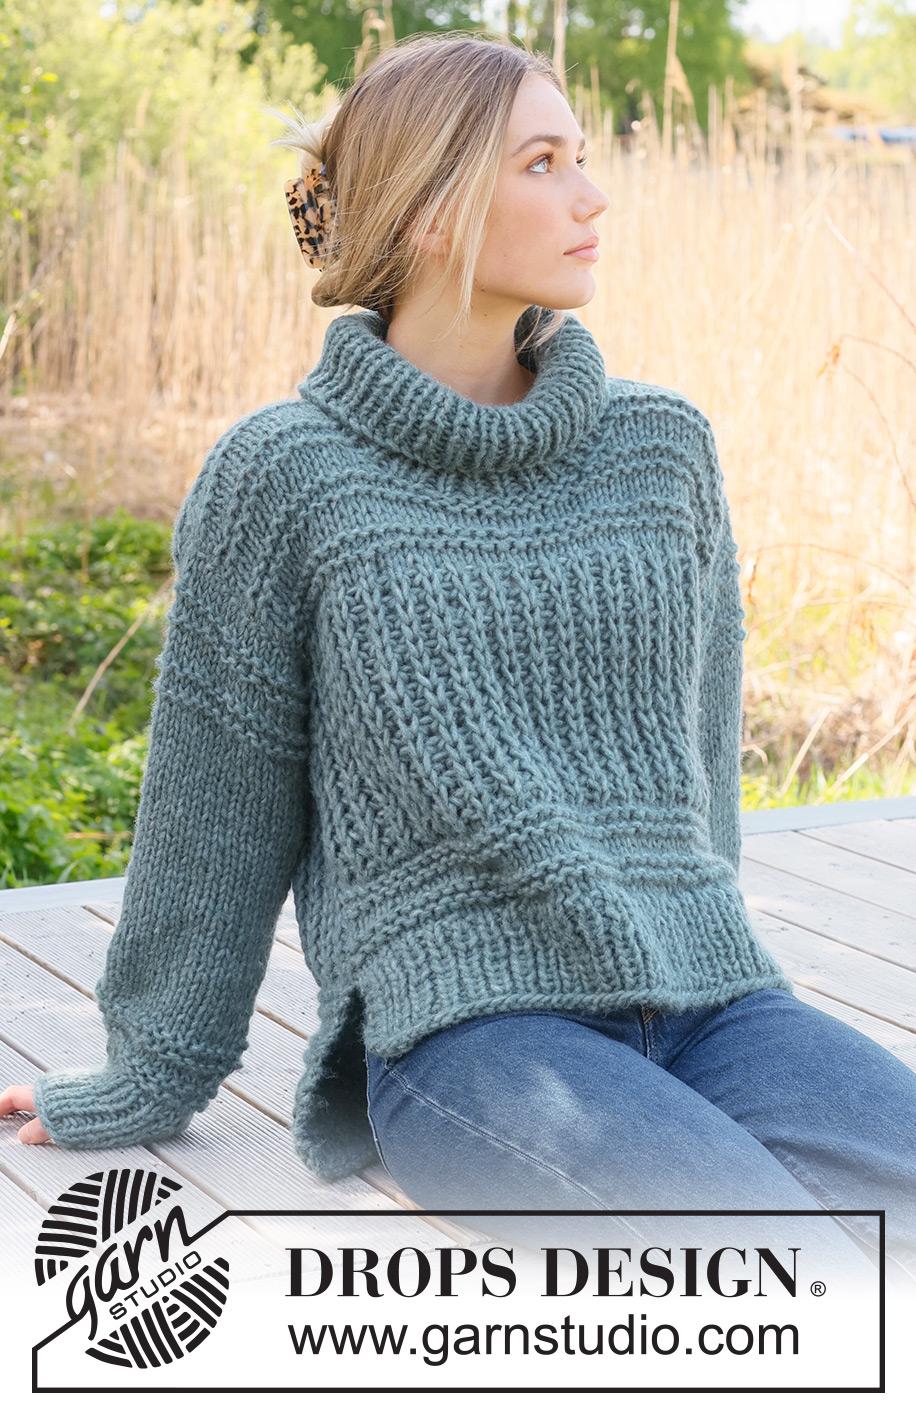
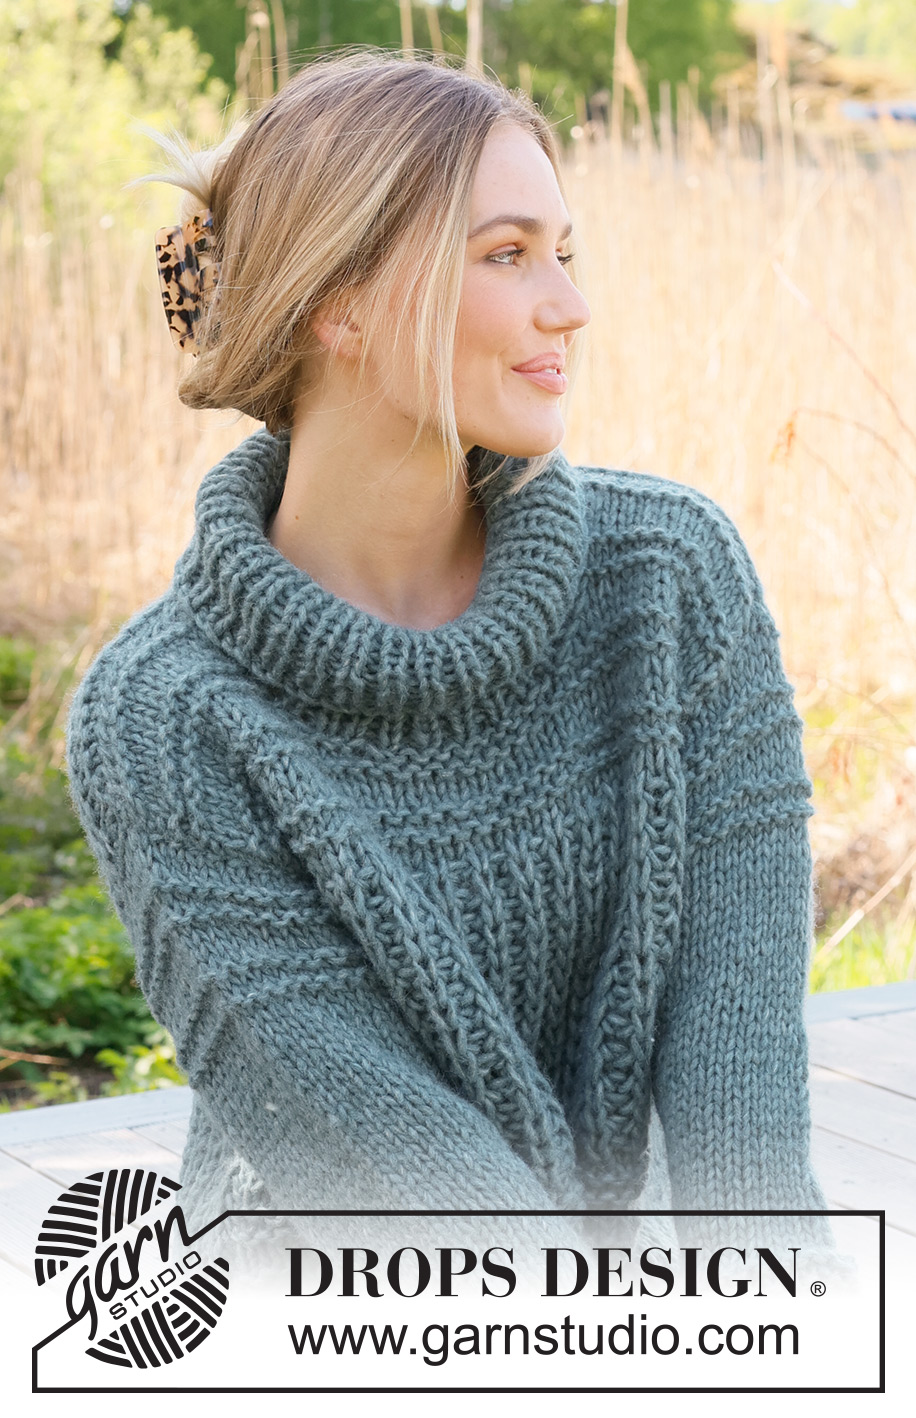
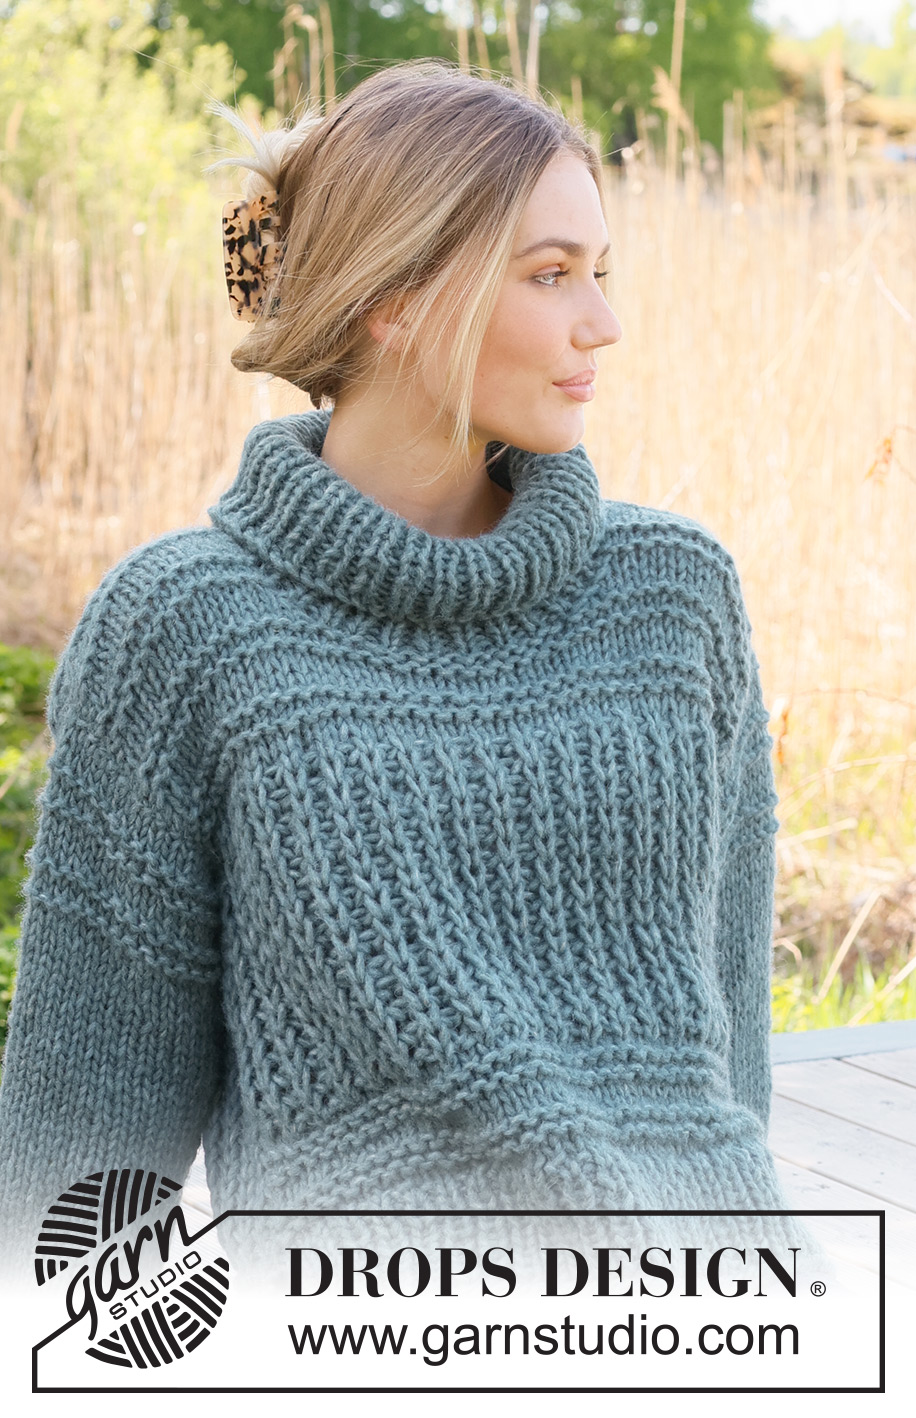
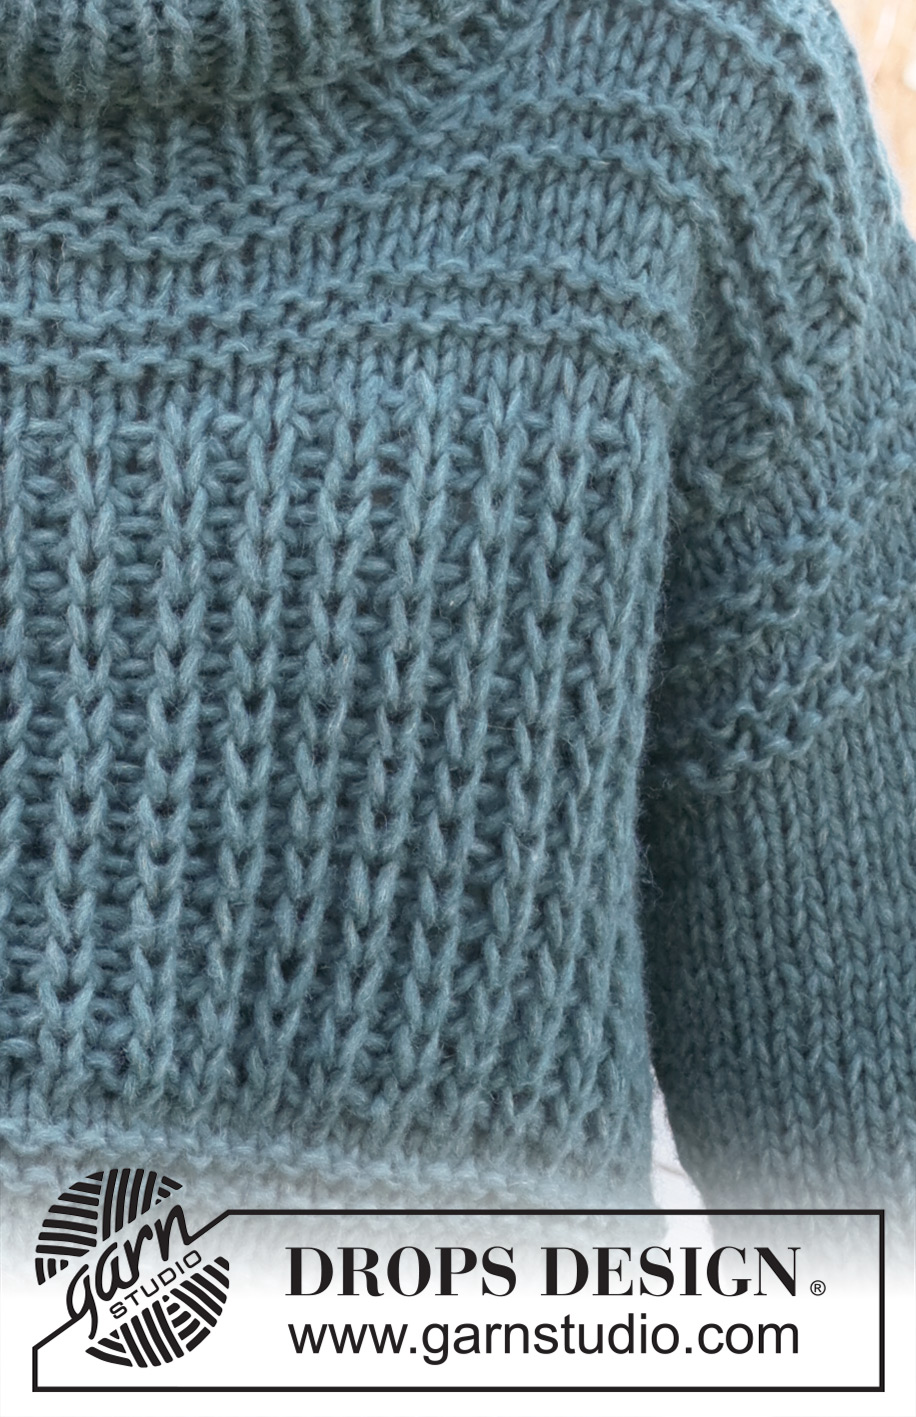
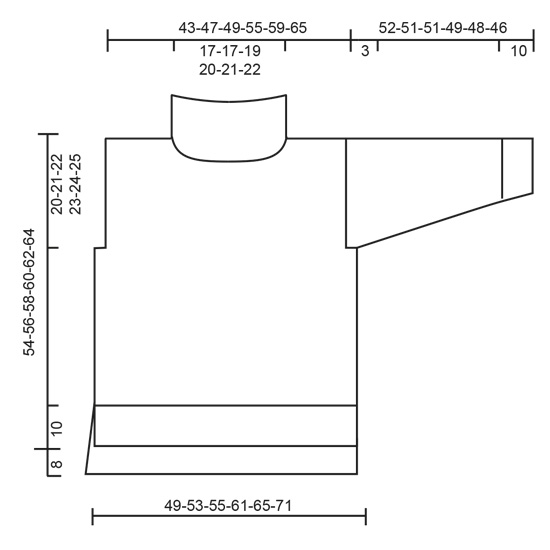
Pulôver tricotado de baixo para cima em canelado inglês, ponto jarreteira fantasia e fendas nos lados, com 1 fio DROPS Wish ou 2 fios DROPS Air. Do S ao XXXL.
DROPS 236-9 |
||||||||||||||||
|
------------------------------------------------------- TÉCNICAS USADAS: ------------------------------------------------------- PONTO FANTASIA: Ver diagramas A.1 e A.2. Os diagramas mostram todas as carreiras, vistas pelo direito. PONTO JARRETEIRA (em idas e voltas): Tricotar todas as carreiras em meia. 1 barra jarreteira = 2 carreiras meia. AUMENTOS (mangas): Tricotar até restar 1 malha antes o fio marcador, 1 laçada, tricotar 2 malhas meia (o fio marcador está entre estas malhas), 1 laçada. Na carreira seguinte, tricotar as laçadas torcidas em meia para evitar buracos. Tricotar então os aumentos em ponto meia. ------------------------------------------------------- PULÔVER – SUMÁRIO: Tricota-se em diferentes partes, em idas e voltas e de baixo para cima, com costuras. As mangas tricotam-se em redondo com as agulhas de pontas duplas/a pequena agulha circular de cima para baixo. As costas são 8 cm mais compridas do que a frente. COSTAS: Montar 59-63-67-73-79-85 malhas com a agulha circular 8 mm e 1 fio DROPS Wish ou 2 fios DROPS Air. Tricotar 1 carreira liga pelo avesso depois continuar em canelado da seguinte maneira, visto pelo direito: 2 malhas de orla em ponto jarreteira – ver acima -, *1 malha meia, 1 malha liga*, tricotar de * a * até restarem 3 malhas, tricotar 1 malha meia e 2 malhas de orla em ponto jarreteira. Continuar em canelado desta maneira durante 10 cm. Tricotar 1 carreira liga pelo avesso diminuindo 10-10-12-12-14-14 malhas a intervalos regulares = 49-53-55-61-65-71 malhas. Continuar com a agulha circular 9 mm. MANTER A MESMA TENSÃO DA INDICADA PARA A AMOSTRA! Tricotar 2-2-2-3-3-3 vezes A.1 em altura. Tricotar então 1 carreira pelo direito da seguinte maneira: 1 malha ourela em ponto jarreteira, *1 malha meia, 1 malha liga*, tricotar de * a * até restarem 2 malhas, tricotar 1 malha meia e 1 malha ourela em ponto jarreteira. Tricotar A.2 (a primeira carreira tricota-se pelo avesso - ler o diagrama da esquerda para a direita, começa-se e termina-se com 1 malha meia do canelado inglês, a 1 malha ourela do rebordo em ponto jarreteira, visto pelo direito). Continuar A.2. Quando a peça medir 42-43-44-45-46-47 cm, arrematar para as cavas 3 malhas no princípio das 2 carreiras seguintes = 43-47-49-55-59-65 malhas. Continuar A.2. Quando a peça medir 44-46-48-50-52-54 cm, tricotar a carreira seguinte em liga pelo avesso. Tricotar então A.1. Quando a peça medir 60-62-64-66-68-70 cm, arrematar as 13-13-15-15-17-17 malhas centrais para o decote e terminar cada ombro separadamente. Arrematar 1 malha na carreira seguinte a partir do decote = 14-16-16-19-20-23 malhas para o ombro. Arrematar quando a peça medir 62-64-66-68-70-72 cm. Tricotar o outro ombro da mesma maneira. FRENTE: Montar e tricotar como se fez para as costas até este que a frente medir 34-35-36-37-38-39 cm. Arrematar para as cavas 3 malhas no princípio das 2 carreiras seguintes = 43-47-49-55-59-65 malhas. Continuar A.2. Quando a peça medir 36-38-40-42-44-46 cm, tricotar a carreira seguinte em liga pelo avesso. Tricotar então A.1. Quando a peça medir 47-49-51-53-55-57 cm, formar a gola da seguinte maneira: Colocar as 9-9-11-11-13-13 malhas centrais em espera num fio e terminar cada ombro separadamente. Arrematar para o decote a cada 2 carreiras: 1 vez 2 malhas e 1 vez 1 malha = 14-16-16-19-20-23 malhas para o ombro. Arrematar quando a peça medir 54-56-58-60-62-64 cm. Tricotar o outro ombro da mesma maneira. MANGAS: Tricotam-se em redondo nas agulhas de pontas duplas/pequena agulha circular. Montar 30-32-32-34-34-36 malhas com as agulhas de pontas duplas 8 mm e 1 fio DROPS Wish ou 2 fios DROPS Air. Colocar 1 fio marcador no princípio da carreira (meio sob a manga). Tricotar 1 volta meia. Tricotar então em redondo, em canelado (1 malha meia, 1 malha liga) durante 10 cm. Tricotar 1 volta meia diminuindo 3-3-3-3-3-3 malhas a intervalos regulares = 27-29-29-31-31-33 malhas. Mudar para as agulhas de pontas duplas 9 mm. Tricotar 2 vezes A.1 em altura depois continuar em ponto meia. AO MESMO TEMPO quando a manga medir 12 cm, aumentar 1 malha de cada lado do fio marcador – ver AUMENTOS. Aumentar desta maneira 7-7-7-8-9-9 vezes ao todo a cada 5½-5½-5-4-3½-3½cm = 41-43- 43-47-49-51 malhas. Quando a manga medir 43-42-42-40-39-37 cm, continuar com A.1. Quando a manga medir 49-48-48-46-45-43 cm, terminar a manga em idas e voltas (a partir do meio sob a manga). Arrematar quando a manga medir 52-51-51-49-48-46 cm. Tricotar a outra manga da mesma maneira. MONTAGEM: Fazer a costura dos ombros. Costurar as mangas, a 1 malha ourela dos rebordos e costurá-las ao longo da parte de baixo das cavas – ver esquema. Costurar os lados até ao canelado (= 10 cm de fenda lado frente, 18 cm lado costas), costurar na alça mais exterior das malhas dos rebordos para que a costura seja lisa. GOLA: Começando na parte de cima do ombro direito, levantar 60 a 72 malhas com a pequena agulha circular 8 mm e 1 fio DROPS Wish ou 2 fios DROPS Air (incluindo as malhas em espera). O número de malhas deve ser múltiplo de 2. Tricotar em redondo, em canelado (1 malha meia, 1 malha liga) durante 20-20-20-22-22-22 cm. Arrematar. |
||||||||||||||||
Explicações do diagrama |
||||||||||||||||
|
||||||||||||||||
 |
||||||||||||||||
 |
||||||||||||||||
 |
||||||||||||||||
Terminou este projecto?Então, identifique as suas fotos com as tags #dropspattern #rainchainsweater ou mostre-as na galeria #dropsfan. Precisa de ajuda para este modelo?Encontrará 35 turotiais em vídeo, uma rubrica Comentários/Perguntas e muito mais ao visitar a página do modelo em www.garnstudio.com © 1982-2026 DROPS Design A/S. Todos os direitos reservados. Este documento, incluuindo as suas su-secções, tem copyrights. Saia mais o que pode fazer com os nossos modelos no fim de cada uma das páginas do nosso site. |
||||||||||||||||


Com mais de 40 anos no design de modelos de tricô e de croché, a DROPS Design oferece uma das mais vastas colecções demodelos gratuitos na Internet - traduzidos em 17 línguas. Neste dia de hoje, temos 324 catálogos e 12290 modelos - dos quais 12271 estão traduzidos em português.
Trabalhamos com muito empenho para lhe proporcionar o melhor que o tricô e o croché têm para oferecer, para lhe fornecer inspiração e conselhos bem como fios da mais elevada qualidade a preços incríveis! Gostaria de usar os nossos modelos para outros fins que não uso pessoal? Pode ler o que lhe é permitido fazer no Copyright texto que se encontra na parte de baixo de todos os nossos modelos. Bom tricô! Bom croché!
Deixe um comentário acerca do modelo DROPS 236-9
Gostaríamos muito de saber o que tem a dizer-nos acerca deste modelo!
Se deixar uma pergunta acerca do modelo, certifique-se de que escolhe a categoria adequada no formulário abaixo para acelerar o processo relativo à resposta. Os campos obrigatórios estão assinalados com um *.