
Oblíbené kategorie
Hledáte přízi?


Komentáře / Otázky (18)
![]() Michaela Lindahl napsala:
Michaela Lindahl napsala:
Hej! Jag förstår inte hur jag ska maska av när jag är färdig med öglan. Dvs jag förstår inte ” Nu stickas m från fram- och baksidan räta tills 2 och 2 SAMTIDIGT som de maskas av.” Och jag hittar tyvärr inte någon video som förklarar. Tack för att ni alltid hjälper till!
12.01.2025 - 21:20Odpověď DROPS Design :
Hej Michaela, du stikker højre pind ind i første maske på den ene pind og ind i første maske på den anden pind, strikker maskerne sammen og lukker af efterhånden :)
14.01.2025 - 14:35
![]() Etta Otten napsala:
Etta Otten napsala:
Bovenstaand tel patroon hoort niet bij bovenstaande foto, maar bij Mandoline 1987’s Kitted Potholder #1. De foto staat hieronder.
04.04.2023 - 16:12
![]() Etta Otten napsala:
Etta Otten napsala:
Graag wil ik de pannenlappen DROPS 159-25 DROPS design: Model nr. r-683 breien, maar als ik naar de foto kijk, mis ik een paar telpatronen in de werkbeschrijving. Alleen A.1 is te zien. Moet ik de rest op een andere plek zoeken? Graag hoor ik van u. Vriendelijke groet.
03.04.2023 - 22:08Odpověď DROPS Design :
Dag Etta,
Er is ook maar 1 patroon, alleen A.1. Alle kabels e.d. zijn hierin verwerkt.
05.04.2023 - 07:45
![]() Antje Konopka napsala:
Antje Konopka napsala:
Ich verstehe leider das Diagramm nicht. Wie stricke ich denn A1 in der Mitte? Also in den ersten 4 Reihen?
18.04.2022 - 23:55Odpověď DROPS Design :
Liebe Frau Konopka, die Zöpfe und das Lochmuster werden nicht genauso in der Höhe wiederholt, dh das Lochmuster in der Mitte wiederholen Sie wenn die ersten 8 Reihen fertig sind, aber die Zöpfe beidseitig stricken Sie wie zuvor (= in jede 6. Runde). Viel Spaß beim stricken!
19.04.2022 - 11:53
![]() Claudia Mackenzie napsala:
Claudia Mackenzie napsala:
Well I have started the Pattern A1 but noticed that where the marker was at the first start of round 1 by the time I did the 56 stitchs it did not reach the marker(where we increased 9 on the knit 1-49ers) so I thought just do the 56 sts so I went to the next round and noticed that the same thing happened. I guess what confusing me is are the 56st in pattern A1 suppose to reach the marker each time? Or do we just knit the pattern A1 and when the stitches end we knit to the marker then due P
15.01.2022 - 03:36Odpověď DROPS Design :
Dear Mrs Mackenzie, after you have increased between 1st and 2nd marker the 2nd marker is now in the 58th stitch (not in the 49th anymore because of the increases), and you work: K1, A.1 (= 56 sts), K1, P2, K43, P2 - there are more sts on front piece because of the cable but width will be the same on front and back. Hope it will help. Happy knitting!
19.01.2022 - 10:18
![]() Claudia Mackenzie napsala:
Claudia Mackenzie napsala:
Thank you for your response.it is helpful and I looked at the lesson .I know each square is a stitch so when you have the lines going through 2 of the square does that mean when do it twice or just one time. Example 1st round in A1: purl ,purl (slip1st as if to knit,K1,Psso) do we do it twice?Then you do a 1Yo,K2 tog ,purl,purl.This is how I’m reading the pattern. Now 2nd round in pattern A1: purl,purl,knit,knit,purl,knit 6,purl,knit2,purl2,knit9,purl,purl,knit,knit,
13.01.2022 - 00:42Odpověď DROPS Design :
Hi Claudia, If you mean the 2 squares side by side with a diagonal line through, then this means the explanation covers 2 stitches (you do not do it twice). !st row in A.1 is : P2, psso, 1 yarn over, P1, K6, P1, 1 yarn over, K2 together, P2 and so on. You are correct in your reading of row 2. Happy knitting!
13.01.2022 - 07:54
![]() Claudia Mackenzie napsala:
Claudia Mackenzie napsala:
In the pattern for this pot holder in the 56 stitch. you in the first row purl twice then you slip one as if to knit then do your 6 cables then purl then knit2 together.then the next row purl2,Knit 2,Purl1 then do you do a cable or knit?after that you Purl 1 then K2 or do you knit 2together.In other words do you only do the cables or slip 1 or knit togeather where the vertical lines are? I see that in the middle of the 56 stitches you have some vertical lines and can see that it is in di
12.01.2022 - 09:43Odpověď DROPS Design :
Dear Mrs Mackenzie, in diagram A.1 you will have decreases and yarn over (see 4th and 5th symbol for decreases) and at the same time you will work cables (as shown in next to last + last symbol). When the lace pattern in the middle of A.1 is done, repeat from first row, while continuing the cables on each side, ie the middle panel is worked over 8 round but the cables are worked over every 6th round (and the small lace pattern on each side on every other round). This lesson might help you understanding how to read diagrams. Happy knitting!
12.01.2022 - 15:55
![]() Claudia Mackenzie napsala:
Claudia Mackenzie napsala:
So when do you start the pattern in A1?Do you do the purl 1 round then knit 1 round first then when you get to the 5th round is that when you start the increases of 9 sts. Or do you start the increases at each knit 1 round?
08.01.2022 - 04:18Odpověď DROPS Design :
Dear Mrs Mackenzie, cast on the stitches, then purl 1 round, knit 1 round, purl 1 round, knit 1 round and purl 1 round. Insert the 2 markers without working the stitches, on next round, knit all stitches increasing between 1st and 2nd marker. On next round, start working A.1 between first 2 markers. Happy knitting!
10.01.2022 - 07:43
![]() MJ napsala:
MJ napsala:
Hei! Så nydelige grytekluter! Men jeg trenger litt hjelp med diagrammet. Hvorfor er det tegnet flere omganger på sidene?? Hva gjør man da med maskene i midten?
26.07.2019 - 00:50Odpověď DROPS Design :
Hej, ja vist er de fine :) du fortsætter bare de midterste masker fra starten igen. Det er fordi de yderste snoninger i hver side skal strikkes på hver 6.pind. God fornøjelse!
02.08.2019 - 09:37
![]() Maria napsala:
Maria napsala:
Hei! Blir disse tykke og trygge grytekluter som beskytter hendene, eller vil hullmønsteret gjøre at de først og fremst er dekorative? Jeg står mellom å strikke disse eller strikke "sun-baked" en gang til.
10.04.2018 - 21:02Odpověď DROPS Design :
Hei Maria. Disse gryteklutene strikkes rundt så de blir dobble. Du kan derfor helt fint bruke dem. God fornøyelse
12.04.2018 - 15:50
|
||||||||||||||||||||||
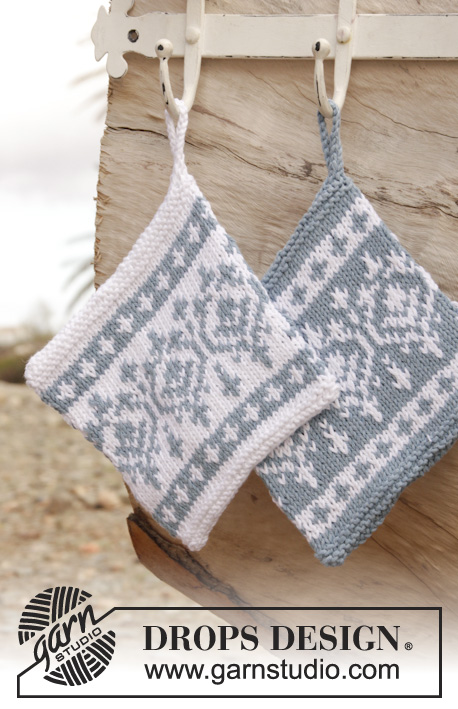
Helping Hand#helpinghandpotholder |
||||||||||||||||||||||
|
|
||||||||||||||||||||||
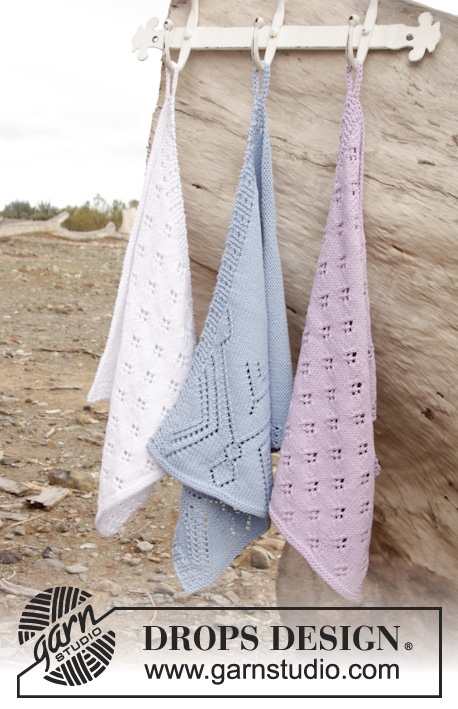
DROPS chňapka s ažurovým vzorem pletená z příze "Muskat".
DROPS 159-25 |
||||||||||||||||||||||
|
VZOR: Viz schéma A.1. ---------------------------------------------------------- CHŇAPKA: Pleteme v kruhových řadách na kruhové jehlici. Na krátkou kruhovou jehlici č.3 nahodíme přízí Muskat 96 ok a upleteme 1 kruhovou řadu obrace, 1 hladce, 1 obrace, 1 hladce a 1 obrace. Označíme si 1. a 49. oko v kruhové řadě (= boční strany). Upleteme 1 kruhovou řadu hladce a SOUČASNĚ přidáme rovnoměrně mezi 1. a 2. značkou 9 ok (vhledem k tomu, že ažurový vzor s copánky pleteninu mírně stahuje, máme na přední straně více ok, než na zadní) = na jehlici máme 105 ok. První kruhovou řadu pleteme následovně: 1 oko hladce (= označené oko), vzor A.1 (= 56 ok), 1 oko hladce (= označené oko), 2 oka obrace, 43 ok lícovým žerzejem a 2 oka obrace. V tomto rozvržení vzorů pokračujeme až do výše asi 19 cm, končíme po dopletení 1 celé střední sekvence vzoru A.1 (na výšku). Nyní upleteme 1 kruhovou řadu hladce a SOUČASNĚ ujmeme rovnoměrně mezi 1. a 2. značkou 9 ok, abychom získali stejný počet ok na přední i zadní straně = 96 ok. Upleteme 1 kruhovou řadu obrace, 1 hladce a 1 obrace. Následující kruhovou řadu pleteme opět hladce a SOUČASNĚ nahodíme na jejím konci 20 nových ok (= poutko). Práci otočíme, všech těch 20 nových ok uzavřeme, pak chňapku složíme a srovnáme, se značkami na bocích. Poté splétáme hladce oka přední a zadní strany a SOUČASNĚ je uzavíráme. Sešijeme dolní okraj; konec poutka přišijeme do rohu chňapky. Stejným způsobem upleteme druhou chňapku. |
||||||||||||||||||||||
Vysvětlivky ke schématu |
||||||||||||||||||||||
|
||||||||||||||||||||||
 |
||||||||||||||||||||||
Dokončili jste tento model?Pak označte své fotky tagem #dropspattern #helpinghandpotholder nebo je pošlete do galerie #dropsfan. Potřebujete s tímto návodem poradit?Otevřete-li si návod na stránce garnstudio.com, najdete tam 15 výukových video-ukázek, Komentáře/Dotazy a další užitečné informace. © 1982-2026 DROPS Design A/S. Vyhrazujeme si veškerá práva. Tento dokument, včetně všech jeho dílčích částí, podléhá autorským právům. Podrobnější komentář k možnostem užití našich návodů najdete dole pod každým návodem na našich stránkách. |
||||||||||||||||||||||


V oblasti pletené a háčkované módy působí DROPS Design více než 40 let. Díky tomu vám můžeme nabídnout jednu z nejrozsáhlejších kolekcí modelů s bezplatnými návody dostupnými na internetu - navíc v 17 jazycích. K dnešnímu dni máme na 324 katalogů a 12290 návodů celkem - z nich je už 7602 dostupných v [češtině].
Přidejte komentář k návodu DROPS 159-25
Rádi bychom věděli, co si o tomto modelu myslíte!
Pokud se chcete na něco zeptat, dbejte prosím na to, abyste ve formuláři níže vybrali správnou kategorii - díky tomu se dříve dozvíte, co potřebujete vědět. Povinná pole jsou označena *.