
Oblíbené kategorie
Hledáte přízi?


Komentáře / Otázky (12)
![]() Pia Weimer-Andersson napsala:
Pia Weimer-Andersson napsala:
Hej Alma! Ditt tips var ju superbra för att gå sidorna likadana, med hål i kanten. Gjorde du din minskning vartannat varv som man gjorde ökningen eller vart fjärde varv som man minskar enligt mönstret. Tycker det är konstigt att man ska öka vartannat varv och minska vart fjärde varv!! Hur gjorde du???
05.03.2026 - 21:19
![]() Marja Stravers napsala:
Marja Stravers napsala:
Ik wil de sjaal graag maken, maar met een andere kleur Fabel dan op het patroon. Nu heb ik Fabel print gekozen maar die blijkt met pen 3 te worden gebreid. Een heel verschil. Is de print een dunnere kwaliteit dan de Fabel van het patroon?
02.12.2023 - 17:12Odpověď DROPS Design :
Dag Marja,
De pendikte kan in het patroon soms afwijken van de aanbevolen pendikte die bij het garen staat, om bijvoorbeeld een bepaald effect te creëren (bijvoorbeeld opener of dichter breiwerk). De pendikte in het patroon is leidend, maar wat vooral belangrijk is , is dat de aangegeven stekenverhouding in het patroon overeen moet komen. Maak dus altijd een proeflapje en pas eventueel de pendikte aan zodat het proeflapje overeen komt zoals aangegeven in het patroon.
02.12.2023 - 17:39
![]() Alma napsala:
Alma napsala:
Tip... Because there won't be holes on the side of the scarf where the decreases are made, and you want it to be even. Knit 2 sts together, a yarn over, 2 sts together. The cover compensates for the extra reduction that occurs.
14.10.2023 - 10:05
![]() Alma napsala:
Alma napsala:
Tips... Eftersom det inte blir hål på den sidan av skarfen som minskningarna sker, och du vill ha det lika. Sticka 2 m ihop, ett omslag, 2 m ihop. Omslaget kompenserar den extra minskning som blir. Så gjorde jag och båda sidorna blev lika
12.10.2023 - 06:03
![]() Cristina napsala:
Cristina napsala:
Salve, per favore vorrei sapere se i “buchi “ si devono formare solo durante gli aumenti. In caso contrario come si ottengono durante le diminuzioni? Grazie
17.02.2023 - 15:15Odpověď DROPS Design :
Buonasera Cristina, i buchini si formeranno solo con gli aumenti. Buon lavoro!
20.02.2023 - 18:54
![]() Cristina napsala:
Cristina napsala:
Salve, per favore vorrei sapere se i “buchi “ si devono formare solo durante gli aumenti. In caso contrario come si ottengono durante le diminuzioni? Grazie
17.02.2023 - 15:12Odpověď DROPS Design :
Buonasera Cristina, i buchini si formeranno solo con gli aumenti. Buon lavoro!
20.02.2023 - 18:54
![]() Sharon Hunt napsala:
Sharon Hunt napsala:
Hi, a quick question. Are the decreases down on the same side as the increases? I suspect it is but I want to make sure. When I did the increases I ended on the wrong side row after knitting the yarn over. I had to knit one row to start counting the beginning of the 4 rows to start the decreases. Hence the question. The pattern says that this Shawl measured 30 cm in the middle I don’t quite understand is the middle where the decreases started? S
17.02.2023 - 07:00Odpověď DROPS Design :
Dear Mrs Hunt, yes the decreases should be worked on the same side, ie you increased at the beginning of every 4th row (increase on first/next row from RS, work 3 rows) and repeat from (to); then you decrease at the beg of every 4th row (decrease on first/next row from RS, work 3 rows). The middle of the shawl is the middle of the total width/wingspann, where the tip is, now you work the other way, decreasing instead of increasing. Happy knitting!
17.02.2023 - 11:58
![]() Sharon Hunt napsala:
Sharon Hunt napsala:
Hei! When do you start to count 4 rows for the next increase. Does one start counting after completing the 2 row increase? Am not sure. but I would knit 4 rows. Work these to rows: INCREASE TIP: All increases are worked from the right side! At the beginning of the row: Knit 1, make 1 yarn over. On the next row knit the yarn over (leaves a hole). After which I would start counting 4 rows and then work the increase rows. Is this correct?
11.02.2023 - 23:43Odpověď DROPS Design :
Dear Sharon, you increase every 4th row, only the yarn over counts as an increase; when you knit the yarn over from the previous row, that row is already the first of the 4 rows before the next increase. So, work the increase row, knit the yarn overs in the next row, knit 2 more rows and then work the increase row again. Happy knitting!
13.02.2023 - 00:36
![]() Christina napsala:
Christina napsala:
Kommer det saknas hål på sidan vi minskar på Ökning sker ju med omslag =lika med hål
11.10.2022 - 16:01Odpověď DROPS Design :
Hei Christina. Det skal bare være hull på den ene siden. mvh DROPS Design
17.10.2022 - 10:30
![]() Anna napsala:
Anna napsala:
Caleidoscope
07.08.2022 - 18:43
|
|
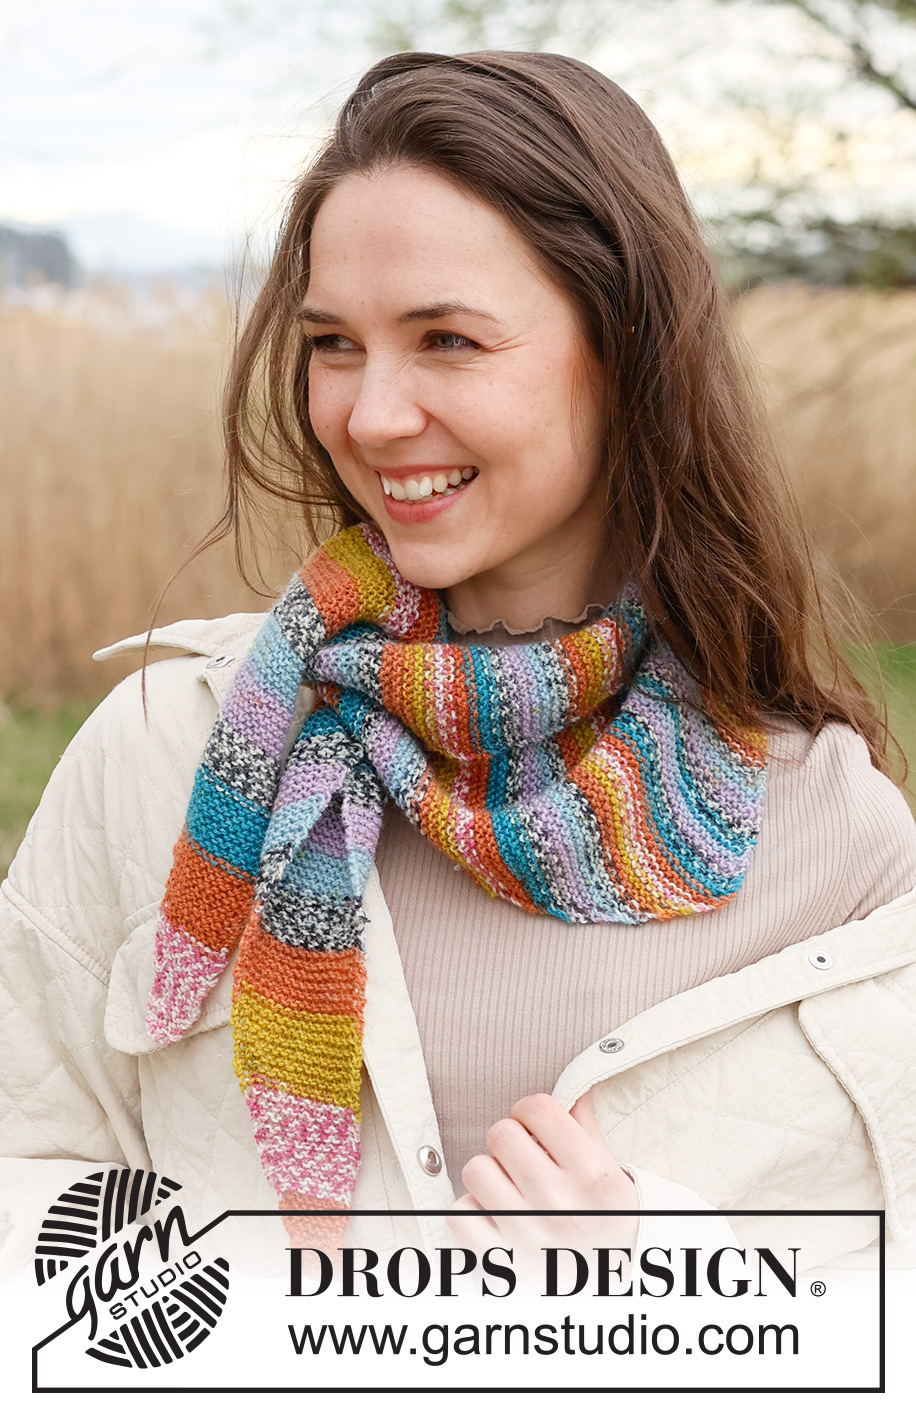
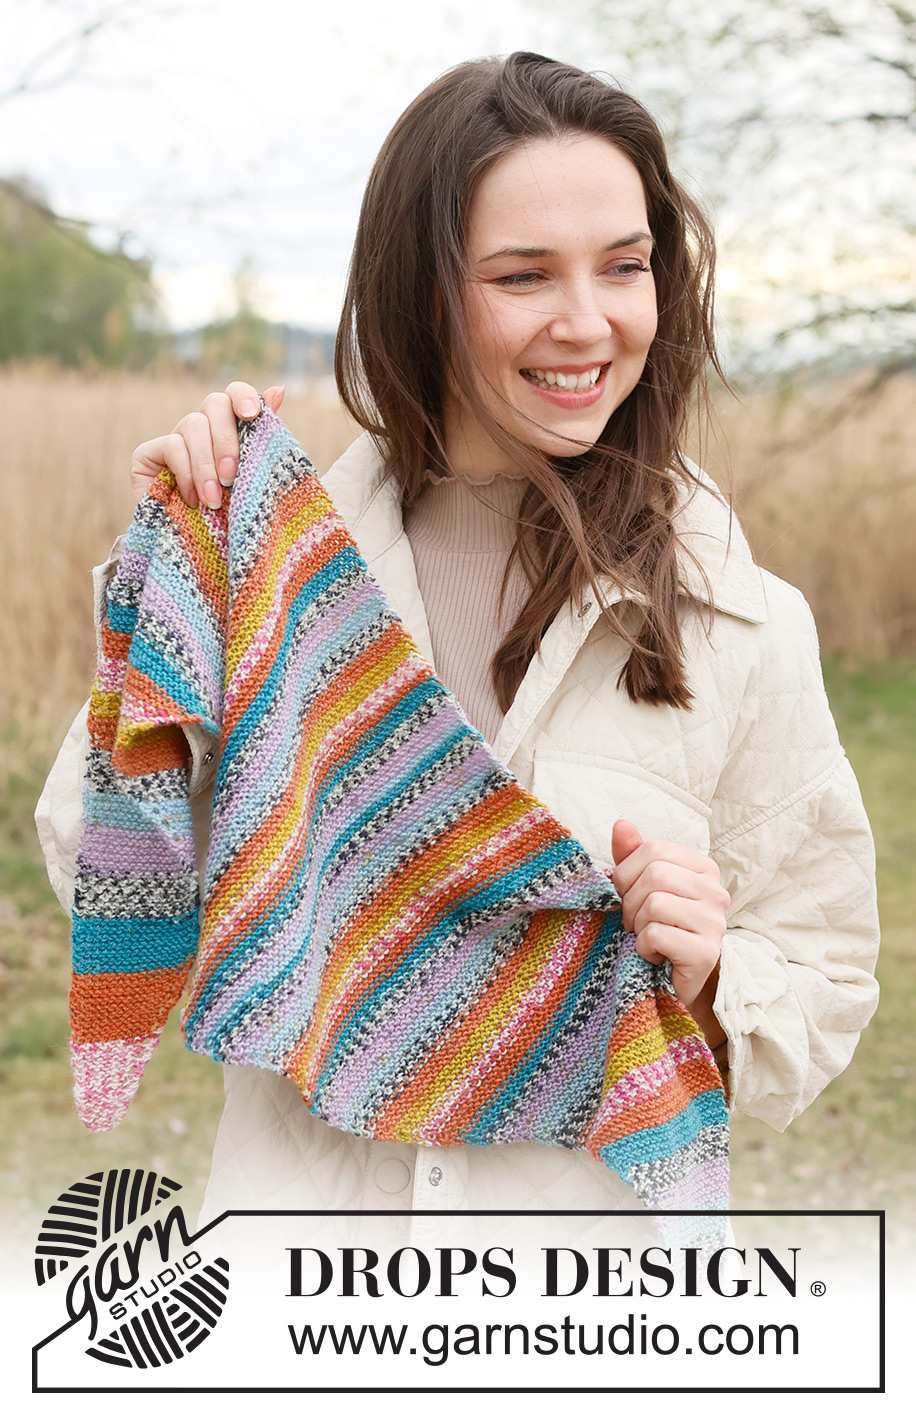
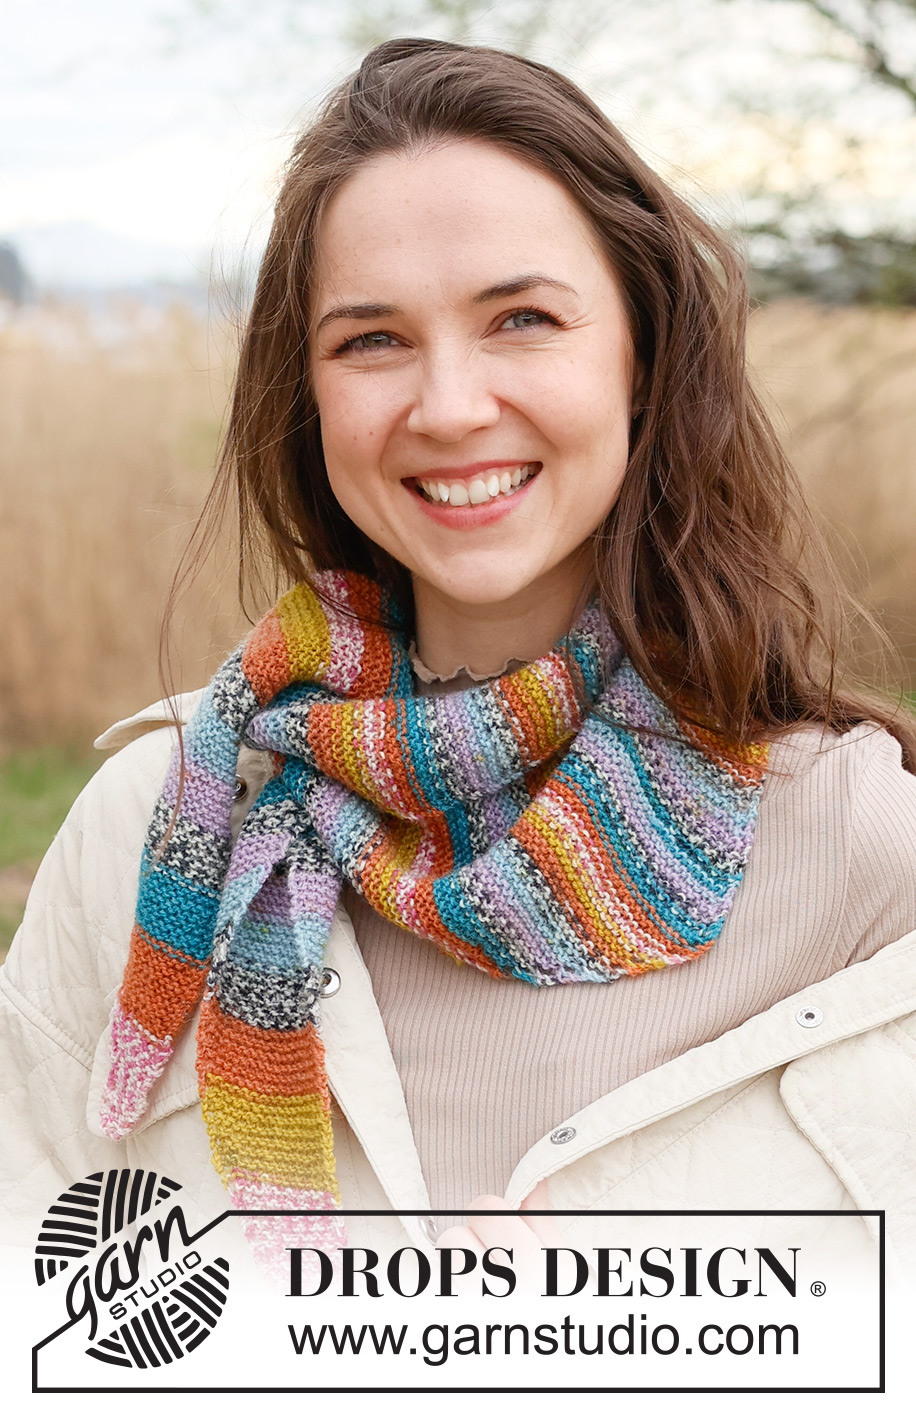
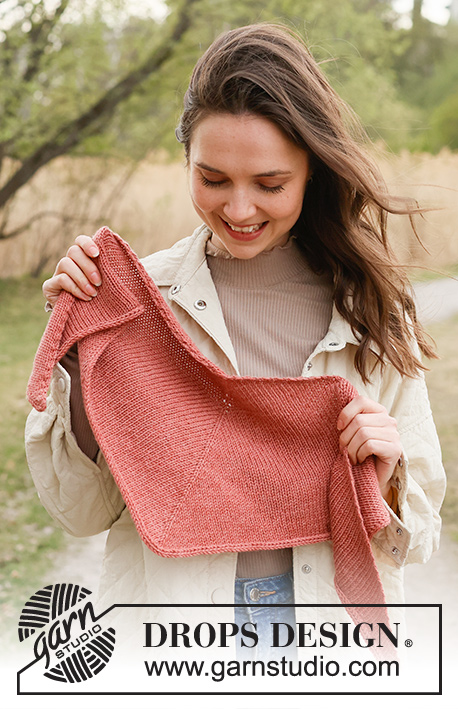
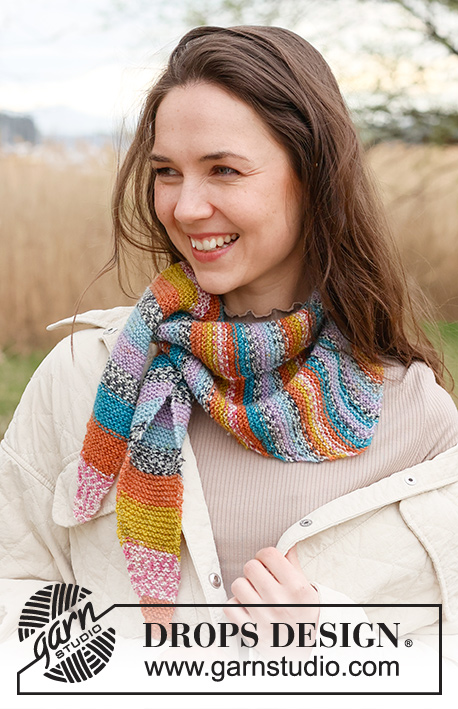
Autumn Fair Wrap#autumnfairwrapshawl |
|
 |
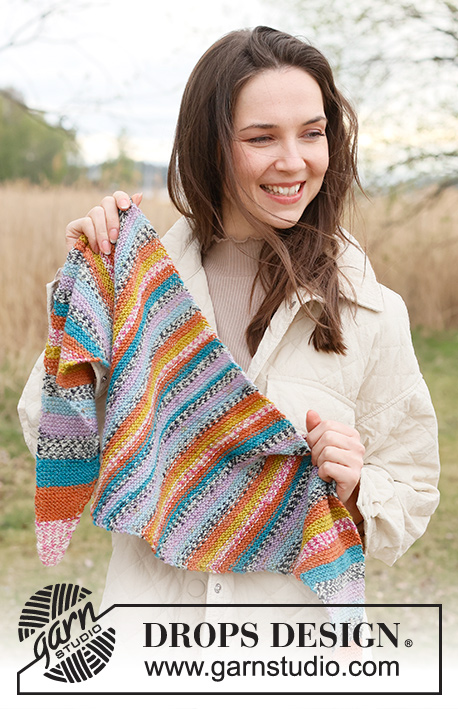 |
Šátek pletený kolmo, napříč vroubkovým vzorem z příze DROPS Fabel.
DROPS 234-48 |
|
|
------------------------------------------------------- VYSVĚTLIVKY: ------------------------------------------------------- VROUBKOVÝ VZOR: Pleteme stále hladce, lícové i rubové řady. 1 vroubek = 2 řady hladce. TIP – PŘIDÁVÁNÍ: Přidáváme vždy v lícových řadách! Na začátku řady: 1 oko hladce, 1x nahodíme. V následující řadě pleteme nahození hladce běžným způsobem (NE za zadní nit) – vznikne ozdobná dírka. TIP – UJÍMÁNÍ: Ujímáme vždy v lícových řadách! Na začátku řady: 1 oko hladce, 2 oka spleteme hladce. ------------------------------------------------------- POPIS PRÁCE: ------------------------------------------------------- ŠÁTEK – JAK BUDEME POSTUPOVAT: Šátek pleteme kolmo, napříč vroubkovým vzorem, v řadách. Začínáme u jednoho bočního cípu, pleteme a přidáváme až ke středu šátku, poté budeme směrem ke druhému bočnímu cípu ujímat. ŠÁTEK: Na kruhovou jehlici č.4 nahodíme přízí DROPS Fabel 5 ok a pleteme VROUBKOVÝM VZOREM – viz výše; SOUČASNĚ přidáváme 1 oko na začátku každé 4. řady – viz TIP – PŘIDÁVÁNÍ výše. Když už jsme přidali 64x, máme na jehlici 69 ok a řada měří asi 30 cm (= středová délka šátku). Nyní začneme ujímat. Ujímáme 1 oko na začátku každé 4. řady, a to až do chvíle, kdy nám zbude posledních 5 ok – viz TIP - UJÍMÁNÍ. Pak všechna zbylá oka uzavřeme. Díl měří asi 114 cm (= horní okraj šátku). |
|
Dokončili jste tento model?Pak označte své fotky tagem #dropspattern #autumnfairwrapshawl nebo je pošlete do galerie #dropsfan. Potřebujete s tímto návodem poradit?Otevřete-li si návod na stránce garnstudio.com, najdete tam 9 výukových video-ukázek, Komentáře/Dotazy a další užitečné informace. © 1982-2026 DROPS Design A/S. Vyhrazujeme si veškerá práva. Tento dokument, včetně všech jeho dílčích částí, podléhá autorským právům. Podrobnější komentář k možnostem užití našich návodů najdete dole pod každým návodem na našich stránkách. |
|


V oblasti pletené a háčkované módy působí DROPS Design více než 40 let. Díky tomu vám můžeme nabídnout jednu z nejrozsáhlejších kolekcí modelů s bezplatnými návody dostupnými na internetu - navíc v 17 jazycích. K dnešnímu dni máme na 324 katalogů a 12290 návodů celkem - z nich je už 7605 dostupných v [češtině].
Přidejte komentář k návodu DROPS 234-48
Rádi bychom věděli, co si o tomto modelu myslíte!
Pokud se chcete na něco zeptat, dbejte prosím na to, abyste ve formuláři níže vybrali správnou kategorii - díky tomu se dříve dozvíte, co potřebujete vědět. Povinná pole jsou označena *.